Sourdough Donut Recipe: Ever wondered what happens when the rich, tangy flavor of sourdough meets the fluffy, sweet delight of a donut? You get a sourdough donut—soft on the inside, lightly crispy on the outside, and bursting with flavor that makes your taste buds do a happy dance. Unlike your usual yeast or cake donuts, sourdough donuts come with a natural fermentation twist that not only adds depth but also makes them a bit easier on your stomach.
In this step-by-step guide, you’ll learn exactly how to make the perfect sourdough donut at home—even if you’ve never fried anything in your kitchen before. So tie on that apron, and let’s roll into the magic of homemade sourdough donuts.
What Makes Sourdough Donuts Special?
Sourdough donuts are a cut above the rest, and it’s not just hype. What makes them stand out is their fermentation process, which gives them a slightly tangy flavor and superior texture. The dough rises slowly, letting flavors develop naturally and creating a more complex taste profile. No artificial additives or commercial yeast needed—just the magic of a living sourdough starter.
They’re also typically lighter, less greasy, and have a more “bready” chew compared to regular donuts. Think of them as the perfect marriage between a classic brioche donut and a tangy sourdough loaf. Plus, they’re a great way to use up excess starter you’d otherwise discard during regular feedings.
Benefits of Using Sourdough Starter in Donuts
Why bother with sourdough in your donuts? For one, sourdough fermentation improves digestibility. The long fermentation breaks down gluten and phytic acid, making the final product easier on the gut. Secondly, sourdough adds flavor in layers—subtle, complex, and never too sweet.
Another bonus? It adds natural leavening, so you’re not relying on instant yeast. That means no yeast flavor overpowering your dough, and less need for processed ingredients. And let’s not forget, the process of making sourdough donuts—while it does take time—is highly rewarding. It connects you to your food, slows you down, and gives your kitchen a bakery-worthy aroma that’s hard to beat.
Tools and Equipment You’ll Need
Before you dive into mixing and frying, gather these essential tools:
- Kitchen scale (for accurate measurements)
- Mixing bowls (at least two)
- Stand mixer (optional but helpful)
- Dough scraper
- Rolling pin
- Donut cutter or round biscuit cutters (one large, one small)
- Baking sheet and parchment paper
- Plastic wrap or damp towel
- Candy/oil thermometer
- Heavy-bottomed pot or deep fryer
- Slotted spoon or spider skimmer
- Cooling rack
- Whisk (for glazes)
Ingredients You’ll Need
For the Dough:
- 200g (about 1 cup) active sourdough starter (fed and bubbly)
- 500g (about 4 cups) all-purpose flour
- 2 large eggs
- 100g (1/2 cup) sugar
- 180ml (3/4 cup) whole milk (warm)
- 85g (6 tbsp) unsalted butter (softened)
- 1 tsp vanilla extract
- 1 tsp salt
For Frying:
- Neutral oil like canola, sunflower, or peanut oil (enough for deep frying)
For Glaze or Toppings:
Choose one or mix and match!
- Classic vanilla glaze (1 cup powdered sugar + 2–3 tbsp milk + 1/2 tsp vanilla)
- Chocolate glaze (powdered sugar + cocoa + milk)
- Cinnamon sugar
- Powdered sugar dusting
Understanding the Sourdough Starter
How to Feed Your Starter
If you haven’t used your starter in a few days, feed it with equal parts flour and water (e.g., 100g flour + 100g water) and let it rest at room temperature for 4–6 hours or until bubbly and doubled in size.
How to Know When It’s Ready
A ripe sourdough starter will be:
- Doubled in volume
- Filled with bubbles
- Slightly domed at the top
- Pass the float test: Drop a spoonful in water—if it floats, it’s good to go!
Tips Before You Start Making Donuts
- Make sure your sourdough starter is active and bubbly.
- Use a kitchen scale to get accurate measurements.
- Allow enough time. This isn’t a rush job—expect the full process to take about 18–24 hours including overnight proofing.
- If you’re new to frying, keep your oil between 350°F–375°F (175°C–190°C) for perfect donuts.
- Prepare a wire rack lined with paper towels to drain excess oil.
Step-by-Step Guide: Making Sourdough Donuts
Step 1: Mix the Dough
In a large bowl (or stand mixer), combine sourdough starter, warm milk, sugar, eggs, and vanilla. Mix well. Gradually add flour and salt, and knead until combined. Then, add the softened butter in chunks and knead again for about 10 minutes until the dough is smooth, soft, and slightly sticky.
Step 2: Bulk Fermentation
Transfer the dough to a lightly oiled bowl, cover with plastic wrap or a damp towel, and let it ferment at room temperature for 4–6 hours or until doubled in size. If your kitchen is cooler, this might take longer.
Step 3: Chill the Dough Overnight
Once the dough has doubled, gently degas it and place it in the refrigerator overnight (8–12 hours). This slow proofing helps develop the flavor and makes the dough easier to handle.
Step 4: Roll Out and Shape the Donuts
In the morning, roll out the chilled dough on a lightly floured surface to about ½ inch thickness. Cut donuts using a donut cutter (or two round cutters). Place them on a parchment-lined tray and cover loosely with a towel. Let them rest until puffy—about 1–2 hours.
Step 5: Final Rise
Watch the donuts—not the clock. They should be light and airy to the touch. If you poke one gently, it should slowly spring back halfway. That’s your sign they’re ready to fry.
Step 6: Fry the Donuts
Heat your oil to 350°F (175°C). Carefully place 2–3 donuts in the oil at a time. Fry each side for about 1–2 minutes or until golden brown. Use a slotted spoon to flip and remove them. Transfer to a wire rack with paper towels.
Step 7: Glaze or Coat the Donuts
While still slightly warm, dip the donuts into your chosen glaze or roll them in cinnamon sugar. Let them set on the rack for a few minutes. You can also inject fillings like jam or custard using a piping bag once they cool.
Troubleshooting Common Issues
Let’s face it: even the best bakers hit a few bumps. Here’s how to fix the most common sourdough donut problems:
- Dough is too sticky: Add a small amount of flour during kneading, but be careful not to overdo it. The dough should be soft and slightly tacky—not dry.
- Donuts didn’t rise well: Your starter may not have been active enough. Make sure it passes the float test before mixing your dough.
- Donuts soaked up too much oil: This often means your oil temperature was too low. Always use a thermometer and maintain 350°F–375°F.
- Crust too dark, inside undercooked: Oil too hot. Dial it back slightly, and fry for a little longer to ensure the inside cooks through.
- Too tangy flavor: Long fermentation in a warm room can make the dough overly sour. Reduce bulk fermentation time slightly next time or refrigerate the dough earlier.
Don’t worry—every mistake teaches you something, and next time, your batch will be even better.
Optional Variations to Try
Sourdough donuts are super versatile. Once you master the base, the sky’s the limit. Here are some variations to spice things up:
- Pumpkin Spice Sourdough Donuts: Add 1/4 cup pumpkin puree and pumpkin pie spice to the dough.
- Lemon Glazed Donuts: Use lemon juice and zest in the glaze for a fresh, citrusy punch.
- Maple Bacon Donuts: Top with maple glaze and crispy bacon bits. Sweet and salty perfection.
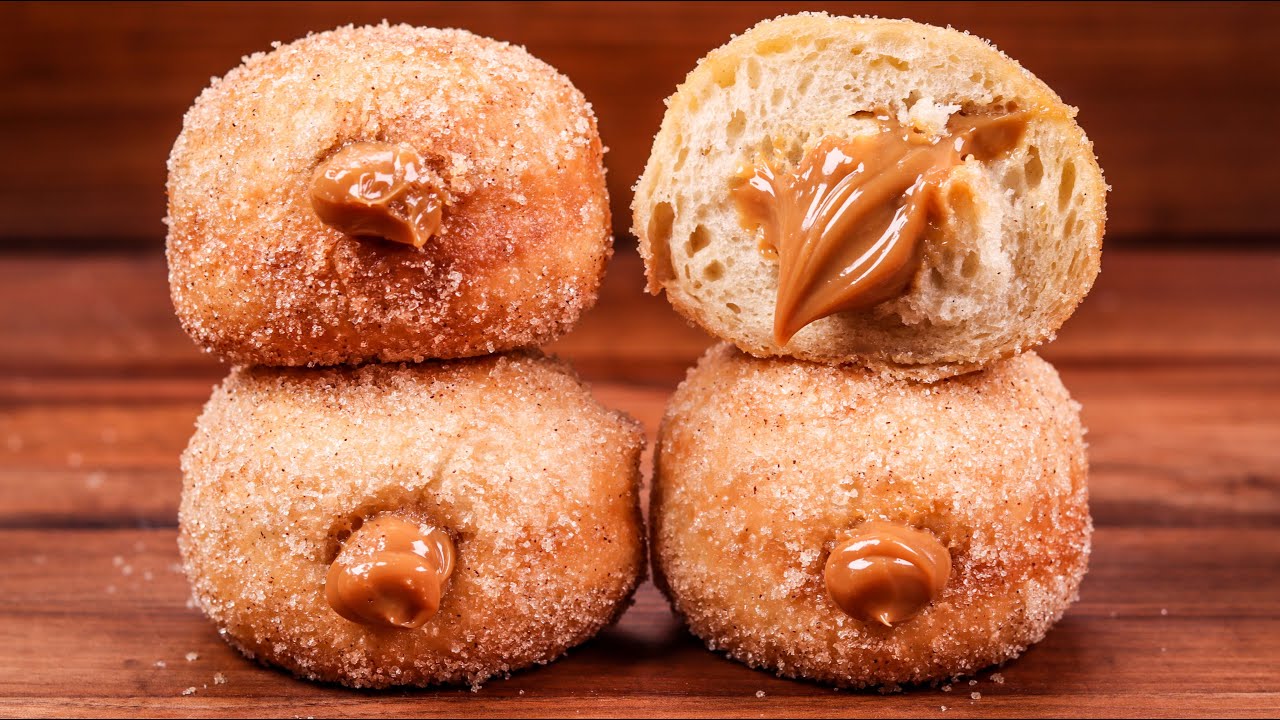
- Filled Donuts: Skip the hole and fry round discs. Fill with jam, chocolate, pastry cream, or Nutella.
- Chocolate Sourdough Donuts: Add cocoa powder to the dough and dip in chocolate glaze.
Get creative. Sourdough is your playground!
Best Toppings and Fillings
Let’s be honest—toppings and fillings make or break a donut. Here are some tried-and-true favorites:
Glaze Ideas:
- Vanilla Bean: Classic and smooth.
- Chocolate Ganache: Rich and decadent.
- Coffee Glaze: A grown-up twist.
- Maple Syrup Glaze: Sweet, earthy, perfect with nuts.
Sugar Coatings:
- Cinnamon sugar
- Powdered sugar
- Cardamom sugar for something unique
Fillings:
- Strawberry jam
- Lemon curd
- Salted caramel
- Whipped cream
- Pastry cream or custard
Use a piping bag with a long nozzle to inject fillings after frying. It’s fun and way easier than it looks.
How to Store and Reheat Sourdough Donuts
Fresh sourdough donuts are best eaten the same day, but if you’ve made a big batch (nice work!), here’s how to store and reheat them:
- Room Temperature: Keep them in an airtight container for up to 2 days. Avoid stacking or they may stick.
- Refrigeration: You can refrigerate filled donuts for 3–4 days. Just note that refrigeration may dry them out a bit.
- Freezing: Freeze unglazed donuts in a single layer for up to 2 months. Reheat and glaze later for that fresh-from-the-fryer taste.
How to Reheat:
- Microwave: 10–15 seconds for a soft texture.
- Oven: 5–7 minutes at 300°F (150°C) for a crispy edge.
- Air fryer: 3–4 minutes at 320°F (160°C) for a bakery-style finish.
Serving Suggestions
Want to really impress? Serve your sourdough donuts like a pro:
- With coffee or chai: The tangy-sweet combo pairs beautifully with warm drinks.
- As a dessert platter: Mini filled sourdough donuts with different glazes and dips.
- For brunch: Stack them on a tower with fresh berries and whipped cream.
- Kids’ party treat: Add colorful sprinkles or edible glitter for fun.
Presentation matters. A beautiful donut tastes even better, trust us.
FAQs about Sourdough Donut Recipe
Q1: Can I use discard sourdough starter instead of active starter?
Not for this recipe. You need a strong, active starter to give the dough the right rise and texture. Discard can work in crackers or pancakes, but not here.
Q2: What’s the best oil for frying donuts?
Use a neutral, high-smoke point oil like canola, sunflower, or peanut oil. Avoid olive oil or coconut oil—they’ll change the flavor too much.
Q3: How do I make my donuts extra fluffy?
Make sure your dough is well-kneaded and fully proofed. Don’t rush the bulk fermentation or the final rise. Use strong flour and a well-fed starter for best results.
Q4: Can I bake these instead of frying?
You can, but they’ll be more like enriched buns than donuts. If you’re baking, brush them with butter post-bake and roll in sugar to mimic the fried texture.
Q5: My donuts are too sour—what went wrong?
That usually means over-fermentation. Try reducing your bulk ferment time or refrigerating the dough earlier. Also, make sure your starter isn’t too acidic before use.
Conclusion
And there you have it—a foolproof, step-by-step sourdough donut recipe that delivers bakery-quality results right in your own kitchen. From mixing the dough to frying golden rings of deliciousness, this guide walks you through everything you need to know. Sure, it takes time, but the result is more than worth it.
The tangy richness of sourdough adds character to every bite, and with endless topping and filling options, you can reinvent this recipe a dozen different ways. So roll up your sleeves, activate that bubbly starter, and treat yourself to a donut experience like no other. Once you try sourdough donuts, it’s hard to go back to anything else.