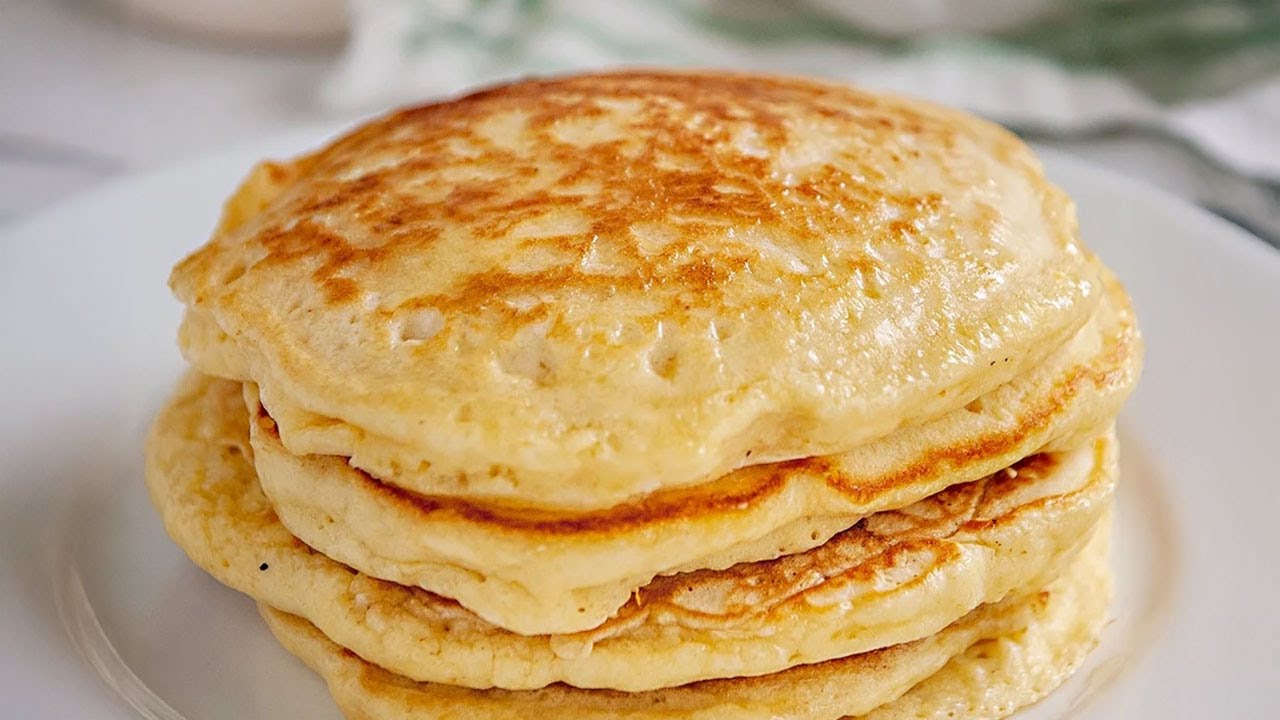
Sourdough Discard Pancakes Recipe: Sourdough discard pancakes are a delicious and clever way to use up the leftover sourdough starter that’s removed during the feeding process. Instead of tossing that tangy, fermented mixture into the compost or trash, you turn it into fluffy, golden-brown pancakes that boast a uniquely deep flavor and an amazing texture. Think of it as a classic pancake—but with a touch of artisan bakery charm added in.
Why Use Sourdough Discard?
Because it’s already partially fermented, sourdough discard adds a rich depth and subtle tang to your pancakes that you simply can’t get from regular batter alone. Plus, it’s a sustainable and budget-friendly option. No need to waste good starter when you can transform it into breakfast perfection!
Benefits of Making Sourdough Discard Pancakes
Reduces Food Waste
Let’s face it—throwing away starter feels like tossing potential down the drain. Making sourdough discard pancakes is the ultimate way to give your discard a second life. It’s eco-conscious and guilt-free.
Adds Tangy Flavor
If you love a bit of zing in your breakfast, you’re in for a treat. The natural fermentation in the discard adds a complex tangy flavor that elevates the humble pancake to gourmet status.
Perfect for Meal Prep
Make a big batch on the weekend and enjoy them throughout the week. They store beautifully, freeze well, and reheat like a dream.
Ingredients You’ll Need
Here’s a simple breakdown of what you’ll need to make these pancakes:
Basic Ingredients:
- 1 cup sourdough discard (unfed)
- 1 cup all-purpose flour
- 1 tablespoon sugar (adjust to taste)
- 1 teaspoon baking powder
- 1/2 teaspoon baking soda
- 1/2 teaspoon salt
- 3/4 cup milk (dairy or non-dairy)
- 1 egg
- 2 tablespoons melted butter or oil
- 1 teaspoon vanilla extract (optional)
Optional Add-Ins:
- Blueberries
- Chocolate chips
- Chopped nuts
- Cinnamon or nutmeg
Sourdough Discard Tip: Use discard that’s about 1-2 days old for best flavor. It can be cold or room temperature—no need to bring it to warm.
Essential Tools for the Recipe
Before you dive in, make sure you’ve got the following:
- Mixing bowls (at least 2)
- Whisk or fork
- Measuring cups & spoons
- Nonstick skillet or griddle
- Spatula
- Ladle or scoop
Before You Begin: Prepping Tips
Sourdough Starter Tips
You can use discard straight from the fridge. Just give it a stir and smell—it should be tangy, not foul. If it has any mold or strange color, skip it.
Ingredient Prep Advice
Measure everything out before starting. Have your skillet or griddle preheating so that once the batter is ready, you’re good to go!
Step-by-Step Guide to Making Sourdough Discard Pancakes
Step 1: Gather All Ingredients
Make sure you have everything on hand. Nothing derails a morning like realizing halfway through that you’re out of eggs or milk!
Step 2: Mix the Wet Ingredients
In a large bowl, whisk together the sourdough discard, egg, milk, melted butter, and vanilla extract. Blend until smooth. The discard may look stringy or lumpy—totally normal.
Step 3: Combine Dry Ingredients Separately
In another bowl, mix the flour, sugar, salt, baking powder, and baking soda. Stir until well combined. This keeps things light and prevents overmixing.
Step 4: Combine Wet & Dry Mixtures
Pour the dry mixture into the wet mixture. Stir just until combined. Lumps are okay—don’t overmix, or you’ll end up with tough pancakes.
Step 5: Heat the Skillet or Griddle
Preheat your skillet over medium heat. Lightly grease it with butter or oil. It’s ready when a drop of water sizzles on the surface.
Step 6: Cook the Pancakes
Scoop 1/4 cup batter onto the skillet. Cook until bubbles form on the surface and edges look set (about 2–3 minutes). Flip and cook for another 1–2 minutes until golden brown.
Step 7: Serve & Enjoy
Stack them high and serve warm with your favorite toppings: syrup, fresh fruit, nut butter, or even a dollop of yogurt.
Pro Tips for Fluffy, Flavorful Pancakes
Want those thick, diner-style pancakes with a light, fluffy interior? Here’s how to make it happen:
Don’t Overmix!
The golden rule of pancakes: mix until just combined. A few lumps in the batter are perfectly fine. Overmixing develops the gluten in the flour, which can make your pancakes tough and chewy rather than light and airy.
Let the Batter Rest
Give your batter a 5–10 minute rest after mixing. This allows the flour to fully hydrate and the baking soda and sourdough to work their leavening magic. During this rest, your batter will become puffier—exactly what you want!
Use the Right Temperature
A medium heat is key. Too hot, and the pancakes burn before the insides cook through. Not hot enough, and they won’t brown or puff up. Test your skillet with a drop of water—it should sizzle gently, not violently.
Flip Only Once
Once bubbles start forming and the edges begin to set, it’s flipping time. Only flip once for best results. Constant flipping deflates your pancakes.
Topping Ideas and Variations
Let’s get creative! These pancakes are incredibly versatile and can handle both sweet and savory directions.
Sweet Toppings:
- Classic maple syrup
- Fresh berries and whipped cream
- Cinnamon apples and a drizzle of honey
- Greek yogurt with a sprinkle of granola
- Nutella and banana slices
Savory Add-Ons:
- Crispy bacon and eggs on the side
- Smoked salmon, sour cream, and dill (yes, seriously!)
- Sautéed mushrooms and cheese
Seasonal Ideas:
- Fall: Add pumpkin puree and cinnamon to the batter
- Winter: Mix in orange zest and cranberries
- Spring: Try lemon zest and poppy seeds
- Summer: Fold in fresh blueberries or peaches
These tweaks keep your pancake routine interesting and delicious all year round.
How to Store & Reheat Leftovers
Pancakes are surprisingly meal-prep friendly. Here’s how to keep them fresh and tasty:
Refrigeration Tips:
- Let pancakes cool completely
- Store in an airtight container or resealable bag
- Keeps for up to 4 days in the fridge
Freezing Instructions:
- Place pancakes in a single layer on a baking sheet
- Freeze for 1 hour (prevents sticking)
- Transfer to a freezer-safe bag or container
- Label and date them – they’ll last up to 2 months
Reheating Methods:
- Microwave: Wrap in a damp paper towel and heat for 20–30 seconds
- Toaster: Pop them in like toast for crispy edges
- Oven: Reheat in a 300°F (150°C) oven for 8–10 minutes
Whether you’re in a rush or planning brunch, having pancakes ready to go is a serious win.
Troubleshooting Common Issues
Batter Too Runny?
No worries—just add a tablespoon of flour at a time until it thickens. The batter should slowly run off a spoon, not pour like water.
Pancakes Not Fluffy?
Check the freshness of your baking soda or baking powder. Old leavening agents won’t provide the necessary lift. Also, resting the batter helps!
Burning on the Pan?
Reduce the heat. Some stoves run hotter than others, so medium-low might be better. And don’t skip greasing the pan between batches.
Nutritional Information
(Approximate per pancake, assuming 10 pancakes total)
| Nutrient | Amount |
|---|---|
| Calories | 130 kcal |
| Carbohydrates | 18 g |
| Protein | 4 g |
| Fat | 5 g |
| Fiber | 1 g |
| Sugar | 3 g |
Keep in mind this will vary with add-ins and toppings.
Gluten-Free & Vegan Adaptations
Gluten-Free Substitutes:
- Use a 1:1 gluten-free flour blend
- Almond flour or oat flour can also work, but may alter texture
Vegan Swaps:
- Replace egg with a flax egg (1 tbsp flaxseed + 3 tbsp water)
- Use plant-based milk (like oat, soy, or almond)
- Sub in melted coconut oil or vegan butter
These swaps are super simple and still result in fluffy, golden pancakes everyone can enjoy.
Make-Ahead and Batch Cooking Tips
Scaling the Recipe:
- Double or triple everything for a crowd
- Use a large mixing bowl and griddle to speed things up
Storing for the Week:
- Cool completely, then layer between parchment paper and refrigerate or freeze
- Make a large batch on Sunday and enjoy pancakes all week
Bonus Tip:
You can even refrigerate the batter overnight and cook fresh pancakes in the morning. Just give it a stir and let it come to room temp before cooking.
FAQs about Sourdough Discard Pancakes Recipe
How Long Can I Store Discard?
Sourdough discard lasts up to 1 week in the fridge. The longer it sits, the tangier it gets. Just stir before using and make sure there’s no mold.
Can I Use Cold Discard?
Absolutely. Cold discard works fine in pancake recipes. No need to bring it to room temperature, especially if you’re mixing with warm melted butter or milk.
Can I Add Sourdough Discard to Any Pancake Recipe?
Yes, but you’ll need to adjust the flour and liquid. The discard acts as both.
Why Do My Pancakes Taste Too Sour?
You may be using very old discard. Try using discard that’s only 1–2 days old for a milder flavor.
Can I Use Whole Wheat Flour Instead of All-Purpose?
Sure! Just know that whole wheat will make them a bit denser and nuttier in flavor. You might need a little more liquid.
Conclusion
Sourdough discard pancakes are more than just a clever way to use up extra starter—they’re a flavorful, fluffy, and versatile breakfast you’ll find yourself making again and again. Whether you’re a sourdough pro or just starting your baking journey, this easy recipe helps you waste less and eat better. Plus, with all the topping options and customization ideas, it never gets boring.
So next time you’re feeding your starter, don’t toss the discard—turn it into pancakes that’ll have your whole family asking for seconds.