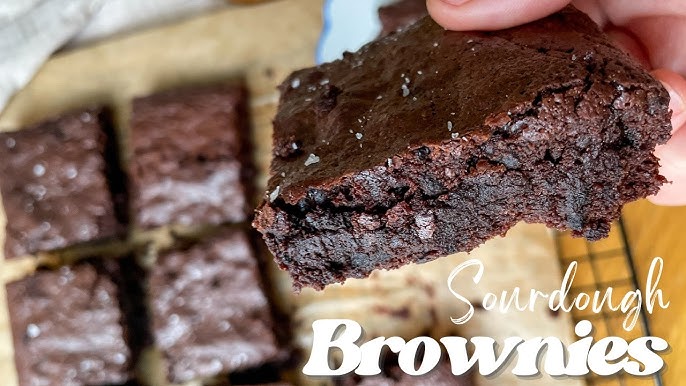
Sourdough Brownies Recipe: If you’ve got some sourdough starter sitting around and you’re tired of the usual bread recipes, let’s switch things up. How about turning that tangy goodness into something sweet and decadent? Sourdough brownies are your next obsession—and yes, they’re fudgy, rich, and absolutely irresistible. Whether you’re using active starter or discard, this recipe turns leftovers into dessert gold.
You don’t need to be a sourdough expert or a pastry chef. Just a love for brownies and a little curiosity. Ready to transform that sourdough starter into gooey chocolate perfection?
Let’s dive in.
Why Add Sourdough Starter to Brownies?
The Flavor Boost
You might be wondering—why sourdough in a brownie? Sounds weird, right? But here’s the thing: sourdough starter adds a subtle tang that beautifully balances the rich sweetness of chocolate. It’s not overpowering or bread-like. Instead, it gives your brownies that mysterious “oomph” where people go, “Whoa, what’s in this?”
The acidity in the starter actually enhances the chocolate flavor. Think of it like adding coffee to chocolate—it deepens the complexity without stealing the spotlight.
Texture Benefits
Sourdough also does something magical to the texture. We’re talking moist, chewy, dense brownies that somehow feel lighter at the same time. It gives the batter a beautiful elasticity, making the end result less crumbly and more cohesive. It’s like your brownies went to a yoga class—stretchy, strong, and flexible in the best way.
List of Ingredients You’ll Need
Let’s break down exactly what you need for the ultimate sourdough brownie batch:
Main Ingredients:
- 1/2 cup (113g) unsalted butter – the base for rich flavor
- 1 cup (170g) dark or semi-sweet chocolate chips – melt-in-your-mouth goodness
- 3/4 cup (150g) granulated sugar – the sweet punch
- 1/4 cup (50g) brown sugar – adds depth and chewiness
- 2 large eggs – for structure and richness
- 1 teaspoon vanilla extract – adds aroma and warmth
- 1/2 cup (120g) sourdough starter (discard or active) – the star of the show
- 1/3 cup (40g) unsweetened cocoa powder – intensifies the chocolate
- 1/2 cup (65g) all-purpose flour – to hold it all together
- 1/4 teaspoon salt – balances all the sweetness
Optional Add-Ins:
- 1/2 cup chopped walnuts or pecans – for crunch
- 1/4 teaspoon espresso powder – enhances chocolate
- A swirl of peanut butter or caramel – for indulgence
- Extra chocolate chunks – because why not?
Types of Sourdough Starter You Can Use
Active Starter vs. Discard
Both active sourdough starter and discard work. If you want more rise and airiness, go for active starter. But for a denser, fudgy texture? Discard is perfect. No need to feed it—just scoop, measure, and mix.
Flavor Differences
Active starter gives a milder sour taste. Discard, especially if a few days old, has a bolder tang. Depending on how much zing you want, choose accordingly. Some even combine both!
Essential Tools and Equipment
Before getting your hands dirty, make sure you’ve got these kitchen essentials ready:
- Mixing bowls
- Whisk or hand mixer
- Rubber spatula
- 8×8-inch square baking pan
- Parchment paper
- Double boiler or microwave-safe bowl
- Cooling rack
- Sharp knife for cutting brownies
Trust me, the parchment paper is your best friend when lifting out the cooled brownies. Don’t skip it.
Step-by-Step Guide to Making Sourdough Brownies
Step 1: Prep Your Pan and Oven
Preheat your oven to 350°F (175°C). Line your baking pan with parchment paper and lightly grease the edges. This prevents sticking and ensures perfect brownie edges every time.
Step 2: Melt Butter and Chocolate
In a heatproof bowl, melt the butter and chocolate chips together. You can use a double boiler or microwave in 30-second bursts, stirring in between until silky smooth. Let it cool for a minute before moving on.
Step 3: Beat in Sugar and Eggs
Add both sugars to the melted chocolate mix, whisk until combined. Then, crack in the eggs one at a time, whisking vigorously after each. This step helps emulsify the batter, giving it that shiny, crackly top.
Step 4: Stir in Sourdough Starter
Now it’s time to fold in your sourdough starter. Don’t overmix—just blend until it disappears into the batter. You’ll notice a slightly thicker, stretchy texture. That’s exactly what you want.
Step 5: Fold in the Dry Ingredients
Sift in the cocoa powder, flour, and salt. Gently fold the dry mix into the wet using a spatula. Stop as soon as you see no more dry streaks. Overmixing here leads to cakey brownies—and we’re not doing that.
Step 6: Add-Ins and Customization
Want to jazz things up? Fold in nuts, extra chocolate chunks, or swirl in some peanut butter. This is where you can really get creative.
Step 7: Bake to Fudgy Perfection
Pour the batter into your prepared pan. Smooth out the top and tap the pan gently on the counter to release air bubbles. Bake for 25–30 minutes, or until the center is set but still has a slight jiggle. A toothpick should come out with moist crumbs, not wet batter.
Step 8: Cool, Cut, and Serve
Let the brownies cool completely in the pan on a rack. This helps them set and makes cutting easier. Use a sharp knife to slice them into squares. Serve as-is or with a scoop of vanilla ice cream.
Tips for Perfect Brownie Texture
Getting the perfect sourdough brownie texture is all about balance. Too much mixing or baking, and you’ll end up with a dry or cakey result. Not enough mixing, and things might be too gooey in the wrong way. Let’s break down how to achieve that signature fudgy finish:
Fudgy vs. Cakey: What’s the Trick?
- Fudgy brownies = more fat (butter and chocolate), less flour.
- Cakey brownies = more flour, possibly a bit of baking powder or soda.
This recipe leans heavily on the fudgy side, thanks to the melted chocolate, butter, and sourdough starter. The starter helps create a chewy middle that’s just firm enough around the edges.
Want them even more gooey? Slightly underbake them. Take them out of the oven when the center is just barely set. They’ll continue to cook a little from residual heat, especially if you leave them in the pan to cool.
Don’t Overmix the Batter
It’s tempting to keep stirring, but once your flour and cocoa are in, be gentle. Overmixing activates the gluten in flour and leads to a tougher texture—something you don’t want in a brownie. Use a folding motion and stop once everything is just incorporated.
Also, give the batter a few minutes to rest before baking. It allows the sourdough and cocoa flavors to deepen, almost like marinating.
Sourdough Brownie Variations
Brownies are already amazing. But with sourdough as the base, you can go in so many creative directions. Here are some fun ways to spice things up:
Sourdough Mocha Brownies
Add 1–2 teaspoons of instant espresso powder to your dry mix. The coffee doesn’t make it taste like mocha—it just intensifies the chocolate flavor. But if you’re a true coffee lover, go ahead and drizzle some espresso glaze on top after baking. Thank me later.
Walnut or Nut Variants
Classic and crunchy. Toss in chopped walnuts, pecans, or even hazelnuts. About 1/2 cup is perfect. Toasting them before adding? That’s the pro move. It brings out their oils and makes your brownies extra aromatic.
Salted Caramel Swirl
Use a spoon to swirl in salted caramel sauce just before baking. You don’t have to go overboard—just a few ribbons will do. The combo of tangy starter + rich caramel + deep chocolate is next-level good.
Other ideas:
- White chocolate chunks
- Peanut butter chips
- Orange zest + dark chocolate
Make it your own. Sourdough is flexible like that.
How to Store Sourdough Brownies
Let’s say you somehow don’t eat the whole pan in one sitting (no judgment if you do). Here’s how to keep your sourdough brownies tasting fresh:
Room Temperature
Store them in an airtight container at room temp for 3–4 days. Place a piece of parchment between layers if stacking. This helps keep the crackly top intact and prevents sticking.
Refrigeration
Want them to last longer? Pop them in the fridge for up to a week. The texture will get a little firmer, which some people actually prefer—it’s almost like a chewy chocolate bar. You can always warm them in the microwave for 10–15 seconds to soften.
Freezing Brownies
Yes, you can freeze sourdough brownies!
- Wrap individual brownies tightly in plastic wrap, then foil.
- Store in a zip-top bag or airtight container.
- They’ll keep for up to 3 months.
To thaw: Just leave on the counter for about an hour, or microwave briefly for a fast treat.
Make-Ahead and Meal Prep Tips
If you’re baking for a party or just want dessert ready for the week, sourdough brownies are a great make-ahead treat.
Here’s how:
- Bake a double batch and freeze half.
- Make the batter ahead (up to 24 hours), cover tightly, and refrigerate. Bring to room temp before baking.
- Store pre-cut brownies in portions for easy lunchbox packing or afternoon pick-me-ups.
These brownies are also a hit for gifting—wrap them up in parchment, tie with twine, and boom: homemade edible gift with a twist.
Common Mistakes to Avoid
Even though this recipe is simple, a few common slip-ups can sabotage your brownies. Let’s keep your bake flawless:
Overbaking
This is the biggest crime in Brownie Land. Sourdough adds moisture, but overbaking can still dry everything out. Remember: a toothpick should come out with moist crumbs, not totally clean.
Using the Wrong Chocolate
Avoid chocolate chips with waxy stabilizers unless that’s all you have. Instead, go for high-quality dark or semi-sweet chocolate bars (like 60–70% cocoa) for melting. The richer the chocolate, the better the brownie.
Too Much Flour
Stick to the measurements. Even a little extra flour can tip the balance from fudgy to dry. Use a kitchen scale if possible—it’s way more accurate than scooping with a cup.
Not Cooling Before Cutting
Cutting hot brownies = gooey mess. Let them cool fully (even chill them) for clean edges and a better chew. It’s hard to wait—but totally worth it.
How to Use Up Extra Sourdough Starter
So now you’ve got a recipe that uses your sourdough starter in a sweet treat—but what about the rest of that discard hanging out in the jar? Good news: there are tons of ways to use it, so none of it goes to waste. Let’s look at a few clever (and delicious) options:
Sweet Recipes:
- Sourdough Chocolate Chip Cookies – Super chewy with a slight tang.
- Sourdough Pancakes or Waffles – Light, fluffy, and great for weekend brunch.
- Sourdough Banana Bread – Moist, dense, and uses two kinds of fermentation: sour and ripe!
Savory Recipes:
- Sourdough Crackers – Crispy, salty, and addictive.
- Sourdough Pizza Dough – Fermented flavor that makes takeout jealous.
- Sourdough Soft Pretzels – Perfectly chewy with a golden crust.
Saving discard means saving money and reducing waste. Plus, it gives you a fun excuse to bake more!
Health Benefits of Using Sourdough Starter
While brownies are definitely a treat, using sourdough starter does offer some cool nutritional perks—especially if you’re trying to sneak in more fermented foods.
Gut Health & Digestion
Fermented foods like sourdough can help support gut-friendly bacteria, which may improve digestion and immunity. Even though baking kills live cultures, the acids produced during fermentation may still benefit your gut and make the final product easier to digest.
Lower Glycemic Impact
The natural acidity of sourdough slows down the breakdown of sugars and starches. This can result in a lower glycemic index, meaning your blood sugar won’t spike as hard. So while brownies are still indulgent, sourdough may help blunt the sugar hit just a bit.
Fewer Preservatives
Baking from scratch, especially with sourdough, means no weird additives or preservatives. You control every ingredient, from the chocolate to the flour. Cleaner baking = smarter indulgence.
Sourdough Brownies for Special Diets
Got dietary restrictions? No problem. This recipe is super easy to tweak for different needs. Here’s how to adapt your sourdough brownies for specific lifestyles:
Dairy-Free Option
- Butter Substitute: Use coconut oil or dairy-free butter. Both work great and still give a rich, fudgy texture.
- Chocolate: Be sure to use dairy-free chocolate chips or bars (many dark chocolates are naturally dairy-free—just check the label).
Gluten-Free Adaptation
- Replace the all-purpose flour with a 1:1 gluten-free flour blend that includes xanthan gum for structure.
- Use gluten-free starter (made with gluten-free flours like brown rice or buckwheat) if needed.
Vegan Adjustments
This gets trickier but is possible:
- Use flax eggs (1 tbsp ground flax + 2.5 tbsp water per egg).
- Sub out butter and chocolate with vegan alternatives.
- Use discard from a vegan sourdough starter.
Note: Texture may be slightly different, but the flavor still shines.
FAQs about Sourdough Brownies Recipe
1. Can I use sourdough discard directly from the fridge?
Yes! No need to bring it to room temperature or feed it. Cold discard works fine and blends right into the batter. Just give it a stir if it’s separated.
2. Do I need to feed the starter first before using it in brownies?
Not at all. In fact, unfed discard is ideal—it adds the right tang without too much rise or yeast activity.
3. How long will sourdough brownies stay fresh?
Stored in an airtight container, they’ll stay fresh for 3–4 days at room temp or up to a week in the fridge. They also freeze beautifully for up to 3 months.
4. Can I double the recipe?
Absolutely. Use a 9×13-inch pan and increase the baking time by about 5–10 minutes. Just keep an eye on the center for doneness.
5. What’s the best chocolate to use for sourdough brownies?
Go for high-quality dark or semi-sweet chocolate (60–70% cocoa). Bars work better than chips for melting. If you like a less intense chocolate flavor, you can use milk chocolate, but the result will be sweeter and softer.
Conclusion
And there you have it—sourdough brownies that are rich, fudgy, tangy, and straight-up unforgettable. They’re the perfect way to use up that extra sourdough starter while treating yourself to something sweet. Whether you’re a long-time sourdough lover or just exploring new baking ideas, this recipe is guaranteed to win hearts (and taste buds).
Remember, baking is part science, part art, and a whole lot of love. Don’t stress about making it perfect—just have fun, taste as you go, and enjoy the process. Because honestly, once you take that first bite of these gooey, chocolatey, sourdough-kissed brownies… you’ll never go back to plain old box mix again.
Happy baking!