Sourdough Bread Machine Recipe: If you’ve ever dreamed of making artisan-quality sourdough bread but dreaded the long process, you’re in for a treat. Using a bread machine makes the entire process simpler, quicker, and almost foolproof. No kneading by hand, no guesswork, and best of all – minimal cleanup.
This guide will walk you through everything from ingredients to baking that perfectly crusty loaf with a soft, tangy center. Whether you’re a total beginner or someone who just wants a more convenient way to enjoy sourdough, this guide has you covered.
Why Use a Bread Machine for Sourdough?
A bread machine is a game-changer for anyone short on time but still craving homemade bread. Traditional sourdough recipes often call for meticulous timing, multiple rises, and a lot of manual labor. With a bread machine, much of the guesswork is removed. It mixes, kneads, and bakes for you, creating a consistent texture every time. Think of it as your kitchen assistant that never gets tired.
Plus, bread machines with custom cycle settings allow you to tailor the process to the needs of sourdough – slower rises, longer fermentation, and even just baking if you’ve done the rising outside the machine. For beginners, this removes a lot of the fear that often surrounds sourdough baking.
What Makes Sourdough Special?
Sourdough isn’t your average loaf. It’s made with a live fermented culture – known as a sourdough starter – rather than commercial yeast. This gives it that signature tangy flavor, chewy crumb, and incredible health benefits. Unlike quick yeasted bread, sourdough ferments slowly, making it easier to digest and richer in nutrients.
When made in a bread machine, sourdough retains all of its artisanal charm with none of the stress. You still get the beautifully fermented flavor, the bubbly, open crumb, and the crusty exterior – all with the press of a few buttons.
List of Ingredients You’ll Need
Basic Ingredients for Sourdough Bread
Let’s talk about what you actually need to make this magical loaf. Fortunately, the ingredient list is short and sweet:
- Sourdough starter (active and bubbly) – ½ cup
- Bread flour – 3 cups (or all-purpose if that’s what you have)
- Water (lukewarm) – 1 to 1 ¼ cups, depending on dough consistency
- Salt – 1 ½ teaspoons
That’s it. These four simple ingredients come together to create a loaf bursting with flavor and character. Your starter is the key here—it replaces commercial yeast and does all the heavy lifting during fermentation.
Make sure your sourdough starter is active before you use it. You’ll know it’s ready if it doubles in size within 4 to 6 hours of feeding and has a pleasantly sour smell.
Optional Ingredients for Flavor Variations
Here’s where you can get creative and tailor your bread to your taste:
- Honey or sugar – Adds a subtle sweetness (1 tablespoon)
- Olive oil or butter – Softens the crumb (1–2 tablespoons)
- Herbs like rosemary, thyme, or oregano
- Seeds such as sesame, sunflower, or flax
- Chopped nuts or dried fruits for a gourmet twist
These extras won’t interfere with the fermentation, but they will add complexity and flair to your loaf.
Sourcing Quality Ingredients
Your bread is only as good as what goes into it. Here’s what to look for:
- Flour: Opt for organic or unbleached bread flour if possible. Higher protein flours help create a stronger gluten structure, which is essential for the chewy, airy crumb sourdough is famous for.
- Water: Avoid chlorinated tap water. Chlorine can kill your wild yeast. Use filtered or bottled water for best results.
- Salt: Sea salt or kosher salt adds more depth than regular table salt.
By using the highest quality ingredients you can access, you’ll elevate your sourdough from basic to bakery-worthy.
Essential Tools and Equipment
Choosing the Right Bread Machine
Not all bread machines are created equal. For sourdough, you’ll want a model with customizable cycles or a “homemade” or “artisan dough” setting. This allows you to lengthen the fermentation and proofing stages as needed. Some models worth considering include:
- Zojirushi Home Bakery Supreme
- Breville Custom Loaf
- Panasonic Automatic Bread Maker
Look for features like a delay timer, programmable settings, and a viewing window. A non-stick bread pan also makes removal and cleanup much easier.
Handy Tools to Make the Process Easier
While your bread machine does most of the work, a few extra tools can enhance your sourdough-making experience:
- Digital kitchen scale – For precise measurements
- Silicone spatula – To scrape dough without sticking
- Dough scraper – For easy shaping if you’re pre-proofing outside the machine
- Thermometer – To check internal temperature (ideal bread temp: 190–200°F)
Investing in the right tools makes sourdough baking feel less like a chore and more like a hobby you’ll actually stick with.
Preparing Your Sourdough Starter
What is a Sourdough Starter?
At the heart of every sourdough loaf is the starter — a fermented mixture of flour and water teeming with wild yeast and beneficial bacteria. It’s what gives sourdough its distinct tang, aroma, and texture.
Your starter acts as the leavening agent, meaning it’s responsible for making the dough rise. If you don’t already have one, you can either create your own from scratch or buy one from a reputable source online or from a friend.
How to Feed and Maintain It
Feeding your sourdough starter is like taking care of a pet. Here’s how to keep it happy and active:
- Remove half of the starter (discard or use it in other recipes).
- Feed with equal weights of flour and water (usually 50g each).
- Stir thoroughly and let it rest at room temperature until bubbly (4–6 hours).
Store it in the refrigerator if you don’t bake daily. Feed it once a week to keep it alive. Before using it in your bread machine, always let it come to room temp and ensure it’s active (doubles in size and bubbles up).
Step-by-Step Guide to Making Sourdough in a Bread Machine
Step 1 – Activate the Starter
Begin by ensuring your sourdough starter is active and bubbly. Feed it with equal parts flour and water about 4–6 hours before baking so it’s at peak activity when you use it. You’ll know it’s ready when it’s doubled in size, has a pleasant tangy aroma, and small bubbles throughout. Using an active starter helps your bread rise properly, even when using a bread machine.
Step 2 – Mixing the Dough
In your bread machine pan, add the following ingredients in this order:
- ½ cup active sourdough starter
- ¾ cup warm water (about 100°F / 38°C)
- 2½ cups bread flour
- 1 tablespoon olive oil or melted butter
- 1 teaspoon salt
Avoid placing the salt directly on the starter, as it can slow fermentation. Set your bread machine to the dough cycle (or “mix and knead” cycle). This will take about 20–30 minutes, during which the machine combines and kneads everything into a smooth, elastic dough.
Step 3 – First Proofing (Fermentation)
Once the dough cycle finishes, leave the dough in the bread machine for its first rise. Unlike yeast bread, sourdough needs more time to ferment. Let it rest inside the machine (with the lid closed) for 3–4 hours, or until it has doubled in size. The timing will vary depending on the warmth of your kitchen and the strength of your starter. Be patient — this slow rise is where all the sourdough flavor develops.
Step 4 – Second Rise
After the first proof, gently deflate the dough by pressing it down lightly. You can either shape it into a loaf and return it to the bread machine pan or transfer it to a loaf pan if your machine has a bake-only option. Let it rise again for another 1–2 hours, or until it puffs up nicely. The dough should spring back slowly when poked — that’s your sign it’s ready to bake.
Step 5 – Baking the Bread
Select the bake cycle on your bread machine (usually about 45–50 minutes) and start it. If your machine doesn’t have a sourdough setting, you can use the basic bake function or bake in a preheated oven at 375°F (190°C) for 35–40 minutes. The bread is done when it’s golden brown on top and sounds hollow when tapped on the bottom.
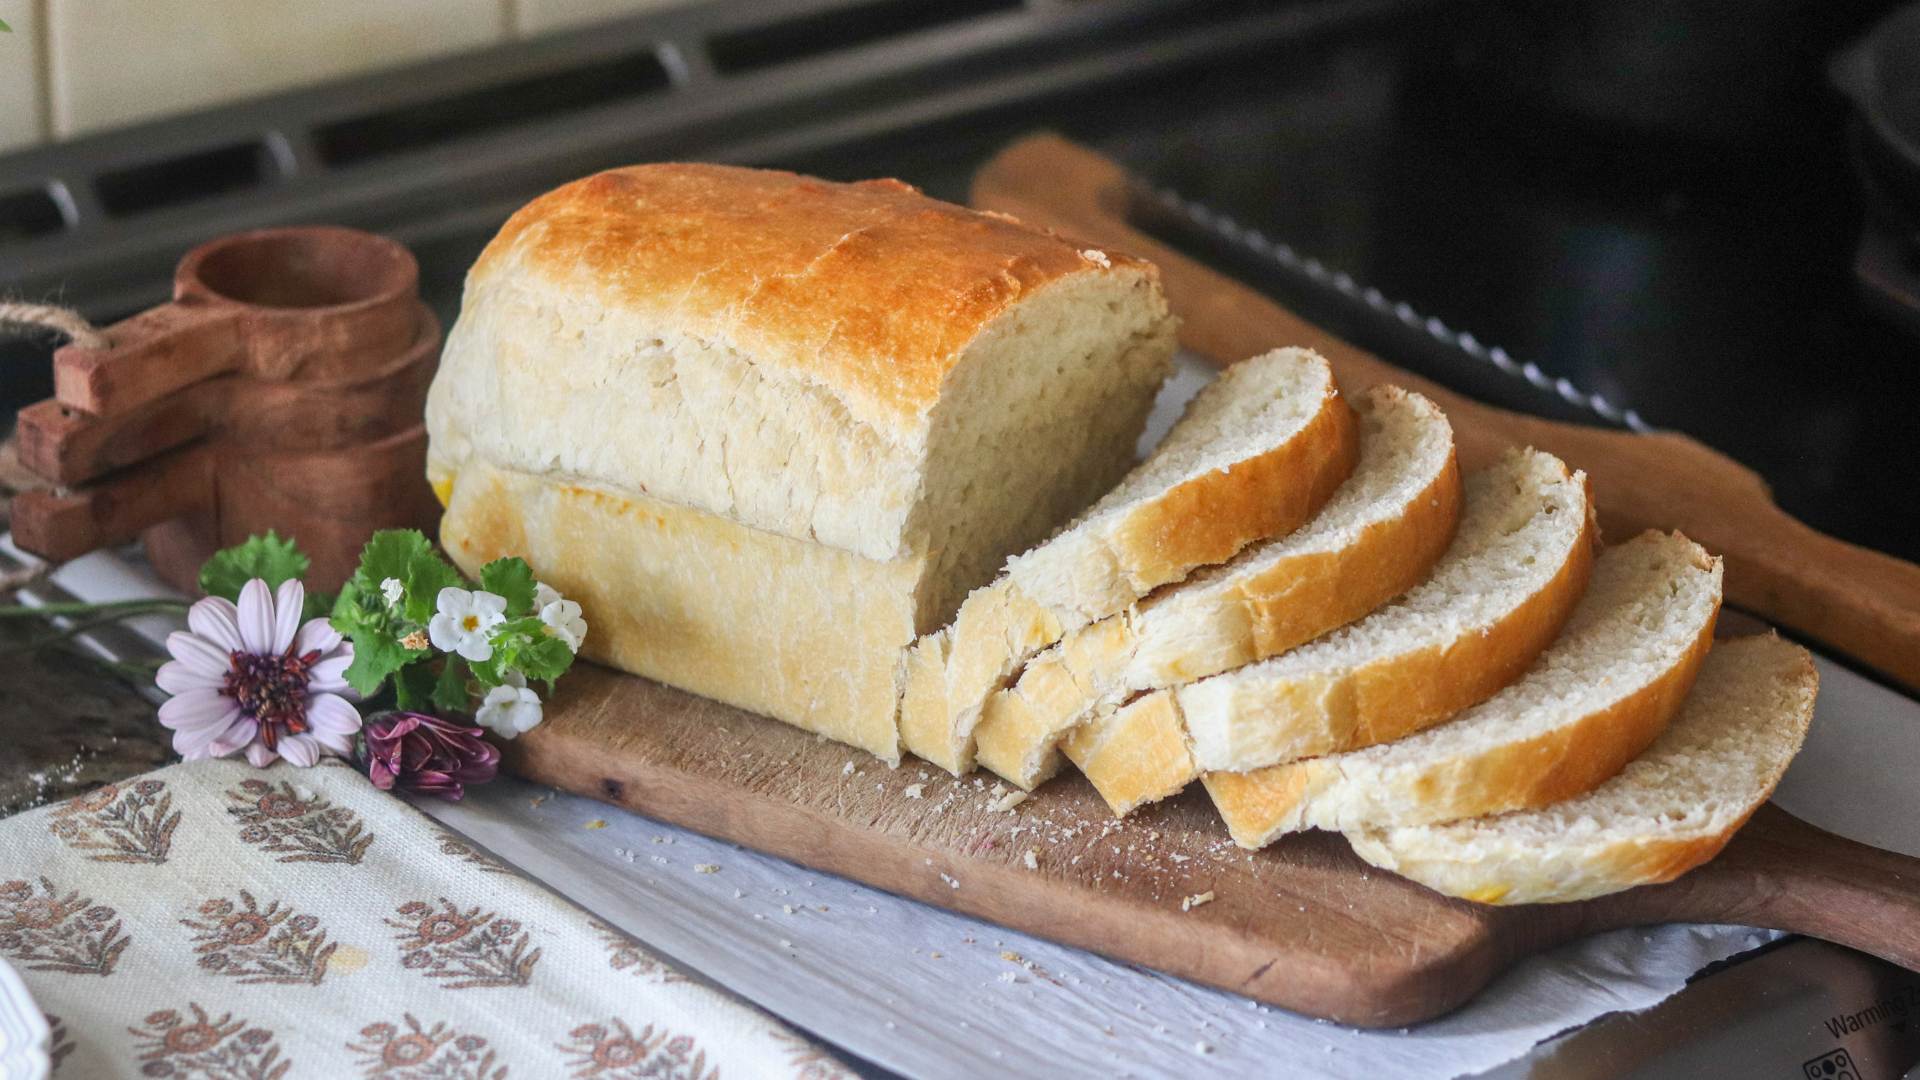
Let the loaf cool on a wire rack for at least 1 hour before slicing — this allows the crumb to set and the flavors to deepen.
Soft inside, crisp outside, and full of that signature tang, this Sourdough Bread Machine Loaf brings artisan flavor to your kitchen with modern-day convenience.
Tips for Better Results
Adjusting for Temperature and Humidity
Baking sourdough isn’t just about the ingredients—it’s also about your environment. Wild yeast is sensitive to changes in temperature and humidity, which means you’ll need to adapt depending on the season.
In warm weather:
- Fermentation will happen faster. Keep an eye on your dough to avoid overproofing.
- You might need slightly less water due to increased humidity.
In cold weather:
- Fermentation slows down. Consider placing the dough in a warm spot like an oven with the light on.
- Hydration may increase due to drier air—add a touch more water if needed.
Use your senses. A properly proofed dough will be airy, slightly jiggly, and leave a faint indent when poked.
How to Get a Crispy Crust
Want that bakery-style crackly crust? Here’s how to get it—even in a bread machine:
- Finish baking in the oven: After the machine finishes baking, pop the loaf into a preheated 450°F oven for 10 minutes.
- Use steam: If finishing in the oven, place a small dish of water on the oven floor to create steam during the first 10 minutes of baking.
- Brush with water: Right before baking, lightly mist the top of your dough with water. It encourages blistering and a golden crust.
Once baked, allow it to cool fully on a rack. That cooling time allows the crust to set properly and gives the inside time to finish cooking.
Common Mistakes to Avoid
Overproofing or Underproofing
This is the #1 culprit behind sourdough disasters. Overproofed dough loses structure and collapses. Underproofed dough bakes dense and gummy.
Signs of overproofing:
- Dough has risen and then started to deflate
- Very sticky texture
- Bread bakes with a flat top
Signs of underproofing:
- Dough feels stiff or tight
- Small or no rise in the oven
- Heavy texture after baking
To avoid these, watch your dough—not the clock. Learn how it looks, feels, and smells when it’s ready.
Poor Starter Maintenance
Your sourdough starter is a living thing. If it’s neglected, you’ll get poor results every time. Make sure to:
- Feed it regularly, even if you’re storing it in the fridge.
- Use filtered water and fresh flour.
- Smell it often—a good starter smells yeasty or fruity. A foul odor means trouble.
A weak starter leads to flat, flavorless bread. Treat it right, and it’ll reward you with loaf after loaf of sourdough perfection.
Nutritional Benefits of Sourdough
Digestive Health
Sourdough bread is not only delicious—it’s a gut-friendly powerhouse. Thanks to the natural fermentation process, sourdough contains beneficial bacteria and prebiotics that support your digestive system. The long fermentation breaks down gluten and phytic acid, two components that can make other breads hard to digest. This means that even some people with mild gluten sensitivities (not celiac disease) often tolerate sourdough better than commercial bread.
The live cultures in sourdough, similar to those found in yogurt or kombucha, may also promote healthy gut flora. When your gut is balanced, it improves everything from nutrient absorption to mood and immune function. Compared to conventional bread, sourdough is the real MVP for your stomach.
Lower Glycemic Index
Another hidden benefit of sourdough? It won’t spike your blood sugar like regular white bread. Due to the slow fermentation process, the starches in the flour are partially broken down, resulting in a lower glycemic index (GI). This means it releases sugars more slowly into the bloodstream, helping maintain energy levels and preventing sugar crashes.
For those managing diabetes or watching carbs, sourdough can be a smarter option. It’s also more satisfying—thanks to its rich texture and flavor, you’ll likely eat less while feeling fuller longer.
Storing and Preserving Sourdough Bread
Best Ways to Keep It Fresh
Homemade sourdough doesn’t have preservatives, so it won’t last as long as store-bought bread. But with a few tricks, you can extend its life while preserving that amazing crust and chewy crumb.
- Room Temperature: Store your bread at room temperature in a bread bag or linen wrap. Avoid plastic, which makes the crust soft and soggy.
- Paper Bag Inside a Bread Box: This combination allows the bread to breathe while preventing it from drying out too quickly.
- Cut-Side Down: When storing on a cutting board or in a container, always place the cut side down to protect the exposed interior.
Avoid the fridge—it actually speeds up staling. Your loaf will dry out within a day or two if chilled.
Freezing Tips
Need to keep sourdough fresh for longer? Freezing is your friend.
- Let the bread cool completely before freezing.
- Slice the loaf first so you can grab a slice or two at a time.
- Wrap tightly in plastic wrap or foil, then place in a freezer-safe bag.
To thaw, just pop slices into the toaster or oven for a quick refresh. Whole loaves can be defrosted at room temp, then crisped in the oven at 350°F for 10–15 minutes.
Sourdough Bread Recipe Variations
Whole Wheat Sourdough
Want to make your sourdough even more nutritious? Swap out part of the bread flour for whole wheat flour. A typical ratio is 2 cups bread flour + 1 cup whole wheat flour. This gives your bread a nutty flavor, denser texture, and a big nutritional boost from the added fiber and minerals.
You may need to add a bit more water, as whole wheat flour absorbs more moisture. Expect a tighter crumb, but don’t worry—it’ll still be wonderfully chewy and flavorful.
Garlic and Herb Sourdough
For a flavor-packed twist, try adding roasted garlic, rosemary, or even sun-dried tomatoes. These mix-ins should be added during the kneading cycle of your bread machine, or manually folded into the dough after the first rise.
Some tasty combos to try:
- Roasted garlic + thyme
- Cheddar + chives
- Kalamata olives + rosemary
- Cranberries + walnuts (for a sweet-savory variation)
Flavor add-ins make sourdough more versatile and perfect for pairing with soups, salads, or simply enjoying as a gourmet snack.
Serving Suggestions
Perfect Pairings
Now that you’ve baked your sourdough, let’s eat! This bread pairs beautifully with a wide range of dishes. Here are some delicious serving ideas:
- Toasted with butter and sea salt – A simple classic.
- Avocado toast – Add eggs, chili flakes, and a squeeze of lime.
- Grilled cheese sandwich – The tangy bread takes it to a whole new level.
- With soup or stew – Great for dipping and soaking up every last drop.
- Open-faced sandwiches – Smoked salmon, cream cheese, or tomato mozzarella—get creative!
You can also slice it thin for crostini or turn it into croutons for salads. The bold, tangy flavor complements both savory and sweet toppings.
Making the Most of Your Loaf
Sourdough is incredibly versatile. Here’s how to avoid waste and use up every last slice:
- Stale sourdough? Make French toast, bread pudding, or homemade breadcrumbs.
- Leftover crusts? Dry them out and blend into bread crumbs or toast into croutons.
- Too much bread? Freeze half the loaf in slices right after baking.
Maximize your efforts by using sourdough throughout your weekly meals. It’s not just a loaf—it’s a kitchen essential.
FAQs about Sourdough Bread Machine Recipe
Can I use store-bought starter?
Yes, store-bought sourdough starters work just fine. Just make sure to feed and activate them before baking.
How long does sourdough bread last?
At room temperature, it stays fresh for about 3–4 days. You can freeze it to extend shelf life up to 3 months.
Can I bake gluten-free sourdough in a bread machine?
Yes, but you’ll need a gluten-free starter and recipe. Regular machines may not handle gluten-free dough well unless they have a dedicated setting.
What if my bread collapses in the machine?
This usually means overproofing or too much hydration. Next time, reduce the second rise time or slightly cut back on water.
Is sourdough healthier than regular bread?
Yes. It’s easier to digest, has a lower glycemic index, and contains beneficial bacteria thanks to natural fermentation.
Conclusion
Sourdough bread made in a bread machine is the perfect balance of tradition and convenience. You get all the complex flavors and health benefits of sourdough without the long manual process. From activating your starter to crafting delicious recipe variations, each step brings you closer to mastering this timeless bread.
Remember, every loaf is a learning experience. The more you bake, the better your intuition will become. Don’t be afraid to experiment, tweak hydration levels, or try new flavors. Once you get the hang of it, your bread machine will become your secret weapon for bakery-quality sourdough—right at home.