Sour Cream Recipe: There’s something magical about making sour cream at home. Sure, you can grab a tub from the grocery store, but the satisfaction of creating this creamy, tangy kitchen staple yourself is unmatched. Sour cream is not only versatile—it works in dips, sauces, soups, baked goods, and even as a topping for savory dishes—but it’s also incredibly easy to make. If you’ve never tried making dairy products at home before, sour cream is the perfect place to start.
Why Make Sour Cream at Home?
The first reason is control. When you make sour cream at home, you know exactly what’s going into it. Many store-bought versions are loaded with stabilizers, thickeners, and preservatives. At home, you only need two or three ingredients—cream, a culture (like buttermilk or lemon juice), and sometimes milk.
The second reason is taste. Homemade sour cream has a fresher, tangier flavor than most commercial options. It’s creamier, richer, and feels more natural in recipes. Plus, it often enhances baked goods like cakes, muffins, and breads far better than processed alternatives.
Lastly, there’s the cost factor. A small tub of sour cream at the store can be pricey, especially if you’re going for organic or premium brands. With homemade sour cream, you can make larger quantities for a fraction of the price.
The Benefits of Homemade vs Store-Bought
When comparing homemade sour cream with store-bought, the difference is clear. Store-bought options often contain gelatin, guar gum, or modified cornstarch to extend shelf life and thicken the cream artificially. While these additives aren’t necessarily harmful, they aren’t needed. Homemade sour cream relies on natural fermentation, making it cleaner and healthier.
Additionally, homemade sour cream can be customized to your taste. Want it extra tangy? Let it ferment longer. Prefer it mild? Stop the process earlier. Want it extra thick? Use heavy cream instead of light cream. These adjustments are nearly impossible with store-bought tubs, which are uniform and standardized.
Ingredients You’ll Need
Now that you know why homemade sour cream is worth it, let’s dive into the essentials you’ll need. The good news? The list is short, simple, and budget-friendly.
Key Ingredients for Authentic Sour Cream
- Heavy Cream – This is the base of sour cream. The higher the fat content, the richer and thicker your sour cream will be. Aim for cream with at least 30–35% fat.
- Buttermilk (or Yogurt Starter) – This introduces the good bacteria needed for fermentation. Traditional recipes use cultured buttermilk, but plain yogurt or even a probiotic capsule can work as substitutes.
- Milk (Optional) – Sometimes a splash of milk is added to lighten the texture if you prefer a less dense sour cream.
That’s it—just two to three ingredients, and you’re good to go.
Alternative Ingredients for Variations
- Lemon Juice or Vinegar – If you don’t have buttermilk, you can use an acid like lemon juice or vinegar to curdle the cream and create a similar tangy effect. While it won’t be quite the same as fermented sour cream, it works in a pinch.
- Dairy-Free Options – For a vegan version, you can use coconut cream, cashew cream, or soy milk with a probiotic culture. The method is similar, though fermentation time may vary.
Tools and Equipment Required
You don’t need a professional kitchen to make sour cream. Just a few basic tools will do:
- A clean glass jar or bowl (with a lid or cover)
- A whisk or spoon
- A breathable cloth or plastic wrap
- Measuring cups and spoons
Keeping things sterile is key here. Since sour cream is a fermented product, you want good bacteria to thrive, not harmful ones. Always wash your jar and utensils thoroughly before starting.
Step-by-Step Guide to Making Sour Cream
Now comes the fun part—actually making your sour cream. Don’t worry; it’s much easier than it sounds. Just follow these simple steps.
Step 1 – Preparing the Base
Start with fresh, high-quality heavy cream. Pour about 1 cup of cream into a clean glass jar. The quality of your cream matters a lot here because it directly affects the taste and texture of your sour cream. Organic or grass-fed cream usually produces the best results.
If you’d like your sour cream a little lighter, add 2–3 tablespoons of milk to the cream. This helps balance richness while still keeping that creamy texture.
Step 2 – Adding the Culture
Next, add your starter. For every 1 cup of cream, stir in 2–3 tablespoons of cultured buttermilk. If you don’t have buttermilk, you can use plain yogurt with live active cultures. Mix it gently but thoroughly to ensure the culture is evenly distributed.
For a shortcut method, you can also add 1 tablespoon of lemon juice or vinegar instead of buttermilk. However, this will make more of a quick sour cream substitute rather than true cultured sour cream.
Step 3 – Letting It Ferment
This step is where the magic happens. Once your cream and culture are combined, cover the jar loosely with a lid or breathable cloth. You don’t want to seal it airtight—remember, this is fermentation, and the bacteria need air circulation. Place the jar in a warm spot in your kitchen, ideally between 70°F and 75°F (21°C to 24°C).
Now, patience is key. Let the mixture sit undisturbed for about 18 to 24 hours. During this time, the good bacteria will slowly transform the cream into thick, tangy sour cream. Don’t stir it or shake it—just let it rest.
After 18 hours, check the consistency. It should be noticeably thicker and have that classic sour cream tang. If it’s still too thin, let it ferment a few more hours. If your kitchen is on the cooler side, the process may take up to 36 hours.
Think of this step like making bread dough rise—it’s all about giving nature time to work. The longer it sits (up to a point), the tangier the sour cream will become.
Step 4 – Checking Consistency and Flavor
Once fermentation is complete, give your sour cream a gentle stir. You should notice it has thickened significantly, resembling the store-bought texture but fresher and creamier. If you dip a spoon into it, it should coat the back smoothly.
Taste a small spoonful. Does it have that mild tang you’re looking for? If yes, congratulations—you’ve successfully made homemade sour cream! If you prefer a stronger flavor, you can leave it out for a few more hours before chilling.
If your sour cream seems too thin, don’t panic. Sometimes it just needs a few extra hours of fermentation. Another trick is to use cream with a higher fat percentage or add a bit more buttermilk next time. Conversely, if it becomes too sour for your taste, simply reduce fermentation time on your next batch.
This is the beauty of making it at home—you can adjust until it’s exactly how you like it.
Step 5 – Storing Your Sour Cream Properly
Once your sour cream reaches the perfect consistency and flavor, transfer it to the refrigerator. Cooling it down will stop the fermentation process and help it set even thicker.
Homemade sour cream typically lasts about 1 to 2 weeks when stored in an airtight container in the fridge. Be sure to use a clean spoon each time you scoop some out to avoid contamination.
If you make a large batch, consider dividing it into smaller containers. That way, you only open what you need, keeping the rest fresher for longer.
A helpful tip: label your jar with the date you made it. This makes it easier to track freshness and avoid using sour cream past its prime.
With proper storage, your homemade sour cream will be ready to enhance everything from tacos and baked potatoes to cakes and casseroles.
Tips for Perfect Sour Cream
Making sour cream is simple, but a few small details can make the difference between an okay batch and an amazing one.
Common Mistakes to Avoid
- Using ultra-pasteurized cream – This type of cream doesn’t ferment well because the high heat treatment kills off beneficial bacteria. Opt for regular pasteurized cream instead.
- Skipping sterilization – If your jar or utensils aren’t clean, unwanted bacteria may interfere with fermentation. Always start with a sterilized container.
- Fermenting in a cold kitchen – Sour cream needs warmth to thicken. If your kitchen is too chilly, wrap the jar in a towel or place it in your oven with just the light turned on.
- Sealing the jar too tightly – Fermentation needs air circulation. A loose cover or cloth is best.
Tricks for Thicker and Creamier Sour Cream
- Use heavy cream instead of light cream for a richer texture.
- Add a tablespoon of milk powder to the cream before fermenting—it boosts thickness.
- If your sour cream is too thin after fermentation, strain it gently through a cheesecloth for a few hours to remove excess liquid.
Once you’ve mastered the basics, you’ll find it hard to go back to store-bought sour cream.
Flavor Variations and Uses
Homemade sour cream isn’t just for dolloping on chili or topping nachos—it’s a versatile ingredient you can customize and use in countless ways.
Infusing Herbs and Spices
Want to take your sour cream to the next level? Try mixing in fresh herbs and spices after fermentation. Some great options include:
- Chopped chives and garlic for a savory dip
- Dill and lemon zest for a refreshing spread
- Smoked paprika or chipotle for a spicy kick
You can also experiment with sweet variations by adding a touch of honey or vanilla for a dessert-friendly version.
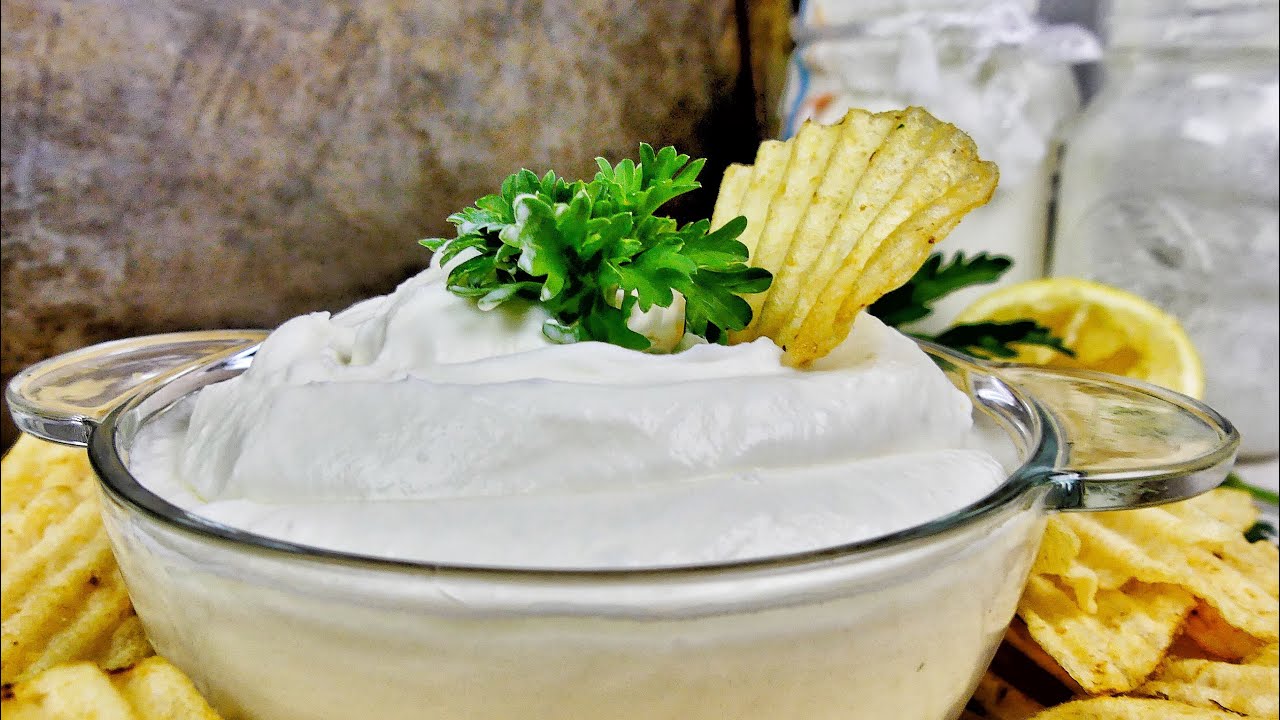
Using Sour Cream in Savory Dishes
Sour cream shines in savory cooking. It balances spice in dishes like chili, tacos, and curries, adds creaminess to mashed potatoes and pasta sauces, and works beautifully in creamy soups like borscht or mushroom soup.
It’s also a classic base for dips—just mix it with onion powder, garlic, or ranch seasoning, and you have an instant party favorite.
Sweet Uses of Sour Cream in Baking
Sour cream isn’t just for savory dishes. Bakers love it because it keeps cakes, muffins, and breads moist and tender. It adds richness without making baked goods overly heavy.
For example, sour cream chocolate cake is famous for its moist, velvety texture. Cheesecakes also benefit from sour cream, which adds smoothness and that perfect tangy balance to the sweetness.
Nutritional Value of Sour Cream
Homemade sour cream is not just delicious—it also has some surprising nutritional benefits when enjoyed in moderation. While it’s certainly a higher-fat dairy product, it provides essential nutrients that support your body in multiple ways.
Calories, Protein, and Fat Breakdown
A typical two-tablespoon serving of sour cream contains around:
- 60 calories
- 5 grams of fat (mostly saturated fat)
- 1 gram of protein
- 1 gram of carbohydrates
It’s not a food you’d eat in huge amounts, but as a condiment or recipe ingredient, it adds creaminess and flavor without an excessive calorie load. The fat in sour cream also helps your body absorb fat-soluble vitamins like A, D, E, and K, especially when paired with veggies.
Comparing Full-Fat vs Low-Fat Versions
Store-bought sour cream often comes in low-fat or fat-free varieties. While these may sound like healthier choices, they usually contain added thickeners and stabilizers to make up for the missing fat. Homemade full-fat sour cream, on the other hand, is simple, natural, and more satisfying.
Fat is also what gives sour cream its rich mouthfeel and flavor. Without it, the texture can be watery, and the taste less pronounced. If you’re watching calories, it’s often better to use a smaller portion of full-fat sour cream rather than opting for a processed low-fat version.
Another key point is probiotics. Fermented sour cream (the homemade kind) contains beneficial bacteria that support gut health. These probiotics help with digestion, boost immunity, and may even improve mood and energy.
So while sour cream should be enjoyed in moderation, homemade versions have definite nutritional perks compared to store-bought alternatives.
Storage and Shelf Life
You’ve made your batch of sour cream—now how do you keep it fresh and safe to eat? Proper storage makes all the difference.
How Long Does Homemade Sour Cream Last?
Homemade sour cream generally lasts 1 to 2 weeks in the refrigerator. The exact time depends on the freshness of your cream, how clean your utensils were, and how it’s stored. Always keep it in an airtight container and avoid letting it sit out at room temperature for long periods.
If you notice your sour cream separating a little (with some liquid pooling on top), don’t worry—that’s normal. Just stir it back in before using.
Signs That Your Sour Cream Has Gone Bad
Since sour cream already has a tangy flavor, it can sometimes be tricky to tell when it’s spoiled. Here are the key warning signs:
- Off smell – If it smells overly sour, rancid, or unpleasant, toss it.
- Mold growth – Any mold spots mean it’s no longer safe to eat.
- Slimy texture – Sour cream should be creamy, not stringy or gooey.
- Strange taste – If it tastes sharper or more bitter than usual, it’s better to discard it.
When in doubt, it’s always safer to throw it away. Food safety comes first, especially with dairy.
For longer storage, you might wonder if you can freeze sour cream. Technically, yes—you can freeze it for up to three months. However, freezing changes the texture, making it grainy and watery. Frozen sour cream works best in cooking (like soups and casseroles) rather than as a topping or dip.
FAQs about Sour Cream Recipe
1. Can I make sour cream without buttermilk?
Yes! You can use plain yogurt with live cultures, lemon juice, or vinegar. Yogurt works best as a true culture, while lemon juice and vinegar give you a quick substitute.
2. How do I fix runny sour cream?
If your sour cream turns out too thin, let it ferment longer, use heavy cream instead of light cream, or strain it through cheesecloth to thicken.
3. Can I freeze sour cream?
You can, but the texture changes after thawing. It’s best used in cooked dishes like soups and casseroles, not as a topping.
4. Is homemade sour cream healthier than store-bought?
Yes, because it avoids additives, stabilizers, and preservatives. Homemade sour cream also contains probiotics, which benefit gut health.
5. Can vegans make a dairy-free version of sour cream?
Absolutely. Coconut cream, cashews, or soy milk can be used with probiotics or lemon juice to create a tangy, creamy vegan alternative.
Conclusion
Making sour cream at home is one of those small kitchen projects that brings big rewards. With just cream and a culture, you can whip up a batch of creamy, tangy sour cream that’s fresher, healthier, and more customizable than anything you’ll find in a store.
From topping baked potatoes to enriching cakes, homemade sour cream proves its versatility again and again. You can experiment with flavors, adjust the tanginess, and even try dairy-free alternatives if you wish.
Most importantly, it connects you to the age-old tradition of fermenting foods—something humans have done for centuries to preserve and enhance flavor. So the next time you reach for a tub at the store, consider making your own instead. It’s simple, rewarding, and deliciously worth it.