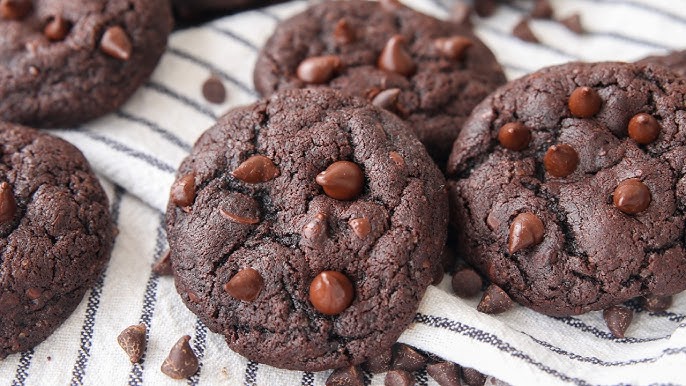
Soft Chocolate Cookie Recipe: Who doesn’t love a warm, gooey, melt-in-your-mouth chocolate cookie? Whether it’s a rainy day, a holiday, or just a regular Wednesday night, soft chocolate cookies are always a treat. They’re comfort food at its best—soft, chewy centers with slightly crisp edges, packed with rich chocolate flavor in every bite.
In this guide, we’re diving into everything you need to know to bake the perfect soft chocolate cookies from scratch. It’s not just about throwing ingredients in a bowl—it’s about creating a texture and taste that hits that sweet spot between bakery-level excellence and homemade love. And don’t worry if you’re new to baking. This step-by-step breakdown is foolproof, beginner-friendly, and guaranteed to give you cookies that’ll have everyone asking for your recipe.
Ingredients You’ll Need
Let’s start with the good stuff—your ingredients. Great cookies start with great ingredients, and every item here plays a role in the cookie’s flavor, texture, and softness.
Basic Ingredients:
- 1 cup (2 sticks) unsalted butter, softened
- 1 cup brown sugar (light or dark for a deeper molasses flavor)
- 1/2 cup granulated sugar
- 2 large eggs
- 2 teaspoons vanilla extract
- 2 and 1/4 cups all-purpose flour
- 1/3 cup unsweetened cocoa powder
- 1 teaspoon baking soda
- 1/2 teaspoon salt
- 2 cups semi-sweet chocolate chips
Ingredient Tips:
- Butter: Room temperature is key. Cold butter won’t mix well, and melted butter can make cookies spread too much.
- Brown Sugar: Adds moisture and a deep flavor, contributing to that chewy texture.
- Cocoa Powder: Choose unsweetened, high-quality cocoa for rich chocolate taste.
- Chocolate Chips: Go semi-sweet or mix with dark and milk chocolate for variety.
Using quality ingredients truly makes a difference. Always check expiration dates on your baking soda and flour, and if possible, use organic eggs and pure vanilla extract for that extra layer of flavor.
Kitchen Tools You’ll Need
Before you jump in, it’s smart to gather all your tools. This not only keeps your baking process smooth but also prevents mid-bake panic when you can’t find your spatula.
Essential Tools:
- Mixing bowls (medium and large)
- Hand or stand mixer
- Measuring cups and spoons
- Rubber spatula
- Baking trays (2-3)
- Parchment paper or silicone baking mats
- Cookie scoop (optional but helpful)
Optional but Handy:
- Cooling rack
- Digital kitchen scale
- Offset spatula
You don’t need fancy gadgets, but having the right tools on hand will make your baking experience more enjoyable and consistent.
Step-by-Step Instructions
Let’s dive into the baking process itself. This is where the magic happens. Follow each step carefully, and you’ll be rewarded with bakery-style soft chocolate cookies that disappear fast!
Step 1: Prepare Your Ingredients
Preparation is half the battle. Before mixing begins, make sure your ingredients are at room temperature. This allows everything to combine evenly, which is key for achieving that soft, chewy consistency.
- Take out the butter and eggs at least 30 minutes in advance.
- Pre-measure your ingredients. It saves time and ensures accuracy.
- Sift your cocoa powder and flour if they look clumpy—this prevents dry pockets in your dough.
Being organized from the start keeps your baking stress-free and more enjoyable. Plus, it gives you a moment to double-check you haven’t missed anything important.
Step 2: Mix Dry Ingredients
In a medium bowl, whisk together the flour, cocoa powder, baking soda, and salt. This helps distribute the leavening agent evenly and avoids a bitter bite from unsifted cocoa.
- Use a spoon or whisk to combine.
- Avoid over-mixing—just enough to blend the dry components.
This step seems minor, but it ensures your cookies rise properly and bake evenly. A well-mixed dry blend means each bite is balanced in flavor and texture.
Step 3: Cream Butter and Sugars
Creaming the butter and sugars is one of the most critical steps in creating soft, fluffy cookies. This process incorporates air into the dough, which directly impacts the final texture of your cookies.
- In a large mixing bowl, add the softened butter, brown sugar, and granulated sugar.
- Using a hand mixer or stand mixer on medium speed, beat the mixture until it becomes light, creamy, and slightly fluffy—usually about 2–3 minutes.
Why does this matter so much? Because the tiny air bubbles you create during creaming expand in the oven, leading to a lighter texture. Brown sugar adds moisture and a slight caramel flavor, while white sugar helps with crispness on the edges. Together, they create that perfect cookie balance.
If you under-cream, the cookies may turn out dense. Over-creaming can make them too soft and even lead to spreading. Watch for that “just right” light and creamy consistency—it’s your golden ticket to cookie success.
Step 4: Add Eggs and Vanilla
Now that your butter and sugar mixture is ready, it’s time to add the eggs and vanilla. This step helps bind the dough and infuses it with flavor.
- Crack in the eggs, one at a time, beating well after each addition.
- Add the vanilla extract and beat until fully combined.
Don’t rush this step. If you add both eggs at once or don’t beat them enough, the mixture can look curdled or separate. Mixing thoroughly gives you a smooth, even batter that blends well with your dry ingredients later.
Vanilla might seem like a minor player, but it enhances all the flavors in your cookie dough. If you’re feeling fancy, use a high-quality Madagascar vanilla extract for a richer taste.
Step 5: Combine Wet and Dry Ingredients
Here’s where everything starts to come together. It’s essential to mix just enough to combine but not too much to avoid overworking the dough, which can lead to tough cookies.
- Slowly add the dry ingredient mixture to the wet ingredients.
- Use your mixer on low speed or a wooden spoon to gently incorporate.
Mix until you no longer see streaks of flour. Be patient—resist the urge to crank up the speed and rush through. Overmixing at this stage can develop too much gluten, resulting in a chewy or cakey cookie rather than a soft one.
The dough should be thick and slightly sticky but not runny. If it feels too loose, you can chill it for 15–30 minutes before baking to help the cookies hold their shape better.
Step 6: Fold in Chocolate Chips
Now for the fun part—chocolate! Gently fold in the chocolate chips using a rubber spatula. This ensures even distribution without breaking them apart or overworking the dough.
- Use about 2 cups of semi-sweet chocolate chips.
- Want to level up? Use a mix of chips and chunks, or try white, dark, and milk chocolate together for a triple-chocolate dream.
This is also a great time to get creative. Want a bit of crunch? Add chopped walnuts or pecans. Feeling indulgent? Toss in some caramel bits or peanut butter chips.
Remember: don’t overmix. Once your chips are evenly spread, you’re done. Now you’ve got a beautiful, chocolate-studded dough that’s just begging to be baked.
Baking the Cookies
With your dough ready, it’s time to get these cookies in the oven. This part of the process transforms your raw dough into warm, gooey goodness.
Step 7: Preheat and Prep the Oven
Preheating is crucial. Cookies bake best in an already-hot oven where they start to rise immediately and set properly.
- Preheat your oven to 350°F (175°C).
- Line your baking trays with parchment paper or silicone baking mats. These prevent sticking and help cookies bake evenly.
Using parchment also helps with easy cleanup—always a bonus. Make sure your oven rack is in the center position to allow for even heat circulation.
If you’re baking multiple trays, rotate them halfway through the baking time for consistent results. Oven temperatures can vary, so use an oven thermometer if needed to ensure accuracy.
Step 8: Scoop and Place Dough on Tray
Use a cookie scoop or tablespoon to portion out even-sized balls of dough. This helps ensure all your cookies bake at the same rate.
- Scoop 1.5 to 2 tablespoons of dough per cookie.
- Leave about 2 inches of space between cookies.
Spacing is important because the dough spreads as it bakes. If cookies are too close, they’ll run into each other, resulting in uneven baking and wonky shapes.
Want thick, bakery-style cookies? Try chilling the dough balls for 15–20 minutes before baking. This slows down spreading and gives you that perfect, soft center with slightly crisp edges.
Step 9: Bake to Perfection
Slide your tray into the oven and bake for 10–12 minutes, or until the edges are set but the centers still look a little underbaked.
Don’t overbake! The cookies continue to cook from residual heat after you take them out. That slightly gooey center will firm up as they cool, giving you that ultra-soft texture you’re aiming for.
If you like them a bit crispier, you can leave them in for an extra minute or two, but be careful—they can go from perfect to dry very quickly.
Cooling and Storage
After baking, cooling is just as essential as mixing and baking when it comes to achieving soft, chewy cookies. If you move them too early or store them incorrectly, you can lose that perfect texture you worked so hard for.
Cooling Instructions:
- Let cookies sit on the baking tray for 5–10 minutes after removing them from the oven.
- Then, transfer them to a wire cooling rack to cool completely.
Leaving them on the tray allows them to set properly. If you move them too early, they may fall apart. The wire rack ensures air circulates all around the cookies, preventing sogginess.
Storage Tips:
- Store completely cooled cookies in an airtight container.
- Keep at room temperature for up to 5–7 days.
- Add a slice of bread or a marshmallow to the container to keep cookies soft longer.
Want to make them last even longer? You can freeze baked cookies or the unbaked dough.
- For dough, scoop into balls, freeze on a tray, then transfer to a zip-lock bag.
- For baked cookies, wrap in foil or plastic wrap, then store in an airtight container in the freezer for up to 2–3 months.
Warm them in the microwave for 10–15 seconds, and they’ll taste just as fresh as day one!
Tips for Perfectly Soft Cookies Every Time
Let’s talk about the golden rules to keep your cookies soft and chewy every time. If you follow these, your cookies won’t just be good—they’ll be bakery-worthy.
Secret Tips:
- Use room-temperature butter – Soft but not melted. This creates air pockets when creamed with sugar.
- Don’t overmix the dough – Overworking the flour leads to tougher cookies.
- Use brown sugar generously – It’s more moist and flavorful than white sugar.
- Slightly underbake them – Pull them out when they’re still soft in the middle.
- Cool on the tray first – Letting them set helps maintain shape and texture.
Bonus Softness Hacks:
- Chill the dough for 30 minutes if your kitchen is warm or your cookies tend to spread.
- Try adding a teaspoon of cornstarch to your dry ingredients for extra tenderness.
- Use cake flour in place of a portion of all-purpose flour to soften the texture.
These might seem like small adjustments, but they really make a big difference in the final cookie.
Variations and Add-Ins
Looking to spice things up? There’s no reason you have to stick with the classic chocolate chip. Here are some creative and mouth-watering add-in ideas.
Flavor Variations:
- Double Chocolate: Add more cocoa powder and white chocolate chips.
- Peanut Butter Swirl: Mix in dollops of peanut butter before baking.
- Mocha Delight: Add a teaspoon of instant espresso powder.
Fun Add-Ins:
- Crushed Oreos
- Caramel bits
- Toffee pieces
- Dried cranberries
- Chopped nuts like pecans, almonds, or walnuts
You can even turn them into festive treats with holiday-colored M&Ms or themed sprinkles. The possibilities are endless, and the base dough is flexible enough to handle most flavors without compromising texture.
Common Mistakes to Avoid
Even seasoned bakers make slip-ups. Here are the most frequent cookie mistakes—and how to dodge them.
Top Mistakes:
- Melting the butter: Causes cookies to spread too thin and become crispy.
- Not measuring ingredients properly: Baking is chemistry—precision matters.
- Skipping the chill time: Especially important in warm kitchens or humid weather.
- Overbaking: The most common mistake. Remember, cookies firm up as they cool.
- Using old baking soda: This will stop your cookies from rising and puffing properly.
Fixes:
- Always scoop flour using the spoon-and-level method.
- Use an oven thermometer to verify correct temperature.
- If your cookies spread too much, add a tablespoon of flour next time.
- If they’re dry or crumbly, reduce baking time by a minute or two.
Avoid these, and your cookie game will be unstoppable.
Nutritional Information
Here’s an estimate of the nutritional content for one soft chocolate cookie (based on a batch making 24 cookies). Keep in mind this can vary depending on the exact ingredients and portion sizes.
| Nutrient | Per Cookie (Approx.) |
|---|---|
| Calories | 210 |
| Total Fat | 11g |
| Saturated Fat | 6g |
| Cholesterol | 30mg |
| Sodium | 120mg |
| Carbohydrates | 28g |
| Sugars | 18g |
| Protein | 2g |
If you’re looking to lighten them up, try swapping half the butter with applesauce or using dark chocolate instead of milk.
FAQs about Soft Chocolate Cookie Recipe
1. Can I freeze the cookie dough?
Yes! Scoop dough into balls, freeze on a tray, and store in a ziplock bag. They’ll last up to 3 months and bake wonderfully from frozen (just add 1-2 minutes to baking time).
2. Can I use dark chocolate instead of semi-sweet?
Absolutely! Dark chocolate adds a more intense cocoa flavor and slightly less sweetness—perfect for chocolate lovers.
3. Why did my cookies come out flat?
Likely causes: melted butter, too little flour, or skipping the chill time. Check your ingredient measurements and refrigerate dough before baking.
4. How do I make them gluten-free?
Use a gluten-free flour blend designed for baking. Make sure your baking soda and chocolate chips are certified gluten-free too.
5. Can I add nuts or caramel to this recipe?
Definitely! Chopped nuts, caramel bits, or even pretzels make for delicious and creative variations.
Conclusion
There’s something magical about baking your own soft chocolate cookies. The smell, the taste, the warmth—it’s pure comfort in dessert form. With this guide, you’re armed with all the knowledge you need to master the perfect cookie, every single time.
Whether you stick to the classic recipe or get adventurous with add-ins, just remember the golden rule: don’t overbake, and always use room-temperature ingredients. Happy baking!