Smore Cookie Recipe: There’s nothing quite like the nostalgic taste of s’mores—the perfect combination of gooey marshmallows, melted chocolate, and crunchy graham crackers. Now imagine that same campfire classic, but in the form of a soft, chewy cookie. That’s exactly what you get with Smore Cookies, a delightful treat that brings comfort and joy in every bite. Whether you’re baking for family gatherings, holidays, or just a cozy night in, this recipe will give you bakery-style cookies with all the flavors you love.
What Are Smore Cookies?
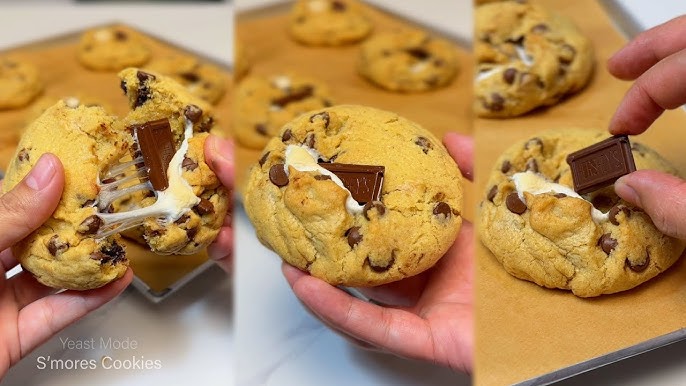
Smore cookies are the cookie version of the traditional campfire treat “s’mores.” They combine all the classic ingredients—graham crackers, chocolate, and marshmallows—baked right into a soft and chewy cookie base. Unlike regular cookies, these are packed with texture and flavor, giving you a little crunch, a little gooeyness, and a whole lot of chocolatey goodness.
Think of them as the perfect fusion between chocolate chip cookies and s’mores. The graham cracker crumbles add a nutty sweetness, while the marshmallows toast slightly in the oven, creating that same gooey campfire magic.
Why Smore Cookies Are Loved Everywhere
Smore cookies are loved for more than just their flavor—they bring back memories. For many, the taste of s’mores is tied to childhood camping trips, roasting marshmallows under the stars, or family bonfires. By baking them into cookies, you get all that nostalgia without the need for a fire pit.
They’re also incredibly versatile. Smore cookies can be enjoyed fresh out of the oven when they’re soft and gooey, or cooled down for a chewier texture. They’re perfect for kids’ parties, holiday cookie exchanges, or even as a gift wrapped in a cute jar.
And the best part? They’re easier to make than you might think. With just a few simple ingredients and some baking basics, you can whip up a batch in less than an hour.
Ingredients You’ll Need
The magic of smore cookies lies in the ingredients. Each one plays an important role in creating the right texture and flavor. Here’s a breakdown of what you’ll need:
Basic Pantry Ingredients
- All-Purpose Flour – The backbone of the dough, giving structure to the cookies.
- Baking Soda & Baking Powder – Helps the cookies rise and stay soft.
- Salt – Enhances all the flavors and balances sweetness.
- Unsalted Butter – Provides richness and creates that melt-in-your-mouth texture.
- Brown Sugar & Granulated Sugar – Brown sugar adds moisture and chewiness, while white sugar helps with crispiness.
- Vanilla Extract – A small ingredient that makes a huge difference in flavor.
- Eggs – Binds the ingredients together and adds richness.
Special Ingredients for Authentic Flavor
- Graham Crackers – Crushed into crumbs and folded into the dough for that classic s’mores taste.
- Marshmallows – Mini marshmallows work best, as they blend into the dough more evenly.
- Chocolate Chunks or Bars – Instead of regular chips, chunks give that melted, gooey chocolate effect, just like a real s’more.
Ingredient Substitutions and Variations
- Butter Substitute – You can use coconut oil or margarine if you’re dairy-free.
- Flour Alternatives – Almond flour or oat flour can work for a gluten-free version.
- Marshmallow Substitute – Vegan marshmallows are widely available and work just as well.
- Chocolate Options – Try dark chocolate for a richer flavor, or white chocolate for a twist.
The key is balance—you want each bite to have a little bit of cookie dough, some chocolate, marshmallow, and graham cracker.
Kitchen Tools and Equipment
Before diving into baking, it’s important to gather the right tools. Having everything ready will make the process smoother and ensure your cookies come out perfect.
Essential Baking Tools
- Mixing Bowls – A large one for the dough and smaller ones for prepping ingredients.
- Measuring Cups and Spoons – Accuracy is key in baking.
- Electric Mixer or Stand Mixer – Creaming butter and sugar is much easier with one, though you can do it by hand.
- Baking Sheets – Preferably heavy-duty to prevent uneven baking.
- Parchment Paper or Silicone Baking Mats – Keeps the cookies from sticking and makes cleanup easier.
- Cooling Rack – Helps cookies cool evenly without getting soggy.
Helpful Optional Tools
- Cookie Scoop – Ensures uniform cookie sizes, which helps them bake evenly.
- Kitchen Scale – For precise measurements, especially if you’re adjusting the recipe.
- Offset Spatula – Makes transferring delicate cookies easier.
- Rolling Pin – Useful if you’re crushing graham crackers yourself instead of buying pre-crushed crumbs.
Having the right equipment not only saves time but also gives your cookies a professional bakery finish.
Step-by-Step Guide to Making Smore Cookies
Now comes the fun part—baking! Follow this detailed step-by-step guide, and you’ll have a batch of irresistible smore cookies ready in no time.
Step 1: Prepping Your Workspace
Baking is all about preparation. Before you even touch the ingredients, preheat your oven to 350°F (175°C). Line your baking sheets with parchment paper or silicone mats. Crush your graham crackers into small crumbs (you can use a food processor or place them in a ziplock bag and crush with a rolling pin).
Having everything prepped will make the process seamless and prevent mistakes.
Step 2: Mixing the Dough
The foundation of any cookie is the dough, and for smore cookies, it needs to be soft yet sturdy enough to hold chocolate chunks and marshmallows. Start by creaming together room-temperature butter, brown sugar, and granulated sugar until the mixture becomes light and fluffy. This step usually takes about 2–3 minutes with an electric mixer. The creaming process is important because it incorporates air into the dough, giving the cookies their soft and chewy texture.
Next, add the eggs one at a time, mixing well after each addition. Stir in vanilla extract for that warm, comforting flavor. In a separate bowl, whisk together flour, baking soda, baking powder, and salt. Gradually add this dry mixture into the wet ingredients, mixing just until combined. Be careful not to overmix, as this can make the cookies dense.
At this stage, the dough should be slightly sticky but not overly wet. If it feels too dry, you can add a teaspoon of milk. If too sticky, add a tablespoon of flour. Getting this consistency right ensures the cookies bake evenly and don’t spread too much.
Step 3: Adding Graham Cracker Crumbles
Now comes the ingredient that gives these cookies their signature s’mores flavor—graham crackers. Fold in about 1 cup of crushed graham crackers into the dough. You want a mix of fine crumbs and small chunks so that every bite has texture.
The graham crackers add a slightly nutty, honey-like sweetness that balances perfectly with the chocolate and marshmallows. They also help absorb some of the cookie moisture, preventing the cookies from being too gooey.
If you love a crunchier texture, reserve a small handful of graham cracker pieces to sprinkle on top of the cookies just before baking. This not only enhances flavor but also gives the cookies that rustic campfire look.
Step 4: Folding in Chocolate Chunks
S’mores are all about melty chocolate, so this is where you get generous. Chop up a bar of good-quality semi-sweet or milk chocolate into chunks. Unlike chocolate chips, chunks melt unevenly, giving you those big pockets of gooey chocolate in the middle of the cookies.
Fold the chocolate gently into the dough using a spatula. Don’t overmix—just enough so that the chocolate is evenly distributed. If you prefer extra indulgence, you can add both chunks and chips for a double layer of chocolatey goodness.
For those who like experimenting, try mixing in dark chocolate for richness, white chocolate for sweetness, or even a swirl of Nutella for a creamy twist.
Step 5: Incorporating Marshmallows
Finally, the star of the show—marshmallows. Mini marshmallows work best because they blend well into the dough without overwhelming each cookie. Gently fold them in, being careful not to crush them too much.
One tip: don’t add too many marshmallows directly to the outer edges of the dough balls, because they tend to melt quickly in the oven and can stick to the baking sheet. Instead, keep most marshmallows tucked inside the dough for that perfect gooey center.
For extra presentation, you can also press a couple of marshmallows on top of each cookie dough ball before baking. This makes them toast slightly in the oven, giving you that authentic campfire look and taste.
Step 6: Shaping and Chilling the Dough
Shaping the dough properly makes a big difference in how your cookies bake. Use a cookie scoop or tablespoon to portion the dough into equal-sized balls. Roll them gently in your hands to make them smooth and even.
Here’s an important step many people skip: chill the dough. Place the cookie dough balls on a tray and refrigerate for at least 30 minutes before baking. Chilling helps the cookies hold their shape, prevents spreading, and allows the flavors to meld together for a richer taste.
If you want to prepare ahead of time, you can freeze the dough balls and bake them later straight from the freezer—just add an extra 2–3 minutes to the baking time.
Step 7: Baking the Cookies to Perfection
Preheat your oven to 350°F (175°C) if you haven’t already. Line your baking sheet with parchment paper and place the cookie dough balls about 2 inches apart to allow room for spreading.
Bake for 10–12 minutes, or until the edges are golden brown but the centers are still slightly soft. Remember, cookies continue to bake a little after being removed from the oven, so don’t overbake them.
For that irresistible bakery-style look, press a few extra chocolate chunks and marshmallow pieces on top of the cookies right after pulling them from the oven. The residual heat will melt them slightly, creating an Instagram-worthy finish.
Step 8: Cooling and Serving
Once out of the oven, let the cookies cool on the baking sheet for about 5 minutes before transferring them to a cooling rack. This helps them firm up while keeping the centers soft and chewy.
Serve your smore cookies warm for the ultimate gooey experience, or let them cool completely if you prefer a chewier texture. They pair perfectly with a glass of cold milk, hot cocoa, or even a scoop of vanilla ice cream for an indulgent dessert.
If you’re storing them, keep them in an airtight container at room temperature for up to 5 days. You can also reheat them in the microwave for about 10 seconds to bring back that fresh-out-of-the-oven gooeyness.
Tips and Tricks for Perfect Smore Cookies
Every baker knows that small details can make or break a recipe. Smore cookies are no exception. While they’re simple to make, a few insider tips can take them from good to absolutely irresistible.
How to Keep Marshmallows from Melting Too Much
Marshmallows are delicious but tricky in baking. They can melt into a sticky mess if not handled properly. To prevent this, make sure most marshmallows are tucked inside the dough instead of sitting on the edges. This keeps them gooey without spreading too much on the pan. You can also chill the dough before baking, which slows down the marshmallow melting process.
If you love toasted marshmallows on top, add a few extra minis halfway through the baking process. This way, they get perfectly golden without burning.
Choosing the Right Chocolate
Not all chocolate is created equal. While chocolate chips are convenient, chunks from a good-quality chocolate bar melt much better and create those dreamy pockets of chocolate throughout the cookie. Semi-sweet chocolate is the classic choice, but if you want a sweeter cookie, milk chocolate is perfect. For a more grown-up flavor, go for dark chocolate with at least 70% cocoa.
You can even mix different chocolates together—imagine a bite with both dark and milk chocolate melting side by side. Pure bliss!
Storage and Shelf Life
Freshly baked smore cookies are best enjoyed within the first 24 hours while the marshmallows are still soft and gooey. However, if you need to store them, place them in an airtight container at room temperature. They’ll last up to 5 days.
To refresh them, pop a cookie in the microwave for 10–12 seconds. It’ll soften the marshmallows and melt the chocolate just enough to bring back that fresh-baked taste. For longer storage, you can freeze the cookie dough balls for up to 3 months and bake them whenever a craving hits.
Variations of Smore Cookies
One of the best things about smore cookies is how customizable they are. You can stick with the classic recipe or try creative twists to match your mood or dietary preferences.
Peanut Butter Smore Cookies
If you love peanut butter cups, you’ll adore this variation. Add ½ cup of creamy peanut butter to the dough before mixing in the dry ingredients. You can also replace part of the chocolate chunks with chopped peanut butter cups for an even richer flavor. The salty-sweet combination makes these cookies completely addictive.
Nutella Smore Cookies
Nutella fans—this one’s for you. After shaping the cookie dough, flatten each ball slightly and add a teaspoon of Nutella in the center. Wrap the dough around it to seal, then bake as usual. The result? A warm, gooey Nutella surprise inside every cookie.
Gluten-Free and Vegan Options
Don’t worry if you’re gluten-free or vegan—you can still enjoy smore cookies! Swap the all-purpose flour for gluten-free flour blends or almond flour. Use vegan butter or coconut oil instead of regular butter. For marshmallows, choose vegan marshmallows, which are gelatin-free and melt beautifully. As for the chocolate, opt for dairy-free dark chocolate chunks.
The flavor stays just as rich and indulgent while catering to dietary needs.
Serving Suggestions
Smore cookies are delicious on their own, but why stop there? You can make them the centerpiece of a cozy dessert spread or pair them with complementary drinks.
Pairing with Drinks
- Hot Chocolate – Double the chocolatey goodness by pairing smore cookies with a rich mug of hot cocoa.
- Coffee or Espresso – The bitterness of coffee balances the sweetness of the cookies.
- Cold Milk – A classic combo that never fails.
- Milkshakes – Dip your smore cookies into a vanilla or chocolate milkshake for an indulgent treat.
Creative Dessert Boards
Create a dessert board featuring smore cookies alongside mini marshmallows, chocolate bars, graham crackers, and fruits like strawberries or bananas. It makes for a fun, interactive dessert for parties or family nights. You can also sandwich ice cream between two smore cookies to make homemade ice cream cookie sandwiches—an instant crowd-pleaser.
Common Mistakes to Avoid
Even experienced bakers sometimes run into issues with smore cookies. Here are a few common mistakes and how to avoid them:
Overbaking the Cookies
This is the number one mistake. Smore cookies should be soft and slightly underbaked in the center when you pull them out. If you wait until they look completely baked, they’ll end up dry and crumbly. Remember, they’ll continue baking on the sheet for a few minutes after being removed from the oven.
Using the Wrong Marshmallows
Large marshmallows don’t work well in cookie dough—they melt unevenly and make the cookies messy. Always stick with mini marshmallows for the best texture. If you only have large ones, cut them into smaller pieces and coat them lightly in flour before mixing them in.
Other mistakes include not chilling the dough (leading to flat cookies), using low-quality chocolate, or overcrowding the baking sheet. Give your cookies space to spread and breathe in the oven.
Nutritional Information
Cookies are a treat, but it’s always good to know what you’re eating. Here’s an approximate breakdown for one standard smore cookie (depending on size):
Calories and Macronutrients (per cookie)
- Calories: 210–230
- Carbohydrates: 28g
- Fat: 10g
- Protein: 2–3g
- Sugar: 17–20g
Making a Healthier Version
If you want to lighten things up without losing flavor, here are a few swaps:
- Replace half the butter with unsweetened applesauce or Greek yogurt.
- Use dark chocolate instead of milk chocolate for more antioxidants.
- Try coconut sugar or honey instead of refined white sugar.
- Add oats to the dough for extra fiber.
These small adjustments can make smore cookies a little more wholesome while still keeping them delicious.
FAQs about Smore Cookie Recipe
1. Can I make Smore Cookies ahead of time?
Yes! You can make the dough ahead of time and chill it for up to 48 hours. You can also freeze shaped dough balls for up to 3 months and bake them whenever you like.
2. How do I reheat Smore Cookies?
Pop them in the microwave for 10–12 seconds. This softens the marshmallows and melts the chocolate again for that fresh-baked taste.
3. Can I freeze the cookie dough?
Absolutely. Freeze the dough balls on a baking tray first, then transfer them to a freezer bag. When ready to bake, place them straight in the oven and just add 2–3 extra minutes to the baking time.
4. What type of marshmallows work best?
Mini marshmallows are ideal. They melt evenly without overwhelming the dough. If using larger ones, cut them into smaller pieces.
5. How do I make them extra gooey?
For maximum gooeyness, press extra marshmallows and chocolate chunks onto the top of each cookie dough ball before baking.
Conclusion
Smore cookies are the perfect fusion of campfire nostalgia and homemade comfort. They’re chewy, gooey, chocolatey, and crunchy all at once—everything you love about s’mores in cookie form. With this step-by-step guide, you can easily make bakery-worthy smore cookies at home. Whether you stick to the classic recipe or experiment with peanut butter, Nutella, or vegan variations, one thing’s for sure: these cookies will disappear fast!
Bake a batch today, share them with family or friends, and enjoy a treat that feels like a warm hug in every bite.