Smoked Turkey Brine Recipe: Brining is the ultimate secret behind a juicy, flavorful smoked turkey that melts in your mouth. If you’ve ever wondered why your smoked turkey turns out a little dry or lacking in taste, the answer is probably in the preparation—or rather, the lack of a good brine. A well-prepared turkey brine not only enhances flavor but also guarantees that your bird stays moist throughout the long smoking process. In this guide, we’ll walk through everything from the science of brining to a step-by-step recipe you can easily follow at home. Whether you’re preparing for Thanksgiving, Christmas, or just a family cookout, this smoked turkey brine recipe will transform your cooking game.
Why Brining is Essential for Smoked Turkey
When you smoke a turkey, it spends several hours exposed to heat. During that time, moisture escapes from the meat, often leaving the final dish dry. Brining solves this problem by allowing the turkey to absorb liquid before cooking. As a result, the bird retains water even after smoking, keeping the meat succulent and tender. Beyond just moisture, brining also infuses the meat with flavor from the herbs, spices, and aromatics added to the brine.
Think of it as a flavor bath for your turkey—it soaks up all the goodness, ensuring every bite is seasoned from the inside out. Without brining, even the most beautifully smoked turkey can taste bland in the middle.
The Science Behind Brining
Brining works on a simple principle: osmosis. When you submerge turkey in a salty solution, the salt penetrates the meat and helps it retain water. Proteins in the meat actually unwind and trap the liquid, holding onto it throughout the cooking process. This means that even though the turkey is exposed to heat for hours, it loses far less moisture compared to an unbrined bird.
Sugar and other aromatics in the brine also contribute by balancing flavors and creating a more complex taste profile. Essentially, brining is part chemistry, part culinary magic—and when done correctly, it guarantees turkey perfection.
Benefits of Brining a Turkey Before Smoking
Flavor Infusion
One of the biggest reasons people brine their turkey is to enhance flavor. While a dry rub or glaze only seasons the surface, brining allows the seasoning to penetrate deep into the meat. This means that every slice, whether it’s breast meat or dark meat, carries a balanced taste. You can get creative here—adding citrus for brightness, garlic for depth, or rosemary for a woodsy aroma. The longer you brine, the more infused your turkey becomes.
Moisture Retention
Smoked meats are notorious for drying out, but a brined turkey holds onto moisture far better than an unbrined one. Even the lean breast meat remains juicy, which is often the most challenging part of the bird to keep moist. By brining, you’re essentially giving your turkey a safety net against the drying effects of smoke and heat.
Tenderness and Texture
Brining doesn’t just add flavor and juiciness—it also improves the texture of the meat. Salt in the brine breaks down some of the turkey’s muscle fibers, making the meat more tender. This results in a bird that cuts smoothly and practically melts in your mouth. It’s the kind of turkey that gets people asking for seconds (and maybe even thirds).
Essential Ingredients for a Smoked Turkey Brine
List of Ingredients You’ll Need
Before we dive into the step-by-step guide, let’s look at the star players in this recipe. A good smoked turkey brine usually includes:
- Water – the base of the brine
- Kosher salt – for flavor and moisture retention
- Brown sugar or honey – to balance the saltiness
- Garlic cloves – for a savory punch
- Onion – adds sweetness and aroma
- Peppercorns – for a subtle spice kick
- Bay leaves – a classic brining herb
- Fresh herbs (rosemary, thyme, sage) – for depth of flavor
- Citrus (orange or lemon slices) – for freshness
- Optional spices (cloves, cinnamon sticks, or allspice) – for a holiday twist
These ingredients can be mixed and matched based on personal taste. The beauty of brining is that it’s flexible—you can keep it simple with just salt, sugar, and water, or elevate it with layers of herbs and spices.
Choosing the Right Salt
Salt is the foundation of any brine, but not all salts are created equal. Kosher salt is the best choice because it dissolves easily and provides consistent results. Avoid table salt since it often contains additives that can alter flavor. Sea salt is another great option, but make sure to measure carefully since grain size affects the overall saltiness.
Sweeteners for Balance
A good brine balances saltiness with a touch of sweetness. Brown sugar is the most common choice, as it not only sweetens but also adds a subtle caramel flavor. Honey and maple syrup work beautifully too, adding unique notes that complement smoked flavors.
Herbs and Spices for Flavor Depth
Herbs like rosemary, sage, and thyme are classic in turkey brines. Spices like peppercorns, cloves, and star anise can take your brine to gourmet levels. You can go bold with lots of aromatics or keep it minimal for a cleaner taste.
Optional Ingredients for Unique Twists
Want to put your own spin on things? Try adding apple cider for a fruity note, beer for a malty depth, or soy sauce for umami richness. These ingredients give your smoked turkey a signature flavor that stands out.
Tools and Equipment You’ll Need
Containers for Brining
Since a turkey is a large bird, you’ll need a container big enough to hold both the turkey and the brine. Common choices include:
- Food-grade buckets
- Large stockpots
- Heavy-duty brining bags
The key is to make sure the turkey is fully submerged in the liquid. If not, parts of the bird will miss out on the brining magic.
Keeping the Turkey Cool
Brining must be done at a safe temperature to avoid foodborne bacteria. The brine solution and turkey should be kept at or below 40°F (4°C). To achieve this, you can refrigerate the container or pack it with ice. Some people even use coolers filled with ice water, which works perfectly for larger turkeys.
Additional Handy Tools
- A ladle for mixing the brine
- Measuring cups and spoons for precise ingredients
- A meat thermometer for checking doneness later
- Towels for drying the turkey before smoking
Having these tools ready ensures a smooth brining and smoking process without unnecessary hiccups.
Step-by-Step Guide to Making Smoked Turkey Brine
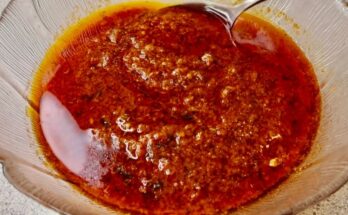
Step 1: Prepare the Brine Solution
To start, combine water, salt, sugar, and your chosen herbs and spices in a large pot. Bring it to a simmer, stirring occasionally until the salt and sugar fully dissolve. This creates the concentrated base of your brine.
Step 2: Cool and Combine the Mixture
Once your brine base is ready, it’s crucial to let it cool completely before adding your turkey. Placing raw poultry into hot brine is a food safety hazard and can also partially cook the meat in an uneven way, which ruins the texture. To speed up cooling, you can add ice cubes to the mixture after simmering or divide the liquid into two batches—boil half with the seasonings and then add the other half as cold water once removed from heat.
The goal is to achieve a brine temperature of 40°F (4°C) or lower before submerging the turkey. At this point, you can also add extra flavor boosters such as citrus slices, whole cloves of garlic, or even a splash of apple cider. The cooling stage is where you can get creative, layering more flavors that will slowly seep into the turkey during the brining process.
Remember, patience is key. If you rush and don’t let the mixture cool, you risk food safety issues and may end up with a poorly brined turkey. So give it time to chill properly before moving on to the next step.
Step 3: Submerge the Turkey
Now comes the fun part—placing your turkey in the brine. First, make sure the bird is completely thawed. A partially frozen turkey won’t brine evenly, and you’ll end up with some bland, under-seasoned sections. Remove the giblets and neck from inside the cavity, then gently lower the turkey into the container or brining bag.
It’s essential that the entire bird is submerged in the liquid. If it floats to the top, place a heavy plate or bowl over it to keep it fully covered. For best results, the turkey should be breast-side down since that’s the leanest part and needs the most help staying juicy.
At this point, you’ll notice the turkey starting its “flavor bath.” The salt begins breaking down muscle fibers, while herbs and spices slowly infuse into the meat. The longer it soaks, the more flavorful and tender your final smoked turkey will be.
Step 4: Brining Time and Storage Tips
How long should you brine? That depends on the size of your turkey. As a rule of thumb:
- Small turkeys (10–12 pounds): 12–18 hours
- Medium turkeys (12–16 pounds): 18–24 hours
- Large turkeys (16–20+ pounds): 24–36 hours
Avoid brining for more than 48 hours, as this can make the turkey too salty and give it a spongy texture.
Storage is another critical factor. Always keep the brining container in a refrigerator or a cooler packed with ice to maintain safe temperatures. If using a cooler, check periodically to make sure the ice hasn’t melted completely.
During this time, resist the urge to keep opening the container or moving the turkey around. Let the brine do its work naturally. After the soaking period, you’ll have a beautifully seasoned bird ready for the smoking stage.
Step 5: Rinsing and Drying Before Smoking
Once the brining time is up, it’s time to take the turkey out of its flavorful bath. At this stage, the meat has absorbed all the salt and seasonings it needs. Rinse the bird thoroughly under cold running water to remove excess brine and herbs stuck to the surface. Skipping this step can leave the turkey overly salty or give it an uneven seasoning.
After rinsing, pat the turkey dry using paper towels. This step is more important than most people realize. A dry surface ensures that the skin crisps up beautifully during smoking. If the skin is too wet, it won’t achieve that golden-brown, slightly crackly texture everyone loves.
Some cooks like to leave the turkey uncovered in the refrigerator for an additional 6–12 hours after drying. This helps the skin dehydrate further, making it extra crispy once smoked. Whether you do this or not, make sure your turkey is completely dry before moving on.
Preparing the Turkey for Smoking After Brining
Patting the Turkey Dry
Dryness is your best friend when prepping a brined turkey for smoking. After rinsing, use plenty of paper towels to soak up any excess moisture inside and outside the bird. Pay special attention to the cavity and under the wings—these spots hold onto liquid more than others.
Some pitmasters swear by “air-drying” the turkey in the refrigerator for several hours after patting it down. This extra step gives the skin time to lose more moisture, which helps it render fat more effectively during smoking. The result? Crispy, bite-through skin that’s loaded with flavor.
Seasoning Before Smoking
Even though your turkey is already infused with flavor from the brine, a little extra seasoning on the outside goes a long way. A simple dry rub of salt, pepper, garlic powder, onion powder, and paprika works beautifully. For a more complex flavor, try adding cayenne, chili powder, or even a hint of brown sugar to balance smokiness with a touch of sweetness.
Rub the seasoning all over the turkey, including under the skin and inside the cavity. This ensures every bite has layers of flavor. Some people also like to rub softened butter or oil under the skin to help crisp it up during smoking and give the meat extra richness.
Resting the Turkey
Before smoking, let the seasoned turkey rest at room temperature for about 30–45 minutes. This allows the bird to cook more evenly, as going straight from the fridge to the smoker can cause uneven cooking. During this rest period, the seasoning also has time to settle and bond with the skin, locking in flavor before the smoke hits.
Smoking the Turkey
Choosing the Right Wood Chips
The type of wood you choose for smoking makes a huge difference in the flavor of your turkey. Popular options include:
- Applewood – sweet and mild, perfect for poultry
- Cherrywood – adds a beautiful color and mild fruity flavor
- Hickory – strong and smoky, best used in moderation
- Maple – sweet and balanced, great for a holiday bird
Mixing woods can create a more complex flavor. For example, apple with a touch of hickory gives you both sweetness and smokiness without overwhelming the meat.
Temperature Control
When it comes to smoking turkey, temperature is everything. Unlike grilling, where high heat sears the outside, smoking is a slow and steady process. The ideal smoker temperature for turkey is 225°F to 250°F (107°C to 121°C). This range allows the bird to cook slowly while soaking up all that smoky goodness without drying out.
Consistency is key—fluctuating heat can ruin your results. If your smoker tends to run hot, adjust the vents to control airflow or add water pans to help stabilize the temperature. A digital thermometer is your best friend here; keep an eye on both the smoker’s internal temperature and the turkey’s internal temperature throughout the cooking process.
Another pro tip: avoid opening the smoker too often. Every time you lift the lid, you lose heat and smoke, which can add unnecessary hours to your cooking time. Think of your smoker like an oven—set it, monitor it, and resist the urge to peek too much.
Cooking Times and Doneness
The length of time it takes to smoke a turkey depends largely on its size and the temperature of your smoker. As a general rule:
- At 225°F: Allow about 30–40 minutes per pound
- At 250°F: Allow about 25–30 minutes per pound
For example, a 12-pound turkey at 225°F would take around 6–7 hours, while at 250°F it would be closer to 5–6 hours.
However, always rely on internal temperature—not just time. The turkey is done when the thickest part of the breast reaches 165°F (74°C) and the thighs hit 175°F (80°C). Use a meat thermometer inserted without touching the bone for the most accurate reading.
Once fully cooked, let the turkey rest for at least 20–30 minutes before carving. This allows the juices to redistribute throughout the meat, ensuring every slice stays moist and flavorful.
Common Mistakes to Avoid When Brining Turkey
Using Too Much Salt
Salt is the backbone of brining, but too much can ruin your turkey. If you go overboard, the meat will turn out overly salty and inedible. Always stick to the recommended ratios: about 1 cup of kosher salt per gallon of water. If you’re using sea salt or another coarse salt, adjust the amount accordingly since salt grains vary in size.
Over-Brining
Longer isn’t always better. Leaving your turkey in the brine for more than 48 hours can make it mushy and unpleasant in texture. Stick to the time frames we discussed earlier (12–36 hours depending on size). If you accidentally leave it too long, rinse it thoroughly and soak it in fresh water for an hour to dilute the saltiness.
Not Rinsing Properly
Failing to rinse your turkey after brining is another common mistake. The surface will carry excess salt and seasoning, which can make the skin unpleasantly salty or bitter once smoked. Always rinse under cold running water and pat dry before seasoning or smoking.
Tips for the Perfect Smoked Turkey
Flavor Variations
Once you’ve mastered the basic brine, experiment with different flavors to create your signature turkey. Some fun twists include:
- Apple cider brine – adds sweetness and pairs beautifully with applewood smoke.
- Beer brine – gives a malty depth and a slight caramel note.
- Citrus brine – perfect for a fresh, zesty flavor profile.
- Asian-inspired brine – with soy sauce, ginger, and star anise for an umami punch.
Don’t be afraid to mix and match. The beauty of brining is that it’s endlessly customizable.
Timing Your Brine and Smoke
Timing is everything when it comes to holiday cooking. Plan ahead so your brining and smoking schedule doesn’t overlap with other dishes. For example, start brining the night before and finish smoking early in the day. That way, your turkey has time to rest while you prepare side dishes.
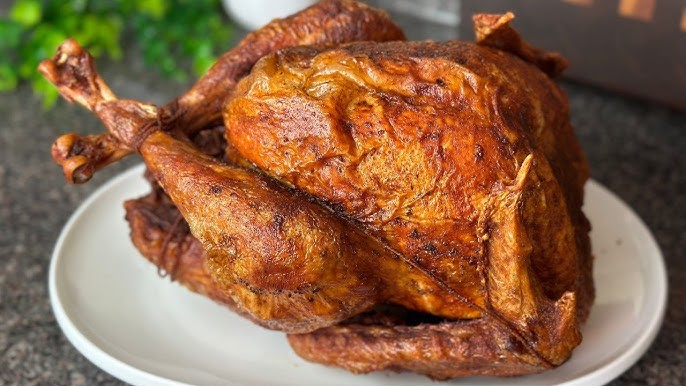
Presentation and Carving
A smoked turkey is a showstopper, so make sure it looks as good as it tastes. After resting, carve the turkey carefully:
- Remove the legs and thighs first.
- Slice the breast meat against the grain.
- Arrange the slices neatly on a platter.
For extra wow factor, garnish the serving platter with fresh herbs, citrus slices, or roasted vegetables. It makes the turkey look festive and inviting—perfect for a holiday feast.
FAQs about Smoked Turkey Brine Recipe
1. Can I add wine to my turkey brine?
Yes! A dry white wine can add complexity and a subtle acidity that pairs beautifully with smoked turkey.
2. Should I inject the turkey as well as brine it?
You can, but it’s not necessary. Brining alone gives plenty of flavor and moisture. Injecting is optional for an extra punch.
3. Can I dry brine instead of wet brine?
Yes, dry brining (rubbing salt and seasonings directly on the bird) works well too, but wet brining usually provides deeper flavor and more moisture.
4. Do I need to baste a smoked turkey?
Not really. A brined turkey already has built-in moisture. If you want extra flavor, spritz with apple cider or broth occasionally.
5. How do I store leftover smoked turkey?
Wrap it tightly in foil or store it in an airtight container in the fridge for up to 4 days. For longer storage, freeze it in portions for easy meals later.
Conclusion
Brining is the ultimate game-changer for smoked turkey. It ensures that your bird stays juicy, flavorful, and tender from the first bite to the last. By combining the right balance of salt, sugar, herbs, and spices, you can create a smoked turkey that’s not only moist but also packed with incredible depth of flavor. Add in the proper smoking technique, and you’ve got a centerpiece dish worthy of any holiday table or backyard cookout.
Whether this is your first time brining or you’re looking to perfect your method, the steps in this guide will guarantee a turkey that leaves your guests asking for seconds. So grab your ingredients, prepare your brine, and get ready to enjoy the most unforgettable smoked turkey you’ve ever made.