Smoked Chili Recipe: Imagine a rich, spicy bowl of chili infused with deep, smoky flavor that lingers on your tongue. That’s the magic of smoked chili. It’s everything you love about traditional chili—but taken up a notch. This isn’t your average stovetop recipe; it’s a smoky, savory experience you’ll want to revisit again and again.
So, what exactly is smoked chili? It’s chili that’s cooked slowly in a smoker rather than a pot on the stove or slow cooker. This low-and-slow method allows all the flavors—especially those from the wood smoke—to penetrate every bite of the dish. The result? A hearty, complex chili with layers of flavor that’s perfect for BBQ parties, game day, or just a cozy dinner at home.
Whether you’re a seasoned pitmaster or a curious kitchen explorer, this step-by-step guide will walk you through everything you need to make the best smoked chili of your life—from choosing the right wood to nailing that perfect texture and taste.
Benefits of Smoking Chili
Smoking chili might sound like a trendy twist, but the benefits are anything but superficial. Here’s why it’s worth trying:
Flavor Enhancement
Smoking transforms chili into something much deeper. As the smoke wraps around your meat and vegetables, it infuses every component with a rich, wood-fired flavor. Whether you’re using hickory, mesquite, or applewood, the smoke elevates each bite with earthy, aromatic notes.
Texture Improvement
Slow smoking allows the meat to become incredibly tender without drying out. Beans absorb smoky goodness and soften perfectly, while the tomato base thickens and concentrates into a luscious, saucy texture.
Longer Shelf Life
Smoked dishes, when done right, tend to have slightly better longevity in storage due to the preservative nature of smoke. While chili already keeps well, the smoke may give it a little extra staying power in your fridge or freezer.
Essential Equipment You’ll Need
You don’t need a professional BBQ pit setup, but a few tools will make your smoked chili experience smooth and delicious.
Smoker Types
- Offset Smokers: Great for low-and-slow cooking with wood logs.
- Pellet Grills: Easy temperature control; great for beginners.
- Electric Smokers: Super convenient and reliable.
- Kamado Grills: Versatile and excellent for consistent heat.
Other Necessary Tools
- Cast iron Dutch oven or heavy-duty pot (oven-safe)
- Long-handled tongs
- Meat thermometer
- Heat-resistant gloves
- Wood chips or chunks
- Aluminum foil (optional for managing heat)
Choosing the Right Ingredients
High-quality ingredients make all the difference in chili—especially when you’re smoking it.
Fresh vs. Dried Ingredients
Fresh garlic, onions, and peppers pack more punch than their dried or powdered counterparts. However, smoked paprika and chipotle powder can boost the flavor if you don’t have access to a smoker.
Organic or Local Options
Opt for locally sourced meats and produce when possible. They’re usually fresher, and buying local supports your community.
List of Ingredients You’ll Need
Here’s a basic ingredient list. Feel free to customize depending on your dietary needs or preferences:
Proteins
- 2 lbs ground beef (or brisket, pork shoulder, turkey, or plant-based crumbles)
Vegetables
- 1 large onion, diced
- 3 cloves garlic, minced
- 2 bell peppers (red and green), diced
- 1 jalapeño, finely chopped (optional for heat)
Beans & Tomatoes
- 2 cans kidney beans, drained
- 1 can black beans, drained
- 2 cans crushed tomatoes (28 oz total)
- 2 tbsp tomato paste
Spices & Herbs
- 2 tbsp chili powder
- 1 tbsp smoked paprika
- 1 tbsp cumin
- 1 tsp oregano
- Salt and pepper to taste
- 1-2 chipotle peppers in adobo (optional for smoky kick)
Liquids
- 1 cup beef broth (or veggie broth)
- 1 bottle dark beer or 1/2 cup coffee (optional but flavorful)
Prepping the Ingredients
Before you even fire up the smoker, prepping your ingredients is key to a smooth cooking process.
Chopping and Measuring
Dice your veggies uniformly to ensure even cooking. Pre-measure all your spices and keep them in a small bowl. It makes life easier once you’re ready to mix.
Marinating Tips for Extra Flavor
If you’re using beef or pork chunks, consider marinating them in your spice mix the night before. A bit of olive oil, garlic, smoked paprika, and cumin can go a long way. It helps the meat soak up flavor even before it hits the smoker.
How to Choose the Best Wood for Smoking
The type of wood you choose can make or break your smoked chili. Wood isn’t just a fuel source—it’s a flavor booster. Each variety has its own personality, and when used correctly, it complements the chili rather than overwhelming it.
Wood Flavor Profiles
- Hickory: Strong and bold, hickory adds a bacon-like smokiness. It’s a classic choice for beef chili.
- Mesquite: Very intense, great for those who love a deep, earthy flavor—but be careful, a little goes a long way.
- Applewood: Sweet and mild, applewood is excellent for turkey or vegetarian chilis.
- Oak: Medium strength, oak is incredibly versatile and burns consistently—perfect for long smoking sessions.
- Cherry: Slightly sweet and adds a beautiful dark hue to your chili. Ideal for blending with stronger woods.
Best Wood Types for Chili
For a balanced smoke flavor, try mixing woods. A 50/50 blend of hickory and applewood, or oak and cherry, is a go-to combo. Avoid pine or other resin-heavy woods—they taste bitter and can ruin your dish.
Step-by-Step Guide: How to Make Smoked Chili
Now we’re getting into the good stuff! Let’s walk through the full process of making mouthwatering smoked chili from scratch.
Step 1: Preheat the Smoker
Start by firing up your smoker to a steady 225°F (107°C). Add your preferred wood chunks or chips to get that flavorful smoke rolling. Let it stabilize before adding anything inside.
Step 2: Brown the Meat
In a cast iron skillet or Dutch oven, brown your meat over medium heat. You can do this indoors or on a grill grate over a flame. Sear it until it’s no longer pink—this adds depth of flavor. Remove any excess fat if needed, but leave a little for richness.
Step 3: Combine Ingredients in a Cast Iron Pot
Add your sautéed onions, garlic, bell peppers, and jalapeño to the meat. Stir in your spices—chili powder, cumin, smoked paprika, oregano, and salt. Let the spices toast for a minute to bring out their aromas.
Next, stir in your tomato paste, crushed tomatoes, beans, broth, and optional beer or coffee. Mix everything well until fully combined.
Step 4: Smoke Slowly and Steadily
Place the covered Dutch oven inside your preheated smoker. Crack the lid slightly to allow smoke to seep in. Let the chili smoke for 2–3 hours, stirring every 30–45 minutes to ensure even cooking and to check for moisture. If it starts drying out, add a splash of broth.
Step 5: Stir Occasionally and Monitor Temperature
Use a meat thermometer to ensure the internal temp stays around 160–180°F (71–82°C). This range allows flavors to develop without drying out the chili. Keep the smoker steady—don’t rush this step!
Step 6: Final Touches Before Serving
After 3 hours of smoking, taste and adjust seasoning. Add more salt, a dash of lime juice for brightness, or hot sauce if you want more heat. If you like thicker chili, let it simmer uncovered for the last 30 minutes to reduce liquid.
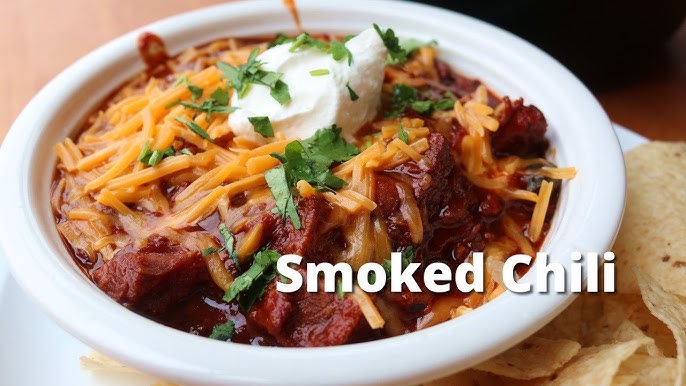
Serve hot with your favorite toppings like shredded cheese, sour cream, green onions, or crushed tortilla chips.
Tips for a Smokier Flavor
Want that full-on campfire vibe? Here’s how to amp up the smokiness in your chili without overwhelming it.
Wood Chips vs. Chunks
Wood chips burn fast and work well in electric or pellet smokers. Chunks burn slower and are ideal for offset or charcoal smokers. For a long smoking session like chili, chunks are usually the better choice.
Layering Smoke with Spices
Add a pinch of chipotle powder or smoked paprika near the end of cooking to deepen the smoky flavor. You can also stir in a spoonful of adobo sauce from canned chipotles.
Another pro tip? Char your peppers or tomatoes slightly over an open flame before adding them to the pot.
Time and Temperature Guidelines
Smoking chili is an art—but following basic time and temp rules keeps everything on track.
Smoking Duration
- Total smoke time: 3–4 hours
- Stir every 30–45 minutes
- Let rest for 10–15 minutes before serving to allow flavors to settle
Ideal Temperature Range
- Smoker: 225–250°F (107–121°C)
- Internal chili temp: 160–180°F (71–82°C)
Stay within these ranges for safe cooking and perfect texture.
How to Store and Reheat Smoked Chili
Smoked chili gets better the next day. Here’s how to store and reheat it properly:
Refrigeration Tips
Let your chili cool to room temperature before storing. Pour it into airtight containers and refrigerate. It’ll keep well for up to 4–5 days.
Freezing for Long-Term Storage
Smoked chili freezes beautifully. Portion it into freezer-safe containers or bags. Label them and freeze for up to 3 months. To reheat, thaw overnight in the fridge.
Best Reheating Practices
Reheat slowly on the stove or in a microwave, stirring occasionally. Add a bit of broth or water if the chili is too thick. Avoid boiling—it can dull the flavors.
Creative Ways to Serve Smoked Chili
Why stop at a bowl of chili? Here are some fun and delicious ways to enjoy your smoked masterpiece:
As a Main Dish
- Classic bowl topped with cheese, sour cream, green onions
- Serve over rice or quinoa for a filling meal
Other Tasty Ideas
- Chili Dogs: Top grilled hot dogs with chili, cheddar, and jalapeños
- Chili Nachos: Layer tortilla chips with chili, cheese, salsa, and guac
- Chili Mac: Mix with cooked macaroni for a smoked mac & chili combo
- Baked Potato Topping: Smother a baked potato with chili and cheese
- Chili Sliders: Use as a topping for small burger buns
Common Mistakes to Avoid
Even experienced cooks can slip up when making smoked chili. To help you dodge those flavor-killing blunders, here are the most common mistakes—and how to avoid them.
Over-smoking
It’s tempting to go heavy on the wood, thinking more smoke equals more flavor. But too much smoke can make your chili taste bitter or burnt. Stick to a consistent, gentle smoke. A few chunks or a moderate amount of chips will do the trick.
Using Too Much Liquid
Chili should be thick and hearty—not watery. It’s easy to overdo the broth or beer, especially if you’re used to stove-top methods where evaporation is faster. When smoking, the pot retains moisture more, so start with less and add only as needed.
Not Stirring Often Enough
Because chili is dense, it needs regular stirring to avoid burning or sticking, especially around the edges of your pot. Every 30 to 45 minutes, give it a good stir to keep everything moving and absorbing the smoky goodness evenly.
Skipping the Tasting Phase
Your taste buds are your best tool. Don’t just follow a recipe to the letter—taste as you go. A dash more salt, a squeeze of lime, or a spoonful of hot sauce can make a huge difference near the end.
Rushing the Process
Smoking is not about speed. If you’re short on time, make a different dish. Smoked chili needs a few hours to truly absorb the smoke and for the flavors to deepen and blend. Plan ahead and enjoy the process—it’s worth it!
Variations of Smoked Chili
Once you master the basics, it’s time to have fun with variations. Chili is one of the most flexible dishes out there, so feel free to make it your own.
Vegetarian/Vegan Smoked Chili
Swap the meat for:
- Lentils
- Plant-based meat crumbles
- Extra beans or chickpeas
- Mushrooms for umami depth
Use veggie broth, and make sure your smoker setup is clean of any meat drippings. Add extra veggies like zucchini or corn to bulk it up.
White Chicken Chili
Change it up with:
- Shredded smoked chicken breast or thighs
- White beans (like cannellini or Great Northern)
- Green chilies and a creamy base made from sour cream or coconut milk
- Smoke with applewood for a milder flavor
Spicy Tex-Mex Version
Kick up the heat with:
- Ground chorizo or spicy sausage
- Chipotle peppers in adobo
- Cayenne or ghost pepper powder (careful!)
- Corn and black beans for a true Tex-Mex touch
Top with fresh cilantro, jalapeños, and lime juice for a fiesta in your mouth.
FAQs about Smoked Chili Recipe
1. Can I make smoked chili without a smoker?
Yes, you can mimic smoked flavor using liquid smoke or smoked spices like chipotle powder or smoked paprika. You can also roast your ingredients on a grill to add some char before cooking.
2. What’s the best meat for smoked chili?
Ground beef is a classic, but brisket, pork shoulder, or even smoked turkey work wonderfully. For a leaner option, go with ground chicken or turkey. You can also mix multiple meats for added texture and flavor.
3. How long can I store smoked chili?
Smoked chili will stay fresh in the fridge for 4–5 days. If frozen in an airtight container, it can last up to 3 months. Always reheat thoroughly before serving.
4. Can I use canned beans and tomatoes?
Absolutely. Canned beans and tomatoes save time and still deliver great flavor. Just be sure to drain and rinse your beans to control salt levels, and use high-quality crushed tomatoes for best results.
5. What toppings go best with smoked chili?
Top your bowl with shredded cheddar, sour cream, green onions, avocado slices, or crushed tortilla chips. For a spicy twist, try sliced jalapeños or a dash of hot sauce.
Conclusion
There’s chili—and then there’s smoked chili. The difference? Depth, richness, and that unforgettable campfire flavor that lingers in every bite. Whether you’re a meat lover or a plant-based eater, you can tailor this dish to fit your taste, dietary needs, and smoker setup.
The slow smoking process may require a bit of patience, but trust me—it pays off. Once you taste that smoky, spicy, slightly sweet chili straight from the smoker, there’s no going back to stovetop-only versions. It’s comfort food, BBQ-style.
So grab your wood, fire up your smoker, and get cooking. Whether it’s for a tailgate, weekend cookout, or just a rainy day indoors, smoked chili is a game-changer. Don’t forget to try different variations, experiment with spices, and—most importantly—enjoy every bite.