Simple Sugar Cookie Recipe: Sugar cookies have been a staple in American households for centuries. Originating from the 1700s in Pennsylvania, they were originally known as “Nazareth cookies,” named after a small town. These cookies were simple and made from pantry basics: flour, sugar, butter, eggs, and vanilla. The beauty of sugar cookies lies in their simplicity and adaptability. Over the years, they’ve become a holiday tradition, loved for their soft texture, sweet flavor, and versatility in decoration. Whether you’re cutting them into stars for Christmas or hearts for Valentine’s Day, sugar cookies are as timeless as they are delicious.
Why Sugar Cookies Are a Favorite for All Ages
What makes sugar cookies so universally loved? It’s the combination of a sweet, buttery base with a crisp edge and a chewy center. They’re easy enough for kids to help make and customizable enough for seasoned bakers to get creative. You can leave them plain, top them with colored sugar, or go all out with royal icing and sprinkles. Plus, they’re the perfect canvas for any theme, occasion, or celebration. From school bake sales to elegant wedding favors, sugar cookies never go out of style.
Ingredients You’ll Need
Basic Ingredients for Classic Sugar Cookies
To create the perfect batch of sugar cookies, you don’t need fancy ingredients. Here’s what you’ll need for a traditional recipe:
- 2 ¾ cups all-purpose flour – the base of your dough
- 1 teaspoon baking soda – for a little lift
- ½ teaspoon baking powder – helps with texture
- 1 cup (2 sticks) unsalted butter, softened – for that rich, buttery flavor
- 1 ½ cups white granulated sugar – the sweetness factor
- 1 large egg – for structure and moisture
- 1 teaspoon vanilla extract – for classic flavor
- ½ teaspoon almond extract (optional) – adds depth to the flavor
Each of these ingredients plays a crucial role. Flour forms the structure, while butter gives the cookies that soft, melt-in-your-mouth texture. Sugar sweetens and slightly crisps the edges, and the extracts give your cookies that bakery-style aroma and taste.
Optional Ingredients for Custom Flavors
Want to switch things up? Here are a few extras you can mix in to personalize your sugar cookies:
- Citrus zest (lemon, orange, lime) for a tangy twist
- Cinnamon or nutmeg for a warm, spiced flavor
- Sprinkles or colored sugar mixed into the dough for a festive look
- Mini chocolate chips for a chocolatey surprise
These variations let you turn a basic sugar cookie into something truly special without making the recipe more complicated.
Tools and Equipment Required
Baking Essentials
Before you get started, make sure your kitchen is stocked with the right tools. Here are the essentials:
- Mixing bowls – at least one large and one medium
- Hand mixer or stand mixer – for creaming the butter and sugar
- Measuring cups and spoons – accuracy matters in baking
- Baking sheets – at least two, so you can bake in batches
- Parchment paper or silicone baking mats – to prevent sticking and ensure even baking
- Cooling racks – to cool the cookies without moisture buildup
Nice-to-Have Tools for Better Results
While not required, these tools can make the process smoother:
- Cookie cutters – for fun shapes and themed cookies
- Rolling pin – to roll out dough evenly
- Sifter – helps incorporate dry ingredients more smoothly
- Icing bags and tips – if you want to decorate like a pro
- Spatula – to transfer cookies from the tray without breakage
Using the right equipment can mean the difference between a good cookie and a great one. Investing in just a few quality tools can elevate your baking game and help you achieve consistent results every time.
Step-by-Step Instructions for Making Sugar Cookies
Step 1: Prepping Your Workspace
Before diving into baking, take a few minutes to prep your kitchen. Trust me, it makes the process so much smoother. Start by clearing off a clean, flat surface where you can roll out your dough later. Set out all your ingredients and tools—mise en place, as chefs call it. It’s not just for show; it helps prevent missing ingredients or steps.
Preheat your oven to 375°F (190°C) so it’s ready when your dough is. Line your baking sheets with parchment paper or silicone mats. These not only help with easy cleanup but also give your cookies that perfect golden-brown bottom.
Also, make sure your butter is softened (not melted!). If you forgot to take it out, a quick trick is to cube it and microwave it for about 10 seconds—just until it’s soft to the touch.
Step 2: Mixing the Dough
Now let’s get into the heart of the cookie—the dough!
- Cream the butter and sugar: In a large mixing bowl, beat the softened butter and sugar until light and fluffy. This usually takes about 2-3 minutes using a hand mixer or stand mixer on medium speed. The fluffier the mix, the better your cookies will rise.
- Add the egg and extracts: Beat in the egg, vanilla extract, and almond extract (if using). Mix just until combined.
- Combine dry ingredients: In a separate bowl, whisk together the flour, baking soda, and baking powder. This ensures even distribution of the leavening agents.
- Mix it all together: Gradually add the dry ingredients to the wet mixture, mixing on low until just combined. Avoid overmixing—the dough should be soft, not sticky.
You’ll know your dough is ready when it pulls away from the sides of the bowl and feels slightly tacky but not wet.
Step 3: Chilling the Dough
This step is critical. Don’t skip it.
Wrap your dough in plastic wrap and chill it in the refrigerator for at least 1 hour—preferably 2. If you’re in a hurry, 30 minutes in the freezer can do the trick.
Chilling firms up the fat in the dough, which helps your cookies maintain their shape while baking. It also deepens the flavor, giving you a more pronounced buttery-sweet taste. Plus, rolling chilled dough is a thousand times easier than dealing with sticky, warm dough.
Step 4: Rolling and Cutting the Dough
Now for the fun part—rolling and cutting!
Lightly flour your clean surface and rolling pin. Unwrap your chilled dough and roll it out to about ¼ inch thick. Too thin, and your cookies will be crispy; too thick, and they won’t bake evenly.
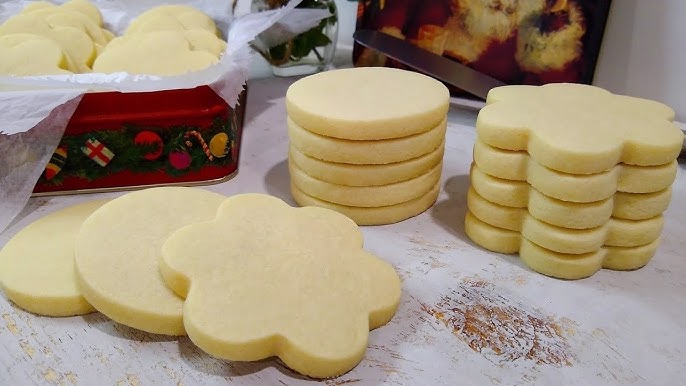
Use your favorite cookie cutters to cut shapes. Hearts, stars, snowflakes, letters—you name it! If you don’t have cookie cutters, you can use a glass or jar lid to make circles.
Place your cut cookies on your prepared baking sheet, spacing them about 1 inch apart. This gives them room to spread slightly without touching.
Gather any dough scraps, re-roll them, and keep cutting until you’ve used it all. If the dough gets too soft, just pop it back in the fridge for 10 minutes to firm up again.
Step 5: Baking the Cookies
With your oven preheated to 375°F (190°C), slide your cookie tray in the center rack and bake for 8 to 10 minutes.
Here’s what you’re looking for:
- Light golden edges
- Slightly puffed centers
- No browning on the tops
Keep a close eye, especially after the 8-minute mark. Sugar cookies can go from perfect to overbaked in just a minute. Once done, remove them from the oven and let them sit on the tray for 2-3 minutes before transferring to a wire rack.
The cookies will continue to cook slightly on the hot tray, so don’t worry if the centers look a little soft when they come out.
Step 6: Cooling and Decorating
Once your cookies are on the wire rack, let them cool completely—totally cool, not warm—to prevent any icing from melting.
Here’s where your creativity shines. You can:
- Dust them with powdered sugar
- Add colored sugar before baking
- Decorate with royal icing and food coloring
- Pipe melted chocolate or add sprinkles
If you’re going all out with icing, let the cookies set for a few hours afterward so the icing can harden. Pack them up in cookie tins or cellophane bags, and they’re ready to gift, store, or snack on!
Tips and Tricks for the Best Sugar Cookies
How to Keep Cookies Soft
There’s nothing more disappointing than biting into what looks like a perfect sugar cookie—only to find it dry and crumbly. Luckily, keeping sugar cookies soft isn’t rocket science. Here are some expert-level secrets that make a real difference:
- Don’t overbake: This is the golden rule. Even an extra minute in the oven can dry out your cookies. Remove them when the edges just begin to turn golden and the center still looks a tad underdone. They’ll continue cooking on the baking sheet.
- Use room temperature butter: This helps create the right texture when creamed with sugar, leading to a fluffier and softer cookie.
- Add a little cornstarch to the dough: Just 1 tablespoon can make a noticeable difference in softness without affecting taste.
- Chill your dough: We already mentioned this, but it’s worth repeating. It helps control the spread and keeps cookies from turning into thin, crispy wafers.
- Don’t skimp on sugar or fat: Sugar helps retain moisture, and butter adds softness. Reducing either may compromise the end result.
- Store properly: Once cooled, place cookies in an airtight container. You can even add a slice of bread to the container to keep them extra moist—the cookies will absorb moisture from the bread, staying soft longer.
If you follow these steps, your sugar cookies won’t just be tasty—they’ll be bakery-quality soft with a delicate crumb.
How to Store Them for Freshness
Sugar cookies store well, but only if you follow some basic guidelines. Here’s how to keep them fresh and flavorful, whether you’re making them ahead for a party or saving leftovers for late-night cravings:
- Room temperature storage: Once fully cooled and decorated, store cookies in an airtight container at room temperature. They’ll stay fresh for up to a week.
- Freezing raw dough: You can make the dough ahead of time and freeze it. Wrap it tightly in plastic wrap, then seal in a zip-top freezer bag. It’ll keep for up to 3 months. When you’re ready to use it, thaw it in the fridge overnight before rolling and baking.
- Freezing baked cookies: You can also freeze the baked cookies (either plain or decorated). Place a sheet of wax paper between each layer to prevent sticking, and seal them in an airtight container or freezer-safe bag. They’ll last about 2-3 months frozen.
- Thawing: To thaw frozen cookies, just leave them at room temperature for a couple of hours. If they’re decorated with icing, let them thaw without stacking to prevent smudging.
Whether you’re prepping for the holidays or just want to have emergency cookies ready, proper storage makes sure your hard work lasts.
FAQs about Simple Sugar Cookie Recipe
1. Can I make sugar cookie dough ahead of time?
Yes, you can! Sugar cookie dough can be made up to 3 days in advance. Just wrap it tightly in plastic wrap and store it in the refrigerator. You can also freeze the dough for up to 3 months.
2. Do I need to chill the dough before baking?
Chilling the dough helps prevent the cookies from spreading too much while baking. For best results, chill it for at least 30 minutes.
3. What’s the best way to keep sugar cookies soft?
Store them in an airtight container at room temperature. Adding a slice of bread to the container can help maintain their softness.
4. Can I use margarine instead of butter?
While margarine works in a pinch, real butter gives a richer flavor and better texture. For the classic taste and soft bite, stick with butter.
5. How do I know when sugar cookies are done?
Bake until the edges are just turning golden brown. The centers may still look slightly soft, but they’ll firm up as they cool.
6. Can I decorate these cookies with icing?
Absolutely! Sugar cookies are perfect for decorating. Use royal icing, buttercream, or a simple glaze to add color and flavor.
7. What flour is best for sugar cookies?
All-purpose flour is ideal. It provides the right balance of structure and tenderness.
8. Can I make this recipe gluten-free?
Yes, you can substitute all-purpose flour with a 1:1 gluten-free baking blend. Be sure it contains xanthan gum for best results.
Conclusion
Sugar cookies are more than just a treat—they’re a blank canvas for creativity, a way to connect with loved ones, and a nostalgic reminder of simple pleasures. From prepping your ingredients to that final bite, each step in the process brings joy and satisfaction. Whether you’re a first-time baker or a seasoned cookie pro, following this step-by-step guide ensures that your cookies come out delicious every single time.
The best part? You can make them your own. Change up the flavors, shapes, and decorations to fit the season or your mood. Once you master the basics, the sugar cookie possibilities are endless.
So go ahead—get that apron on, preheat the oven, and treat yourself and your loved ones to a batch of freshly baked sugar cookies. They’re guaranteed to bring smiles all around.


