Simple Kimchi Recipe: Kimchi isn’t just a side dish in Korea—it’s a cultural icon. This fermented, spicy cabbage dish has won hearts globally, thanks to its tangy flavor and gut-loving benefits. But what if I told you that you don’t have to visit a Korean restaurant or buy an overpriced jar at the store to enjoy it? Yep, you can make delicious, authentic kimchi right in your kitchen with simple ingredients and a little patience.
So why should you make kimchi at home? First, it’s surprisingly affordable. Second, you can control the spice level, salt content, and ingredients to match your taste. Third, the satisfaction of fermenting your own food? It’s unmatched. Whether you’re a beginner or a seasoned home cook, this guide will walk you through the entire process—step by step.
Health Benefits of Kimchi
You’ve probably heard that fermented foods are good for your gut—and kimchi is one of the best! It’s loaded with probiotics, which are beneficial bacteria that help your digestive system stay healthy and balanced. Beyond that, kimchi is also packed with vitamins A, B, and C, as well as antioxidants that boost your immune system.
The fermentation process breaks down the vegetables, making nutrients more absorbable. Plus, it’s low in calories but high in flavor, making it a perfect addition to almost any meal if you’re trying to eat healthy. Some studies even suggest kimchi can help with weight management, reduce inflammation, and support heart health. It’s not just tasty—it’s functional food at its best.
Types of Kimchi
Kimchi isn’t a one-size-fits-all dish. There are hundreds of regional and seasonal variations, but here are a few popular ones:
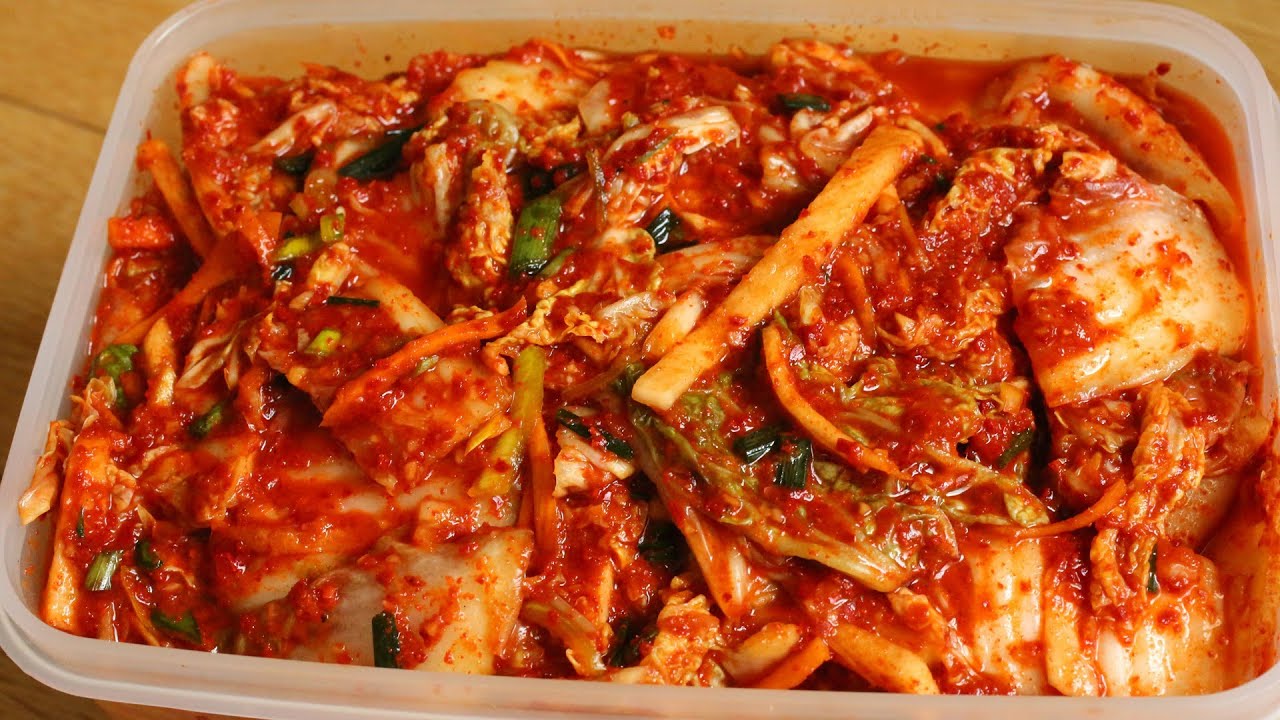
- Baechu Kimchi (Napa Cabbage): The classic red, spicy kimchi most people think of.
- Kkakdugi (Radish Kimchi): Made with crunchy diced daikon radish.
- Baek Kimchi (White Kimchi): A milder, non-spicy version that’s kid-friendly and gentle on the stomach.
In this guide, we’ll focus on Baechu Kimchi, the spicy napa cabbage version that’s most common and beloved around the world.
List of Ingredients You’ll Need
Here’s what you’ll need to make about 1 quart (1 liter) of classic napa cabbage kimchi:
Main Ingredients:
- 1 medium Napa cabbage
- 1/4 cup sea salt (non-iodized, for salting cabbage)
- 1 tablespoon sugar
- 1 tablespoon grated ginger
- 1 tablespoon minced garlic
- 1 tablespoon fish sauce (optional, skip for vegan)
- 1/2 cup Korean red pepper flakes (Gochugaru)
- 4 green onions, chopped
- 1 small carrot, julienned
- 1 small daikon radish, julienned
Optional Add-ins:
- 1 small apple or pear, grated (for natural sweetness)
- 1 tablespoon soy sauce or tamari (for depth of flavor)
- 1 teaspoon sesame seeds (for a nutty finish)
Make sure all veggies are fresh, firm, and washed properly before you begin.
Tools and Supplies Needed
Before diving into the fun part, grab these kitchen essentials:
- A large mixing bowl
- A colander
- Clean glass jars or fermentation containers
- A cutting board and sharp knife
- Gloves (optional but helpful for mixing the spicy paste)
- A spoon or fermentation weight to press down the kimchi
Having the right tools makes the process smoother and keeps everything sanitary.
Preparation Tips Before You Start
You can’t just chop and mix everything—making kimchi requires a few prep steps for best results.
- Choose a firm napa cabbage with fresh, tight leaves. Avoid wilted or yellowed ones.
- Salt properly: This draws out moisture from the cabbage and helps create that crisp texture.
- Use non-iodized salt only. Iodine can mess with the fermentation process.
- Make sure everything is clean and sanitized—especially the jars. Dirty tools can cause mold.
Prepping right means your kimchi won’t just be tasty—it’ll also be safe to eat.
Step-by-Step Guide to Making Kimchi
Step 1: Cutting and Salting the Cabbage
Cut napa cabbage into bite-sized pieces or quarters. Place it in a large bowl and sprinkle generously with salt, tossing to coat evenly. Let it sit for 1–2 hours, turning occasionally, until the cabbage softens and releases water. Rinse thoroughly to remove excess salt and drain well.
Step 2: Preparing the Kimchi Paste
In a bowl, mix Korean chili flakes (gochugaru), minced garlic, grated ginger, sugar, and fish sauce (or soy sauce for a vegetarian option). Add a little water if needed to create a thick, spreadable paste. This paste is the heart of kimchi’s flavor.
Step 3: Mixing the Vegetables and Paste
Add the drained cabbage to the bowl with the paste. Mix thoroughly, using gloves if possible, until every piece of cabbage is well coated. You can also add sliced green onions, carrots, or radish for extra texture.
Step 4: Packing the Kimchi into Jars
Pack the kimchi tightly into clean glass jars, pressing it down so it’s submerged in its juices. Leave about an inch of space at the top to allow for fermentation gases.
Step 5: Fermenting the Kimchi
Loosely close the jars and let them sit at room temperature for 1–3 days, depending on how tangy you like it. Once fermented to your taste, refrigerate to slow the process.
Bold, spicy, and deeply flavorful—homemade kimchi gets better with time 🥬🔥
How Long to Ferment Kimchi
Fermentation is both an art and a science. The ideal length of fermentation depends on your taste preference and your home’s room temperature. Typically, you’ll start to see bubbles and a sour aroma within 24–48 hours at room temperature. If your kitchen is warmer, fermentation will happen faster; if it’s cooler, it’ll take a bit longer.
Once you notice activity in the jar—small bubbles rising and a tangy smell—do a quick taste test. If you like your kimchi mild and lightly fermented, you can move it to the fridge after just one day. If you prefer a stronger, funkier flavor, leave it out for two to three days before refrigerating.
Remember, fermentation doesn’t stop in the fridge—it just slows down. Over time, the flavor deepens and the texture softens. Some people enjoy kimchi that’s been aging for weeks or even months! Experiment to find your sweet spot.
Storing Your Kimchi Properly
Once your kimchi is fermented to your liking, storing it properly ensures it stays fresh and safe to eat.
Best Storage Practices:
- Use airtight glass containers or jars. Avoid metal containers, as the acids from fermentation can react with metal.
- Always use clean utensils when taking kimchi out of the jar to avoid contamination.
- Keep your kimchi in the back of the fridge, where temperatures are most stable.
Shelf Life:
- Freshly made kimchi can last up to 3 months in the fridge.
- As it ages, it gets more sour and soft—but still perfectly edible (and great for cooking).
- If it smells off or develops mold (which is rare if you use clean tools), it’s time to toss it.
Kimchi is like wine—it gets better (and funkier) with age. Some people love it fresh, others like it ultra-aged and super tangy. Totally your call!
How to Serve Kimchi
Kimchi is incredibly versatile. Traditionally, it’s served as a side dish with Korean meals like rice, soup, or grilled meats. But the beauty of kimchi is that it can be used creatively in almost any cuisine.
Traditional Serving Ideas:
- As part of a Korean BBQ spread
- Alongside rice and miso soup
- Mixed into bibimbap or rice bowls
Modern Uses:
- Tossed into stir-fries or fried rice
- Added to grilled cheese sandwiches for a spicy twist
- Stuffed in tacos, burgers, or wraps
- Topped on pizza (yes, really!)
Kimchi’s bold flavor and crunchy texture elevate even the simplest dishes. A spoonful can transform bland leftovers into a gourmet experience.
Common Mistakes to Avoid
Making kimchi at home is easier than you think, but a few mistakes can affect the flavor, safety, or fermentation process.
Avoid These Common Pitfalls:
- Not Salting Properly: Too much salt, and it becomes inedible. Too little, and harmful bacteria might grow.
- Using the Wrong Salt: Always use non-iodized salt like sea salt or kosher salt.
- Dirty Jars or Tools: Cleanliness matters—dirty tools can ruin your batch.
- Sealing Jars Too Tightly: Pressure builds up during fermentation. Always leave space and use loose lids or fermentation tops.
- Not Pressing Down the Kimchi: Air pockets can lead to mold. Pack it tightly!
Learning what not to do is just as important as following the recipe. Each batch is a learning experience!
Tips for Adjusting Spice Levels
Not everyone likes their kimchi mouth-on-fire spicy—and that’s totally fine. You can customize the heat level to suit your taste.
Milder Kimchi:
- Use less Gochugaru (start with 1–2 tablespoons).
- Add a bit more sugar or grated apple/pear for a sweeter, gentler flavor.
- Try Baek Kimchi, which skips the red pepper flakes entirely.
Spicier Kimchi:
- Add extra Gochugaru or mix in some chili paste (Gochujang).
- Use chili powder or fresh red chili peppers for a punch of heat.
Gochugaru Substitutes:
Can’t find Korean chili flakes? Try crushed red pepper, paprika, or a blend of mild and hot chili powders—but keep in mind, the flavor won’t be exactly the same.
Vegan and Gluten-Free Kimchi Options
Great news—kimchi can easily be adapted for vegan and gluten-free diets without losing its deliciousness.
Vegan Kimchi Tips:
- Skip the fish sauce. Use soy sauce, tamari, or liquid aminos.
- Add miso paste, kombu (dried kelp), or shiitake mushroom powder to deepen the umami flavor.
Gluten-Free Kimchi Tips:
- Avoid soy sauce that contains wheat—use gluten-free tamari instead.
- Always check the ingredients of any store-bought sauces or spice blends.
Making your own kimchi means you’re fully in control. You can make it as clean, allergen-free, and healthy as you like.
FAQs about Simple Kimchi Recipe
1. Is it safe to ferment kimchi at home?
Absolutely! As long as you follow proper hygiene and fermentation techniques, it’s perfectly safe. The salt and acidity help prevent harmful bacteria.
2. My kimchi smells really strong. Is it bad?
Kimchi is naturally pungent. Strong smell is normal, but if it smells rotten, has mold, or tastes off, discard it.
3. Can I eat kimchi right after making it?
Yes, but it’s best after fermenting for at least a day. Fresh kimchi is tasty, but fermentation brings out the full flavor.
4. What can I do with over-fermented kimchi?
Don’t throw it out! Use it in kimchi fried rice, soups, or pancakes (kimchi jeon)—cooking mellows the sourness.
5. How do I know when kimchi is ready?
Taste is your best guide. It should be tangy, slightly fizzy, and flavorful. If you like it more sour, let it sit longer before refrigerating.
Conclusion
Making kimchi at home might seem intimidating at first, but it’s actually a rewarding, affordable, and surprisingly simple process. Once you’ve made your first batch, you’ll never look at store-bought kimchi the same way again. With just a few ingredients, some basic tools, and a bit of patience, you can create your own version of this iconic Korean dish—tailored exactly to your taste.
So roll up your sleeves, grab a cabbage, and start fermenting. You’ll not only end up with a delicious probiotic powerhouse but also gain a deeper appreciation for Korean food culture. Trust me—once you’ve got that first successful jar of homemade kimchi bubbling away, you’ll be hooked for life.


