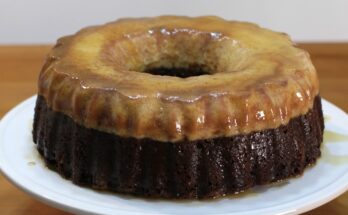
Simple Icing Recipe: Icing is more than just a pretty topping—it’s the delicious crown on cakes, cookies, cupcakes, and even cinnamon rolls. It’s a sweet mixture often made from powdered sugar and a liquid like milk or water, designed to harden or remain slightly soft depending on its purpose. Icing can be glossy and smooth, or light and fluffy, based on how it’s prepared and used. Unlike frosting, which is thicker and creamier, icing is usually thinner and more fluid.
It can range from a simple glaze to a rich buttercream. The beauty of icing lies in its versatility—it enhances the flavor and appearance of your baked goods and makes your creations look professional even if you’re baking at home.
Why Learn to Make Your Own Icing?
Making icing at home is incredibly rewarding. For one, it gives you total control over the ingredients—no preservatives, artificial thickeners, or unnecessary extras. Whether you’re whipping up something for a special occasion or a late-night snack craving, knowing how to make your own icing is a game-changer.
Plus, store-bought icing often lacks that fresh, homemade taste. With just a few basic ingredients and simple steps, you can elevate your dessert game instantly. Whether you’re going for a smooth vanilla glaze, a zesty lemon drizzle, or a rich chocolate finish, homemade icing brings both flavor and flair to your baked goodies.
Ingredients You’ll Need
Basic Ingredients for Simple Icing
You don’t need a fancy pantry to whip up some icing. Most of the ingredients are already in your kitchen. Here’s what you’ll need for a classic, foolproof icing:
- Powdered sugar (also known as confectioners’ sugar or icing sugar): This is your base. It’s finely ground and dissolves easily into liquids.
- Milk or water: These help form the consistency. Milk adds a creamier texture, while water creates a thinner glaze.
- Vanilla extract: A splash of vanilla gives your icing a warm, sweet depth.
Basic Recipe:
- 1 cup powdered sugar
- 2 tablespoons milk or water
- ½ teaspoon vanilla extract
That’s it! Simple and easy. Mix these ingredients together and you’ll get a smooth, pourable icing perfect for drizzling.
Optional Add-ins for Flavor and Color
Want to jazz up your icing? There are plenty of fun ways to customize your recipe:
- Flavored extracts: Almond, peppermint, lemon, or even maple extract can totally change the vibe.
- Food coloring: Gel or liquid colors allow you to match themes or seasons.
- Cocoa powder: Turn your icing into a chocolate glaze by adding 1-2 tablespoons.
- Citrus zest or juice: Adds zing and brightness—perfect for spring and summer treats.
Experimentation is the key. Once you master the base, the sky’s the limit in terms of flavor and presentation.
Tools and Equipment
Must-Have Tools for Perfect Icing
You don’t need a chef’s kitchen to get started with icing, but a few tools will definitely help:
- Mixing bowl: Use a medium-sized bowl to mix everything smoothly.
- Whisk or spoon: A whisk is best for eliminating lumps, but a sturdy spoon will work in a pinch.
- Measuring cups and spoons: Precision is important, especially for sugar and liquid measurements.
- Sifter (optional): Sifting the powdered sugar beforehand helps prevent clumps.
- Spatula or icing knife: For spreading icing on cakes or cookies evenly.
- Piping bag or zip-top bag (optional): Great for detailed decorating or adding a drizzle.
Substitutes You Can Use in a Pinch
Don’t have a whisk? A fork will work. No piping bag? Just snip the corner off a sandwich bag. Baking is flexible, especially when it comes to simple icing. The important part is having something to stir with and a smooth surface to apply your icing.
Step-by-Step Icing Recipe
Step 1: Measure Your Ingredients Properly
Precision makes a difference here. Scoop one level cup of powdered sugar—don’t pack it down. Measure your milk or water exactly. Even a little too much liquid can make your icing too runny, while too little makes it too thick to spread.
Use a dry measuring cup for the sugar and a liquid measuring cup for the milk or water. Measuring correctly from the beginning saves you from adjusting too much later on.
Step 2: Mixing the Base
Add the powdered sugar to your bowl first, followed by your liquid of choice (milk or water). Pour slowly. Then, add the vanilla extract. Use your whisk or spoon to blend everything together until smooth.
Mixing tips:
- Stir slowly at first to avoid a sugar dust cloud.
- Once combined, whisk vigorously for about 1 minute to get a silky texture.
- If you see lumps, keep whisking or sift your sugar beforehand next time.
Step 3: Adjusting Consistency
Now, this part is crucial. Depending on what you’re icing, the texture matters a lot. Are you glazing cookies? You’ll want it a bit runnier. Want to spread it on a cake? You’ll need a thicker consistency.
Here’s how to adjust:
- Too thick? Add liquid—just a few drops at a time. Stir and check. Don’t pour all at once.
- Too thin? Add more powdered sugar—again, little by little. Stir well after each addition.
You’re aiming for a smooth, pourable icing that’s not watery but also not stiff. A good test: Dip a spoon in and lift it. The icing should drizzle off slowly but still coat the back of the spoon.
Pro Tip: If you’re planning to pipe designs with the icing, it should hold soft peaks but not be stiff. For a glaze that sets hard (like on donuts), go thinner.
Step 4: Adding Flavors or Colors
This is the fun part—making your icing unique!
To add flavor:
- Start with ½ teaspoon of any extract (like almond, peppermint, or citrus).
- Taste and adjust—some flavors are stronger than others.
- Don’t overdo it; too much extract can thin out your icing or make it bitter.
To add color:
- Use gel food coloring for vibrant tones without watering down the icing.
- Start with a toothpick dab or 1 drop, then mix.
- Add more as needed—but remember, colors deepen as the icing sits.
Want something fancy? Try natural colors like beet juice (pink), matcha powder (green), or turmeric (yellow). They give a unique tint and can even add subtle flavors.
Step 5: Applying the Icing
How you apply the icing depends on the dessert and the consistency you chose. Here are a few methods:
For drizzling:
- Use a spoon or fork to drizzle over cookies, cakes, or muffins.
- Let it drip from the utensil in thin lines or zigzags.
For spreading:
- Use a small spatula or butter knife to evenly coat the surface of a cake or brownie.
- Work quickly—icing can start to set in minutes.
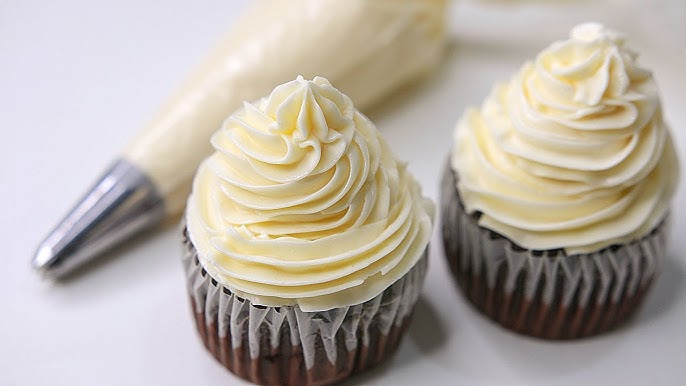
For piping:
- Spoon the icing into a piping bag (or zip-top bag with the corner snipped).
- Gently squeeze to draw lines, dots, or decorative borders.
Let your iced creations sit at room temperature for 10–30 minutes so the icing sets. If you need it to harden faster, pop it in the fridge for a bit.
Tips for Success
Do’s and Don’ts of Making Icing
Do:
- Sift your powdered sugar to avoid lumps.
- Mix well for a glossy, smooth finish.
- Add flavorings and colors slowly, tasting and checking consistency as you go.
- Store leftover icing in an airtight container for up to 3 days.
Don’t:
- Add too much liquid all at once.
- Use granulated sugar—it won’t dissolve properly.
- Overbeat—it can make icing runny or bubbly.
- Apply icing to hot baked goods—it’ll melt and run off.
A little attention to detail goes a long way. Once you’ve got the hang of it, making icing becomes second nature.
Common Mistakes to Avoid
- Not measuring correctly: Even a little extra liquid or sugar can throw off the balance.
- Skipping the sifting: Lumps will ruin the texture and appearance.
- Using warm baked goods: Always cool your desserts completely before icing.
- Rushing the process: Take your time to mix thoroughly and get the right consistency.
- Over-flavoring: A drop too much of certain extracts can overpower or ruin the icing.
Stick to these tips, and you’ll be icing like a pro in no time.
FAQs about Simple Icing Recipe
1. Can I make icing without milk?
Yes! You can use water, almond milk, coconut milk, or even citrus juice for a dairy-free version.
2. How do I store leftover icing?
Keep it in an airtight container at room temperature for 2 days or in the fridge for up to 5. Stir well before using again.
3. Can I freeze icing?
Yes, simple icing can be frozen for up to a month. Thaw in the fridge and stir before using.
4. Why is my icing too runny?
You probably added too much liquid. Add more powdered sugar a little at a time until the consistency thickens.
5. Can I use icing for piping decorations?
Definitely! Just make sure it’s a bit thicker so it holds its shape when piped.
Conclusion
There you have it—a complete, foolproof, step-by-step guide to making simple icing at home. Whether you’re dressing up cookies, glazing a cake, or adding flair to pastries, this icing recipe is your go-to base. It’s quick, customizable, and incredibly satisfying. Once you master the basics, the creative possibilities are endless. Just remember: icing isn’t just the finishing touch—it’s often the first thing people taste and see, so make it count!