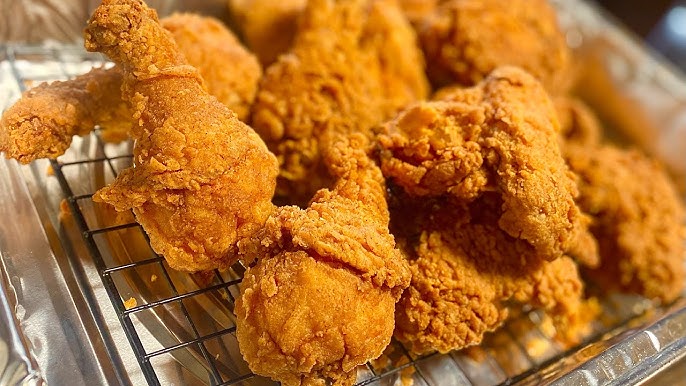
Simple Fried Chicken Recipe: Is there anything more comforting than a golden-brown, crispy piece of fried chicken? This all-time classic isn’t just a Southern staple—it’s beloved around the world. Whether you’re hosting a weekend dinner or just want to treat yourself to a mouthwatering meal, nothing hits the spot quite like homemade fried chicken. The aroma, the crunch, the juiciness—every bite is a mini celebration.
But here’s the truth: many people shy away from making fried chicken at home because they think it’s complicated. Good news—it’s not. In fact, with the right ingredients and a few easy steps, you can whip up a batch of crispy, flavorful chicken that rivals any restaurant. This guide walks you through everything you need to know, step-by-step, so even if you’re a beginner in the kitchen, you’ll feel confident frying up the best chicken of your life.
We’ll go over the basics, from selecting ingredients and prepping the meat to mastering the fry and serving it like a pro. So tie that apron, turn up the heat, and get ready—your fried chicken journey starts now.
Ingredients You’ll Need
Main Ingredients
Every great dish begins with quality ingredients. When it comes to fried chicken, less is more—focus on freshness and balance. Here’s what you’ll need to get started:
- Chicken pieces (bone-in, skin-on) – Choose thighs, drumsticks, or breasts. Go with what you love.
- Flour – All-purpose flour forms the crispy coating. No fancy flours needed here.
- Buttermilk – This tenderizes the chicken and gives it that classic Southern-style flavor.
- Eggs – Helps the coating stick better and adds richness.
- Salt and pepper – Essential for flavoring every layer.
- Paprika – Adds a warm, smoky undertone.
- Garlic powder – For depth of flavor.
- Onion powder – Complements the garlic and boosts the savory notes.
Using these core ingredients ensures your chicken will be both juicy and delicious. You can find all these items in any local grocery store—no specialty items required.
Optional Add-ons and Seasonings
Want to elevate your fried chicken? Consider adding these ingredients to your mix:
- Cayenne pepper – For heat. A little goes a long way.
- Dried thyme or oregano – Adds a herbal note to your coating.
- Hot sauce – A splash in the buttermilk marinade kicks things up a notch.
- Cornstarch – Mixing it with flour makes for an extra crispy crust.
The beauty of this recipe is flexibility. Once you master the base, you can tweak the spices to match your personal taste.
Preparing the Chicken
Cleaning and Cutting Tips
Let’s talk prep. Start with fresh, high-quality chicken. Rinse each piece under cold water, then pat them completely dry with paper towels. Why dry them? Excess moisture makes the coating soggy instead of crispy.
If you’re starting with a whole chicken, cut it into even pieces—two breasts, two thighs, two drumsticks, and two wings. You can ask your butcher to do this if you’re not comfortable. Try to keep the sizes uniform so they cook evenly.
Always trim off any excess skin or fat, but don’t remove the skin altogether—it crisps up beautifully when fried.
Marinating for Flavor
Now here’s the magic step: the marinade. Soak your chicken in buttermilk for at least 4 hours—or overnight if you can. The acidity in the buttermilk tenderizes the meat while infusing it with flavor.
You can jazz up the marinade with:
- A tablespoon of hot sauce
- A pinch of salt
- Cracked black pepper
- A clove of minced garlic
Put the chicken and marinade in a large ziplock bag or a bowl with a lid, and refrigerate. The longer it sits, the more flavorful it gets. This isn’t a step to skip—it makes a world of difference.
Making the Coating
Dry Coating Mix
Once your chicken is marinated and ready, it’s time to make the crispy coating. In a large bowl, combine:
- 2 cups of all-purpose flour
- 1 tablespoon paprika
- 1 tablespoon garlic powder
- 1 tablespoon onion powder
- 1 teaspoon salt
- 1 teaspoon pepper
- Optional: 1 tablespoon cornstarch for extra crispiness
Mix well so the spices are evenly distributed. This is your base coat, and it’s where most of the flavor lives.
Wet Mix or Buttermilk Dip
Before you dredge your chicken in the dry mix, consider a quick egg dip. Beat two eggs with a splash of buttermilk in a separate bowl. Dip each piece of chicken from the marinade into the egg mix, then roll it in the flour mixture.
This double-dip technique ensures the coating sticks like a dream and gets that lovely, flaky crunch we all crave. Some folks prefer to skip the egg, but trust us—it’s worth it for that golden crust.
Frying the Chicken
Choosing the Right Oil
Frying chicken isn’t just about submerging meat in hot oil—it’s about choosing the right kind of oil. The oil you use plays a massive role in both flavor and texture. For deep frying, go with oils that have a high smoke point such as:
- Peanut oil – This is a top choice because of its neutral flavor and high heat resistance.
- Canola oil – Affordable and widely available, making it a popular alternative.
- Vegetable oil – Works well and is often what people already have in their kitchens.
Avoid using olive oil or butter—they burn too quickly and will ruin your chicken and your pan.
Fill your heavy-bottomed pot or Dutch oven with about 2 to 3 inches of oil. Make sure the pot is large enough to prevent overflow. Always leave plenty of space at the top for the oil to bubble and rise as the chicken cooks.
Perfect Temperature and Timing
Getting the temperature right is crucial. Too hot and the outside burns while the inside stays raw. Too cool and your chicken absorbs too much oil and turns out greasy.
- Ideal temperature: 325°F to 350°F (use a thermometer!)
- Cooking time: 12 to 15 minutes depending on the size of the pieces
Don’t overcrowd the pot. Fry 3–4 pieces at a time to keep the oil at the right temperature. Overcrowding causes the temperature to drop, leading to soggy, undercooked chicken.
Turn the pieces occasionally to ensure even browning. You’ll know they’re done when they reach an internal temperature of 165°F and are golden brown all over. Listen for the telltale sizzling sound—it should be steady and gentle, not aggressive.
After frying, place the chicken on a wire rack over a baking sheet (not paper towels—they make the bottom soggy). Let it rest for 5–10 minutes. This helps the juices redistribute and keeps the crust crispy.
Draining and Serving
Best Tools for Draining
Once you pull those crispy, golden pieces out of the oil, proper draining makes all the difference. Here’s how to do it like a pro:
- Wire rack over a baking sheet – This setup allows excess oil to drip off while keeping the bottom crispy.
- Tongs or a slotted spoon – Helps lift the chicken without damaging the crust.
- Avoid paper towels – They trap steam and make your hard-earned crunch soggy.
If you’re cooking in batches, keep the finished pieces in a 200°F oven to stay warm and crispy while you finish frying the rest.
Ideal Side Dishes
Now that you’ve made some of the best fried chicken ever, it’s time to complete the meal. Pair it with side dishes that balance the richness and make the plate pop.
Here are a few classics:
- Mashed potatoes with gravy – Creamy comfort to balance the crunch.
- Coleslaw – Adds a fresh, tangy crunch.
- Biscuits or cornbread – You can’t go wrong with these Southern staples.
- Macaroni and cheese – Ultimate indulgence.
- Pickles or pickled vegetables – The acidity cuts through the richness beautifully.
Want something lighter? Try a crisp garden salad or grilled veggies for a healthy twist.
Tips for Crispy Fried Chicken Every Time
Getting that irresistible crunch isn’t just luck—it’s science. Here are some top tips that guarantee your fried chicken will be crispy on the outside and juicy on the inside, every single time.
1. Use Cornstarch in the Flour Mixture
This is the secret weapon of many pro kitchens. Adding just a couple tablespoons of cornstarch to your flour mix helps the coating puff up and stay crispier longer. It makes a big difference, especially if you’re keeping the chicken warm in the oven before serving.
2. Double Dredging for Extra Crunch
Want that thick, craggy coating? Try double-dipping your chicken. After the first coat of flour and dip in the egg wash, roll it in the flour mixture again. Press it in with your hands to make sure it adheres well. More layers = more crunch.
3. Let the Coated Chicken Rest Before Frying
Once you’ve dredged your chicken, let it sit on a wire rack for 15-20 minutes before frying. This helps the coating adhere and dries it out a bit, which leads to a better fry.
4. Don’t Flip Too Often
Let your chicken fry undisturbed for the first few minutes. Flipping it too often can cause the coating to break off. One or two turns per piece are enough.
5. Maintain the Oil Temperature
Use a thermometer and adjust the heat as needed. If the temperature drops too low, your chicken will soak up oil and lose its crunch. Keep it steady around 350°F for best results.
6. Finish in the Oven if Needed
If your pieces are getting too dark on the outside before they’re cooked through, transfer them to a 325°F oven to finish cooking. This trick ensures the inside is juicy and cooked without burning the outside.
These pro tips take the guesswork out of frying and help you serve up a plate of fried chicken that everyone will rave about.
Common Mistakes to Avoid
Even the best cooks can mess up fried chicken if they’re not careful. Avoid these common mistakes to ensure flawless results:
1. Skipping the Marinade
Marinating is not optional—it’s essential. Buttermilk doesn’t just flavor the chicken; it breaks down proteins to make the meat incredibly tender. Skipping this step leads to bland, tough chicken.
2. Using Cold Chicken
Take the chicken out of the fridge 30 minutes before frying. Cold chicken can cause the oil temperature to drop, making it harder to cook evenly and crisp up properly.
3. Using the Wrong Oil
Not all oils are made for frying. Avoid oils with low smoke points like butter or extra virgin olive oil. Stick to peanut, canola, or vegetable oil.
4. Overcrowding the Pan
This is a big one. If you add too many pieces at once, the temperature of the oil drops, leading to soggy chicken. Fry in batches and keep your oil hot.
5. Not Checking Internal Temperature
Undercooked chicken is unsafe, and overcooked chicken is dry. Use a meat thermometer to make sure each piece hits 165°F at the thickest part.
6. Using Paper Towels to Drain
Paper towels seem convenient, but they steam the chicken and make it soggy. Always drain on a wire rack for maximum crunch.
Avoiding these pitfalls can turn your fried chicken from “meh” to mouthwatering every time.
Storing and Reheating Leftovers
Got leftovers? Lucky you. Fried chicken stores and reheats surprisingly well—if you do it right.
How to Store Fried Chicken
Let your chicken cool completely before storing. Place it in an airtight container or wrap it in foil. Add a paper towel at the bottom of the container to absorb excess oil and moisture. Store in the fridge for up to 3–4 days.
Reheating Fried Chicken Without Losing the Crunch
Reheating in the microwave is quick, but it ruins the crispy texture. Here’s the best method:
- Preheat your oven to 375°F.
- Place the chicken on a wire rack over a baking sheet.
- Heat for 10–15 minutes or until hot and crispy.
For an even better result, let the chicken come to room temperature before reheating.
Can You Freeze Fried Chicken?
Absolutely. Fried chicken freezes well. Place cooled pieces in a freezer bag or airtight container. Separate layers with parchment paper. Freeze for up to 3 months.
To reheat, thaw in the fridge overnight and bake at 375°F until heated through and crisped up again.
FAQs about Fried Chicken Recipe
1. How do I make my fried chicken more flavorful?
Marinate in seasoned buttermilk overnight and add bold spices like paprika, cayenne, garlic, and onion powder to both the flour mix and marinade.
2. Can I bake instead of fry?
Yes! While you won’t get the same crunch, oven-fried chicken coated in breadcrumbs or crushed cornflakes can still be delicious. Bake at 400°F until golden and cooked through.
3. What is the best part of the chicken to use?
Thighs and drumsticks are favorites because they stay juicy. However, breasts and wings work well too—just adjust cooking times accordingly.
4. How do I keep my coating from falling off?
Let the coated chicken rest before frying and avoid flipping too often. A double-dredge method with egg wash helps it stick better.
5. Can I use an air fryer for this recipe?
Yes! Coat your chicken lightly with oil spray and air fry at 375°F for 25–30 minutes, turning halfway through. It won’t be quite the same as deep-fried but still tasty.
Conclusion
Fried chicken isn’t just food—it’s a comfort, a tradition, and honestly, a form of edible joy. With this step-by-step guide, you’ve got everything you need to whip up a batch that’s crispy, juicy, and bursting with flavor. From choosing the right chicken and spices to mastering the perfect fry, each step adds up to something truly delicious.
And the best part? This recipe is totally flexible. Spice it up, tone it down, switch out the sides—make it yours. So go ahead, get that oil heating, and make some magic in the kitchen tonight. Once you taste that first bite, you’ll be hooked.