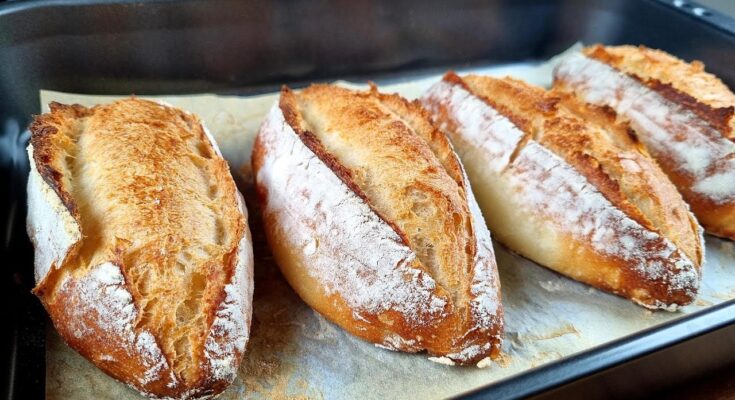
Simple Bread Recipe: Bread is one of the most beloved staples worldwide, and there’s nothing quite like the smell of freshly baked bread wafting through your home.
Not only is homemade bread more flavorful, but it’s also free from unnecessary additives often found in store-bought versions.
In this guide, we’ll walk you through a straightforward bread recipe that even beginners can master. So, roll up your sleeves and let’s get started!
Ingredients for the Simple Bread Recipe
To bake your own bread, you’ll need just a handful of ingredients:
Basic Ingredients:
- 3 ½ cups (450g) of all-purpose flour
- 1 packet (2 ¼ tsp) of active dry yeast
- 1 ½ tsp of salt
- 1 tbsp sugar
- 1 ¼ cups (300ml) of warm water
- 2 tbsp of olive oil or melted butter
Optional Ingredients for Flavor:
- Fresh or dried herbs (e.g., rosemary, thyme)
- Seeds (e.g., sesame, sunflower)
- Garlic powder or grated cheese
These simple ingredients come together to create a versatile dough that can be adapted to your taste preferences.
Tools You’ll Need
Before you begin, gather the following tools:
- A large mixing bowl
- A measuring cup and spoons
- A wooden spoon or stand mixer with a dough hook
- A clean kitchen towel
- A baking tray or loaf pan
- Parchment paper (optional)
Pro Tip: If you don’t have a stand mixer, don’t worry! Mixing and kneading the dough by hand works just as well. A little elbow grease is all you need.
How to Make Simple Bread – Step by Step Guide
Step 1: Preparing the Ingredients
Accuracy is key when it comes to bread-making. Start by measuring out your ingredients carefully. Use a kitchen scale for precise measurements if possible. Make sure the water is warm but not hot—between 100°F and 110°F—to activate the yeast properly.
Let the butter come to room temperature, and have everything within reach to streamline the process.
Step 2: Mixing the Dough
Combine the flour, yeast, salt, and sugar in your mixing bowl. Make a small well in the center and pour in the warm water and olive oil. Mix until the ingredients form a shaggy dough.
If you’re using a stand mixer, set it to low speed for about 5 minutes. For hand mixing, use a wooden spoon and then switch to your hands as the dough starts to come together.
The Role of Yeast in Bread-Making
Yeast is the magic ingredient that makes bread rise. It feeds on the sugars in the dough, producing carbon dioxide that creates those delightful air pockets. Make sure your yeast is fresh for the best results.
Step 3: Kneading the Dough
Once your dough is mixed, it’s time to knead. This process develops the gluten, giving your bread structure and elasticity.
- Hand-Kneading: Lightly flour your surface, then push and fold the dough for about 8–10 minutes.
- Stand Mixer: Let the mixer do the work for 5–6 minutes on medium speed.
Signs Your Dough is Ready: It should be smooth, elastic, and slightly tacky to the touch but not sticky.
Step 4: Letting the Dough Rise
Transfer the dough to a greased bowl, cover it with a clean kitchen towel, and place it in a warm spot. Let it rise until it doubles in size—this usually takes 1–2 hours.
Troubleshooting Common Rising Issues
If your dough isn’t rising, check the temperature of your environment or ensure your yeast was properly activated.
Step 5: Shaping the Dough
After the first rise, punch the dough down to release any excess air. Shape it into a loaf or your preferred form, such as rolls or baguettes. Place the shaped dough on a parchment-lined tray or into a loaf pan.
Step 6: Final Rise Before Baking
Now that the dough is shaped, it needs one more rise before going into the oven. Cover the dough lightly with a kitchen towel and let it rest for about 30–45 minutes. During this time, it will puff up slightly, which helps create a lighter texture in the final loaf.
Avoid Over-Proofing
Be careful not to let the dough rise too long at this stage, as over-proofing can cause the dough to collapse when baked. A good rule of thumb is to press the dough lightly with your finger—if the indentation springs back slowly, it’s ready to bake.
Step 7: Baking the Bread
Preheat your oven to 375°F (190°C) while the dough finishes its final rise. Place the loaf or rolls into the oven and bake for 25–30 minutes, or until the bread is golden brown and sounds hollow when tapped on the bottom.
Tips for Achieving a Crispy Crust
If you want a bakery-style crust, you can create steam in your oven:
- Place a shallow pan of hot water on the bottom rack of the oven while the bread bakes.
- Alternatively, mist the dough with water right before placing it in the oven.
For an even shinier crust, brush the dough with egg wash (a beaten egg mixed with water) before baking.
Step 8: Cooling the Bread
Once your bread is out of the oven, resist the temptation to slice it immediately. Cooling is crucial because it allows the bread to finish setting and prevents a gummy texture. Transfer the bread to a wire rack and let it cool for at least 30 minutes.
Storage Tips
If you don’t finish the bread in one sitting, store it in a breadbox or wrap it in a clean kitchen towel to maintain its freshness. Avoid plastic bags, as they can make the crust soft.
Variations of the Simple Bread Recipe
This basic bread recipe is incredibly versatile. Here are a few ideas to switch things up:
- Herbed Bread: Add 1–2 teaspoons of dried herbs like rosemary, oregano, or thyme to the dough.
- Seeded Loaf: Sprinkle sesame seeds, sunflower seeds, or flaxseeds on top before baking.
- Whole-Wheat Bread: Substitute half of the all-purpose flour with whole-wheat flour for a nuttier flavor.
- Gluten-Free Option: Use a gluten-free flour blend and follow the recipe as directed, adjusting for slightly longer rising times.
Benefits of Baking Your Own Bread
Making bread at home has more perks than you might realize:
- Healthier: No preservatives, additives, or unnecessary sugar.
- Cost-Effective: Homemade bread is far cheaper than store-bought artisan loaves.
- Satisfying: There’s a deep sense of accomplishment in baking your own bread from scratch. Plus, it’s a great way to bond with family or relax after a busy day.
Troubleshooting Common Issues
While baking bread is simple, a few hiccups can arise. Here’s how to fix them:
- Dense Bread: This is often caused by insufficient kneading or not letting the dough rise long enough.
- Over-Baking: If the crust is too hard, reduce the oven temperature slightly or tent the bread with foil halfway through baking.
- Under-Baking: Bread that’s raw in the middle may need extra time. Use an instant-read thermometer to check—it should read 190°F (88°C) for fully baked bread.
Pro Tips for Beginners
If you’re new to bread-making, don’t stress! These tips will make the process smoother:
- Use Fresh Yeast: Expired yeast can prevent your bread from rising.
- Patience Pays Off: Don’t rush the rising or proofing process—it’s what makes the bread soft and airy.
- Start Simple: Master the basic recipe before experimenting with add-ins or new techniques.
Most importantly, don’t worry about perfection. Bread-making is a skill that improves with practice.
FAQs about Simple Bread Recipe
1. What basic ingredients do I need for a simple bread recipe?
Most simple bread recipes require just four basic ingredients: flour, water, yeast, and salt. Some variations might include sugar or oil for additional flavor and texture.
2. How long does it take to make homemade bread?
The total time to make homemade bread is about 3 to 4 hours. This includes about 10 to 20 minutes of active preparation and kneading, 1 to 2 hours for the first rise, a few minutes to shape the dough, and another hour for the second rise before baking.
3. Do I need a bread machine to make bread?
No, you don’t need a bread machine. Bread can easily be made by hand or with a stand mixer. A bread machine simplifies the process, but it’s not necessary to produce delicious homemade bread.
4. Can I make bread without yeast?
Yes, there are recipes for yeast-free breads that use baking soda or baking powder as leavening agents, such as soda bread. These breads have a different texture and flavor but are simple and quick to make.
5. What is the best flour to use for making bread?
The best flour for making bread is typically a strong bread flour, which is high in protein and helps develop the gluten necessary for a good rise and chewy texture. However, you can use all-purpose flour, which is easily accessible and also yields good results.
6. How can I tell when my bread is fully baked?
Bread is fully baked when it sounds hollow if tapped on the bottom and has an internal temperature of about 190-210°F (88-99°C). A digital thermometer can help ensure accuracy.
7. What are some common problems when making bread and their solutions?
Common problems include bread not rising due to old yeast or incorrect temperatures, and bread being too dense, which can be caused by not kneading enough or not allowing it to rise sufficiently. Ensure your yeast is active and follow the recipe’s timing and kneading instructions closely.
Conclusion
Congratulations! You’ve just mastered the art of making bread from scratch. This simple recipe proves that homemade bread doesn’t have to be complicated. With a few ingredients and some basic techniques, you can enjoy the unbeatable taste and aroma of freshly baked bread anytime. So why not roll up your sleeves and give it a try? Once you taste the difference, you’ll never want store-bought bread again!


