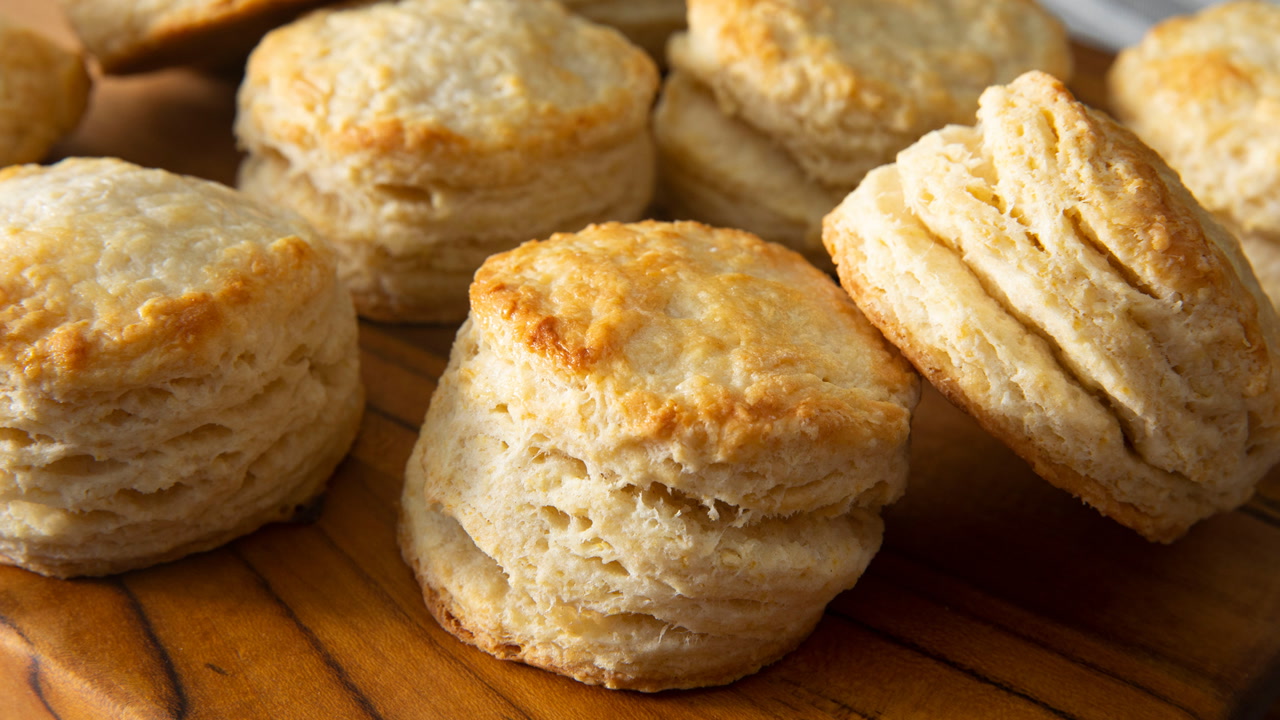
Simple Biscuit Recipe: There’s something incredibly satisfying about baking biscuits from scratch. Not only do they taste better than the store-bought kind, but they also fill your kitchen with a warm, comforting aroma that’s hard to resist. Biscuits are a staple in many households—perfect for pairing with gravy, slathering with butter and jam, or simply enjoying on their own.
What makes this recipe truly stand out is its simplicity. No complicated techniques or obscure ingredients here—just good, honest cooking that anyone can master. Whether you’re a complete novice or a seasoned baker, this guide breaks down each step so you can bake with confidence. The goal is to help you create biscuits that are golden on the outside, soft and fluffy on the inside, and utterly irresistible.
Homemade biscuits don’t just taste better—they let you control the ingredients and customize flavors to your liking. And once you master this basic recipe, you’ll have a go-to base you can tweak to create cheddar biscuits, herb-infused delights, or even sweet versions with a touch of honey or cinnamon. So, let’s get started with the ingredients you’ll need.
Ingredients You’ll Need
The beauty of this simple biscuit recipe is that it uses ingredients you likely already have in your pantry. Here’s what you’ll need for a classic biscuit:
Basic Ingredients:
- 2 cups all-purpose flour – This forms the structure of your biscuit.
- 1 tablespoon baking powder – The leavening agent that makes your biscuits rise.
- ½ teaspoon baking soda – Helps activate the acid in buttermilk for more rise.
- 1 teaspoon salt – Enhances the overall flavor.
- ½ cup (1 stick) cold unsalted butter – The key to those flaky layers.
- ¾ cup cold buttermilk – Adds tang and helps create a tender texture.
Optional Ingredients:
- 1 tablespoon sugar – If you like a touch of sweetness.
- 1 cup shredded cheese – For cheesy biscuits.
- 1 tablespoon chopped herbs – Like rosemary, thyme, or chives.
- A pinch of garlic powder – For an extra savory kick.
These ingredients form the foundation of a perfect biscuit. The cold butter is especially important; it creates steam pockets as it melts in the oven, resulting in that ideal flaky texture. You can also swap buttermilk for regular milk and a splash of lemon juice or vinegar if you’re in a pinch.
Using fresh, quality ingredients can make a noticeable difference in flavor. And once you’re comfortable with the basics, you can easily experiment with add-ins to match your meal or mood.
Kitchen Tools You’ll Need
You don’t need fancy equipment to whip up these biscuits, but having the right tools on hand can make the process smoother and more enjoyable.
Essential Tools:
- Mixing bowls – One large for the dough, one small for liquids.
- Pastry cutter or two knives – To cut the butter into the flour.
- Measuring cups and spoons – Accuracy matters!
- Rolling pin (optional) – If you prefer rolling out your dough.
- Biscuit cutter or drinking glass – For cutting out even rounds.
- Baking sheet – To bake your biscuits.
- Parchment paper or silicone baking mat – For easy cleanup and even baking.
Nice-to-Have Extras:
- Bench scraper – Great for folding dough and cleaning surfaces.
- Food processor – Can speed up the butter-cutting step (though it’s easy to over-mix).
- Pastry brush – For brushing melted butter on top of biscuits.
Don’t let a lack of gear stop you. You can always improvise with what you have. For example, a fork can replace a pastry cutter, and a water glass can stand in for a biscuit cutter.
The goal here is to keep it simple and stress-free. Once you have everything set up, you’ll be amazed at how quickly biscuit dough comes together.
Preparing the Dough
This is where the biscuit magic begins. The key to a tender, flaky biscuit is minimal handling. The more you fuss with the dough, the tougher it becomes. So work quickly and confidently!
Step 1: Mix the Dry Ingredients
Start by whisking together your flour, baking powder, baking soda, and salt in a large bowl. If you’re using sugar or any dried herbs, toss them in now too. This ensures an even distribution of your leavening agents and flavors.
Step 2: Cut in the Cold Butter
Cut your butter into small cubes and add it to the dry mixture. Use a pastry cutter, fork, or two knives to cut the butter into the flour until the mixture resembles coarse crumbs. You want little pea-sized bits of butter scattered throughout the dough—these are what make the biscuits flaky.
Avoid using your hands too much, as the warmth can soften the butter. The goal is to keep the butter as cold as possible until the biscuits hit the oven.
Step 3: Add the Liquid
Pour in the cold buttermilk and gently stir with a fork or spatula just until the dough begins to come together. It will be shaggy and sticky—that’s perfect. Resist the urge to overmix; a few dry spots are okay.
At this stage, your dough should be moist but not wet, and it should hold together when pressed lightly. If it’s too dry, add a tiny splash of buttermilk. If it’s too wet, sprinkle in a bit more flour.
Now it’s time to turn this dough into beautiful biscuits!
Shaping and Cutting the Biscuits
Now that your dough is ready, it’s time to shape it into those classic biscuit rounds. This step may seem simple, but it plays a huge role in determining the final texture and height of your biscuits.
Step 1: Turn Out the Dough
Lightly flour your work surface and turn the dough out onto it. Pat it into a rough rectangle about 1 inch thick. Avoid kneading the dough too much—just press it together until it holds its shape. The less you handle it, the softer your biscuits will be.
Step 2: Fold for Flakiness
Here’s a little secret for extra flakiness: fold the dough like a letter. Fold one third over the middle, then the other third over that. Turn it 90 degrees and repeat. Do this folding process 2-3 times. Each fold creates layers that puff up beautifully in the oven.
Step 3: Shape the Final Layer
After folding, gently pat or roll the dough out to about ¾ to 1 inch thick. Be careful not to flatten it too much—thicker dough means taller, fluffier biscuits.
Step 4: Cut the Biscuits
Use a round biscuit cutter or a floured glass to cut out the biscuits. Press straight down—don’t twist! Twisting seals the edges and prevents the biscuits from rising properly. Gather the scraps, press them together, and cut more biscuits. Try to handle the dough as little as possible to maintain its light texture.
Place the biscuits on a parchment-lined baking sheet. For softer sides, place them close together. For crispier edges, space them about an inch apart. Now you’re ready to bake!
Baking the Biscuits
This is where everything comes together—the heat transforms your dough into golden, flaky masterpieces. Baking time is short, but it’s important to get it just right for that perfect bite.
Step 1: Preheat the Oven
Preheat your oven to 425°F (220°C). A hot oven is crucial for that quick rise and crispy top. Make sure it’s fully preheated before the biscuits go in—cold ovens make flat biscuits.
Step 2: Optional Toppings
Before baking, brush the tops of your biscuits with melted butter or a bit of buttermilk. This gives them a beautiful golden color and adds extra flavor. You can also sprinkle on toppings like coarse salt, herbs, or shredded cheese if you’re feeling fancy.
Step 3: Bake Time
Place your baking sheet in the center of the oven and bake for 12-15 minutes, or until the tops are golden brown. Every oven is a little different, so keep an eye on them after the 10-minute mark. The bottoms should be lightly browned, and the biscuits should feel firm but not hard.
Step 4: Cool and Serve
Let the biscuits cool for a couple of minutes on the pan before transferring them to a wire rack. They’re best served warm, fresh from the oven. Slather them with butter, spoon on some jam, or top with gravy—they’re a blank canvas for all your favorite toppings.
Common Mistakes to Avoid
Even with a simple recipe, a few missteps can turn fluffy dreams into biscuit disappointments. Here are the most common pitfalls and how to steer clear of them:
1. Overmixing the Dough
This is the number one biscuit sin. Stirring the dough too much activates the gluten in the flour, resulting in tough biscuits. Mix just until everything comes together and no more.
2. Using Warm Butter
Cold butter is crucial for flakiness. Warm butter melts into the flour, resulting in dense, greasy biscuits. Always start with butter straight from the fridge and handle it as little as possible.
3. Twisting the Biscuit Cutter
It might feel natural to twist the cutter, but don’t do it! Twisting seals the edges, preventing the biscuit from rising properly. Press straight down and lift.
4. Not Folding the Dough
Skipping the fold step robs your biscuits of beautiful layers. Just a couple of gentle folds add structure and flakiness without overworking the dough.
5. Oven Not Hot Enough
Biscuits need a blast of heat to rise quickly and form that crisp, golden crust. Make sure your oven is fully preheated before baking.
By keeping these tips in mind, you’ll avoid common biscuit-making woes and bake like a pro every time.
Variations to Try
Once you’ve mastered the basic biscuit recipe, the possibilities are endless. Here are some delicious twists you can try to keep things interesting:
1. Cheddar Chive Biscuits
Add 1 cup of shredded sharp cheddar cheese and 2 tablespoons of chopped fresh chives to the dry ingredients. These savory biscuits are great with soups or scrambled eggs.
2. Garlic Herb Biscuits
Mix 1 teaspoon garlic powder and 1 tablespoon dried Italian herbs into the dough. Brush the tops with garlic butter before baking for a mouthwatering twist.
3. Sweet Biscuits
Add 2 tablespoons sugar and a dash of vanilla extract for a sweeter version. Top with cinnamon sugar before baking or serve with strawberries and whipped cream for a classic shortcake.
4. Bacon Cheddar Biscuits
Fold in ½ cup cooked, crumbled bacon and ¾ cup shredded cheese. These hearty biscuits are perfect for breakfast sandwiches.
5. Vegan Biscuits
Use vegan butter and plant-based milk (like almond or oat milk) with a splash of vinegar or lemon juice to mimic buttermilk. You’ll still get great rise and flavor.
These variations are just the beginning. Once you’re comfortable with the base recipe, feel free to experiment with spices, cheeses, or even diced jalapeños for a spicy kick!
How to Store and Reheat Biscuits
Biscuits are best fresh, but they store surprisingly well if handled properly. Here’s how to keep them tasting great even days after baking:
Storing Biscuits
- At Room Temperature: Place cooled biscuits in an airtight container. They’ll stay fresh for up to 2 days.
- In the Fridge: Store in a sealed bag or container for up to a week.
- In the Freezer: Wrap biscuits individually in plastic wrap and store in a freezer bag for up to 3 months.
Reheating Tips
- Oven: Preheat to 350°F, place biscuits on a baking sheet, and heat for 5-10 minutes.
- Microwave: Wrap in a damp paper towel and heat for 20-30 seconds. Not ideal for texture but works in a pinch.
- Toaster Oven: A great option for reviving the crispiness.
To make life even easier, freeze unbaked biscuits on a tray, then transfer to a freezer bag. Bake straight from the freezer—just add 2-3 minutes to the baking time.
Serving Suggestions
Freshly baked biscuits are versatile and pair beautifully with a wide range of dishes. Whether you’re hosting brunch or preparing a cozy dinner, biscuits can steal the spotlight. Here are some serving ideas to inspire you:
Breakfast and Brunch
- With Eggs and Bacon: Classic combo—fluffy biscuits, scrambled eggs, and crispy bacon.
- Biscuits and Gravy: A Southern favorite—smother hot biscuits in creamy sausage gravy.
- Breakfast Sandwiches: Slice biscuits in half and stuff with eggs, cheese, and sausage or ham.
Lunch and Dinner
- With Soup or Stew: Biscuits are perfect for soaking up hearty soups and stews.
- As a Side Dish: Serve with roasted chicken, turkey, or BBQ for a comforting meal.
- Mini Sandwiches: Use small biscuits as buns for sliders—great for parties!
Sweet Treats
- Strawberry Shortcake: Split biscuits, add strawberries and whipped cream.
- With Honey or Jam: A simple, delicious snack.
- Cinnamon Sugar Biscuits: Top with butter and a sprinkle of cinnamon sugar for dessert.
Biscuits truly shine with just about anything. Keep a batch ready for unexpected guests, quick breakfasts, or indulgent treats.
Nutritional Information
While biscuits are undeniably delicious, it’s helpful to understand their nutritional content—especially if you’re watching your intake. Here’s an approximate breakdown for one plain homemade biscuit (made with butter and buttermilk):
| Nutrient | Amount per Biscuit |
|---|---|
| Calories | 180-220 |
| Total Fat | 10-12g |
| Saturated Fat | 6-7g |
| Carbohydrates | 20-25g |
| Protein | 3-5g |
| Sodium | 300-400mg |
| Sugar | 1-2g |
Healthier Swaps:
- Use whole wheat flour for more fiber.
- Swap butter with Greek yogurt or a mix of butter and olive oil.
- Use plant-based milk and vegan butter for dairy-free versions.
Remember, biscuits are a treat—enjoy in moderation or tweak the recipe to suit your dietary needs.
Making Biscuits Ahead of Time
If you’re hosting a brunch or planning a big dinner, making biscuits ahead of time can save you stress. Here’s how to prep them in advance:
Make and Store the Dough:
- Mix the dough and cut out biscuits.
- Place them on a tray and refrigerate for up to 24 hours before baking.
Freezing Unbaked Biscuits:
- Flash-freeze the cut biscuits on a baking sheet until solid.
- Transfer to a zip-top bag and freeze for up to 3 months.
- Bake directly from frozen—just add a few extra minutes to the bake time.
Reheating Baked Biscuits:
- Wrap them in foil and warm in the oven at 300°F for 10 minutes.
This make-ahead method is perfect for holidays or when you want fresh biscuits without the last-minute prep.
Tips for the Perfect Biscuit Every Time
Want bakery-worthy biscuits every time? Follow these golden rules:
- Use Cold Ingredients: Butter and buttermilk should be straight from the fridge.
- Don’t Overwork the Dough: Mix until just combined—no more.
- Fold the Dough: Folding creates flaky layers.
- Cut Straight Down: Don’t twist the cutter!
- Bake at High Heat: Start with a hot oven for that perfect rise.
Pro Tip: Chill the cut biscuits for 10 minutes before baking to keep the butter extra cold and improve flakiness.
By mastering these techniques, you’ll consistently produce tall, fluffy, golden-brown biscuits that impress every time.
Troubleshooting Your Biscuits
Even with a foolproof recipe, sometimes things go wrong. Here’s how to fix common biscuit issues:
Biscuits Didn’t Rise?
- Check your baking powder’s expiration date.
- Make sure you didn’t twist the cutter.
- Oven might not have been hot enough.
Biscuits Too Dry?
- You may have added too much flour or overbaked them.
- Try adding a splash more liquid next time.
Too Dense or Flat?
- Butter was too warm or the dough was overmixed.
- Stick to gentle mixing and cold ingredients.
Burned Bottoms?
- Use parchment paper or a silicone mat.
- Place the tray in the center of the oven.
Learning from small mistakes helps you perfect your process and improve with every batch.
FAQs about Simple Biscuit Recipe
1. Can I use milk instead of buttermilk in biscuit recipes?
Yes, you can. Just add 1 tablespoon of lemon juice or vinegar to ¾ cup of milk and let it sit for 5 minutes. This mimics buttermilk’s acidity.
2. Why are my biscuits hard instead of fluffy?
You likely overmixed the dough or used warm butter. Keep ingredients cold and mix minimally.
3. What’s the best flour for making biscuits?
All-purpose flour works well, but for ultra-light biscuits, try a low-protein flour like White Lily.
4. Can I make biscuit dough in advance?
Absolutely. You can refrigerate it for 24 hours or freeze unbaked biscuits for up to 3 months.
5. What’s the difference between biscuits and scones?
Biscuits are usually savory and use less sugar, while scones are sweeter and often include eggs.
Conclusion
Biscuits are one of those magical comfort foods—simple to make, endlessly customizable, and universally loved. With just a few ingredients and the right technique, you can whip up bakery-quality biscuits right at home. Whether you’re baking them for breakfast sandwiches, dunking them in stew, or layering them with sweet berries, this humble biscuit recipe will never let you down.
Take the time to practice, tweak, and enjoy the process. Baking biscuits is more than a recipe—it’s a cozy tradition that brings people together, one flaky, buttery bite at a time.