Simple Banana Pudding Recipe: Banana pudding is one of those timeless desserts that almost everyone can agree on. It’s creamy, sweet, and packed with comforting flavors that instantly bring back memories of grandma’s kitchen. At its core, banana pudding is a luscious dessert made from layers of vanilla pudding, ripe bananas, and vanilla wafers, often topped with whipped cream or meringue. It’s the kind of treat that makes family gatherings and weekend dinners extra special.
This dish originated in the Southern United States and has evolved into a classic American comfort food. Whether served in a glass trifle dish or scooped onto a plate, it remains a favorite thanks to its nostalgic value and sheer deliciousness.
Why It’s a Favorite Dessert
So, why is banana pudding so beloved? First off, it’s incredibly easy to make. Even beginners can nail this dessert on their first try. You don’t need fancy ingredients or complicated techniques—just a few everyday items and a bit of patience. Secondly, it’s versatile. You can dress it up for a dinner party or keep it simple for a casual snack. The blend of creamy pudding with the soft bananas and crunchy wafers offers a symphony of textures that’s hard to resist.
Another reason it’s so popular? It’s make-ahead friendly! You can prepare it the night before, and by the time you’re ready to serve, it’s perfectly chilled and the flavors are well-blended.
Ingredients Needed
Main Ingredients
Before we dive into the steps, let’s gather everything you’ll need for this simple banana pudding recipe. Here’s your shopping list:
- 4 ripe bananas (medium-sized)
- 1 box of vanilla wafers (around 11 oz)
- 3 cups whole milk
- 1/2 cup granulated sugar
- 1/4 cup all-purpose flour
- 1/4 teaspoon salt
- 4 large egg yolks (save the whites if you want to make meringue)
- 2 teaspoons vanilla extract
- 1 tablespoon unsalted butter
These ingredients create the creamy base and delicious flavor that defines banana pudding. The ripeness of the bananas plays a crucial role—go for slightly overripe ones for extra sweetness and softness.
Optional Add-ons
Want to elevate your banana pudding? Try these optional ingredients:
- Whipped cream or Cool Whip (for topping)
- Meringue (for a classic Southern touch)
- Shaved chocolate or chocolate chips (adds a decadent flair)
- Toasted coconut flakes (for a tropical twist)
- Cream cheese (for an extra creamy base)
With just a few tweaks, you can customize your pudding to suit your personal tastes or the preferences of your guests.
Tools and Equipment Required
To make banana pudding, you don’t need a fully-stocked kitchen. A few basic tools will do:
- Mixing bowls
- Medium saucepan
- Whisk
- Spatula
- Measuring cups and spoons
- Electric mixer (optional but helpful)
- Glass dish or trifle bowl (for layering)
- Plastic wrap (for chilling)
Having everything ready before you start will make the process smoother and more enjoyable.
Step-by-Step Banana Pudding Recipe
Step 1: Prepare the Ingredients
Start by gathering and prepping your ingredients. Slice the bananas into even 1/4-inch rounds. Open your box of vanilla wafers and set them aside. If you’re planning to make your own whipped cream or meringue, now is the time to do that as well.
In a separate bowl, separate your egg yolks and set them aside. Measure out your flour, sugar, milk, and other ingredients to make cooking easier and prevent any scrambling during the process.
Step 2: Make the Vanilla Pudding
Let’s get that creamy vanilla base going. In a medium saucepan, whisk together the sugar, flour, and salt. Slowly add the milk, whisking constantly to avoid lumps. Cook over medium heat until the mixture starts to thicken—this will take about 8-10 minutes.
Once it’s thickened, reduce the heat and gradually whisk in the beaten egg yolks. Stir constantly to prevent the eggs from curdling. Cook for another 2-3 minutes until the pudding reaches a custard-like consistency.
Remove from heat and stir in the butter and vanilla extract. Let it cool slightly before moving on to the next step.
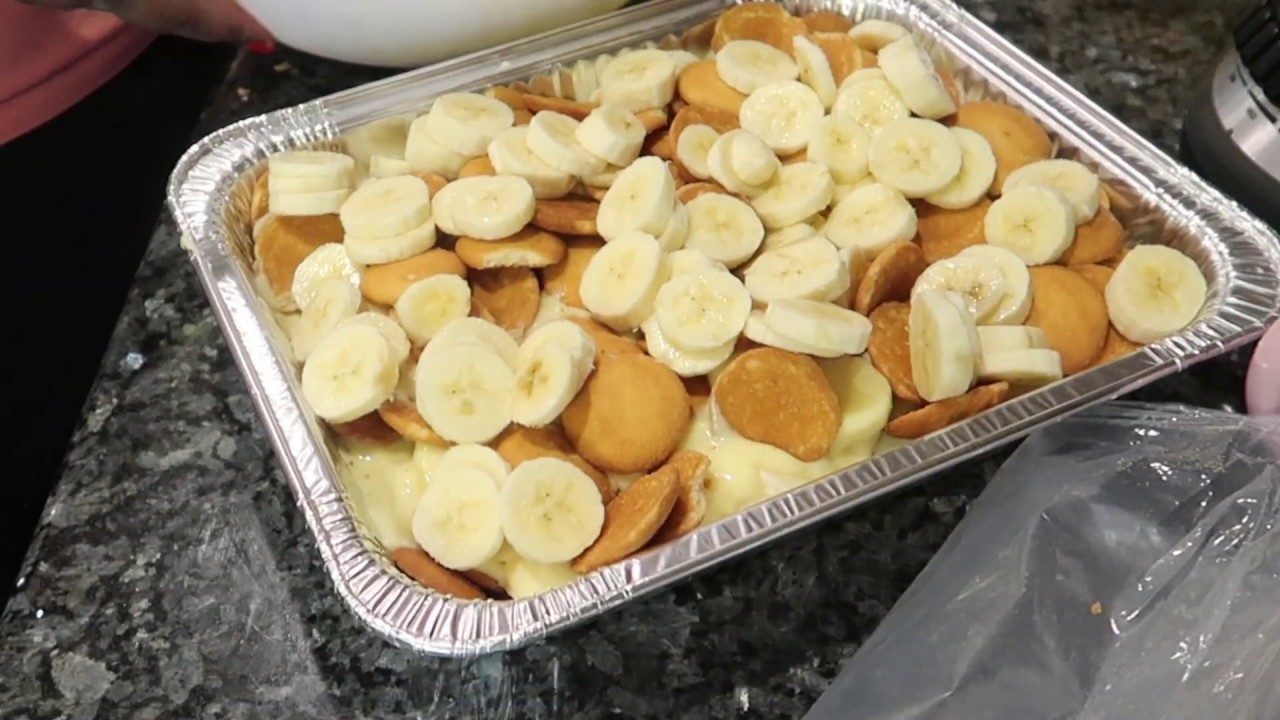
Step 3: Layering the Pudding
Now for the fun part—layering! In your glass dish or trifle bowl, start with a layer of vanilla wafers. Add a layer of banana slices, followed by a generous scoop of your homemade pudding. Repeat this layering process until all your ingredients are used up, finishing with a layer of pudding on top.
If you’re using whipped cream, spread it on top for a smooth finish. Want that old-school meringue vibe? Whip up those leftover egg whites with sugar and bake briefly to brown the top.
Step 4: Chilling the Dessert
Cover the dish with plastic wrap, pressing it directly onto the surface of the pudding to prevent a skin from forming. Chill it in the refrigerator for at least 4 hours, or overnight for best results. This step is essential—it allows the wafers to soften and the flavors to meld beautifully.
Step 5: Garnishing and Serving
When you’re ready to serve, add a final touch with more banana slices, crushed wafers, or a sprinkle of cinnamon. Serve it cold, straight from the dish, or spoon into individual dessert cups for a fancy presentation.
Tips and Tricks for the Best Banana Pudding
Making banana pudding might be simple, but a few expert tips can take your dessert from good to absolutely unforgettable. Let’s go through the tricks that seasoned home cooks swear by.
Use Overripe Bananas: The riper the banana, the sweeter and softer it is. If your bananas have brown spots, that’s a good sign. Avoid green bananas—they won’t provide the creamy texture or rich flavor you need.
Homemade Pudding > Instant Mix: While instant pudding is convenient, making your own gives you control over the flavor and consistency. Plus, you avoid unnecessary additives and enjoy a richer, more authentic taste.
Let It Sit Overnight: Patience pays off. Allowing the pudding to chill overnight gives the flavors time to meld and the wafers a chance to soak up the moisture, resulting in a smooth, creamy texture.
Layer Like a Pro: Don’t just throw the ingredients together. Be intentional with your layers—start with wafers, add banana slices, then pudding. Repeat. This method ensures every spoonful has the perfect balance of flavor and texture.
Prevent Browning: Bananas oxidize and turn brown quickly. To slow this process, toss the slices in a bit of lemon juice before layering. This won’t affect the taste much but will help maintain a fresh appearance.
Use Cold Milk for Pudding: If you’re making the pudding from scratch, cold milk helps blend the flour and sugar mixture more evenly, avoiding clumps and lumps.
Common Mistakes to Avoid
Even a simple recipe like banana pudding has its pitfalls. Here are the most common mistakes and how to dodge them:
1. Not Letting It Chill Enough: This isn’t a last-minute dessert. If you don’t chill it for at least four hours, you’ll miss out on the soft, cake-like texture that makes banana pudding so delicious. Rushing this step can leave you with runny pudding and crunchy wafers.
2. Using Unripe Bananas: Green bananas won’t soften properly in the fridge, leaving you with a chewy texture that clashes with the pudding. Make sure your bananas are ripe and spotty.
3. Overheating the Pudding Mixture: If you’re making homemade pudding, take it slow. High heat can scorch the bottom of the pan and curdle the eggs. Stir constantly and keep the heat at medium.
4. Skipping the Lemon Juice: It might seem like a small step, but skipping it can result in your bananas turning brown and unappetizing. A little lemon juice goes a long way in preserving freshness.
5. Forgetting the Wrap Touch: Always press plastic wrap directly onto the surface of your pudding while it chills. This prevents that gross skin from forming and keeps the top nice and smooth.
Banana Pudding Variations to Try
Feeling adventurous? Banana pudding is versatile, and with a few tweaks, you can create fun new versions that surprise and delight.
1. Chocolate Banana Pudding: Add layers of chocolate pudding or drizzle chocolate syrup between layers for a richer, more indulgent dessert.
2. Peanut Butter Twist: Swirl a bit of creamy peanut butter into the pudding for a banana-and-peanut-butter combo that’s pure comfort food.
3. Coconut Cream Pudding: Replace part of the milk with coconut milk and add toasted coconut flakes for a tropical flavor.
4. Banana Pudding Cheesecake: Blend cream cheese into the pudding mixture for a thicker, richer consistency that feels almost like cheesecake.
5. Vegan Banana Pudding: Use almond or coconut milk, egg replacers, and vegan vanilla wafers to create a dairy-free, plant-based version.
6. Biscoff Banana Pudding: Swap the vanilla wafers with Biscoff cookies for a caramelized, spiced flavor twist.
These creative spins can breathe new life into a classic, making it the perfect dessert for any occasion.
Nutritional Facts
Wondering what’s in a serving of banana pudding? Here’s a general nutritional breakdown for a typical serving (about 1 cup):
| Nutrient | Amount (Approx.) |
|---|---|
| Calories | 300-350 kcal |
| Carbohydrates | 45-50g |
| Sugars | 25-30g |
| Fat | 10-15g |
| Saturated Fat | 4-6g |
| Protein | 5-7g |
| Fiber | 2-3g |
| Sodium | 200-250mg |
Note: These values may vary depending on the ingredients used, especially if you use full-fat dairy or additional toppings like whipped cream or chocolate.
Banana pudding is a sweet treat, so while it’s not low-calorie, it’s definitely worth the indulgence every now and then. For a lighter version, consider using skim milk, sugar substitutes, or reducing the number of wafers.
Storing and Shelf Life
Banana pudding is best enjoyed fresh, but you can store it for later without compromising flavor too much.
Refrigeration: Always store banana pudding in the fridge. Keep it covered with plastic wrap or in an airtight container to preserve freshness. It will last for up to 3-4 days before the bananas start to brown and the texture changes.
Freezing: While you can freeze banana pudding, it’s not ideal. The texture of the bananas and pudding can become watery or mushy when thawed. If you do freeze it, make sure it’s in a tightly sealed container and consume within 1 month. Let it thaw in the fridge overnight before serving.
Make-Ahead Tip: You can make the pudding and slice the bananas in advance but layer everything the day before serving for the best texture.
FAQs about Simple Banana Pudding Recipe
Q1: Can I use instant pudding for banana pudding?
Yes, instant vanilla pudding is a quick and easy option. Just mix it with cold milk and layer with bananas and wafers for a fast dessert.
Q2: How long does banana pudding need to chill?
Ideally, chill it for at least 4 hours—or overnight—for the best flavor and texture. This allows the layers to set and blend beautifully.
Q3: Can I make banana pudding without eggs?
Absolutely! Many simple banana pudding recipes skip the eggs and use instant pudding or sweetened condensed milk instead.
Q4: How do I keep bananas from turning brown in the pudding?
Lightly coat the banana slices with lemon juice before layering. It helps slow down browning while keeping the taste fresh.
Q5: How long does homemade banana pudding last?
Store it covered in the fridge and enjoy within 3 days. After that, the bananas and wafers may get too soft.
Final Thoughts
Banana pudding is more than just a dessert—it’s a warm hug in a bowl. Whether you stick to the traditional Southern style or mix it up with your own creative spin, it’s a guaranteed crowd-pleaser. With simple ingredients and easy steps, this dish is perfect for beginners, busy families, or anyone craving a sweet nostalgic treat. So grab those bananas, fire up your stove, and let your inner chef shine. Trust me, once you make this once, it’ll become a staple in your dessert rotation.