Sesame Seed Chicken Recipe: Craving that sweet, sticky, crispy sesame seed chicken just like your favorite Chinese takeout spot? You’re in for a treat. This easy homemade recipe not only satisfies that restaurant-quality craving, but it’s also healthier and budget-friendly.
Whether you’re cooking for a weeknight dinner or planning a small gathering, this sesame seed chicken recipe will have everyone licking their fingers and asking for seconds.
Let’s get into this delicious journey—step by step!
What is Sesame Seed Chicken?
Sesame seed chicken is a classic Chinese-American dish featuring crispy fried chicken bites coated in a sweet and savory sauce, then sprinkled with toasted sesame seeds for that iconic nutty crunch. Think of it as the cousin of General Tso’s or Orange Chicken—but with its own unique flavor profile. The sauce is usually made with a mixture of soy sauce, honey or sugar, garlic, and sesame oil. It’s sweet, tangy, and slightly sticky. The chicken is typically deep-fried, but you can also bake or air-fry it for a healthier twist.
Why You’ll Love This Recipe
Here’s why this dish is going to be your new go-to:
- Quick and easy: No complicated techniques involved.
- Better than takeout: Made fresh with real ingredients.
- Customizable: Control the spice, sweetness, and even how crispy you want it.
- Family-friendly: Kids and adults alike will devour it.
- Meal-prep friendly: Make a batch and enjoy it over a few days.
Ready to start cooking?
List of Ingredients You’ll Need
For the Chicken Marinade:
- 1.5 lbs boneless, skinless chicken breast or thighs (cut into 1-inch cubes)
- 2 tablespoons soy sauce
- 1 tablespoon rice vinegar
- 1 tablespoon cornstarch
- 1 large egg
For the Sauce:
- 1/3 cup soy sauce (low sodium preferred)
- 1/4 cup honey or brown sugar
- 2 tablespoons ketchup
- 1 tablespoon rice vinegar
- 1 tablespoon sesame oil
- 1 tablespoon cornstarch (dissolved in 2 tablespoons water)
- 2 cloves garlic (minced)
- 1 teaspoon fresh ginger (grated, optional)
- 1/4 teaspoon red pepper flakes (optional for heat)
For Garnish and Coating:
- 1/2 cup cornstarch (for coating)
- Vegetable oil (for frying)
- 2 tablespoons sesame seeds (toasted)
- 2-3 green onions (sliced, optional)
Tools & Equipment Needed
- Mixing bowls
- Wok or deep skillet
- Whisk
- Frying pan or deep fryer
- Slotted spoon
- Paper towels
- Tongs
- Plate lined with paper towels
Tips Before You Start Cooking
- Prep everything before you start cooking. This dish moves fast, especially when frying.
- Use boneless thighs for more flavor and juiciness, but breasts work if preferred.
- Toasted sesame seeds add a richer flavor—don’t skip this step!
- Control the sauce thickness with cornstarch slurry—adjust based on how sticky you want it.
Step-by-Step Guide to Making Sesame Seed Chicken
Step 1: Prepare the Chicken
Start by cutting your chicken into even, bite-sized pieces. This helps ensure even cooking and perfect crispy edges on every piece. Rinse lightly and pat dry with paper towels to remove excess moisture. Moisture is the enemy of crispiness, so drying is key!
Step 2: Make the Marinade
In a large bowl, combine soy sauce, rice vinegar, egg, and 1 tablespoon of cornstarch. Whisk it all together to form a smooth mixture. Add the chicken pieces and toss until well coated. Let it sit for at least 15–20 minutes. This not only flavors the chicken but also helps tenderize it.
Step 3: Marinate the Chicken
While your chicken is marinating, take a breath and prep the rest. Marinating allows all those salty, tangy, and umami flavors to soak deep into the chicken. If you have more time, feel free to marinate for 1–2 hours in the fridge for even better flavor.
Step 4: Prepare the Sauce
While your chicken marinates, let’s make that incredible sauce. In a small bowl, mix together:
- Soy sauce
- Honey or brown sugar
- Ketchup
- Rice vinegar
- Sesame oil
- Minced garlic
- Grated ginger
- Red pepper flakes (optional)
Mix well. In a separate small bowl, dissolve the cornstarch in water. Set this slurry aside for later use.
Step 5: Coat and Fry the Chicken
Heat 1–2 inches of vegetable oil in a deep pan over medium heat. While the oil heats, take each marinated chicken piece and coat it in cornstarch, pressing slightly it in cornstarch, pressing slightly so it sticks. Test the oil by dropping a small piece—if it sizzles, it’s ready.
Carefully fry the chicken in batches. Don’t overcrowd the pan. Fry until golden and crispy, about 4–5 minutes per batch. Remove using a slotted spoon and drain on paper towels. Keep warm.
Step 6: Toss the Chicken in Sauce
Drain the oil from your pan and wipe clean. Pour the sauce into the same pan and bring to a simmer over medium heat. Add the cornstarch slurry and stir continuously until the sauce thickens and gets that glossy, sticky texture—usually within 2 minutes.
Once thick, toss in your crispy chicken pieces and stir until fully coated in the sauce. The smell at this stage? Irresistible.
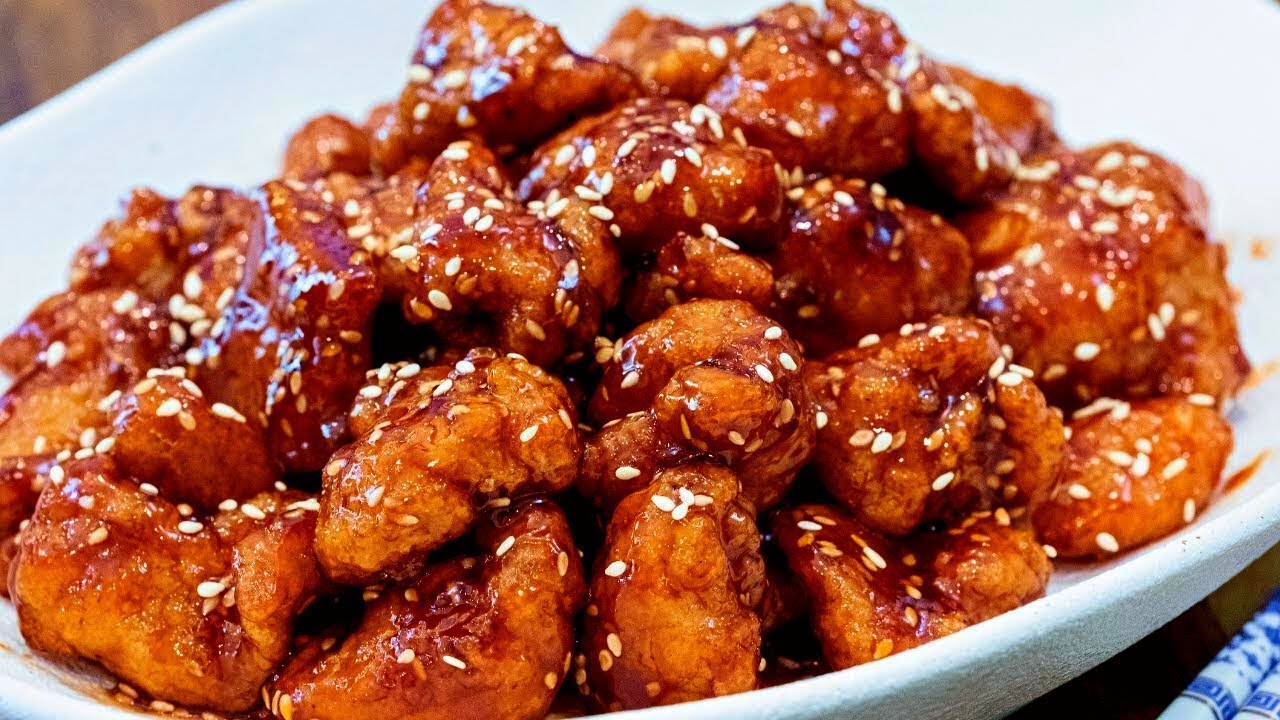
Step 7: Garnish and Serve
Sprinkle toasted sesame seeds all over the coated chicken. Add chopped green onions if using. Serve hot over steamed rice or noodles for the full takeout experience at home.
How to Get the Perfect Crispy Texture
If you’re dreaming of that restaurant-style crunch, there are a few golden rules to follow. First, your chicken must be dry before marinating—blot it with paper towels to remove surface moisture. Second, your oil temperature matters a lot. Aim for 350°F to 375°F (175°C to 190°C) for the perfect fry. Too low and the chicken absorbs oil, turning soggy; too high and the outside burns before the inside is done.
Use cornstarch instead of flour for a lighter, crispier crust. Some people like to double fry—fry once, let it rest for a minute or two, then fry again for extra crunch. It works wonders if you’re serving the dish later and want to keep that crispiness alive. Finally, never cover your fried chicken right after cooking—steam will kill the crunch!
Alternative Cooking Methods (Baking or Air Fryer)
Want a healthier option without all the oil? No problem—here are two great alternatives:
Baking Method:
- Preheat your oven to 400°F (200°C).
- Line a baking tray with parchment paper and spray with oil.
- Place the coated chicken pieces evenly spaced.
- Lightly spray or brush the tops with oil.
- Bake for 20–25 minutes, flipping halfway, until golden and crisp.
- Toss in the sauce just like in the original method.
Air Fryer Method:
- Preheat your air fryer to 380°F (193°C).
- Spray the basket with non-stick cooking spray.
- Add chicken in a single layer (don’t overcrowd).
- Cook for 12–15 minutes, flipping halfway through.
- Once crisp, toss in the sticky sesame sauce and serve hot.
Both methods give you that satisfying bite without the extra oil, and cleanup is a breeze!
Healthy Swaps for a Lighter Version
Trying to make this dish a bit more waistline-friendly? Here are a few smart swaps:
- Use chicken breast instead of thighs for a leaner cut.
- Bake or air fry instead of deep frying.
- Reduce sugar or use honey for a natural sweetener.
- Add steamed veggies like broccoli or snow peas for more nutrients.
- Swap white rice for brown rice or cauliflower rice.
You can also control your sodium by using low-sodium soy sauce and reducing the overall salt. The flavor will still be amazing, and your body will thank you.
Best Side Dishes to Serve With Sesame Chicken
Wondering what to pair it with for a full meal? Here are some fan favorites:
- Steamed Jasmine or Basmati Rice
- Fried Rice (with veggies or egg)
- Chow Mein or Lo Mein Noodles
- Stir-Fried Vegetables (bok choy, broccoli, bell peppers)
- Egg Rolls or Spring Rolls
- Asian Slaw with sesame vinaigrette
These sides not only complement the flavor, but they also stretch the meal out for more servings—great for families or meal prepping!
Storing and Reheating Leftovers
Got leftovers? Lucky you! Here’s how to keep them tasting fresh:
Storage Tips:
- Cool the chicken completely before storing.
- Use an airtight container.
- Store in the fridge for up to 3–4 days.
Reheating Tips:
- For best results, reheat in the oven or air fryer to bring back crispiness.
- Avoid microwaving if possible—it makes the chicken soggy.
- Reheat at 350°F (175°C) for 10–12 minutes or until heated through.
- Reheat sauce separately if stored apart.
Common Mistakes to Avoid
Let’s talk about what not to do, so your sesame chicken turns out perfect:
- Skipping the marinade – This makes a huge difference in taste.
- Overcrowding the frying pan – Leads to uneven cooking and soggy chicken.
- Undercooking the sauce – It should be thick and sticky, not watery.
- Not using fresh garlic/ginger – These elevate the flavor significantly.
- Not drying the chicken before coating – You’ll lose that crisp texture.
Avoid these pitfalls, and your homemade sesame chicken will rival any restaurant!
Nutritional Information (Approximate)
| Nutrient | Per Serving (1 cup) |
|---|---|
| Calories | 420 |
| Protein | 30g |
| Carbs | 28g |
| Sugar | 12g |
| Fat | 20g |
| Saturated Fat | 3.5g |
| Sodium | 780mg |
Note: Values vary based on portion size and preparation method.
FAQs about Sesame Seed Chicken Recipe
1. Can I make this recipe ahead of time?
Yes! You can marinate the chicken up to 24 hours in advance and store it in the fridge. You can also fry it and refrigerate, then reheat and toss in sauce when ready to serve.
2. Can I freeze sesame chicken?
Absolutely. Store cooled chicken in an airtight container for up to 2 months. Reheat in the oven or air fryer, then toss in freshly made sauce.
3. Is sesame seed chicken spicy?
Not by default, but you can make it spicy by adding red pepper flakes or Sriracha to the sauce.
4. Can I use tofu or shrimp instead of chicken?
Yes! Tofu (extra firm) works great for a vegetarian version. Shrimp can also be used—just reduce cooking time since they cook faster.
5. What can I substitute for rice vinegar?
Apple cider vinegar or white vinegar with a pinch of sugar will do the trick if you’re out of rice vinegar.
Conclusion
There you have it—crispy, flavorful, homemade Sesame Seed Chicken with a sticky, glossy sauce that hits all the right notes. Whether you’re frying, baking, or air-frying, this recipe offers a delicious alternative to takeout with simple ingredients and easy-to-follow steps. Plus, you can customize it to suit your diet, spice tolerance, and cooking style.
Cooking at home doesn’t have to be boring or complicated. With this recipe, you’re not just making dinner—you’re creating a dish that brings joy, flavor, and maybe a little wow-factor to your table.