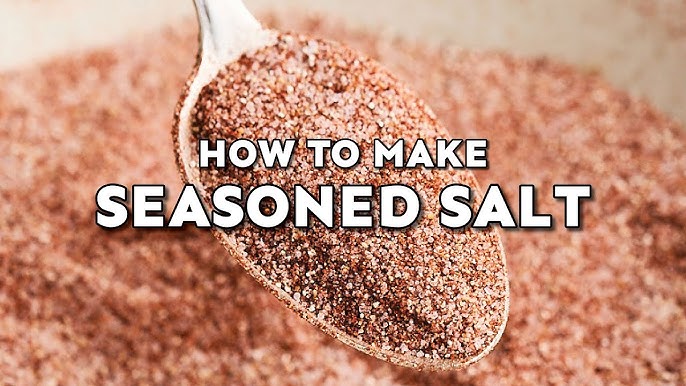
Seasoned Salt Recipe: Seasoned salt is a magical mix of salt combined with various spices and herbs to enhance the flavor of almost any dish. Unlike plain salt, seasoned salt brings a burst of flavor that can transform simple recipes into savory masterpieces. It’s a pantry staple in many homes and commercial kitchens, and for good reason—it’s versatile, easy to use, and incredibly flavorful.
At its core, seasoned salt typically includes table salt or sea salt, paprika, garlic powder, and onion powder. However, the beauty of it lies in customization. You can toss in dried herbs, pepper, celery salt, chili powder, or even sugar depending on the flavor profile you’re aiming for. Think of it as your go-to spice blend when you want something beyond basic salt and pepper.
What makes seasoned salt so appealing is how it pairs with a wide range of foods. Sprinkle it on fries, rub it into meats, mix it into soups, or dust it on roasted veggies. It’s not just for meats or savory snacks—it’s also perfect for popcorn, salad dressings, and even eggs. If you’ve ever tried a brand like Lawry’s, then you’ve had a taste of what seasoned salt is all about. But homemade? That’s a whole new level of delicious.
Why Make Your Own Seasoned Salt?
Making your own seasoned salt isn’t just a fun little DIY project—it’s a culinary power move. When you create your own blend, you’re in control. No more settling for store-bought versions packed with preservatives, anti-caking agents, or excess sodium. You know exactly what’s going in your mix, and you can tweak it to suit your taste preferences perfectly.
Homemade seasoned salt is also incredibly economical. Instead of buying multiple seasoning blends or constantly restocking store-bought options, you can mix a large batch at home using inexpensive pantry staples. Plus, you get to enjoy the process of creating something custom and delicious.
Whether you’re sensitive to certain ingredients or just want to lower your sodium intake, making your own seasoned salt gives you the freedom to personalize. Want a smoky touch? Add chipotle powder. Looking for something herby? Toss in dried rosemary or thyme. The possibilities are endless.
And don’t overlook the gifting potential. A beautifully jarred homemade seasoned salt blend makes an excellent DIY gift for birthdays, holidays, or housewarmings. It’s thoughtful, practical, and delicious—what more could anyone want?
Benefits of Homemade Seasoned Salt
Health Benefits
One of the most significant reasons to go homemade with your seasoned salt is the potential health benefits. Store-bought versions often contain high amounts of sodium and artificial additives that can be harmful in the long run. By making it yourself, you can cut back on sodium, avoid artificial preservatives, and ensure all the ingredients are clean and natural.
For those watching their blood pressure, sodium intake is a major concern. By adjusting the salt content in your homemade blend, you can enjoy flavor without compromising your health. You can also experiment with potassium-based salt substitutes or low-sodium salts for a healthier twist.
Additionally, if you have food allergies or sensitivities, homemade seasoned salt is a safer option. You won’t have to worry about hidden allergens like gluten, MSG, or dairy that sometimes sneak into commercial seasoning blends. You control what goes in and what stays out.
The fresh spices used in homemade seasoned salt are often more potent and flavorful, allowing you to use less seasoning overall. That means fewer additives, less sodium, and a healthier overall dish.
Custom Flavor Control
Flavor is personal, and seasoned salt is the perfect canvas to express your culinary creativity. Maybe you love a garlicky punch, or perhaps you’re into something smoky or herby. Making your own blend means you get to be the boss of your tastebuds.
Want a Southwestern flair? Add cumin and smoked paprika. Prefer a Mediterranean vibe? Try oregano, basil, and lemon zest. The customization doesn’t stop at herbs and spices—you can also play with textures, using coarse sea salt for a crunchier feel or finely ground salt for a smoother blend.
Customizing your own seasoned salt also means you can tweak it for different dishes. Make a special blend just for grilling. Create a low-sodium version for everyday use. The possibilities are endless, and you can keep several versions on hand depending on the meal you’re preparing.
Not only does this elevate your cooking, but it also adds a personal touch that store-bought blends just can’t match. It turns your meals into something uniquely yours—tailored, intentional, and deliciously satisfying.
Essential Ingredients for Seasoned Salt
Base Ingredients
The core ingredients of any good seasoned salt are pretty straightforward, and most are probably already sitting in your spice rack. Here’s a breakdown of the basics:
- Salt: The foundation of your mix. Kosher salt, sea salt, or even Himalayan pink salt can work. Choose one with a texture and flavor you like.
- Garlic Powder: Adds that signature savory depth.
- Onion Powder: Brings a sweet, slightly tangy note.
- Paprika: Offers color and a mild peppery warmth. Use smoked paprika for a bolder flavor.
These ingredients create a balanced base that enhances the natural flavor of your dishes without overpowering them. They’re the starting point—once you’ve nailed this mix, you can build from there.
Optional Additions for Extra Flavor
Here’s where things get fun. Want to add some heat? Try cayenne pepper or crushed red pepper flakes. Need a touch of sweetness? Add a bit of brown sugar. Here are some popular extras to consider:
- Black Pepper: Classic and necessary for that little kick.
- Celery Salt: Adds a savory, earthy taste that pairs well with meats.
- Dried Herbs: Rosemary, thyme, oregano, and parsley bring herbal notes.
- Chili Powder or Cumin: For a Tex-Mex touch.
- Mustard Powder: Adds tang and complexity.
- Sugar or Brown Sugar: Balances out savory and spicy notes.
This is your chance to personalize. Don’t be afraid to experiment. Keep tasting and adjusting until you find your signature blend. That’s the beauty of homemade seasoning—it’s a flavor journey designed by you.
Tools and Equipment Needed
Kitchen Tools
You don’t need any fancy equipment to make seasoned salt. Just a few kitchen basics:
- Mixing Bowl: A small to medium-sized bowl will work great for blending your spices.
- Measuring Spoons: Precision matters for balanced flavor.
- Whisk or Spoon: For mixing everything thoroughly.
- Spice Grinder or Mortar and Pestle (Optional): If you’re using coarse spices or want a finer blend.
Having a clean, dry space to work is also key. Moisture can ruin your blend, leading to clumping or spoilage. Make sure all your tools are dry before you begin.
Storage Tips
To keep your seasoned salt fresh and potent, storage is crucial. Here are some tips:
- Airtight Jars or Containers: Use glass jars or plastic containers with tight lids.
- Labeling: Don’t forget to write the date and name of the blend. You’ll thank yourself later.
- Cool, Dark Place: Keep it in a pantry or cabinet away from heat and sunlight.
When stored properly, homemade seasoned salt can last up to 6 months, though it’s best used within 3–4 months for peak flavor. Always use a clean spoon when scooping to avoid contamination.
Step-by-Step Guide to Making Seasoned Salt
Step 1: Gather Your Ingredients
Before you even pick up a mixing bowl, it’s essential to gather all your ingredients. This not only saves time but ensures you don’t miss anything once you start combining. Here’s what you’ll need for a basic seasoned salt recipe:
Basic Seasoned Salt Ingredients:
- 1/4 cup kosher salt (or sea salt)
- 1 tbsp paprika (smoked or sweet)
- 1 tbsp garlic powder
- 1 tbsp onion powder
- 1 tsp black pepper
Optional Additions:
- 1 tsp dried parsley
- 1/2 tsp celery salt
- 1/2 tsp cayenne pepper (for heat)
- 1/2 tsp sugar or brown sugar (for a mild sweetness)
- 1/2 tsp mustard powder (adds tanginess)
- Pinch of turmeric (for color and a touch of bitterness)
You can double or triple the quantities depending on how much you want to make. It’s always better to make a larger batch and store it than to mix a new batch every time.
Pro tip: Use fresh spices. The older the spice, the weaker its flavor. If your garlic powder or paprika has been sitting in your pantry for years, it’s probably time to refresh.
Arrange your spices on your countertop, set out your measuring tools, and keep your storage container ready. This organized setup will make the mixing process seamless.
Step 2: Measure and Mix
Now that you’ve gathered your ingredients, it’s time to measure and mix them together. Precision is key here, especially if you want a consistent taste every time you use this blend. Use dry measuring spoons to ensure accuracy.
Steps to Mix:
- Add the kosher salt to your mixing bowl first. This is the bulk of your blend and sets the foundation for the rest of the ingredients.
- Layer in the paprika, garlic powder, and onion powder next. These are your main flavor enhancers.
- Add any additional spices you’re using like pepper, sugar, or herbs.
- Use a whisk or spoon to mix everything thoroughly. Stir from the bottom up to make sure the salt doesn’t settle.
If you want an ultra-smooth blend, you can run the mixture through a spice grinder or a blender for a few seconds. This helps distribute the flavors more evenly and gives your seasoned salt a finer texture—great for sprinkling!
Tips:
- Taste your mix as you go. You can always adjust flavors on the spot.
- Want to test it before committing to a large batch? Sprinkle a bit on a piece of raw veggie or popcorn to get a flavor preview.
Mixing by hand also gives you more control over the final texture. If you prefer chunkier blends with visible herbs, stick to a spoon. If you like it smooth, go for a quick pulse in a grinder.
Step 3: Blend and Store
After mixing, it’s time to store your seasoned salt. This is a critical step that ensures the blend stays fresh and flavorful for months to come.
Storage Tips:
- Container Choice: Use an airtight container—preferably glass with a tight-fitting lid. Mason jars work perfectly and look great, too.
- Label Everything: Include the date and ingredients used. This helps you track freshness and replicate the blend later.
- Storage Location: Keep the container in a cool, dry, and dark place—like a spice rack, pantry, or cupboard. Avoid storing near the stove, as heat can degrade the spices.
Homemade seasoned salt usually lasts for about 6 months. The flavor won’t go bad overnight, but it will fade gradually. If you notice the blend isn’t as punchy as before, it might be time to whip up a fresh batch.
Troubleshooting:
- Clumping: If your salt clumps, it might have absorbed moisture. Try adding a few grains of uncooked rice or a silica gel packet to the container to absorb excess moisture.
- Flavor too strong or weak? Adjust ratios in your next batch. Keep notes of what worked or didn’t.
Usage Ideas:
- Use it as a dry rub for meats.
- Sprinkle over fries or popcorn.
- Add it to scrambled eggs or roasted veggies.
- Mix with olive oil for a quick marinade.
Your homemade seasoned salt isn’t just a blend—it’s a game-changer for your kitchen. Once you start using it, you’ll find yourself reaching for it more often than any store-bought option.
Creative Variations of Seasoned Salt
Herb-Infused Seasoned Salt
If you’re into earthy, aromatic flavors, herb-infused seasoned salt is a must-try. This variation leans into the savory charm of dried herbs like thyme, rosemary, oregano, and basil. It’s perfect for Italian dishes, roasted potatoes, grilled vegetables, and even poultry.
Ingredients for Herb-Infused Seasoned Salt:
- 1/4 cup kosher salt
- 1 tbsp garlic powder
- 1 tbsp onion powder
- 1 tsp dried thyme
- 1 tsp dried rosemary (crushed)
- 1 tsp dried basil
- 1/2 tsp black pepper
Why This Works:
The combination of herbs adds layers of flavor that mimic the aroma of fresh herbs simmering in olive oil. It’s the kind of seasoning that makes everything taste like it came from a gourmet kitchen. Just make sure your dried herbs are finely ground so they mix evenly.
This version also makes a fantastic base for salad dressings and herby marinades. Try rubbing it onto chicken before roasting for a golden, flavor-packed crust that’s better than any store-bought seasoning.
Spicy Cajun-Style Seasoned Salt
For those who love bold flavors and a little heat, Cajun-style seasoned salt brings the fire. Inspired by the robust, spicy flavors of Louisiana cuisine, this version is excellent for seafood, fries, chicken wings, and anything you want to kick up a notch.
Cajun Seasoned Salt Ingredients:
- 1/4 cup kosher salt
- 1 tbsp smoked paprika
- 1 tbsp garlic powder
- 1 tbsp onion powder
- 1 tsp cayenne pepper
- 1 tsp black pepper
- 1 tsp oregano
- 1/2 tsp thyme
- 1/2 tsp white pepper (optional)
Flavor Profile:
Expect heat, smoke, and a strong savory punch. This isn’t for the faint of heart, but if you like your food bold and flavorful, it’s a top pick. The blend of cayenne and smoked paprika makes it perfect for dry rubs and spicy marinades.
Keep this version on hand for shrimp boils, blackened fish, or spicing up your morning eggs. It’s like a little Mardi Gras in a jar.
How to Use Seasoned Salt in Everyday Cooking
As a Dry Rub for Meats
One of the most popular uses for seasoned salt is as a dry rub for meat. Whether you’re grilling steaks, roasting chicken, or baking pork chops, seasoned salt can add a depth of flavor without overwhelming the natural taste of the meat.
Tips for Using as a Rub:
- Pat your meat dry before applying.
- Rub the seasoning generously and evenly.
- Let the seasoned meat rest for at least 15-30 minutes before cooking, or refrigerate overnight for deeper flavor.
It’s particularly great for grilling because the salt helps draw out moisture, allowing a beautiful crust to form while keeping the inside juicy.
Sprinkled on Snacks and Veggies
Seasoned salt isn’t just for meat—it’s a game changer for snacks and vegetables too. Popcorn, roasted nuts, french fries, sweet potato wedges, and even fresh tomatoes benefit from a quick shake of seasoned salt.
Quick Ideas:
- Mix it into butter for a seasoned popcorn topping.
- Toss roasted vegetables in olive oil and seasoned salt before baking.
- Sprinkle on avocado toast for a gourmet touch.
This adds flavor without needing to drown your food in sauces or dips. It’s that final flourish that makes a good dish great.
Storing and Preserving Your Homemade Blend
Best Storage Practices
Storing your seasoned salt the right way is essential for maintaining its flavor and freshness. Air, light, and moisture are the enemies of spice blends.
Best Practices:
- Use glass jars or BPA-free plastic containers with airtight lids.
- Store in a cool, dark cupboard away from the stove or window.
- Always use a clean, dry spoon when scooping to prevent contamination or clumping.
Shelf Life and Signs of Spoilage
Homemade seasoned salt can last up to 6 months, but its best quality is usually within the first 3-4 months. Here’s how to know if your blend has gone stale:
Signs to Watch For:
- Faded aroma or lack of smell.
- Clumping or hard texture due to moisture.
- Dull color or loss of vibrancy.
If your blend doesn’t smell as bold or seems off in texture, it’s time to make a new batch.
Packaging Ideas for Gifts
DIY Gift Jar Ideas
Homemade seasoned salt isn’t just practical—it’s gift-worthy. With a little creativity, you can turn your spice mix into a charming, thoughtful gift.
Creative Packaging Tips:
- Use small mason jars or spice jars with custom labels.
- Tie with twine and attach a recipe card with usage ideas.
- Include multiple blends in a gift box: like a classic, spicy, and herb-infused trio.
This makes a great gift for holidays, birthdays, housewarmings, or as a thank-you for hosts. It’s personal, useful, and shows you care enough to craft something from scratch.
FAQs about Seasoned Salt Recipe
1. Can I use sea salt instead of kosher salt?
Absolutely! Sea salt works just fine. Just be sure it’s not too coarse unless that’s the texture you prefer.
2. How do I prevent clumping in my seasoned salt?
Store it in an airtight jar and consider adding a few grains of uncooked rice to absorb moisture.
3. What’s the best way to grind the blend?
You can use a spice grinder or a mortar and pestle for a finer, more consistent texture.
4. How can I make a low-sodium version?
Reduce the amount of salt and boost the flavor with more herbs, garlic, onion powder, and spices.
5. Can I add fresh herbs?
It’s best to stick with dried herbs for shelf stability. Fresh herbs introduce moisture and can spoil the mix.
Conclusion
Seasoned salt is more than just a kitchen staple—it’s a customizable flavor booster that turns ordinary meals into something extraordinary. Whether you prefer bold Cajun spice or a gentle herb blend, making your own gives you full control over flavor, health, and creativity. With just a few pantry ingredients and a bit of mixing, you’ll have a secret weapon in your kitchen that can elevate anything you cook. Go ahead, make your own, experiment with new flavors, and enjoy the savory magic of seasoned salt in every bite.