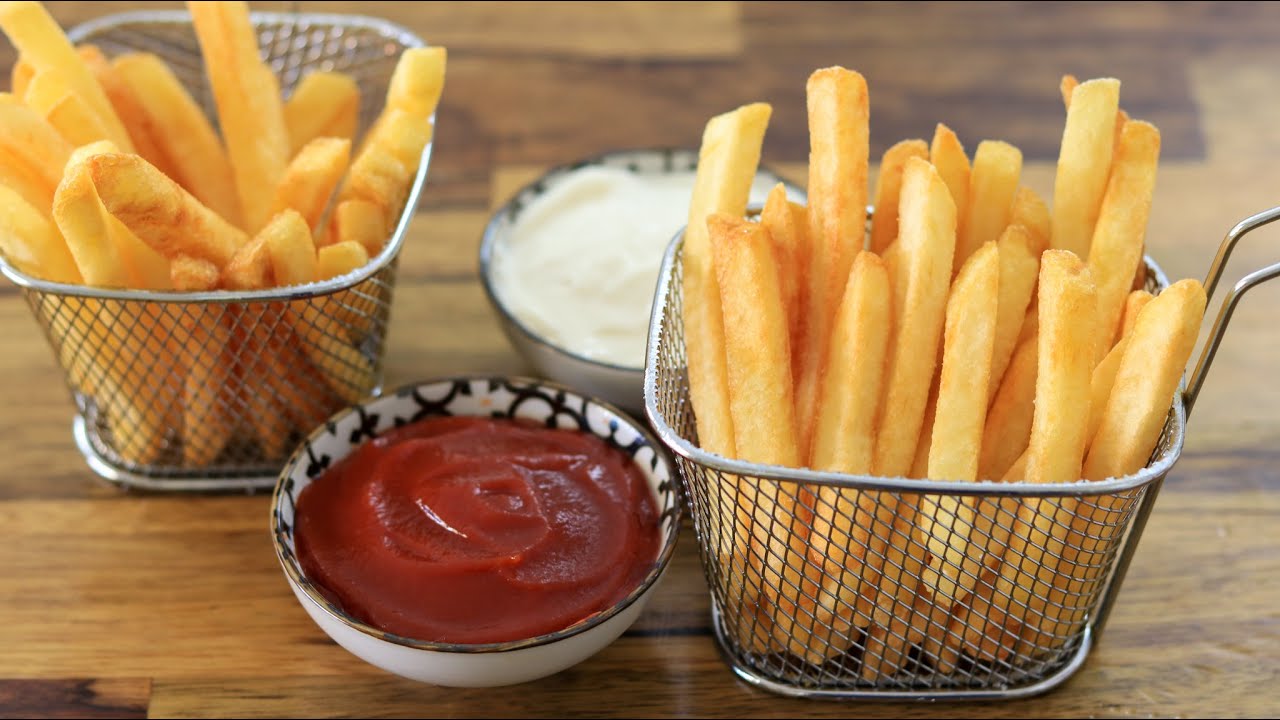
Seasoned Fries Recipe: Who doesn’t love a big basket of crispy, golden fries? But let’s be honest—plain salted fries can get a little boring after a while. That’s where seasoned fries come in. They’re bold, flavorful, and a fun twist on a classic comfort food. Whether you’re making a cozy meal at home or prepping snacks for a get-together, these fries will become your go-to favorite. And guess what? You don’t have to rely on fast food joints to get them anymore—you can totally make restaurant-style seasoned fries right at home with just a few pantry staples.
This step-by-step guide will walk you through everything you need—from the perfect potato choice to the best spice blend, and multiple cooking methods so you can pick your favorite (or try them all!). Ready to upgrade your fry game? Let’s get started!
Why Homemade Seasoned Fries Are Better Than Store-Bought
Store-bought seasoned fries often come loaded with preservatives, mystery ingredients, and that “fake flavor” that’s just not quite right. On top of that, they’re usually pre-fried and frozen, which compromises both taste and texture. When you make them at home, you’re in full control. You can adjust the flavor, spice level, and crispiness exactly the way you like. No more soggy fries or overpowering seasoning blends.
Plus, making them from scratch isn’t just healthier—it’s actually really fun! You can get creative with your seasoning mix, try different dipping sauces, and impress your friends or family with your chef-level skills. Bonus: they’re way more affordable, too.
The Secret to Perfectly Crispy Fries
Here’s the secret to insanely crispy fries: prep and patience. Many people skip key steps like soaking or drying the potatoes, which leads to sad, limp fries. But when you soak the cut potatoes in cold water, it removes excess starch. This one step alone can make the difference between soggy and crispy.
Also, drying the fries well and cooking them at the right temperature (especially with a double-fry method or air fryer) helps get that golden crunch on the outside while keeping the inside fluffy. Don’t worry, we’ll break it all down for you step by step.
Choosing the Right Potatoes
Best Potato Varieties
When it comes to fries, Russet potatoes are the MVPs. They’re high in starch and low in moisture, which means they’ll crisp up beautifully when cooked. They also have that classic “fluffy inside, crispy outside” texture we all crave.
What to Avoid
Waxy potatoes like red potatoes or fingerlings are better for boiling or roasting—not frying. They tend to stay dense and don’t give you the crispy texture you’re aiming for.
Pro Tip: Look for firm, unblemished potatoes with no green spots or sprouting eyes.
List of Ingredients You’ll Need
Here’s what you’ll need for the perfect seasoned fries:
For the Fries:
- 4 large Russet potatoes
- Cold water (for soaking)
- Vegetable oil (for frying or brushing if baking/air frying)
For the Seasoning Mix:
- 1 tsp salt (or to taste)
- 1 tsp paprika (adds color + mild heat)
- ½ tsp garlic powder
- ½ tsp onion powder
- ¼ tsp black pepper
- ½ tsp cayenne pepper (optional, for spice)
- 1 tsp dried parsley or oregano (optional for garnish)
Feel free to tweak these to your liking! Want a smoky flavor? Add smoked paprika. Love spice? Amp up the cayenne.
Essential Tools for Making Seasoned Fries
Having the right tools makes the process easier and helps you get consistent results.
You’ll need:
- A large bowl (for soaking)
- Paper towels or clean kitchen towel (for drying)
- A sharp knife or fry cutter
- Baking tray (for oven-baked)
- Air fryer (optional)
- Deep fryer or deep pot (for frying)
- Tongs or a slotted spoon
- Wire rack (to cool fries)
- Large mixing bowl (to toss fries in seasoning)
Prepping the Potatoes
Washing and Peeling
Start by scrubbing the potatoes clean. You can peel them if you prefer a classic look, but leaving the skin on adds texture and nutrition. It’s totally up to you.
How to Cut Fries Evenly
Cut the potatoes into even matchsticks—about ¼ inch thick. Uniformity is key so they cook evenly. You can use a fry cutter if you have one, or just take your time with a sharp knife.
Pro Tip: Cut one side of the potato flat first so it sits still on the board—this makes cutting safer and easier.
Soaking the Potatoes – Why It’s Important
This step might sound unnecessary, but it’s the #1 key to perfect fries. Soaking the potatoes in cold water for at least 30 minutes (or up to a few hours) pulls out the excess starch. Too much surface starch leads to sticky fries that don’t crisp up properly.
You’ll actually see the water get cloudy—yep, that’s the starch leaving the potatoes.
Bonus Tip: If you have time, soak them overnight in the fridge. Just make sure to dry them really well before cooking.
Drying the Potatoes for Maximum Crispiness
After soaking, drain the potatoes and pat them completely dry with paper towels or a clean kitchen towel. Moisture is the enemy of crispiness—so take your time here.
Lay them out in a single layer and blot off as much water as possible. If you’re air frying or baking, this step is even more important to avoid steam, which can make your fries limp.
The Ultimate Seasoning Blend
This is where the magic happens. While many people use pre-made seasoning salts, mixing your own is fresher, tastier, and allows for full customization.
Suggested Spice Mix:
- 1 tsp salt
- 1 tsp paprika
- ½ tsp garlic powder
- ½ tsp onion powder
- ¼ tsp black pepper
- ½ tsp cayenne (optional for heat)
- 1 tsp dried parsley (for color + aroma)
Mix all the spices in a small bowl and set aside. You’ll sprinkle this on the fries right after they’re cooked so it sticks properly.
Step-by-Step Guide to Cooking Seasoned Fries
Alright, your potatoes are cut, soaked, dried, and your seasoning blend is ready. Now it’s time to cook! You’ve got three solid methods to choose from depending on your tools and preference. Let’s break each one down.
Method 1: Deep Frying (Classic and Crispy)
Step-by-Step:
- Heat the oil – Pour vegetable oil into a deep fryer or a heavy-bottomed pot. Heat it to around 325°F (163°C) for the first fry. Use a thermometer if you can—it makes a big difference.
- First Fry (Blanching) – Fry the potatoes in small batches for 3-4 minutes until they’re soft but not yet golden. Remove them and let them drain on a wire rack or paper towels.
- Let them rest – This gives the potatoes a chance to cool and develop structure.
- Second Fry (The Crisping) – Reheat the oil to 375°F (190°C) and fry the same batches for another 2-3 minutes until they’re golden and crispy.
- Drain and Season – Immediately transfer to a bowl and toss with your seasoning blend while the fries are still hot and slightly oily (that’s how the seasoning sticks!).
Pros: Super crispy, fast
Cons: Uses a lot of oil, can be messy
Method 2: Oven-Baked (Healthier Option)
Step-by-Step:
- Preheat your oven to 425°F (220°C).
- Line a baking tray with parchment paper or foil. Lightly grease it with oil.
- Toss fries in oil – Use 2-3 tablespoons of vegetable or olive oil. Make sure each fry is lightly coated.
- Spread in a single layer – Don’t overcrowd the tray. This ensures even browning.
- Bake for 20 minutes, flip, and then bake for another 15-20 minutes or until golden brown and crispy.
- Season immediately after removing from the oven.
Pros: Healthier, no frying mess
Cons: Takes longer, slightly less crispy than frying
Method 3: Air Fryer (Quick & Crunchy)
Step-by-Step:
- Preheat air fryer to 375°F (190°C).
- Lightly oil the fries – Just a tablespoon of oil is enough.
- Add fries in batches – Don’t overload the basket or they won’t crisp properly.
- Cook for 15-20 minutes, shaking halfway through. Add 2-3 minutes for extra crispiness.
- Toss with seasoning as soon as they’re done.
Pros: Healthier, fast, super crispy
Cons: Limited batch size
How to Toss the Fries in Seasoning (Without Getting Soggy)
Timing is everything here. You want to season the fries immediately after cooking while they’re still hot and lightly coated in oil. That’s when the seasoning sticks best.
Here’s how to do it right:
- Dump the fries into a large mixing bowl right after cooking.
- Sprinkle your seasoning mix evenly across the top.
- Use tongs or gently shake the bowl to toss.
- Taste and adjust seasoning if needed.
Avoid seasoning too early (before cooking) because the spices can burn or slide off during cooking, especially in the oven or air fryer.
Tips for Extra Crunchy Fries
Want that restaurant-level crunch? Try these pro tips:
- Double fry (as mentioned above). It’s the secret to success.
- Soak in ice water – It tightens up the starch even more.
- Dry completely – Moisture = steam = soggy fries.
- Don’t overcrowd – Whether frying, baking, or air frying, give your fries room to breathe.
- Cornstarch trick – Lightly dust the fries with a teaspoon of cornstarch before frying or air frying. It creates a crispier coating.
These little adjustments can take your fries from “meh” to “whoa.”
Delicious Dipping Sauces to Try
Sure, ketchup is great, but why stop there? Seasoned fries deserve some bold, flavorful sauces to match their vibe. Here are some must-try dips:
Classic Garlic Aioli
- ½ cup mayo
- 1 minced garlic clove
- 1 tsp lemon juice
- Salt and pepper to taste
Mix it all up and enjoy that creamy, garlicky goodness.
Spicy Mayo
- ½ cup mayo
- 1-2 tsp sriracha
- A dash of lime juice
Perfect for those who like a little heat.
Honey Mustard Dip
- 2 tbsp mustard
- 1 tbsp honey
- 1 tsp vinegar or lemon juice
Sweet and tangy—great with smoky fries.
Cheese Sauce
- Melted cheddar
- A splash of milk
- A pinch of paprika or chili flakes
Heat it gently for a thick, creamy dip.
How to Store and Reheat Leftover Fries
Let’s be real: leftover fries usually lose their charm. But you can still bring them back to life.
Storing:
- Let fries cool completely.
- Store in an airtight container in the fridge for up to 2 days.
- Don’t store them while still warm—this causes condensation and soggy fries.
Reheating:
- Air fryer: 5–7 minutes at 375°F (crispiest option).
- Oven: 10 minutes at 400°F.
- Avoid microwaving unless you like limp, sad fries (no judgment, but still).
Pro Tip: Re-season lightly after reheating to freshen up the flavor.
Common Mistakes to Avoid
Even the best intentions can go wrong if you skip the basics. Here’s what to watch out for:
- Skipping the soak: You’ll end up with mushy fries.
- Not drying properly: Water = steam = limp fries.
- Overcrowding the pan or fryer: This drops the temperature and leads to uneven cooking.
- Under-seasoning: Don’t be afraid of flavor!
- Seasoning too early: Spices will burn or fall off.
Avoid these traps and you’ll nail it every time.
FAQs about Seasoned Fries Recipe
1. Can I use sweet potatoes for this recipe?
Yes! Just be aware that sweet potatoes cook a bit differently—they’re softer and cook faster. You’ll want to cut them slightly thicker and keep an eye on them during baking or air frying.
2. How do I make the fries spicier?
Add extra cayenne pepper, chili powder, or even a pinch of crushed red pepper flakes to the seasoning mix.
3. Can I freeze seasoned fries?
You can freeze the prepped, uncooked fries after soaking and drying. Lay them on a tray to freeze individually, then store in a zip-top bag. Cook directly from frozen—just add a couple extra minutes.
4. Are air-fried fries actually crispy?
Absolutely! With proper prep (soaking and drying), air fryer fries can be nearly as crispy as deep-fried ones with far less oil.
5. What’s the best oil for frying fries?
Neutral oils like vegetable oil, canola oil, or peanut oil work best. They have a high smoke point and won’t overpower the seasoning.
Conclusion
There you have it—your ultimate guide to making perfectly crispy, flavor-packed seasoned fries at home. It’s not just about frying some potatoes and sprinkling salt. With the right prep, seasoning, and technique, you can turn a simple side dish into the star of the show.
Whether you’re team oven, air fryer, or old-school deep fryer, one thing’s for sure: once you try these homemade seasoned fries, you’ll never look at fast food the same way again.
So grab those potatoes, mix up your spices, and let the crispy magic begin. You’ve got this.