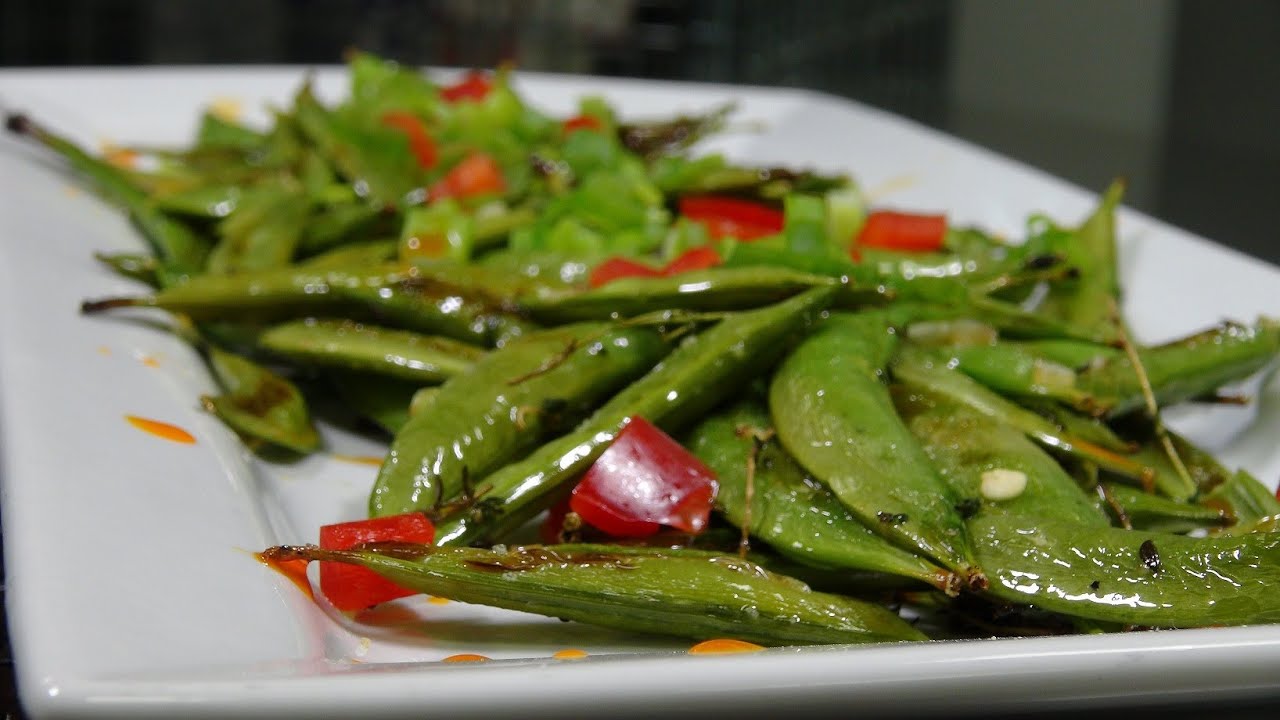
Seared Sugar Snap Peas Recipe: If you’re searching for a simple yet flavorful side dish that comes together in minutes and adds a satisfying crunch to any meal, then seared sugar snap peas are exactly what you need.
This underrated vegetable side is not just healthy but surprisingly addictive. Whether you’re aiming to add more greens to your plate or just need something quick and delicious, this dish will never disappoint.
In this detailed guide, we’ll walk you through everything—from picking the freshest peas to perfecting the sear.
Why You’ll Love Seared Sugar Snap Peas
These vibrant green gems bring a delightful contrast of tender inside and a crisp exterior. Here’s why they’re about to become your go-to veggie:
- Quick to cook: 10 minutes from start to finish.
- Minimal ingredients: A few pantry staples are all you need.
- Versatile: Works great as a side dish or as a topping for rice, noodles, or salad.
- Healthy: Packed with fiber, vitamins, and antioxidants.
- Visually appealing: That charred, blistered look? Chef’s kiss!
They’re the kind of side that makes you forget about the main course. That’s how good they are.
Health Benefits of Sugar Snap Peas
Sugar snap peas are not just tasty—they’re a powerhouse of nutrients. Rich in vitamins A, C, and K, they support your immune system, eye health, and blood clotting. These peas are also loaded with dietary fiber, which helps with digestion and keeps you feeling full longer. With virtually no fat and very few calories, they’re perfect for anyone watching their weight without sacrificing flavor. Plus, they’re high in antioxidants like lutein and zeaxanthin, which are known for promoting healthy skin and eyes.
When Are Sugar Snap Peas in Season?
You’ll get the freshest sugar snap peas in spring and early summer, typically between April and July. That’s when they’re naturally sweet, crisp, and perfect for a quick sear. While you can find them year-round in supermarkets, buying them in season from local farmers’ markets ensures peak flavor and better texture. If you’re growing your own, make sure to harvest them before the pods get too thick or tough.
How to Choose the Freshest Sugar Snap Peas
When shopping, go for peas that are:
- Bright green with a glossy sheen
- Firm to the touch
- Free from blemishes or yellow spots
- Snapping cleanly when bent
Avoid pods that are limp, overly large, or have visible seeds bulging through. Those tend to be overripe and starchy. Remember: fresh is key to a good sear!
What You’ll Need to Make This Recipe
List of Ingredients
- 12 oz fresh sugar snap peas (washed and trimmed)
- 1 tbsp olive oil (or avocado oil)
- 1 tsp sesame oil (optional for added flavor)
- 2 cloves garlic, minced
- Salt to taste
- Freshly ground black pepper
- Red pepper flakes (optional for a spicy kick)
- Fresh lemon juice or zest (optional for brightness)
Recommended Kitchen Tools
- Nonstick or cast iron skillet
- Tongs or spatula
- Cutting board and knife
- Mixing bowl
- Paper towels (for drying peas before searing)
How to Prepare Sugar Snap Peas
Before you toss them in the pan, a little prep goes a long way.
- Wash the peas thoroughly under cold water to remove dirt or pesticide residue.
- Dry them completely—moisture is the enemy of a good sear!
- Trim the ends with a sharp knife or snap off with your fingers. Some people also remove the stringy fiber along the seam, but this is optional depending on your preference.
Getting the peas dry and prepped helps them blister beautifully in the pan.
Secrets to Perfectly Seared Sugar Snap Peas
Want that perfect crunch and seared edge? Follow these tips:
- High heat is key. Your pan should be hot enough to make the oil shimmer.
- Don’t overcrowd the pan. Cook in batches if needed.
- Don’t stir too often. Let them sit and sizzle to get those delicious char marks.
- Add garlic at the right time. Add it near the end to avoid burning.
Patience and heat control are your best friends in this recipe.
Step-by-Step Guide to Making Seared Sugar Snap Peas
Step 1: Preheat the Pan
Start by heating a nonstick or cast iron skillet over medium-high heat. Let it warm up for a solid 2–3 minutes before adding any oil. Once the pan is hot, drizzle in olive oil and optionally sesame oil for a nutty finish. Swirl the oils around the pan to coat the surface evenly.
You’ll know the pan is ready when the oil starts shimmering but isn’t smoking. This is essential for getting a good sear.
Step 2: Prep the Peas
While the pan is heating, take your washed and thoroughly dried sugar snap peas and place them in a bowl. Lightly sprinkle them with salt and pepper for base seasoning. This gives them flavor even before they hit the pan.
If you’re feeling adventurous, add a dash of red pepper flakes for a subtle heat or a bit of lemon zest for a zippy twist. Give them a quick toss to coat evenly.
Step 3: Searing the Snap Peas
Now, carefully toss the seasoned peas into the hot pan. Spread them out in a single layer to avoid overcrowding. You want every pea to touch the surface.
Let them cook undisturbed for 2–3 minutes. Then flip or stir once to expose the other side and sear for another 2–3 minutes. The goal is blistered, slightly charred skin with tender insides.
Once they’re nearly done, add the minced garlic and stir quickly. Garlic burns fast, so only cook it for 30 seconds to 1 minute until fragrant.
Step 4: Season and Serve
Remove the peas from the heat and immediately squeeze a little fresh lemon juice over the top if you like. Serve warm, garnished with sesame seeds or a touch more salt and pepper to taste.
That’s it. Crispy, seared, flavorful sugar snap peas in under 10 minutes!
Optional Add-ins and Variations
Want to jazz up your seared sugar snap peas? There are tons of ways to get creative with this simple dish. Here are some delicious ideas to give them a twist and make them your own:
- Soy Sauce & Ginger: Add a splash of low-sodium soy sauce and freshly grated ginger near the end of cooking for a quick Asian-inspired version.
- Parmesan & Lemon Zest: After searing, sprinkle finely grated parmesan and lemon zest over the peas for a Mediterranean flavor combo.
- Chili Crisp or Sriracha: If you like heat, a drizzle of chili crisp or Sriracha over the hot peas will make your taste buds sing.
- Toasted Nuts or Seeds: Try tossing in toasted sesame seeds, pine nuts, or slivered almonds for added crunch and richness.
- Herbs: Fresh chopped herbs like mint, basil, or dill give it a garden-fresh upgrade.
These tweaks can turn a side dish into a highlight. Don’t be afraid to experiment—sugar snap peas are surprisingly versatile!
Serving Suggestions
These little green beauties go well with just about everything. Here are some pairing ideas to make them shine:
- Grilled or Roasted Proteins: Perfect alongside grilled chicken, steak, shrimp, or tofu.
- Rice or Noodle Bowls: Top brown rice, jasmine rice, or soba noodles with these peas for extra crunch.
- Salads: Toss cold, seared snap peas into green salads for a burst of flavor and texture.
- Appetizers: Serve with a dipping sauce (like garlic aioli or spicy hummus) as a healthier party snack.
- Bento or Lunch Boxes: These make a tasty cold veggie side in any packed lunch.
They’re light yet flavorful enough to complement just about any dish on your table.
How to Store and Reheat Leftovers
Cooked sugar snap peas store well, but the texture changes slightly once cooled. Here’s how to keep them tasting fresh:
Storage:
- Allow them to cool completely before storing.
- Place in an airtight container in the refrigerator.
- They’ll stay good for up to 3 days.
Reheating:
- Reheat in a hot skillet for 2–3 minutes to revive some crispness.
- You can also microwave them for 30–45 seconds, though they’ll be softer.
- Avoid overcooking during reheating, or they’ll turn mushy.
Want to serve them cold? No problem! They taste great as a crunchy addition to pasta salads or quinoa bowls.
Common Mistakes to Avoid
To get restaurant-level seared sugar snap peas, steer clear of these common slip-ups:
- Overcrowding the pan: This causes steaming instead of searing. Cook in batches if needed.
- Too much moisture: Wet peas will never blister. Pat them dry before cooking.
- Low heat: A cold pan results in soggy, limp peas. You need high heat for that delicious char.
- Burning the garlic: Add it too early and it’ll become bitter. Stir it in during the last minute.
- Overcooking: These peas only need a few minutes. Cook them too long, and they lose their snap.
Nail these basics, and your peas will turn out crispy and flavorful every time.
Nutritional Information (Per Serving)
Here’s a quick snapshot of what you’re getting in a single serving (about 1 cup cooked):
| Nutrient | Amount |
|---|---|
| Calories | 90–110 |
| Protein | 3–4g |
| Carbohydrates | 8–10g |
| Fiber | 3g |
| Sugars | 4g |
| Fat | 5–7g |
| Vitamin A | 30% DV |
| Vitamin C | 100% DV |
| Iron | 8% DV |
Low in calories and rich in fiber and vitamins, this recipe is a win-win for health-conscious eaters.
FAQs about Seared Sugar Snap Peas Recipe
1. Can I use frozen sugar snap peas for this recipe?
Yes, but thaw and pat them very dry before cooking. Fresh peas give the best texture and sear.
2. Do I need to remove the strings from the snap peas?
It’s optional. Some people prefer to remove them for a smoother bite, while others don’t mind. Try both ways to see what you prefer!
3. What oil is best for searing sugar snap peas?
High smoke point oils like olive oil, avocado oil, or even grapeseed oil work great. For extra flavor, add a touch of sesame oil at the end.
4. How can I make this dish gluten-free?
It already is! Just skip any soy sauce with gluten or use a gluten-free version like tamari if you plan to add it.
5. Can I meal prep these in advance?
Yes! Cook a batch and store in the fridge for up to 3 days. They reheat well and taste great cold in salads or grain bowls.
Conclusion
Seared sugar snap peas are the ultimate quick fix when you want something healthy, vibrant, and full of flavor. With their crisp texture and caramelized edges, they elevate any meal without much effort. Whether you’re making a weeknight dinner, meal prepping for the week, or hosting a dinner party, this recipe adds that fresh, green spark to the table.
The best part? It’s totally customizable. Add your favorite seasonings, mix in some heat, or keep it simple with lemon and salt—the choice is yours. Either way, you’re looking at a new favorite go-to side dish.