School Pizza Recipe: Let’s face it—there’s something magical about that rectangular slice of cheesy, saucy goodness we all remember from the school cafeteria. It was greasy in the best way, slightly crunchy on the edges, and somehow hit the spot every time. School pizza isn’t just food—it’s a memory, a throwback, and now, something you can easily recreate at home.
Whether you’re cooking for your kids, reliving your youth, or just craving something uniquely comforting, this school pizza recipe brings all those nostalgic flavors right into your kitchen. And trust me—it’s way easier than you think.
Ready to make magic happen? Let’s get into it.
What is School Pizza?
School pizza isn’t your average Neapolitan or New York-style slice. It’s rectangular, it’s served on a tray, and it’s built for mass production—but that’s part of its charm. What makes it different?
- Shape: Unlike round pizzas, this one’s square or rectangular.
- Crust: Thick but not too doughy, slightly crisp.
- Sauce: Mild, slightly sweet tomato sauce.
- Toppings: Typically just cheese or pepperoni, but you can get creative.
This pizza was originally designed to be cost-effective and easy to serve to hundreds of students, but over time, it developed a cult following. People started loving it for its simplicity and flavor. And once you learn how to make it yourself, you’ll understand why.
Ingredients You’ll Need
Let’s break it down by category so you can double-check your pantry and fridge.
For the Dough:
- 3 ½ cups all-purpose flour
- 1 tbsp sugar
- 1 tsp salt
- 1 tbsp dry yeast
- 1 ¼ cups warm water (110°F)
- 2 tbsp olive oil
For the Sauce:
- 1 can (15 oz) tomato sauce
- 1 tsp garlic powder
- 1 tsp onion powder
- 1 tsp dried oregano
- 1 tsp dried basil
- ½ tsp sugar (optional for sweetness)
- Salt and pepper to taste
For the Toppings:
- 2–3 cups shredded mozzarella cheese (or pizza blend)
- Pepperoni slices (optional)
- Grated parmesan (optional)
- Red pepper flakes (for heat, optional)
Want to keep it old-school? Stick to just cheese or pepperoni.
Kitchen Tools and Equipment
Make sure you have these on hand to make the process smooth:
- Large mixing bowl
- Rolling pin
- Measuring cups and spoons
- Stand mixer with dough hook (optional but helpful)
- Baking sheet (preferably 10×15-inch for that school pizza look)
- Parchment paper or non-stick spray
- Oven (obviously!)
Prep Time and Cook Time
Here’s what you’re looking at in terms of time investment:
- Prep Time: 20 minutes
- Dough Rising Time: 1 hour
- Cook Time: 15–20 minutes
- Total Time: Around 1.5–2 hours
Totally worth it for that first nostalgic bite!
Tips Before You Start
Let me give you some pro tips before we dive into the full recipe:
- Use Warm Water for activating the yeast—not hot or it’ll kill it.
- Let the Dough Rest fully—it makes all the difference in texture.
- Pre-bake the Crust lightly before adding toppings—it prevents sogginess.
- Use Low-Moisture Cheese so your pizza doesn’t get watery.
- Slice it into Rectangles to keep it authentic. This isn’t triangle pizza!
Step-by-Step Guide to Make School Pizza
Step 1: Make the Dough
In a large bowl, dissolve sugar in warm water and sprinkle the yeast on top. Let it sit for 5–10 minutes until foamy. Add flour, salt, and olive oil. Mix until combined and knead for 8–10 minutes (by hand or with a mixer). You should have a soft, elastic dough. Not too sticky.
Step 2: Let the Dough Rise
Transfer the dough to a greased bowl, cover with a towel, and let it rise in a warm area for about 1 hour. It should double in size. No peeking—it needs its beauty sleep!
Step 3: Make the Pizza Sauce
While the dough is rising, combine the tomato sauce with garlic powder, onion powder, oregano, basil, sugar, and a pinch of salt and pepper. Simmer on low for 10–15 minutes. Stir occasionally. That smell? Yep, that’s the magic.
Step 4: Prepare the Cheese and Toppings
Shred your cheese if you haven’t already. Pre-sliced mozzarella works, but fresh-shredded melts better. If you’re adding pepperoni, slice it now. Preheat your oven to 475°F.
Step 5: Roll Out and Shape the Dough
Once risen, punch the dough down (gently!) and roll it out to fit your baking sheet. Use parchment paper or grease the pan. Aim for a ½-inch thick crust to keep it classic. Press the dough out with your hands or rolling pin.
Step 6: Pre-Bake the Dough (Optional but Recommended)
Pop the dough into the preheated oven for 5–7 minutes. This helps it stay firm and keeps the sauce from soaking in too much. You’re not fully baking it yet—just giving it a head start.
Step 7: Add Sauce and Toppings
Spread the sauce evenly using the back of a spoon. Don’t drown it—just enough to cover the surface. Sprinkle the cheese generously and add pepperoni or other toppings.
Step 8: Bake to Perfection
Place your pizza back in the oven and bake for 12–15 minutes, or until the cheese is bubbly and just turning golden brown. Keep an eye on it—every oven’s a little different.
Step 9: Slice into Squares
Let it cool for a few minutes, then slice it into rectangles. You know—just like they used to do at school.
Step 10: Serve & Enjoy!
This is the moment. You made real-deal, homemade school pizza. Serve it hot with some ranch on the side (if you’re fancy like that), or just enjoy it straight up.
Popular Topping Variations
While classic school pizza usually came in just cheese or pepperoni, there’s no reason you can’t get creative at home. The base recipe works beautifully with all kinds of toppings—just don’t overload it, or you’ll lose that signature cafeteria vibe.
1. Classic Cheese
- This is the OG. Use shredded mozzarella or a pizza blend.
- Want extra gooeyness? Mix mozzarella with provolone or Monterey Jack.
- Sprinkle a bit of parmesan on top before baking for a sharp, cheesy kick.
2. Pepperoni
- The standard favorite. Add slices evenly over the cheese.
- For extra crispiness, lay the pepperoni under the cheese so they curl slightly while baking.
3. Veggie Mix
- Dice up onions, green peppers, mushrooms, and olives for a veggie-packed version.
- Lightly sauté the veggies before topping to prevent excess moisture.
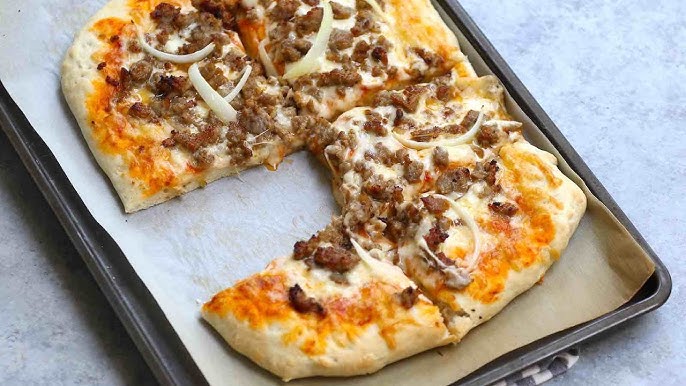
4. Sausage Crumble
- Cook and crumble Italian sausage and sprinkle over the sauce before cheese.
- Great for meat-lovers and adds bold flavor.
5. BBQ Chicken
- Swap the tomato sauce for barbecue sauce.
- Add cooked shredded chicken, red onions, and a blend of mozzarella and cheddar.
Whatever topping you choose, the key is balance. Too many and your pizza gets soggy. Keep it simple, and you’ll have that perfect bite every time.
Gluten-Free and Vegan Options
Want to enjoy school pizza without the gluten or dairy? No problem. There are solid alternatives that still capture the spirit of the original.
For Gluten-Free Dough:
- Use a 1:1 gluten-free flour blend with xanthan gum.
- Consider adding a bit of olive oil and honey to improve texture and flavor.
- Be patient—the dough is more delicate but still delicious.
For Vegan Cheese:
- Choose a vegan mozzarella-style shred that melts well.
- Brands like Violife, Daiya, or Miyoko’s work great.
- Use nutritional yeast for extra cheesy flavor.
Other Substitutes:
- Use tomato paste thinned with water instead of canned sauce for less sugar.
- Toppings like mushrooms, olives, spinach, and roasted veggies are all great plant-based options.
These tweaks let everyone get in on the nostalgia, no matter their dietary needs.
Make Ahead & Storage Tips
Busy day? No problem. You can prep parts of this school pizza recipe in advance.
To Make Ahead:
- Dough: Make the dough, let it rise, then refrigerate for up to 24 hours. Bring to room temperature before rolling out.
- Sauce: Make the sauce up to 3 days ahead and keep in the fridge.
- Pre-bake crusts: Bake the dough slightly, cool, and freeze. Just add toppings later and bake from frozen!
To Store Leftovers:
- Store slices in an airtight container in the fridge for up to 4 days.
- Reheat in an oven or toaster oven at 375°F for 5–8 minutes for a crispy finish.
To Freeze:
- Let pizza cool completely, wrap in foil, and store in freezer-safe bags.
- Reheat from frozen at 400°F for 10–12 minutes.
With just a little planning, you can have school pizza ready anytime that craving hits.
What to Serve with School Pizza
Want to round out the meal like in the cafeteria days? Try these simple sides:
- Tater tots or curly fries – Classic and kid-approved.
- Side salad – Lightens the meal and adds crunch.
- Fruit cups or apple slices – Keep it healthy(ish).
- Chocolate milk or juice box – Because why not go full throwback?
- Ranch or marinara dip – For that extra flavor boost.
The key is fun and easy—just like school lunches were meant to be.
Nutritional Information
Here’s a basic estimate per slice (based on 12 slices per batch with cheese and sauce only):
| Nutrient | Amount |
|---|---|
| Calories | ~220 |
| Carbs | 25g |
| Protein | 9g |
| Fat | 9g |
| Saturated Fat | 4g |
| Sodium | 450mg |
Note: Add more calories and fat if you’re adding meats or extra cheese. For a lighter version, use part-skim mozzarella and go easy on the oil.
Why Homemade is Better
There’s something powerful about recreating something from childhood in your own kitchen. Homemade school pizza isn’t just better-tasting—it’s made with real ingredients and love. No preservatives, no mystery meats, and you control every topping.
And the best part? You can tweak it just how you like it. Want extra cheese? Go for it. Prefer a thinner crust? Roll it out more. Miss the rectangle shape? You’ve got the pan for that.
Making it at home connects you to the past while giving your family a fresh, delicious meal. Plus, it’s fun!
Troubleshooting Common Issues
Even simple recipes have their quirks. Here’s how to fix common school pizza problems:
Dough is Too Tough or Dense
- Let it rise longer next time.
- Use warm—not hot—water for yeast activation.
Crust is Soggy
- Pre-bake before adding toppings.
- Don’t overload with sauce or moist toppings.
Cheese Doesn’t Melt Right
- Use low-moisture shredded mozzarella.
- Avoid fresh mozzarella (too watery for this style).
Pizza Tastes Bland
- Season your sauce well.
- Add a pinch of salt to your dough.
Cooking is about learning by doing—don’t get discouraged if your first try isn’t perfect. You’ll get better with every slice.
FAQs about School Pizza Recipe
1. Can I use store-bought dough instead of homemade?
Yes! Store-bought pizza dough works great if you’re short on time. Just let it rest at room temperature before rolling it out.
2. What kind of cheese is best for school pizza?
Low-moisture shredded mozzarella is closest to the original, but you can mix in cheddar or provolone for more flavor.
3. Can I make this in a round pan instead of a rectangular one?
Absolutely. The shape doesn’t affect taste—it just changes the aesthetic. Go with whatever pan you have.
4. Is this recipe kid-friendly for cooking together?
Definitely! Let the kids help roll dough or add toppings. It’s a great family activity and they’ll love eating what they made.
5. How can I make this pizza healthier?
Use whole wheat flour for the crust, reduce the cheese, and load up on veggie toppings. Homemade sauce also lets you cut back on sugar and salt.
Conclusion
Bringing school pizza into your kitchen isn’t just about flavor—it’s about fun, nostalgia, and sharing something simple and delicious with others. Whether you’re making it for your kids or just for yourself, this recipe hits every note: crispy crust, zesty sauce, gooey cheese, and the comfort of the past on a plate.
With this step-by-step guide, you’re all set to recreate the cafeteria classic—only fresher, tastier, and totally customizable. So roll up those sleeves, fire up the oven, and get ready to enjoy your favorite slice of childhood all over again.