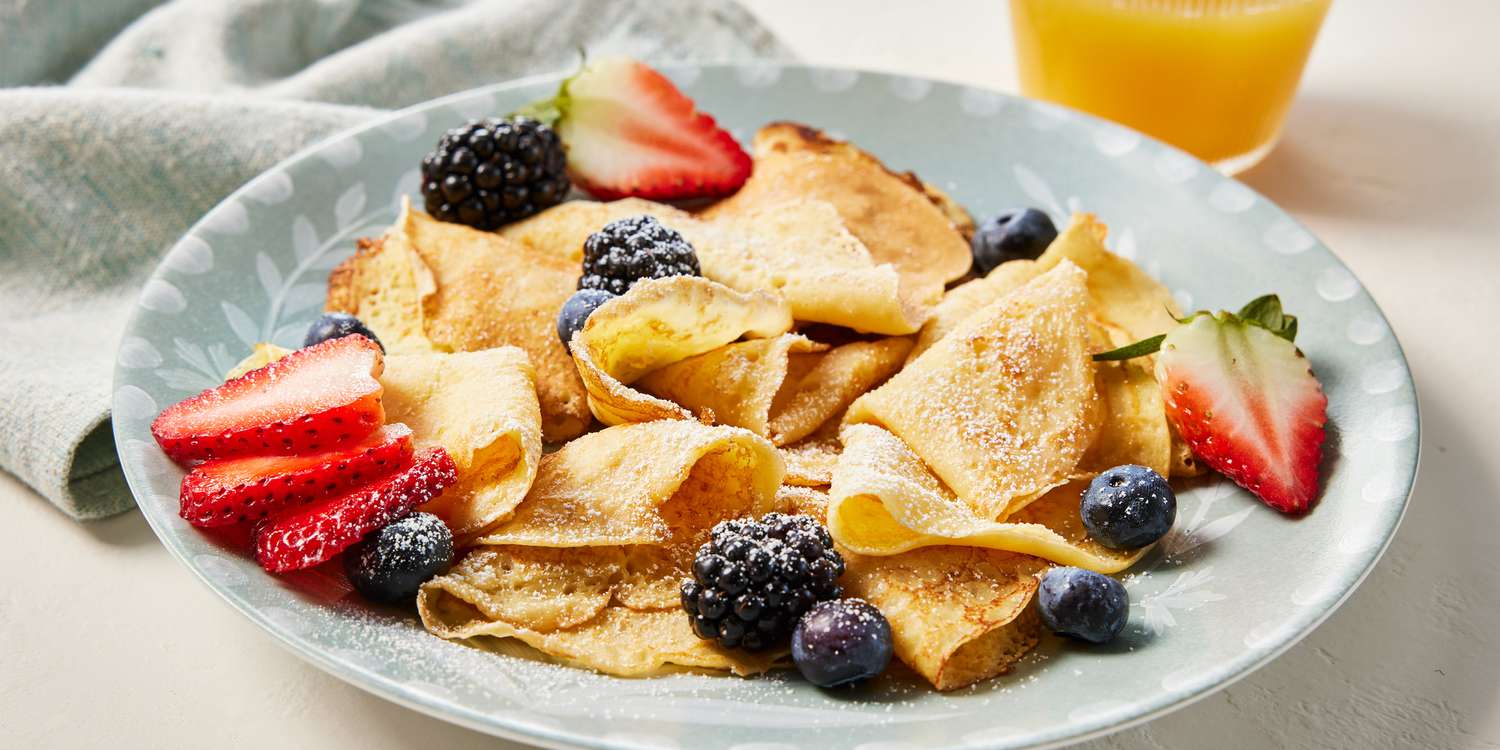
Scandinavian Pancakes Recipe: Scandinavian pancakes are thin, delicate, and slightly sweet crepes traditionally served in countries like Sweden, Norway, and Denmark. Unlike the fluffy American pancakes you might be more familiar with, Scandinavian versions are closer in texture to French crêpes. However, they carry their own signature flair—thanks to rich dairy ingredients, light sweetness, and the use of traditional toppings like lingonberry jam or fresh whipped cream.
They’re typically enjoyed for breakfast, brunch, or even dessert. In Scandinavia, families often gather on weekends or holidays to cook up a big stack of these light pancakes and serve them with an array of toppings. There’s a warmth and tradition baked into every fold of a Scandinavian pancake. Whether rolled, folded, or stacked, they always bring joy to the table.
Difference Between Scandinavian and American Pancakes
If you’ve only ever had American-style pancakes, the first bite of a Scandinavian pancake will be a delightful surprise. These are not the fluffy, cakey rounds soaked in syrup you’re used to.
Here’s how they differ:
| Feature | Scandinavian Pancakes | American Pancakes |
|---|---|---|
| Texture | Thin, soft, and slightly stretchy | Thick and fluffy |
| Batter | Runny, almost like crepe batter | Thicker with leavening agents |
| Cooking Method | Swirled in a hot pan for thin coverage | Poured and left to rise on a griddle |
| Toppings | Jam, berries, whipped cream | Syrup, butter, sometimes fruit |
| Serving Style | Rolled or folded | Stacked |
The unique texture and taste of Scandinavian pancakes make them versatile—perfect for sweet or savory fillings, and easy to enjoy hot or cold.
Why You’ll Love This Recipe
Still wondering why you should try making these pancakes? Let me tell you:
- Quick & Simple: Minimal ingredients and fast cooking time.
- Kid-Friendly: Little hands love helping with rolling and topping.
- Customizable: Top them with fruit, jam, chocolate, or even savory fillings.
- Elegant Yet Casual: They can be served for an everyday breakfast or dressed up for guests.
- No Special Equipment Needed: A regular non-stick skillet will do.
This Scandinavian pancakes recipe is straightforward enough for beginners but produces results that look (and taste) gourmet.
Essential Ingredients You’ll Need
To make the perfect Scandinavian pancakes, you don’t need a fancy shopping list. Just a few simple pantry staples and you’re good to go.
Dairy Products
- Whole Milk (2 cups) – Gives richness and the right texture.
- Eggs (3 large) – Helps bind and adds structure.
- Butter (2 tablespoons, melted) – Adds flavor and prevents sticking.
Dry Ingredients
- All-Purpose Flour (1 cup) – The base of your batter.
- Sugar (1–2 tablespoons) – For a subtle sweetness.
- Salt (¼ teaspoon) – Balances the flavors.
Flavor Boosters
- Vanilla Extract (1 teaspoon, optional) – Adds a sweet, aromatic note.
- Cardamom (optional, a pinch) – Traditional in some Scandinavian households.
Optional Toppings
- Lingonberry jam
- Whipped cream
- Fresh berries
- Powdered sugar
- Nutella
- Cinnamon sugar
Kitchen Tools Required
You don’t need a ton of gear to whip up this recipe. Just the essentials:
- Mixing bowl
- Whisk or blender
- Non-stick skillet or crepe pan
- Ladle or measuring cup (for pouring batter)
- Rubber spatula or thin flipper
- Plate and foil (to keep pancakes warm)
Preparation Tips Before You Start
Before diving into the actual steps, a few quick pointers:
- Room Temperature Ingredients: Let the eggs and milk sit out for a few minutes before using. They mix better when not cold.
- Melt Butter First: If you’re using melted butter in the batter, melt it and let it cool slightly so it doesn’t cook the eggs.
- Don’t Overmix: Whisk just until smooth. Overmixing leads to chewy pancakes.
- Rest the Batter: If possible, let the batter rest for 20-30 minutes. This allows the flour to hydrate and results in more tender pancakes.
Ready to cook? Let’s go step-by-step.
Step-by-Step Guide to Making Scandinavian Pancakes
Step 1: Gather All Your Ingredients
There’s nothing worse than realizing halfway through a recipe that you’re missing something. Lay everything out on your kitchen counter: milk, eggs, flour, sugar, salt, melted butter, and any toppings you love. This step may seem basic, but it sets you up for smooth cooking.
Step 2: Prepare the Batter
In a mixing bowl, whisk together the eggs and sugar until well combined. Slowly add in the milk and whisk again. Gradually sprinkle in the flour and salt, whisking continuously to avoid lumps. Stir in the melted butter and vanilla extract (if using).
Prefer less whisking? Toss everything into a blender and pulse for 20–30 seconds until smooth. This method also helps eliminate any lumps.
Pro Tip: Batter should be thin—like heavy cream. If it feels too thick, add a tablespoon or two of milk to loosen it up.
Step 3: Let the Batter Rest
Once your batter is mixed, let it rest for 20 to 30 minutes at room temperature. This gives the gluten time to relax, ensuring tender pancakes. If you’re short on time, you can skip this step—but trust me, your pancakes will be better if you let them rest.
Step 4: Heat the Pan Correctly
Heat your non-stick pan over medium heat. Add a small dab of butter or oil and swirl to coat. You want the pan hot, but not smoking.
To test if it’s ready, flick a few drops of water onto the surface—if they sizzle and dance, you’re good to go.
Step 5: Pour and Swirl the Batter
Use a ladle or ¼ cup measuring cup to pour the batter into the center of the pan. Quickly lift and swirl the pan in a circular motion to spread the batter into a thin, even layer. This is where the magic happens—it takes a little practice, but you’ll get the hang of it fast.
Let the pancake cook for about 1–2 minutes until the edges look dry and the bottom is lightly golden.
Step 6: Flip and Cook Evenly
Use a thin spatula to gently flip the pancake. Cook for another 30 seconds to 1 minute on the second side. The goal is a golden, lightly browned pancake without crisp edges.
Stack the finished pancake on a plate and cover it with foil to keep it warm while you make the rest.
Step 7: Keep Them Warm
While you’re finishing the batch, keep your cooked pancakes in a low oven (200°F or 95°C) or wrapped in foil. This keeps them soft and warm—perfect for serving a crowd all at once.
Step 8: Add Your Favorite Toppings
Now comes the fun part! Add your toppings and get creative. Some classic combinations:
- Lingonberry jam + whipped cream
- Sliced strawberries + Nutella
- Cinnamon sugar + a squeeze of lemon
- Savory option: smoked salmon + crème fraîche
Roll or fold your pancakes and dig in!
Tips for Perfect Pancakes Every Time
Want to master Scandinavian pancakes like a pro? Here are some tried-and-true tips that make all the difference:
- Use the Right Pan: A good-quality non-stick pan or well-seasoned crepe pan is essential. If the pan isn’t non-stick, your pancakes might tear or stick.
- Control the Heat: Medium heat is best. If the pan is too hot, the pancakes will brown too quickly and burn before cooking through. Too cold, and they’ll be pale and rubbery.
- Butter Wisely: Wipe the pan with a paper towel after adding butter to prevent pooling, which can fry your pancakes instead of gently cooking them.
- Don’t Rush the Flip: Only flip when the edges look dry and the bottom has set. Trying to flip too early will lead to tears.
- Thin Batter Is Key: The thinner the batter, the more delicate and authentic your pancakes will be. If the batter thickens as it sits, just stir in a splash of milk.
Once you get into a rhythm, each pancake will be better than the last. Soon enough, you’ll be flipping like a Scandinavian grandma.
Topping Ideas to Try
One of the most fun parts of Scandinavian pancakes is the endless topping possibilities. Whether you’re in the mood for something sweet or savory, there’s a combo for you.
Here are some ideas to get your creativity flowing:
Sweet Toppings
- Lingonberry Jam – A Scandinavian classic with a tangy-sweet punch.
- Whipped Cream & Berries – Strawberries, blueberries, raspberries—fresh or stewed.
- Nutella & Banana – Because who doesn’t love chocolate and bananas?
- Powdered Sugar & Lemon Zest – Simple and bright.
- Apple Slices & Cinnamon – Warm, comforting flavors.
- Honey & Toasted Nuts – A nutty crunch with sweet drizzle.
Savory Toppings
- Smoked Salmon & Dill Cream Cheese – Elegant and satisfying.
- Ham & Cheese – Melty cheese with salty ham, folded like an omelet.
- Sautéed Spinach & Feta – A veggie-packed option.
- Scrambled Eggs & Bacon – Breakfast wrapped in a pancake.
Mix and match to find your favorites. You can even create a pancake bar for brunch guests to build their own.
Serving Suggestions
Scandinavian pancakes are incredibly versatile and can be served in a variety of ways depending on the occasion.
- Rolled or Folded: Roll them with jam or Nutella, or fold into quarters and stack them.
- Brunch Spread: Serve alongside eggs, fruit, and coffee for a hearty brunch.
- Dessert Style: Fill with sweetened cream cheese and berries, then drizzle with chocolate sauce.
- Buffet Style: Set up a topping station and let everyone create their own.
For an authentic Scandinavian touch, serve with coffee or strong black tea and light candles to set the cozy “hygge” mood.
How to Store and Reheat Leftovers
Got leftovers? No worries—Scandinavian pancakes store really well.
To Store:
- Place cooled pancakes in a zip-top bag or airtight container.
- Refrigerate for up to 3–4 days.
- Layer parchment paper between each pancake to prevent sticking.
To Freeze:
- Stack with parchment paper between each one.
- Wrap tightly in foil or place in a freezer-safe bag.
- Freeze for up to 2 months.
To Reheat:
- Microwave: 15–20 seconds per pancake.
- Oven: Wrap in foil and warm at 300°F (150°C) for 10–15 minutes.
- Skillet: Reheat gently on a non-stick pan over low heat.
You can make a big batch and enjoy them throughout the week!
Can You Make Scandinavian Pancakes Ahead?
Yes! Scandinavian pancakes are an excellent make-ahead option.
Here’s how to prep in advance:
- Make the Batter Ahead: Whip up the batter and store it in the fridge overnight. Just stir before using.
- Cook and Store: Make the pancakes a day ahead and reheat them gently before serving.
- Hosting Brunch? Keep cooked pancakes warm in the oven, layered with parchment paper and foil.
This make-ahead flexibility is perfect if you’re planning a brunch, holiday breakfast, or just want a treat-ready morning with no fuss.
Gluten-Free and Dairy-Free Options
Don’t worry if you have dietary restrictions—you can still enjoy Scandinavian pancakes.
Gluten-Free:
- Use a 1:1 gluten-free flour blend.
- Almond flour or oat flour can work too, though they may affect texture.
Dairy-Free:
- Swap whole milk with almond, oat, or soy milk.
- Use plant-based butter or neutral oil like coconut oil.
Just remember: alternative flours may make the pancakes slightly more delicate, so handle with care when flipping.
FAQs about Scandinavian Pancakes Recipe
1. What’s the best pan to use?
A good non-stick skillet or crepe pan is ideal. The smoother and more even the surface, the easier it is to spread and flip your pancakes.
2. Can I make these pancakes savory?
Absolutely! Omit the sugar and vanilla from the batter, then fill with savory toppings like ham, cheese, eggs, or smoked salmon.
3. How thin should Scandinavian pancakes be?
Very thin—almost like a crepe. The batter should coat the pan in a delicate layer when swirled. Think “see-through” edges.
4. Are these the same as Swedish pancakes?
Yes! Swedish pancakes (Pannkakor) are one of the most well-known types of Scandinavian pancakes. They’re nearly identical in preparation and taste.
5. Can I freeze Scandinavian pancakes?
Yes! Stack them with parchment paper in between, freeze in a zip-lock bag, and reheat when ready to eat.
Conclusion
There’s something wonderfully comforting about Scandinavian pancakes. They’re soft, thin, and filled with endless possibilities—whether you prefer sweet, savory, or somewhere in between. This simple recipe transforms everyday ingredients into something elegant and crowd-pleasing.
So, next time you want to try something new for breakfast or brunch, give these pancakes a go. With a little practice, you’ll be flipping and rolling like a true Scandinavian chef. Cozy up, pour yourself a hot drink, and enjoy every bite.


