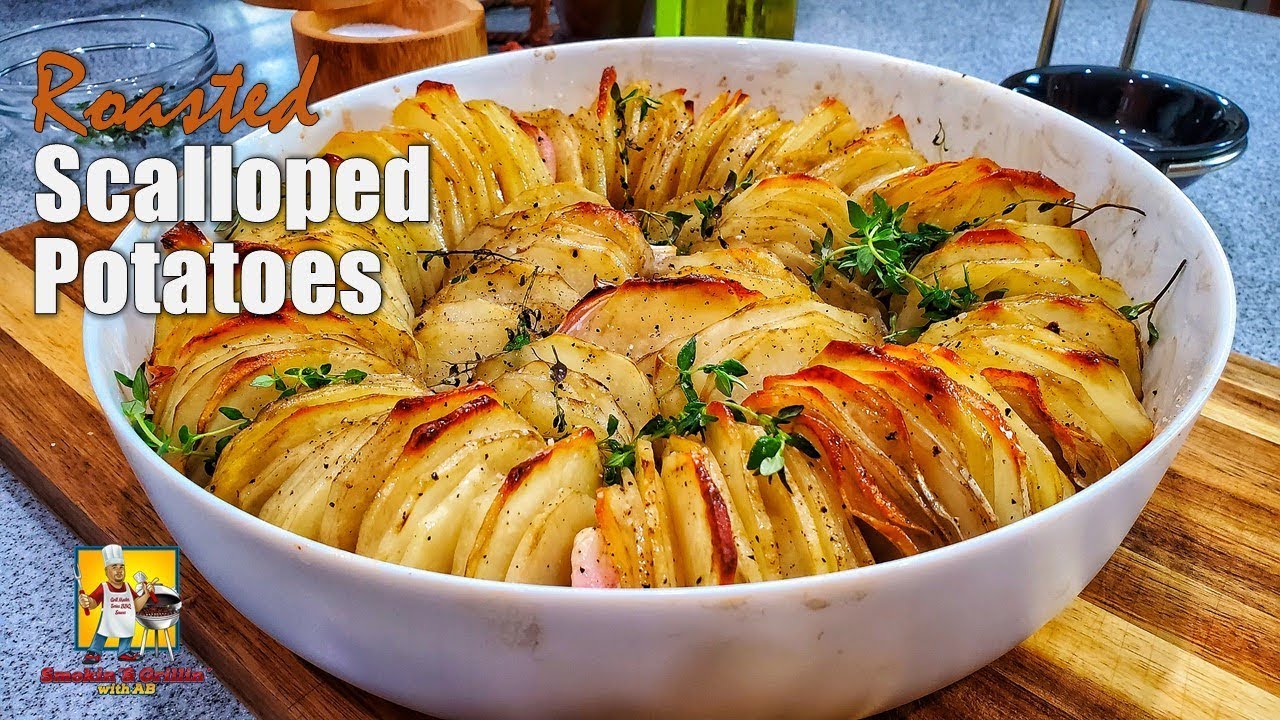
Scallop Potatoes Recipe: There’s something incredibly comforting about scalloped potatoes. Whether you’re making them for a Sunday dinner, a holiday feast, or just because you’re craving something rich and cheesy, scalloped potatoes never disappoint. They’re creamy, savory, and layered with love – the kind of dish that gets scraped clean every time.
Why Everyone Loves Scalloped Potatoes
What’s not to love? Picture tender slices of potatoes, perfectly baked in a rich, garlicky, creamy sauce, all golden and bubbling on top. This dish combines simple ingredients to create something deeply satisfying. It’s the kind of recipe that brings people together and fills the room with irresistible aromas. And the best part? It’s surprisingly easy to make. Once you learn the steps, you’ll want to whip this up for every gathering or cozy night in.
The Origin of This Comfort Food Favorite
Scalloped potatoes may seem like a classic American side dish, but they actually have European roots. The name “scalloped” comes from the old English word “collop,” which means to slice thinly. Over time, the dish evolved, and creamy sauces were added – often involving cheese, garlic, and herbs. Now, it’s a staple in many homes around the world, especially during the colder months when comfort food is king.
Ingredients You’ll Need
Let’s get down to business. The beauty of scalloped potatoes lies in its simplicity. You don’t need anything fancy—just quality ingredients and a little bit of care.
Core Ingredients
Here’s what you absolutely need to make classic scalloped potatoes:
- 4–5 medium russet or Yukon Gold potatoes, peeled and thinly sliced
- 2 tablespoons butter
- 2 tablespoons all-purpose flour
- 2 cups milk (whole milk for creamier texture)
- 1 cup shredded cheese (cheddar works great!)
- 2 cloves garlic, minced
- Salt and pepper, to taste
- 1/2 teaspoon dried thyme (optional for herby flavor)
Optional Add-ins for a Twist
Want to elevate your scalloped potatoes? Here are some add-ins that can take them to the next level:
- Onions, thinly sliced and layered between potatoes
- Bacon bits, for a smoky kick
- Parmesan cheese, for an extra sharp, nutty taste
- Cream instead of milk, for ultra-rich flavor
- Chopped chives or parsley, for a fresh finish on top
Kitchen Tools Required
Before you dive into cooking, make sure you’ve got the right tools on hand:
- A sharp knife or mandoline for slicing potatoes evenly
- A large saucepan for making the sauce
- A whisk to mix the roux and milk smoothly
- A 9×13-inch baking dish
- Foil to cover the dish while baking
- An oven, of course!
Preparing for the Recipe
Preparation is key. It’s what turns a rushed dinner into a well-executed meal that tastes like it came from a fancy restaurant.
Choosing the Right Potatoes
Not all potatoes are created equal for this dish. You want potatoes that hold their shape but still become tender and creamy when baked.
- Russet potatoes: High starch content, super tender and soft when baked.
- Yukon Gold: A little waxier but adds a nice buttery flavor and holds shape better.
Make sure to peel your potatoes (unless you like the rustic skin-on feel) and slice them uniformly. A mandoline is perfect for getting those thin, even slices that cook evenly.
Prepping Your Ingredients Properly
Before you turn on the stove, measure out your ingredients. Shred the cheese, mince the garlic, and have everything ready to go. This makes the cooking process seamless and stress-free. You don’t want to be juggling cheese grating while your sauce is bubbling away.
Step-by-Step Scalloped Potatoes Recipe
Alright, now for the heart of it. Follow these steps carefully, and you’ll end up with golden, creamy scalloped perfection.
Step 1 – Preheat and Prep
Set your oven to 375°F (190°C). Grease your baking dish with a bit of butter or non-stick spray to prevent sticking. This ensures those cheesy edges don’t become a nightmare to scrub off later.
Step 2 – Make the Creamy Sauce
Here’s where the magic begins. In a medium saucepan, melt 2 tablespoons of butter over medium heat. Once melted, stir in 2 tablespoons of flour. This creates a roux—a thick paste that will make your sauce creamy and rich. Cook this mixture for about a minute, stirring constantly so it doesn’t brown.
Slowly whisk in 2 cups of milk (warm milk works best to avoid lumps), and keep whisking until it thickens. This might take 5 to 7 minutes. Once the sauce starts to bubble and thicken, toss in the minced garlic, salt, pepper, and thyme if using. Stir until smooth.
Add in 1 cup of shredded cheese and stir until melted. You should now have a velvety, garlicky, cheesy sauce that smells absolutely heavenly.
Step 3 – Slice the Potatoes
While your sauce is thickening, get to slicing those potatoes. Use a mandoline if you have one—it saves time and guarantees evenly sliced potatoes. You’re aiming for 1/8-inch slices. If you slice them too thick, they might not cook through properly. Too thin, and they’ll fall apart. Find that Goldilocks zone!
If you’re prepping ahead, place the slices in a bowl of cold water to prevent browning, but make sure to pat them dry before layering so you don’t water down your sauce.
Step 4 – Layer the Potatoes and Sauce
Start by spreading a thin layer of sauce on the bottom of your greased baking dish. Then, layer one-third of the potatoes over the sauce. Add another layer of sauce on top of the potatoes, spreading it out evenly. Repeat this process until all the potatoes and sauce are used up—usually about 3 layers in total.
Make sure the top layer is well-coated with sauce. You can sprinkle a little extra cheese on top for that golden crust everyone fights over.
Step 5 – Bake to Golden Perfection
Cover the dish tightly with foil and bake at 375°F (190°C) for 45 minutes. After that, remove the foil and continue baking for another 25–30 minutes, or until the top is golden brown and bubbly, and a knife slides through the potatoes with zero resistance.
If you like a crispier top, switch to broil for the last 2–3 minutes—but watch it closely so it doesn’t burn!
Tips for the Best Scalloped Potatoes
Want to go from good to great? Here are some pro tips that make all the difference:
- Use freshly shredded cheese: Pre-shredded cheese contains anti-caking agents that can mess with the texture of your sauce.
- Don’t rush the sauce: Let it thicken fully before layering, or it could turn runny in the oven.
- Rest before serving: Let the dish sit for 10–15 minutes after baking. This helps the sauce set and makes it easier to serve clean slices.
- Add a breadcrumb topping: Mix breadcrumbs with melted butter and sprinkle over the top for a crunchy finish.
Common Mistakes to Avoid
Even seasoned cooks slip up sometimes. Here’s what to watch out for:
- Slicing potatoes unevenly – they’ll cook at different rates.
- Skipping the roux step – your sauce won’t thicken properly.
- Not covering the dish initially – you’ll get a burned top and undercooked center.
- Using cold milk in the sauce – it can make your roux seize up and clump.
Serving Suggestions
Scalloped potatoes are incredibly versatile. Serve them alongside:
- Roast chicken or turkey for a comforting dinner
- Grilled steak or pork chops for a hearty meal
- Green salad or steamed veggies to lighten up the plate
They also make an excellent side dish for holiday spreads like Thanksgiving, Christmas, or Easter.
Storing and Reheating Scalloped Potatoes
Got leftovers? No problem.
- Storage: Let the dish cool, then cover with foil or transfer to an airtight container. Refrigerate for up to 4 days.
- Reheating: Pop them in a 350°F oven covered with foil for 20 minutes or until heated through. For single portions, microwave in 1-minute bursts.
They might even taste better the next day—like all good comfort food!
FAQs about Scallop Potatoes Recipe
What are scallop potatoes?
Scallop potatoes, often called “scalloped potatoes,” are a classic baked dish made from thinly sliced potatoes, layered in a casserole dish and baked with a creamy sauce. This dish is known for its rich, comforting flavor and golden, crispy top layer.
How do you prevent scallop potatoes from being watery?
To avoid watery scallop potatoes, make sure to slice the potatoes evenly and not too thin. Before assembling, pat the potato slices dry to remove excess moisture. Also, using a thickened sauce or a blend of cheeses can help absorb any excess liquid during baking.
Can I make scallop potatoes ahead of time?
Yes, scallop potatoes are perfect for preparing ahead of time. You can assemble the dish, cover it, and refrigerate for up to two days before baking. This makes it a convenient option for holidays and family gatherings.
What are the best potatoes to use for scallop potatoes?
The best potatoes for scallop potatoes are starchy varieties like Russets or Yukon Golds. These types absorb the creamy sauce well and become tender without falling apart during baking.
Is it necessary to peel the potatoes for scallop potatoes?
Peeling the potatoes is a personal preference. While peeled potatoes provide a classic, smooth texture, leaving the skins on adds a rustic touch and extra nutrients. Ensure the potatoes are well scrubbed if you choose to leave the skins on.
Can scallop potatoes be frozen?
Yes, you can freeze scallop potatoes either before or after baking. If freezing before baking, assemble the dish, wrap it tightly, and freeze. To bake, thaw in the refrigerator overnight and then bake as usual. For already baked dishes, portion them out and freeze for easy reheating.
What can I serve with scallop potatoes?
Scallop potatoes pair wonderfully with a variety of proteins such as roasted chicken, grilled steak, or baked fish. They also complement green vegetables like steamed broccoli, green beans, or a crisp salad for a balanced meal.
Conclusion
Scalloped potatoes are more than just a side dish—they’re a warm hug on a plate. With their rich, creamy texture and golden, cheesy topping, they steal the show every time. And now that you’ve got this foolproof step-by-step guide, you’re all set to wow your family or guests. Whether you’re cooking for the holidays or just looking for something special, this recipe will become your go-to.