Sautéed Brussels Sprouts Recipe: Let’s face it—Brussels sprouts have had a rough reputation for years. But here’s the truth: when cooked the right way, these little green gems are absolutely delicious. Forget the mushy, boiled versions you might’ve suffered through as a kid. Sautéed Brussels sprouts are crispy on the outside, tender on the inside, and loaded with flavor. When done right, they can go from “meh” to “more, please!” in just one bite.
What makes sautéing so effective? It’s all about the caramelization. Cooking Brussels sprouts in a hot skillet allows the natural sugars in them to brown and intensify, giving you that crispy texture and rich, nutty taste. It’s a transformation worth celebrating—and once you get it down, you’ll never want to make them any other way.
Plus, they’re versatile. You can dress them up with garlic, lemon, cheese, or a drizzle of balsamic. You can make them spicy, sweet, savory, or even smoky. Whether you’re cooking for a dinner party or just need a quick side dish, sautéed Brussels sprouts are a crowd-pleaser every single time.
Perfect for Any Occasion
Whether it’s Thanksgiving dinner, a weeknight meal, or even a fancy brunch, sautéed Brussels sprouts slide right into any menu like they were made for it. They complement everything from roasted chicken to grilled salmon, and they even shine in vegetarian and vegan dishes.
And let’s not ignore how healthy they are. These mini cabbages are packed with vitamin C, vitamin K, fiber, and antioxidants. So, while your taste buds are celebrating, your body is quietly thanking you.
Now that we’ve got you excited, let’s get into what you’ll need to make your very own skillet of golden, flavorful Brussels sprouts.
Ingredients You’ll Need
Fresh Ingredients List
Here’s a breakdown of what you’ll need to pull this recipe off like a seasoned chef. Simplicity is key here—you don’t need a long list of ingredients to create magic:
- 1½ pounds fresh Brussels sprouts (look for firm, bright green ones)
- 2–3 tablespoons olive oil (extra virgin is ideal)
- Salt and pepper to taste
- 2–3 cloves garlic, minced (optional, but highly recommended)
- Juice of half a lemon (adds brightness)
- Optional: 1 tablespoon unsalted butter (for extra richness)
If you want to take it up a notch, try adding any of the following:
- Crushed red pepper flakes (for a spicy kick)
- Shredded parmesan cheese (for a savory, nutty finish)
- Chopped bacon (because bacon makes everything better)
- Balsamic glaze (for a touch of sweetness and acidity)
Optional Add-Ins for Extra Flavor
You’re the chef here—feel free to mix things up! Brussels sprouts pair well with sweet, spicy, and salty flavors. Here are a few optional add-ins to experiment with:
- Maple syrup – for a sweet contrast
- Honey and mustard mix – for a tangy glaze
- Crispy pancetta – for a gourmet touch
- Toasted nuts (like almonds or pecans) – for crunch and depth
- Dried cranberries – to add a chewy, tart balance
The beauty of sautéed Brussels sprouts is their ability to play well with so many other flavors. Try a few combos to find your signature style.
Tools and Equipment Checklist
Don’t worry, you don’t need a full-blown professional kitchen to nail this recipe. Just a few basics will do:
- A large skillet or frying pan (preferably cast iron or stainless steel)
- Tongs or a wooden spoon (for flipping and stirring)
- Sharp knife and cutting board (to prep the sprouts)
- Mixing bowl (to toss your ingredients before cooking)
- Colander (for rinsing and draining the sprouts)
Make sure your pan is wide enough to let the Brussels sprouts sit in a single layer—that’s crucial for even browning. If they’re piled up, they’ll steam instead of sauté, and you’ll lose that signature crisp.
How to Choose the Best Brussels Sprouts
Tips for Picking Fresh Sprouts
Great dishes start with great ingredients—and Brussels sprouts are no exception. Picking the right ones makes a huge difference in both taste and texture.
Here’s what to look for:
- Firm and compact heads – Avoid any that feel soft or squishy.
- Bright green color – Yellow or brown spots are signs of age.
- Small to medium size – Smaller sprouts are usually sweeter and more tender.
- Attached to the stalk (if available) – They stay fresher longer this way.
If you’re buying pre-cut or bagged Brussels sprouts, check the package date and look for any signs of browning or wilting.
Prepping Your Sprouts Like a Pro
Once you’ve brought your sprouts home, it’s time to prep. Here’s the lowdown:
- Rinse thoroughly – Dirt and bugs can hide in the outer leaves, so give them a good wash.
- Trim the ends – Slice off the woody stem at the bottom (just a bit!).
- Peel any yellow or damaged outer leaves – You want clean, fresh layers.
- Cut in half vertically – This increases surface area for browning and allows them to cook more evenly.
Want them extra tender? Consider scoring an “X” into the base of each sprout. This helps heat and seasoning penetrate better—especially helpful if you’re working with larger ones.
Step-by-Step Guide to Sautéed Brussels Sprouts
Step 1: Clean and Trim the Brussels Sprouts
Start by rinsing your Brussels sprouts under cool running water to remove any dirt or debris. Trim off the stem ends and peel away any loose or discolored outer leaves. If the sprouts are large, cut them in half lengthwise for even cooking. Smaller ones can be left whole — they’ll develop a lovely golden crust when sautéed.
Step 2: Parboil for Tenderness (Optional but Recommended)
For extra-tender centers, bring a pot of salted water to a boil and parboil the sprouts for 2–3 minutes. Drain immediately and transfer them to a bowl of ice water to stop the cooking process. This step ensures the insides are soft while still allowing the outsides to crisp beautifully in the pan.
Step 3: Heat the Pan and Choose the Right Oil
Place a large skillet over medium-high heat and add 1–2 tablespoons of olive oil, avocado oil, or butter. Once the oil is shimmering (or the butter foams lightly), it’s ready. Using a heavy-bottomed pan, like cast iron, helps achieve that perfect golden sear on the cut sides of the Brussels sprouts.
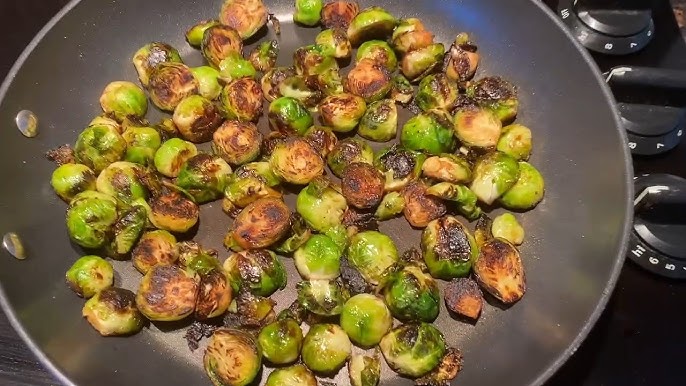
Step 4: Sauté to Perfection
Add the Brussels sprouts cut-side down in a single layer. Don’t overcrowd the pan — they need space to brown properly. Let them cook undisturbed for about 5–6 minutes, until the bottoms are caramelized and crisp. Flip and sauté for another 3–4 minutes, tossing occasionally until they’re tender and beautifully browned all over.
Step 5: Season and Serve
Season with salt, black pepper, and a squeeze of lemon juice while still in the pan. For extra flavor, toss in minced garlic, red pepper flakes, or a drizzle of balsamic glaze during the final minute. Remove from heat and serve immediately.
Crispy on the outside, tender inside, and full of nutty, caramelized flavor — these sautéed Brussels sprouts will convert even the skeptics. A simple, elegant side dish that pairs perfectly with everything from roasted chicken to steak.
Cooking Tips for Restaurant-Quality Brussels Sprouts
Getting the Perfect Sear
The most common complaint about Brussels sprouts is that they’re soggy or bland. Want that restaurant-style crisp? Here’s the deal:
- Cut-side down: Always place them flat side down in the pan first for that golden crust.
- High heat is your friend: Don’t be afraid of a hot pan. A little smoke is okay, but not too much—keep it at medium-high.
- Don’t move them too much: This isn’t a stir-fry. Let them sit so they can develop that irresistible crispiness.
- Use the right oil: High smoke point oils like avocado or grapeseed oil work well if you’re really cranking the heat.
And don’t skip the finishing touch—a splash of acid (lemon juice, vinegar) right at the end really elevates the dish.
Avoiding Sogginess
Soggy Brussels sprouts are the worst. Here’s how to avoid that dreaded mush:
- Dry them thoroughly: After washing or parboiling, pat them dry completely. Moisture is the enemy of browning.
- Cook in a single layer: Give them room to breathe. Overcrowding causes steaming.
- Don’t cover the pan: This traps steam and softens the sprouts.
- Use high heat: It ensures quick cooking and crispy results.
Bonus tip: If your sprouts seem to brown too quickly, reduce the heat slightly and add a small splash of water to finish cooking them through without burning.
Enhancing Flavor with Herbs and Add-ins
Once you’ve mastered the basic sauté, it’s time to get creative with flavor. Here are some pro-level ideas to upgrade your sprouts:
- Garlic & Herb Blend: Add minced garlic, thyme, and rosemary in the last 2 minutes of cooking.
- Spicy Kick: Toss in a pinch of cayenne or chili flakes with a splash of lime juice.
- Sweet & Tangy: Drizzle with honey and balsamic vinegar for a sticky, delicious glaze.
- Cheesy Finish: Grate fresh parmesan or pecorino right before serving.
You can also stir in chopped fresh parsley, toasted breadcrumbs, or lemon zest. Think of your sautéed Brussels sprouts like a blank canvas—it’s up to you to make them sing.
Variations to Try
Garlic Parmesan Brussels Sprouts
If you’re a fan of bold, cheesy, garlicky goodness—this variation is calling your name. Garlic Parmesan Brussels sprouts take the classic sauté and elevate it with a mouthwatering flavor combo.
Here’s how to make them:
- Sauté the Brussels sprouts as usual until golden brown.
- In the last 2 minutes of cooking, add 2–3 minced garlic cloves.
- Stir frequently to avoid burning the garlic.
- Right before serving, sprinkle in ¼ cup of freshly grated Parmesan cheese.
- Toss everything together while the pan is still warm, so the cheese melts slightly and clings to each piece.
The result? Brussels sprouts that are crispy, savory, and slightly creamy from the cheese. You can even finish them off under the broiler for 1–2 minutes if you want an extra golden crust. These pair amazingly well with roasted meats or pasta dishes and make a fantastic party side dish.
Balsamic Glazed Version
Looking for something with a sweet and tangy twist? This balsamic-glazed variation is all about balance. The glaze caramelizes slightly when it hits the hot pan, adding complexity and depth to every bite.
Here’s what to do:
- Sauté the sprouts as usual.
- Once they’re crispy and tender, reduce the heat to low.
- Add 1–2 tablespoons of balsamic vinegar (and optionally, 1 teaspoon of honey or maple syrup).
- Stir to coat and let it simmer for 1–2 minutes until the glaze thickens slightly and clings to the sprouts.
The vinegar adds brightness, while the sweetness enhances the caramelized edges. This version works great for holiday dinners or as a side to grilled chicken or pork. Don’t forget to garnish with some toasted nuts or pomegranate seeds for a festive touch!
Spicy Chili-Lime Sautéed Sprouts
Want to turn up the heat? Try this fiery, zesty twist on the classic. Chili-lime Brussels sprouts are bold, vibrant, and a total flavor bomb.
How to make them:
- Sauté your sprouts until perfectly browned.
- Add ½ teaspoon red pepper flakes or 1 finely chopped chili during the last 2 minutes.
- Squeeze in the juice of one fresh lime right before serving.
- Optional: add a dash of soy sauce or sesame oil for an Asian-inspired flavor punch.
This variation is especially great as a side for Asian dishes, tacos, or anything with bold, spicy flavors. Add some chopped cilantro or green onions to finish things off with a fresh kick.
Serving Suggestions
What Pairs Well with Sautéed Brussels Sprouts
Sautéed Brussels sprouts are incredibly versatile and play well with a variety of dishes. Here’s a quick guide to what they complement best:
Main Dishes:
- Roast chicken or turkey
- Grilled or baked salmon
- Steak or pork chops
- Vegetarian mains like lentil loaf or quinoa bowls
Other Sides to Pair:
- Mashed potatoes
- Wild rice pilaf
- Roasted sweet potatoes
- Fresh green salad
These sprouts add a satisfying crunch and a savory, caramelized flavor that balances richer, heavier entrees. They also work wonderfully as a warm salad base—just add some grains, nuts, and a vinaigrette.
Plating Tips for Presentation
Let’s not underestimate presentation. Even a simple dish like Brussels sprouts can look gourmet with a few easy touches:
- Serve them on a white or black plate to make the green pop.
- Sprinkle toasted almonds, feta cheese, or cranberries on top for texture and color contrast.
- Use a drizzle of balsamic glaze or sriracha mayo across the plate for a restaurant-style finish.
- Garnish with a sprig of fresh herbs—like parsley, thyme, or dill—for that professional flair.
If you’re hosting, serve them in a cast iron skillet for a rustic, straight-from-the-pan look. Just be sure to wipe the sides for a clean appearance.
Storage and Reheating Instructions
Best Practices for Leftovers
So you’ve made a big batch (smart move), and now you’re wondering how to keep them fresh. Here’s how to handle leftovers the right way:
- Let the Brussels sprouts cool to room temperature before storing.
- Transfer to an airtight container and refrigerate for up to 4 days.
- Avoid covering while still hot, as steam can cause sogginess.
Want to prep ahead? You can also trim and cut the sprouts a day in advance and store them raw in the fridge. This shaves time off your cooking process when you’re ready to sauté.
How to Reheat Without Losing Flavor
Reheating Brussels sprouts can be tricky—they’re known to lose their crispy texture quickly. Here’s how to keep them tasting fresh and crispy:
Best Method:
- Reheat in a skillet over medium heat with a touch of oil.
- Cook for 3–5 minutes, stirring occasionally, until warmed through and re-crisped.
Alternative Methods:
- Oven: Spread on a baking sheet and bake at 375°F for 8–10 minutes.
- Air fryer: Reheat at 350°F for 5 minutes for maximum crisp.
Avoid microwaving if you can. It tends to steam the sprouts, making them soggy and less flavorful.
Nutritional Benefits of Brussels Sprouts
Vitamins and Minerals
These tiny green orbs are nutrient powerhouses. Brussels sprouts belong to the cruciferous vegetable family (like broccoli and kale), and they’re absolutely loaded with health benefits.
Here’s what you’re getting in every serving:
- Vitamin C: Supports immunity and skin health
- Vitamin K: Essential for bone health and blood clotting
- Fiber: Aids digestion and keeps you full longer
- Folate: Important for cell growth and function
- Antioxidants: Including kaempferol, known for anti-inflammatory benefits
They’re also low in calories—about 38 calories per cup—but super filling, making them perfect for anyone watching their weight or eating clean.
Low-Calorie, High-Fiber Bonus
Trying to lose weight or eat a bit healthier? Brussels sprouts are your best friend. Thanks to their high fiber content, they help regulate blood sugar, promote satiety, and improve gut health. A serving gives you about 4 grams of fiber, which is about 15% of your daily needs.
They’re also low in carbs and fat, making them a great side dish for keto, paleo, and vegan diets alike. Add them to your meal prep rotation and enjoy a boost of flavor and nutrition without guilt.
Common Mistakes to Avoid
Overcooking or Undercooking
If there’s one thing that can ruin a perfectly good Brussels sprouts recipe, it’s getting the cooking time wrong. Whether you’re sautéing, roasting, or steaming, timing is everything.
Overcooking: This is the #1 reason people say they “don’t like Brussels sprouts.” When overcooked, they become mushy, sulfurous, and bitter—not exactly appetizing. You’ll also lose many of their vital nutrients. Avoid leaving them in the pan too long, and remember, carryover cooking happens even after you remove them from the heat.
Undercooking: On the flip side, undercooked Brussels sprouts can be hard and dense in the middle. No one wants a side dish that’s crunchy for the wrong reasons. If you skip the parboil step, be extra patient while sautéing to ensure the centers get tender.
Pro Tip: Use a fork to test doneness. It should glide in smoothly, but the sprouts should still hold their shape.
Skipping the Parboil Step
Parboiling may seem like an unnecessary extra step, but it’s a game-changer. Especially when working with larger sprouts, it helps soften the core so they sauté evenly without burning the outer layers.
Why it’s important:
- Even cooking: Ensures the inside is tender before the outside gets too crisp.
- Reduces bitterness: A quick boil can mellow some of the naturally bitter flavors.
- Retains color: A fast blanch helps lock in that beautiful green hue.
If you want your sautéed Brussels sprouts to be both crispy and tender (as they should be), don’t skip this step. It only takes a few minutes, but it makes all the difference.
FAQs about Sautéed Brussels Sprouts Recipe
Can I make this dish ahead of time?
Absolutely! You can trim and halve the Brussels sprouts a day ahead and store them in an airtight container in the fridge. Cooked sprouts can also be made up to 2 days in advance and reheated in a skillet or oven before serving.
What’s the best oil for sautéing Brussels sprouts?
Olive oil is a great go-to for its flavor and health benefits, but you can also use avocado oil, canola oil, or ghee. If you’re cooking at high heat, choose an oil with a higher smoke point to prevent burning.
Can I use frozen Brussels sprouts instead of fresh?
Yes, but the texture won’t be as crisp. Thaw them first, pat them dry thoroughly, and be prepared to cook them a little longer. You might need a higher heat to get that same golden-brown sear.
How can I make them extra crispy?
Use a cast iron skillet, make sure the sprouts are completely dry, and don’t overcrowd the pan. Sauté on high heat, undisturbed, until the cut side is deeply caramelized. A sprinkle of breadcrumbs or finishing in the oven can add even more crunch.
Are Brussels sprouts good for meal prep?
Definitely! They store well and reheat beautifully when done right. Add them to grain bowls, pair with proteins, or toss into salads throughout the week for a healthy, flavorful boost.
Conclusion
Sautéed Brussels sprouts might just be the most underrated veggie side dish of all time. They’re quick to make, incredibly versatile, and packed with nutrients. Whether you like them crispy and garlicky, tossed in balsamic glaze, or sprinkled with Parmesan, there’s a version that’ll win your heart—and your taste buds.
Once you master the basics, the possibilities are endless. You can dress them up for holidays or keep them simple for weeknight dinners. You can serve them hot off the stove or reheat them for meal prep. The best part? They’re healthy, affordable, and absolutely delicious.
So grab a skillet, a handful of sprouts, and let the sizzle begin. Your plate (and your guests) will thank you.