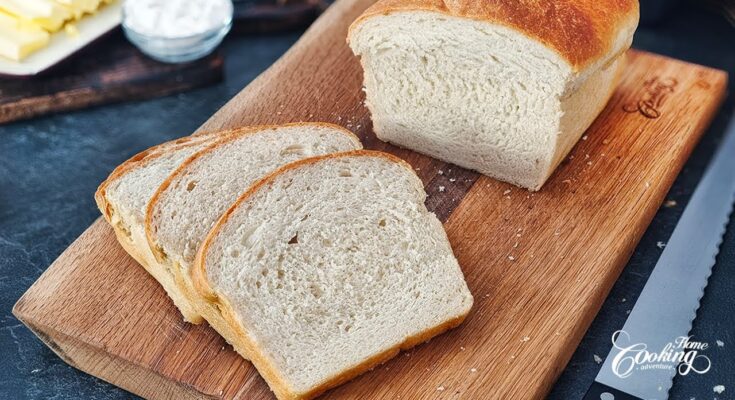
Sandwich Bread Recipe: There’s something magical about the aroma of freshly baked bread filling your home. Homemade sandwich bread isn’t just delicious; it’s a healthier, preservative-free alternative to store-bought bread.
Whether you’re a seasoned baker or a beginner, this step-by-step guide will walk you through creating soft, fluffy sandwich bread that’s perfect for your morning toast or hearty sandwiches.
Ingredients for Sandwich Bread
To create the perfect sandwich bread, you’ll need the following ingredients:
Essential Ingredients:
- Flour: All-purpose or bread flour works best. Bread flour yields a chewier texture due to its higher protein content.
- Yeast: You can use active dry yeast or instant yeast. Both work well but require slightly different handling.
- Water or Milk: Lukewarm water or milk is essential to hydrate the dough. Milk adds softness to the bread.
- Sugar or Honey: Acts as food for the yeast and enhances flavor.
- Salt: Balances the flavor.
- Butter or Oil: Adds richness and softness.
Optional Ingredients:
- Eggs for a richer dough
- Seeds or grains for added texture
Tools You’ll Need
Bread-making doesn’t require fancy gadgets, but having the right tools makes the process easier:
- Measuring tools: Measuring cups and a kitchen scale for precision.
- Mixing tools: A large mixing bowl, whisk, and a stand mixer (optional).
- Proofing essentials: A clean towel or plastic wrap to cover the dough.
- Baking equipment: A standard loaf pan and a well-functioning oven.
Preparation Before You Start
A little preparation goes a long way:
- Set up your workspace: Ensure your kitchen counter is clean and clutter-free.
- Measure accurately: Bread-making is a science, so measure your ingredients precisely.
- Check ingredient temperatures: Yeast thrives in lukewarm liquids (95°F to 110°F). Too hot or cold, and it won’t activate.
Step-by-Step Guide to Making Sandwich Bread
Step 1: Activating the Yeast
- Combine 2 1/4 teaspoons of yeast with 1/4 cup of lukewarm water and a teaspoon of sugar in a small bowl.
- Let it sit for 5–10 minutes until frothy. This ensures your yeast is alive and active.
Step 2: Mixing the Dough
- In a large bowl, combine 3 cups of flour, 1 teaspoon of salt, and 1 tablespoon of sugar.
- Gradually mix in the activated yeast and 3/4 cup of lukewarm milk or water.
- Add 2 tablespoons of melted butter or oil.
- Stir until the dough comes together into a sticky ball.
Step 3: Kneading the Dough
By Hand:
- Transfer the dough to a floured surface and knead for 8–10 minutes until it becomes smooth and elastic.
Using a Stand Mixer:
- Use the dough hook attachment and knead on medium speed for 5–7 minutes.
Step 4: First Rise (Proofing)
- Place the kneaded dough in a lightly oiled bowl. Cover it with a clean towel or plastic wrap.
- Let it rise in a warm spot for 1–2 hours until it doubles in size.
Shaping the Dough
Once the dough has risen, it’s time to shape it into a loaf. This step ensures your bread fits neatly into the pan and bakes evenly.
- Deflate the dough: Gently punch down the dough to release any air bubbles.
- Shape the loaf: Turn the dough onto a lightly floured surface and shape it into a rectangle, roughly the width of your loaf pan. Roll it tightly, starting from one end, to form a log.
- Seal the edges: Pinch the seams together to maintain the loaf’s shape during baking.
Place the shaped dough into a greased loaf pan with the seam side down.
Second Rise
The second rise, or proofing, is crucial for creating the soft texture of sandwich bread.
- Cover the loaf pan with a towel or plastic wrap.
- Let it rise in a warm spot for 30–60 minutes, or until the dough has risen just above the edge of the pan.
- Avoid over-proofing, as it can result in a collapsed loaf during baking.
Baking the Bread
Now comes the most rewarding part: baking your bread to perfection.
- Preheat your oven: Set it to 375°F (190°C) and let it heat for at least 15 minutes.
- Bake the bread: Place the loaf pan in the center of the oven and bake for 25–30 minutes. The bread should turn golden brown and sound hollow when tapped on the bottom.
- Check doneness: If you have a thermometer, the internal temperature of fully baked bread should read 190°F (88°C).
Cooling the Bread
Cooling is often overlooked but critical for maintaining the structure of your bread.
- Remove the loaf from the pan immediately after baking to prevent a soggy bottom.
- Place the bread on a wire rack to cool completely, at least 1–2 hours, before slicing. This allows the crumb to set properly.
Storing Your Sandwich Bread
Homemade bread doesn’t contain preservatives, so proper storage is key.
- Short-term storage: Wrap the loaf tightly in plastic wrap or store it in a bread box for up to 3 days.
- Long-term storage: Slice the loaf, place it in a resealable plastic bag, and freeze it for up to 3 months. Thaw slices as needed for fresh-tasting bread.
Common Mistakes and Troubleshooting
Making bread can be a learning curve. Here are some common issues and how to fix them:
- Dough not rising: Check if your yeast is active. Ensure your liquid is lukewarm, not hot.
- Dense texture: This can result from under-kneading or insufficient proofing.
- Bread collapsing: Over-proofing can cause the dough to lose structure.
Variations of Sandwich Bread
Experiment with different versions of sandwich bread to suit your taste and dietary needs:
- Whole Wheat Bread: Substitute half or all of the flour with whole wheat flour for a nuttier flavor.
- Gluten-Free Bread: Use a gluten-free flour blend and add xanthan gum for structure.
- Add-ins: Mix in seeds, nuts, herbs, or shredded cheese for extra flavor and texture.
Serving Ideas
Homemade sandwich bread is versatile and can be used in countless ways:
- Classic sandwiches: Create your favorite deli-style sandwiches with fresh veggies and meats.
- Toast: Buttered toast or avocado toast is even better with homemade bread.
- Sweet treats: Use it for French toast, bread pudding, or a comforting grilled cheese.
Tips for Beginners
Bread-making may seem intimidating at first, but these tips can help you succeed:
- Start simple: Stick to basic recipes before exploring complex variations.
- Patience pays off: Allow the dough to rise fully for the best texture.
- Practice makes perfect: Each loaf teaches you something new.
FAQs About Sandwich Bread Recipe
1. What ingredients do I need for a basic sandwich bread recipe?
To make a simple sandwich bread, you’ll need all-purpose flour, yeast, sugar, salt, warm water, and butter or oil. Optional additions include milk for softness and honey for sweetness.
2. How long does it take to make sandwich bread?
The process typically takes about 2 to 3 hours, including preparation, proofing, and baking time. Most of this time is waiting for the dough to rise.
3. Do I need a bread machine to make sandwich bread?
No, a bread machine is optional. You can knead the dough by hand or use a stand mixer for convenience.
4. How can I make my bread softer?
Adding milk or an extra tablespoon of butter can make the bread softer. Using bread flour instead of all-purpose flour can also improve texture.
5. Can I use whole wheat flour for sandwich bread?
Yes, you can substitute whole wheat flour for part or all of the all-purpose flour. Keep in mind that the bread may be denser. Adding vital wheat gluten can help maintain a lighter texture.
6. How do I store homemade sandwich bread?
Store the bread in an airtight container or bag at room temperature for up to 3 days. For longer storage, freeze it for up to a month.
7. Why didn’t my bread rise properly?
Check that your yeast is fresh and active, and ensure the water is warm (not hot). Cold environments can also slow down the rising process.
8. Can I customize my sandwich bread?
Absolutely! Add ingredients like seeds, herbs, or cheese for a unique twist. You can also shape it into rolls or baguettes for variety.
Conclusion
Making sandwich bread from scratch is a rewarding experience. From the simple joy of kneading the dough to the irresistible aroma wafting through your kitchen, homemade bread is truly worth the effort. Once you master the basics, you can experiment with endless variations and make bread tailored to your tastes. So grab your apron, gather your ingredients, and give it a try—you’ll never look at store-bought bread the same way again.


