Rolled Sugar Cookies Recipe: Let’s talk about one of the most beloved and timeless treats in baking: Rolled Sugar Cookies. Whether you’re prepping for the holidays, a birthday party, or just want something buttery and sweet, these cookies are your golden ticket.
They’re fun to make, especially when you get creative with shapes and decorations. But here’s the catch—while sugar cookies might seem simple, getting that perfect rolled texture and clean cut-out shape can be tricky without a solid method.
So in this guide, we’re breaking it all down. From the ingredients to every little step, this is your go-to recipe for soft, crisp-edged, perfectly baked sugar cookies that’ll steal the show.
Why Rolled Sugar Cookies are a Classic Favorite
Sugar cookies have stood the test of time for a reason. Their light, buttery taste is irresistible, and when made right, they practically melt in your mouth. But what really sets rolled sugar cookies apart is their versatility. You can cut them into any shape you want—hearts, stars, snowflakes, animals—you name it. They’re basically blank edible canvases waiting to be dressed up with frosting, sprinkles, or royal icing. Plus, they’re the kind of treat that kids and adults both go crazy for. Rolled sugar cookies aren’t just food—they’re fun, nostalgic, and great for making memories in the kitchen.
Perfect Occasions for Rolled Sugar Cookies
You don’t need a holiday to bake sugar cookies, but let’s be real—they do shine brightest during special moments. Think:
- Christmas cookie swaps
- Valentine’s Day treats
- Easter baskets
- Baby showers
- Birthday party favors
- DIY decorating nights with kids
- Graduation parties
- Personalized wedding favors
Because they hold their shape so well, rolled sugar cookies are perfect for custom designs and themed decorations. They’re also a thoughtful and inexpensive homemade gift that shows love and effort.
What Makes Rolled Sugar Cookies Different from Drop Cookies?
Ever wondered why some cookies spread into soft mounds while others stay crisp and cleanly cut? That’s the difference between drop cookies and rolled sugar cookies. Drop cookies, like chocolate chip or oatmeal raisin, are scooped onto the tray and spread while baking. Rolled sugar cookies, on the other hand, are made from a firmer dough that’s chilled and rolled flat, then cut into shapes with cookie cutters.
Here’s the magic: Rolled cookies give you precise edges and even thickness, making them ideal for decorating. They also tend to have a more refined, buttery bite compared to the chewy, casual feel of drop cookies. It’s all in the technique—and we’re about to master it step-by-step.
Tools You’ll Need for This Recipe
Before we get to baking, make sure your kitchen is stocked with the right tools. Here’s what you’ll need for a smooth sugar cookie session:
- Mixing bowls (at least two)
- Electric mixer or stand mixer
- Measuring cups and spoons
- Rubber spatula
- Rolling pin
- Cookie cutters
- Baking sheets
- Parchment paper or silicone baking mats
- Cooling rack
- Plastic wrap or zip-top bags (for chilling dough)
- Optional: Offset spatula, flour shaker, decorating supplies
Being prepared saves you time and makes baking way more fun. You don’t want to be elbow-deep in flour only to realize you forgot your rolling pin!
List of Ingredients You’ll Need
Let’s gather everything you need to make classic rolled sugar cookies. These pantry staples are likely already in your kitchen, and if not—they’re easy to find.
Dry Ingredients
- 2 ¾ cups (345g) all-purpose flour
- ½ tsp baking powder
- ¼ tsp salt
These form the structure of the cookie. Make sure to spoon and level your flour—don’t scoop, or your dough might get too dry.
Wet Ingredients
- 1 cup (226g) unsalted butter, softened
- 1 cup (200g) granulated sugar
- 1 large egg
- 1 ½ tsp vanilla extract
- ½ tsp almond extract (optional but recommended)
That butter-sugar-egg combo gives your cookies their richness and flavor. Don’t skip the extracts—they make a huge difference.
Optional Flavor Enhancers
- Zest of one lemon or orange
- ½ tsp cinnamon or nutmeg for a spiced version
- 1 tbsp milk or cream if dough feels dry
Optional, but fun if you want to add a twist to the classic flavor.
How to Prep Your Baking Space for Sugar Cookies
Getting your kitchen ready is just as important as the recipe. Here’s how to set yourself up for cookie success:
- Clean your counter space – You’ll need a flat surface for rolling out dough.
- Preheat your oven – Set it to 350°F (175°C) so it’s hot and ready when your cookies are.
- Line your baking sheets – Parchment paper or silicone mats are your best friends here.
- Set out all ingredients – Measure them ahead of time to keep things flowing.
- Dust your rolling pin and surface with flour – This keeps the dough from sticking later.
Having everything ready makes the process smooth and lets you enjoy the fun part—baking and decorating!
Step-by-Step Guide to Making Rolled Sugar Cookies
Alright, here comes the good part. This step-by-step guide will walk you through making flawless rolled sugar cookies. Stick to the process, and you’ll be amazed at the results.
Step 1: Cream the Butter and Sugar
In a large bowl, beat softened butter and sugar together until light and fluffy. This step incorporates air, giving the cookies a tender texture and helping them hold their shape.
Step 2: Add Eggs and Flavorings
Mix in the eggs one at a time, beating well after each addition. Add vanilla extract (and a touch of almond extract if desired) for classic sugar cookie flavor.
Step 3: Mix in the Dry Ingredients
In a separate bowl, whisk together flour, baking powder, and salt. Gradually add the dry ingredients to the wet mixture, mixing just until combined. Avoid overmixing to keep the cookies soft.
Step 4: Divide and Chill the Dough
Divide the dough into two portions, flatten into discs, wrap tightly, and refrigerate for at least 1 hour. Chilling firms the dough, making it easier to roll and cut.
Step 5: Roll Out the Dough
On a lightly floured surface, roll out the chilled dough to about ¼-inch thickness. Rotate the dough as you roll to prevent sticking.
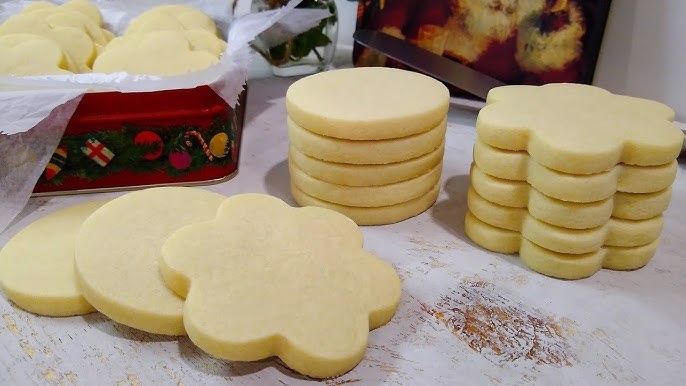
Step 6: Cut Out the Shapes
Use cookie cutters to cut out shapes. Transfer cookies to a lined baking sheet, leaving space between each one.
Step 7: Bake to Perfection
Bake in a preheated oven at 350°F (175°C) for 8–10 minutes, or until the edges are just lightly golden. Avoid overbaking for soft centers.
Step 8: Cool Before Decorating
Let cookies cool on the baking sheet for a few minutes, then transfer to a rack to cool completely before decorating with icing or sprinkles.
Classic, fun, and perfect for decorating—rolled sugar cookies never go out of style 🍪✨
Tips for Perfectly Rolled Sugar Cookies
Want professional-looking sugar cookies at home? Here are some tried-and-true tips:
- Chill your dough—both before rolling and again after cutting.
- Work in batches—keep unused dough in the fridge while rolling the rest.
- Use minimal flour—too much will make the dough dry and crack.
- Roll between two sheets of parchment to reduce sticking.
- Use a ruler to check thickness for even baking.
- Bake similar-sized cookies together so everything cooks evenly.
These small habits can take your sugar cookie game from “meh” to magical.
Common Mistakes to Avoid
Even experienced bakers can run into trouble with sugar cookies. Watch out for these common pitfalls:
- Skipping the chill time – Warm dough equals misshapen cookies.
- Adding too much flour – It’ll dry out your dough and ruin the texture.
- Overmixing the dough – Makes your cookies tough instead of tender.
- Rolling uneven dough – Leads to uneven baking and burnt edges.
- Overbaking – These cookies should be pale with barely golden bottoms.
A little extra care during the process goes a long way toward perfect results.
How to Store Rolled Sugar Cookies
To keep your cookies fresh and fabulous:
- Room temp: Store undecorated or decorated cookies in an airtight container for up to 1 week.
- Freeze dough: Wrap tightly and freeze up to 2 months. Thaw in fridge overnight before rolling.
- Freeze baked cookies: Stack between parchment paper in a sealed container. Freeze up to 2 months.
Pro Tip: If decorating with royal icing, let it dry completely (at least 8 hours) before stacking or storing.
Decorating Ideas for Sugar Cookies
Now comes the fun and creative part—making your cookies beautiful! Here are some decorating options:
1. Classic Buttercream Icing
Spread or pipe tinted buttercream for a soft, sweet finish. Perfect for kids’ parties.
2. Royal Icing
Dries hard and smooth—great for detailed designs and intricate art.
3. Glaze Icing
Quick and easy to whip up with powdered sugar and milk. Adds a shiny coat.
4. Fondant
Roll and cut to fit your cookie shapes for a polished bakery look.
5. Sprinkles, Candies & Edible Glitter
Decorate before baking for baked-in fun, or after icing for a festive touch.
Don’t be afraid to mix and match! Cookie decorating is all about creativity.
Flavor Variations to Try
While the classic vanilla-almond rolled sugar cookie is a tried-and-true favorite, why not switch things up from time to time? Playing with flavors can make your cookies stand out and suit different occasions or preferences. Here are a few crowd-pleasing twists you can try:
1. Citrus Sugar Cookies
- Add 1 tbsp of lemon zest or orange zest to the dough.
- Pair with a simple citrus glaze for an extra zing.
- Perfect for springtime events or afternoon tea.
2. Chocolate Sugar Cookies
- Substitute ½ cup of the flour with unsweetened cocoa powder.
- Consider adding a pinch of espresso powder to enhance the chocolate.
- These are rich, elegant, and pair beautifully with peppermint or vanilla icing.
3. Spiced Sugar Cookies
- Add ½ tsp cinnamon, ¼ tsp nutmeg, and a pinch of clove.
- Ideal for fall holidays or cozy winter baking.
- Decorate with cinnamon-sugar glaze or caramel drizzle.
4. Almond or Maple Cookies
- Swap the vanilla extract for pure almond or maple extract.
- Use chopped nuts in the dough or on top for texture.
- Great for festive occasions and gift tins.
Don’t be afraid to get creative! Just remember—small changes in moisture or fat content can affect texture, so tweak carefully.
Gluten-Free and Vegan Rolled Sugar Cookie Options
Whether you’re baking for dietary needs or just want to experiment with alternatives, gluten-free and vegan sugar cookies can still be absolutely delicious.
Gluten-Free Version
- Use a 1:1 gluten-free all-purpose flour blend that includes xanthan gum.
- Double-check all other ingredients are certified gluten-free.
- Add 1 tbsp milk or cream if dough feels dry.
Vegan Version
- Replace butter with vegan butter or solid coconut oil.
- Substitute the egg with:
- 1 tbsp ground flaxseed + 3 tbsp water (flax egg), or
- ¼ cup unsweetened applesauce.
- Use plant-based milk or cream if needed.
Note: Vegan doughs may be slightly more delicate, so chill thoroughly and handle gently when rolling and cutting.
FAQs about Rolled Sugar Cookies Recipe
1. Can I make the dough ahead of time?
Absolutely! Rolled sugar cookie dough can be made up to 3 days in advance and stored in the refrigerator. You can also freeze it for up to 2 months. Just thaw in the fridge overnight before using.
2. Why do my sugar cookies spread too much?
This usually happens when the dough is too warm or too soft. Always chill the dough before rolling, and consider popping cut-out shapes in the fridge for a few minutes before baking.
3. What’s the best thickness for rolling sugar cookie dough?
¼ inch is the sweet spot. It allows the cookies to bake evenly and hold their shape while staying soft inside.
4. How long do decorated sugar cookies last?
Decorated cookies (especially with royal icing) can last up to 1–2 weeks at room temperature in an airtight container. Make sure the icing is fully dry before storing.
5. Can I use this recipe for edible gifts or party favors?
Yes! These cookies are perfect for gifting. Wrap them in cellophane bags with ribbon or store them in decorative tins. Personalize the shapes and decorations for any event.
Conclusion
There’s something truly magical about rolled sugar cookies. They’re more than just sweet treats—they’re a creative outlet, a bonding activity, and a nostalgic bite of joy all wrapped in one. With the right tools, a bit of patience, and this step-by-step guide, anyone can master the art of these classic cookies. Whether you’re baking for a celebration or just for fun, these cookies never disappoint.
Remember: the key to sugar cookie success lies in the chill time, rolling technique, and not overbaking. Once you nail those, the rest is playtime—from cutting fun shapes to decorating with flair.
So roll up your sleeves, dust off that rolling pin, and bake a batch of cookies that are sure to impress your family, friends, or even just yourself. Happy baking!