Rolled Sugar Cookie Recipe: Rolled sugar cookies are a timeless treat that evoke memories of childhood, holiday baking, and family fun. Whether you’re preparing for a festive occasion or simply craving a buttery, sweet bite, these cookies offer a perfect canvas for creativity and flavor. What sets rolled sugar cookies apart from the average cookie? It’s all in the technique. Rolling the dough and cutting it into shapes allows for stunning visual appeal, especially when decorated with colorful icing or sprinkles.
These cookies are not only delicious but also versatile and beginner-friendly. You don’t need to be a seasoned baker to nail this recipe. With a few basic pantry staples, the right tools, and a little patience, you’ll create cookies that are crisp on the edges, soft in the center, and absolutely irresistible. Plus, you can make them in batches, decorate them however you like, and store them for later — making them ideal for busy schedules and special events alike.
In this detailed step-by-step guide, we’ll walk through everything you need to know — from the ingredients and tools to rolling, baking, decorating, and storing. Let’s get started on baking the perfect rolled sugar cookie that’s sure to impress your friends, family, or even just yourself.
Ingredients You’ll Need
Baking the perfect rolled sugar cookie starts with the right ingredients. Here’s everything you’ll need, broken down into essentials, special touches, and optional extras.
Basic Pantry Staples
You probably already have many of these essentials in your kitchen:
- All-Purpose Flour (2 ¾ cups): The backbone of your cookies, providing structure and texture.
- Granulated Sugar (1 cup): The sweet base that defines a sugar cookie.
- Eggs (2 large): Help bind the dough together while adding moisture and richness.
These ingredients form the core of your dough. Flour gives the cookies their chew and body, while sugar offers sweetness and aids in that golden-brown finish. Eggs help with moisture, structure, and leavening.
Special Additions for Flavor and Texture
These ingredients elevate your cookies from basic to bakery-level delicious:
- Unsalted Butter (1 cup, softened): Adds that melt-in-your-mouth richness. Always use room temperature butter for smooth mixing.
- Pure Vanilla Extract (2 tsp): Adds aromatic warmth and a rich, sweet undertone.
- Baking Powder (2 tsp): Helps the cookies puff slightly without losing their shape.
Butter is essential — it gives that signature soft bite. Vanilla isn’t just a background note; it shines in a simple recipe like this. Baking powder ensures your cookies don’t come out flat, even without a lot of leavening.
Optional Ingredients for Customization
Want to personalize your cookies? Try adding:
- Almond Extract (¼ tsp): Just a dash gives a nutty, aromatic flavor.
- Lemon or Orange Zest (1 tsp): Adds a refreshing twist.
- Food Coloring: Mix into your dough for festive or themed cookies.
- Sprinkles or Colored Sugar: Great for decorating before or after baking.
These extras aren’t necessary, but they let you tailor the cookies to your tastes or events. Almond extract and citrus zest both add complexity, while food coloring and sprinkles make them Instagram-worthy.
Tools and Equipment Required
Before diving into mixing and baking, make sure you have all the tools you’ll need lined up. This ensures a smooth and stress-free baking experience.
Mixing Tools
- Stand Mixer or Hand Mixer: Creaming butter and sugar is much easier with an electric mixer, but a whisk and strong arm will do in a pinch.
- Mixing Bowls: One large bowl for your main dough, and a medium bowl for your dry ingredients.
- Spatula: For scraping down the sides of the bowl and folding the dough.
Having a solid set of mixing tools makes a big difference in texture and consistency. A stand mixer is ideal for ease, but you can still get great results manually.
Rolling and Cutting Tools
- Rolling Pin: Essential for achieving even dough thickness.
- Cookie Cutters: Any shape works! Go classic with circles or get creative with hearts, stars, or seasonal designs.
- Parchment Paper or Silicone Baking Mat: Keeps dough from sticking and helps with even rolling.
A smooth, even roll is key to great cookies. Use spacers or rolling guides if you’re aiming for exact thickness.
Baking Tools
- Baking Sheets: Preferably rimless or low-edged for easy cookie removal.
- Cooling Rack: Helps prevent soggy bottoms after baking.
- Wire Rack: Optional but useful if you’re icing or glazing cookies post-bake.
Organizing all your tools before you begin means you can focus on baking without interruptions. Think of it as your mise en place — the French culinary term for “everything in its place.”
Step-by-Step Guide to Making Rolled Sugar Cookies
Let’s get into the core of the process. This step-by-step breakdown ensures you don’t miss a beat — or a crumb.
Step 1: Creaming the Butter and Sugar
In a large mixing bowl, beat softened butter and granulated sugar together until light and fluffy. This step incorporates air into the mixture, giving your cookies that perfect soft-yet-crisp texture. Use an electric mixer for about 2–3 minutes until the mixture looks pale and creamy — that’s when you know it’s ready.
Step 2: Adding Eggs and Vanilla
Crack in the eggs one at a time, mixing well after each addition. Then add vanilla extract (and a hint of almond extract if you want extra depth of flavor). This step brings richness and aroma to your cookie dough, making it taste like pure nostalgia in every bite.
Step 3: Mixing the Dry Ingredients
In a separate bowl, whisk together all-purpose flour, baking powder, and a pinch of salt. The baking powder gives the cookies a slight lift, while the salt balances the sweetness. Make sure the dry ingredients are well combined before adding them to the wet mixture.
Step 4: Combining Wet and Dry Mixtures
Gradually add the dry ingredients to the butter mixture, mixing on low speed until the dough just comes together. Avoid overmixing — that can make your cookies tough. The dough should be soft but not sticky. If it feels too soft, add a tablespoon of flour at a time until it’s easy to handle.
Step 5: Chilling the Dough
Divide the dough into two discs, wrap each in plastic wrap, and refrigerate for at least 1 hour (or up to overnight). Chilling helps firm up the dough, making it easier to roll out and cut without losing shape.
When you’re ready to bake, roll the dough out on a lightly floured surface, cut into your favorite shapes, and bake at 350°F (175°C) until lightly golden. The result? Buttery, tender, perfectly shaped sugar cookies — ideal for decorating or enjoying as-is.
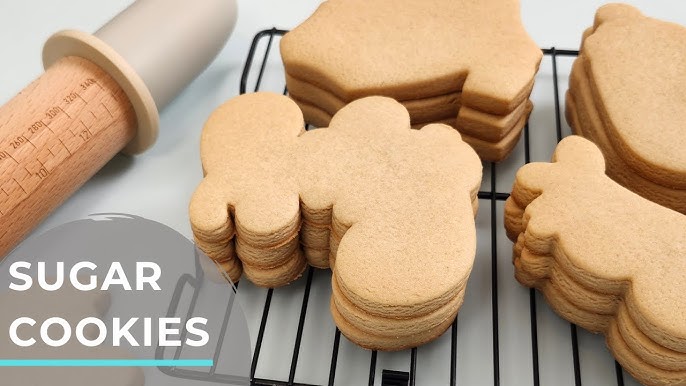
Rolling and Cutting the Cookie Dough
Best Surface for Rolling Dough
To roll cookie dough successfully, use a clean, flat surface such as a lightly floured countertop, a large wooden or marble board, or a silicone baking mat. Sprinkle a little flour on the surface and on your rolling pin to keep the dough from sticking. Roll gently—if the dough sticks, lift it, dust with more flour, and continue. Some bakers also roll between two sheets of parchment paper or plastic wrap to avoid direct contact and reduce the mess. This trick also helps maintain a uniform non-stick surface.
Getting the Perfect Thickness
One of the keys to consistent baking is rolling your dough to a uniform thickness. Aim for around ⅛ to ¼ inch (about 3 to 6 mm), depending on how crisp or soft you want your cookies. If you roll too thin, the cookies may burn or become overly crisp; too thick, and they may bake unevenly or stay underdone inside. Use rolling pin rings or guides, or lay two spacers (like dowels or strips of wood/plastic) on either side of your dough to guide the rolling height.
Using Cookie Cutters Creatively
Once your dough is rolled out, press cookie cutters firmly and lift straight up to get clean edges. For best results:
- Chill the cutters first (dip in a bit of flour) to reduce sticking.
- Dip them in flour between cuts.
- Press straight down — avoid rocking the cutter back and forth, which can distort shapes.
- Use smaller spaces and gather scraps, gently re-roll them (after chilling) — but avoid overworking the dough, which can make it tough.
Have fun exploring shapes—seasonal themes, letters, animals—whatever suits the occasion.
Baking Your Cookies to Perfection
Preheating the Oven
Always preheat your oven for at least 10–15 minutes before baking. A fully hot oven ensures cookies bake quickly and evenly. Aim for 350 °F (175 °C) (or adjust per your oven’s quirks). Use an oven thermometer if yours tends to run hot or cold, so you’re confident in the actual baking temperature.
Baking Time and Temperature
With the oven ready, slide in your baking sheet(s) with enough space between cookies (1 to 2 inches) to allow for slight spreading. Bake for 8 to 12 minutes, depending on cookie thickness, size, and your oven’s heat. Smaller shapes may bake faster; large cookies might need extra time.
How to Tell When They’re Done
The edges should appear set and just lightly golden. The centers may still look a little pale — that’s okay. The cookies will continue to firm up as they cool. Avoid overbaking; they can go from perfect to dry quickly. If you see browning or crisping at the edges, remove them promptly.
Cooling and Decorating Tips
Proper Cooling Techniques
Once you remove the cookies from the oven:
- Let them sit on the baking sheet for 2 to 3 minutes to firm up slightly.
- Transfer carefully onto a cooling rack so air circulates underneath, preventing soggy bottoms.
- Wait until the cookies are completely cool before decorating — icing works best on room‑temperature cookies.
Royal Icing vs Buttercream
Two popular frosting options:
- Royal Icing: Made with powdered sugar, egg white (or meringue powder), and water. Dries hard, making cookies stackable and great for detailed designs.
- Buttercream: Richer, softer, creamier. Adds extra flavor and a tender bite, but won’t harden like royal icing. Best for cookies eaten quickly or displayed flat.
Choose based on how you’ll use the cookies (stacking vs immediate serving) and your preferred texture/flavor.
Easy Decorating Ideas
- Outline & flood: Pipe an outline of royal icing, then “flood” with thinner icing to fill in shapes.
- Sprinkles / sanding sugar: Apply to wet icing before it sets.
- Marbling: Drop contrasting icing colors into wet flood and swirl with a toothpick.
- Spray shimmer / edible dust: Add a finishing glow.
- Royal piping details: Dots, lines, names — after base coat dries.
Let decorations fully dry (several hours or overnight) before stacking or packaging.
Common Mistakes to Avoid
Overmixing the Dough
Once you combine wet and dry ingredients, mix just until the dough comes together. Overmixing develops gluten and leads to tougher cookies. Resist adding extra flour “just in case” — only add small amounts if dough is too sticky to handle.
Skipping the Chill Time
Chilling the dough is critical. It helps:
- Keep the dough firm, making it easier to roll and cut clean shapes.
- Reduce spreading during baking.
- Improve flavor and texture by giving ingredients time to meld.
If you skip or shorten chill time, cookies may spread or lose their shape entirely.
Rolling Too Thin or Thick
Inconsistent thickness causes uneven baking: thin parts burn, thick parts stay raw. Use rolling guides and aim for uniform thickness. Also watch edges — sometimes they roll thinner if pressure isn’t even. Take your time to roll gently and consistently.
Storing and Freezing Sugar Cookies
Best Storage Containers
To keep your cookies fresh:
- Use airtight containers (tins or plastic containers).
- Layer with parchment paper between cookies to prevent sticking.
- Store at room temperature for up to 5–7 days.
- For decorated cookies that have hard icing, store flat (don’t stack until fully dry).
How to Freeze Dough and Baked Cookies
Freezing Unbaked Dough:
- Roll and cut shapes, then flash-freeze on a baking sheet until firm (1–2 hours).
- Transfer frozen shapes into freezer bags or containers with parchment layers.
- Label with date — they last up to 3 months.
- Bake from frozen (add 1–2 minutes to bake time).
Freezing Baked Cookies:
- Let cookies cool completely.
- Place parchment between layers and store in airtight freezer-safe containers.
- Freeze up to 3 months.
- Thaw at room temperature — then decorate or serve.
Making Sugar Cookies Ahead of Time
Batch Baking Tips
If you’re preparing for a party, holiday, or just want to save time, making sugar cookies ahead of time is a life-saver. Here’s how to do it like a pro:
- Double or triple your recipe: The dough stores well, so you can make more without extra effort.
- Divide the dough into portions: Wrap each portion in plastic wrap, then put in a zip-top bag for easy freezing or refrigerating.
- Label everything: Always mark the date and any flavor variations on the dough package.
Batch baking also means you can roll and cut all your cookies in one go, and freeze the raw cookie shapes. Then, simply bake and decorate as needed throughout the season.
Prepping for Holidays and Events
Holidays can get chaotic, but sugar cookies are one of the easiest make-ahead treats. You can:
- Make and freeze the dough up to 3 months in advance.
- Bake cookies weeks ahead and freeze them (undecorated).
- Decorate a few days before your event — just be sure icing is fully dry before stacking or packaging.
Pro Tip: If gifting, wrap individually in cellophane bags with a cute ribbon. It looks professional and keeps the cookies fresh.
Customizing Your Rolled Sugar Cookies
Flavor Variations
Want to switch things up? Rolled sugar cookies are a blank canvas. Here are some delicious variations:
- Citrus Zest: Add 1–2 teaspoons of lemon, lime, or orange zest to the dough.
- Spice It Up: Try ½ teaspoon cinnamon or nutmeg for warmth.
- Almond Joy: Replace part of the vanilla extract with almond extract.
- Cocoa Kick: Swap out ¼ cup of flour for unsweetened cocoa powder for chocolate sugar cookies.
Just remember that any added moisture (like citrus juice or syrup) may change the dough texture, so adjust flour slightly if needed.
Gluten-Free and Vegan Alternatives
Dietary restrictions? No problem. Try these substitutions:
- Gluten-Free: Use a 1:1 gluten-free baking flour blend (with xanthan gum for structure).
- Vegan:
- Replace butter with plant-based butter or coconut oil.
- Use flax eggs (1 tbsp ground flax + 3 tbsp water = 1 egg) or commercial egg replacers.
- Ensure sugar is vegan (some white sugars are filtered with bone char).
These adjustments may slightly alter texture, but the cookies will still be delicious and beautiful.
Perfect for Any Occasion
Holiday-Themed Cookies
Rolled sugar cookies shine during holidays. Some creative ideas:
- Christmas: Trees, stars, candy canes with red and green icing.
- Halloween: Ghosts, pumpkins, bats with black and orange decorations.
- Easter: Bunnies, eggs, pastels, and florals.
- Valentine’s Day: Hearts, Xs and Os, with red, pink, and white sprinkles.
You can even make “paint-your-own” cookies with outlines and a palette of edible colors — kids love them.
Birthday and Party Ideas
Customized sugar cookies are a fun and thoughtful addition to any celebration:
- Names and initials: Pipe the birthday person’s name on each cookie.
- Themed shapes: Dinosaurs, unicorns, or characters from favorite shows.
- Cookie favors: Wrap cookies individually for guests to take home.
Rolled sugar cookies aren’t just tasty — they’re little edible works of art.
Nutritional Information and Serving Suggestions
Nutritional Breakdown (Approximate per cookie)
| Nutrient | Amount |
|---|---|
| Calories | 140 |
| Fat | 6g |
| Saturated Fat | 3.5g |
| Cholesterol | 20mg |
| Carbohydrates | 20g |
| Sugar | 10g |
| Protein | 2g |
Note: This can vary based on ingredients, size, and decorations.
Serving and Pairing Ideas
Sugar cookies are great:
- With a cup of coffee, tea, or hot chocolate.
- As part of a dessert platter with brownies, fudge, or bars.
- Paired with ice cream — try sandwiching two cookies with a scoop in the middle!
- On a holiday cookie tray alongside gingerbread, snickerdoodles, or chocolate chip.
They’re also perfect for gifting, school events, and party favors.
FAQs about Rolled Sugar Cookie Recipe
1. How long should sugar cookie dough chill?
Chill the dough for at least 1–2 hours, or overnight if possible. This helps the dough firm up and hold its shape while baking.
2. Can I freeze decorated sugar cookies?
Yes, once the icing is fully dry (usually 24 hours for royal icing), you can freeze them in layers with parchment paper in airtight containers.
3. What is the best icing for rolled sugar cookies?
Royal icing is best for detailed decorations and hard finish, while buttercream offers a creamier, richer flavor for quick or soft-finish cookies.
4. How do I prevent cookies from spreading?
Use chilled dough, avoid overmixing, and let the cookies rest in the fridge after cutting but before baking. Also, check your baking powder is fresh.
5. Can I use margarine instead of butter?
Yes, but the flavor and texture may differ. Margarine has more water and less fat, which can lead to softer or spread-prone cookies.
Conclusion
There’s something wonderfully nostalgic and satisfying about making rolled sugar cookies from scratch. From mixing the buttery dough and cutting out cute shapes to decorating with vibrant icing and sprinkles, this cookie-making journey is as joyful as it is rewarding. It’s the kind of recipe that invites creativity and brings people together — whether you’re baking with kids, preparing for a party, or indulging in a bit of self-care with some sweet treats.
Remember, the key to perfect sugar cookies lies in the details: quality ingredients, chilling the dough, even rolling, and baking to just the right golden edge. Once you’ve mastered the basics, the options are endless. Flavor it, color it, frost it — make it yours.
So go ahead, preheat that oven and roll up your sleeves. There’s a batch of beautiful, delicious cookies waiting to be made — and devoured.