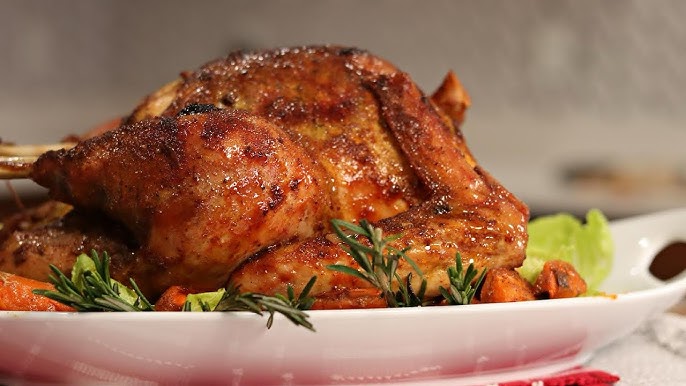
Roast Turkey Recipe: Nothing says a grand feast like a perfectly roasted turkey! Whether it’s for Thanksgiving, Christmas, or a family gathering, mastering the art of roasting turkey is a culinary milestone. This guide will walk you through every step, from choosing the right bird to carving it like a pro.
Ready to impress your guests? Let’s dive in.
Ingredients Needed for the Perfect Roast Turkey
Turkey Selection Tips
The star of the show is, of course, the turkey itself. Start by deciding on the size. A good rule of thumb is to plan for about 1 to 1.5 pounds of turkey per person. If you’re hosting a smaller gathering, consider a bone-in turkey breast instead.
Debating between fresh and frozen? Fresh turkeys offer superior flavor, but frozen ones are more readily available and affordable. If you opt for frozen, remember to account for thawing time.
Essential Ingredients for Seasoning
The key to a flavorful turkey is seasoning. Gather these basics:
- Fresh herbs: rosemary, thyme, sage, and parsley.
- Spices: garlic powder, onion powder, paprika, salt, and pepper.
- Aromatics: onions, carrots, celery, and lemons.
Don’t forget butter or olive oil for that golden, crispy skin.
Tools and Equipment Checklist
To make your roasting process smoother, have these tools ready:
- A large roasting pan with a rack.
- Meat thermometer (preferably digital).
- Basting brush or spoon.
- Aluminum foil (for tenting).
- Carving knife and board.
Preparing the Turkey
Thawing the Turkey
Thawing is a crucial first step if you’re using a frozen bird. Use the refrigerator method for best results: allow 24 hours of thawing time for every 4-5 pounds of turkey. For a quicker option, submerge the bird in cold water, changing the water every 30 minutes.
Cleaning and Prepping the Turkey
Once thawed, remove the packaging, neck, and giblets from the cavity. Rinse the turkey under cold water and pat it dry with paper towels. Cleaning the cavity ensures even cooking and reduces the risk of contamination.
Brining for a Juicy Turkey
Brining helps lock in moisture and flavor. You can choose between a wet brine (saltwater solution) or a dry brine (herb and salt rub). For a wet brine, submerge the turkey in a mixture of water, salt, sugar, and herbs for 12-24 hours. Dry brining requires rubbing the turkey generously with salt and letting it rest uncovered in the fridge.
Seasoning the Turkey
Choosing Your Seasoning Blend
Stick to classic herb blends or get creative with citrus zest, smoked paprika, or Cajun spices. The goal is to infuse flavor into every bite.
Applying Seasoning
Rub your seasoning mixture generously over the turkey, ensuring you get under the skin and into the cavity. A mix of butter and herbs spread under the skin can work wonders for flavor and moisture.
Stuffing the Turkey
While stuffing is optional, it adds another layer of flavor. Popular stuffing ingredients include cubed bread, onions, celery, and dried cranberries. If skipping stuffing, fill the cavity with aromatics like lemon halves, garlic cloves, and rosemary sprigs.
Roasting the Turkey
Preheating the Oven
Set your oven to 325°F (165°C) for slow and even cooking. High temperatures can dry out the bird, so resist the urge to rush.
Placing the Turkey in the Roasting Pan
Position the turkey breast-side up on a roasting rack. This ensures even air circulation. For extra protection against drying, you can start by roasting it breast-side down and flipping it halfway through.
Cooking Times and Temperature Guidelines
Use this general guide:
- 12-14 lbs: 3-4 hours.
- 15-20 lbs: 4-5 hours.
- 20+ lbs: 5+ hours.
Always rely on a thermometer for accuracy. The internal temperature should reach 165°F (74°C) in the thickest part of the breast and 175°F (79°C) in the thighs.
Basting the Turkey
Importance of Basting
Basting adds flavor and keeps the skin golden. Use pan drippings, melted butter, or a mixture of stock and spices.
How Often to Baste
Baste every 30-45 minutes for best results. But don’t overdo it—frequent oven-opening drops the temperature and prolongs cooking time.
Checking for Doneness
Using a Meat Thermometer
The secret to a perfectly cooked turkey lies in using a meat thermometer. Insert the thermometer into the thickest part of the breast, avoiding the bone, for the most accurate reading. Check the thighs as well, as they tend to cook at a slightly different rate than the breast meat.
Ideal Internal Temperatures
To ensure food safety and delicious results, follow these temperature guidelines:
- Breast meat: 165°F (74°C).
- Thigh meat: 175°F (79°C).
- Stuffing (if applicable): 165°F (74°C).
If any part of the turkey hasn’t reached the safe temperature, continue roasting and check again in 10-15 minutes.
Resting the Turkey
Why Resting Is Crucial
Once your turkey has reached the ideal temperature, don’t skip resting. Resting allows the juices to redistribute throughout the meat, resulting in a moist and flavorful bird. Cutting into the turkey too early can cause the juices to escape, leaving the meat dry.
How Long to Rest
Tent the turkey loosely with aluminum foil and let it rest for 20-30 minutes. Larger birds may require up to 40 minutes. This resting period is also the perfect time to prepare your gravy using the pan drippings.
Carving the Turkey
Tools Needed for Carving
To carve your turkey like a pro, you’ll need:
- A sharp carving knife or an electric carving knife.
- A large cutting board with a groove to catch juices.
- A carving fork to steady the bird.
Step-by-Step Carving Guide
- Remove the legs and thighs: Cut through the joint where the thigh connects to the body.
- Separate the drumstick from the thigh: Slice through the joint connecting the two.
- Carve the breast meat: Make a long cut along one side of the breastbone, then slice the breast meat into thin, even pieces.
- Remove the wings: Twist the wings at the joint to remove them.
- Serve and garnish: Arrange the meat on a platter and garnish with herbs or citrus slices for presentation.
Serving Suggestions
Pairing with Side Dishes
A roasted turkey is only as good as its accompaniments. Pair it with classic sides like:
- Mashed potatoes with gravy.
- Sweet potato casserole.
- Green bean almondine.
- Cranberry sauce.
For an elevated experience, consider adding a fresh salad or roasted seasonal vegetables.
Gravy and Sauces
Don’t let those flavorful pan drippings go to waste. Use them to whip up a rich, savory gravy. You can also serve additional sauces, such as cranberry-orange relish or herb-infused butter, to complement the turkey’s flavors.
Storing Leftovers
Best Practices for Leftover Storage
After your meal, ensure the leftover turkey stays fresh by following these steps:
- Remove the meat from the bones and store it in airtight containers.
- Refrigerate within two hours of cooking to prevent bacterial growth.
- Use leftovers within 3-4 days if refrigerated or freeze them for up to 3 months.
Ideas for Using Leftover Turkey
Get creative with your turkey leftovers! Here are some ideas:
- Sandwiches: Layer sliced turkey with cranberry sauce and stuffing for the ultimate Thanksgiving sandwich.
- Soups: Add turkey to a hearty vegetable soup or a creamy turkey chowder.
- Casseroles: Combine turkey, gravy, and vegetables in a baked dish topped with mashed potatoes or stuffing.
Tips for a Stress-Free Turkey Roast
Planning Ahead
Organization is key to a stress-free turkey roast. Create a timeline that includes:
- When to start thawing the turkey.
- When to prep ingredients and brine.
- A cooking schedule based on the size of the turkey.
Doing as much as possible in advance will save you time and headaches on the big day.
Troubleshooting Common Issues
Even seasoned cooks face challenges when roasting turkey. Here’s how to address common problems:
- Dry breast meat: Tent the breast with foil during cooking and baste regularly.
- Uneven cooking: Rotate the turkey halfway through roasting.
- Burning skin: Cover the turkey loosely with foil if the skin browns too quickly.
FAQs about Ribeye Roast Recipe
1. What is the best temperature to cook a ribeye roast?
Cooking a ribeye roast perfectly involves roasting it at a moderate temperature to ensure it’s evenly cooked. Preheat your oven to 350°F (175°C) for the best results. This temperature allows the roast to cook slowly, enhancing its natural flavors and tenderness.
2. How long should I cook a ribeye roast?
The cooking time for a ribeye roast depends on how well-done you prefer your meat. Generally, aim for about 20 minutes per pound for medium-rare. Always use a meat thermometer to check that the internal temperature has reached 135°F (57°C) for medium-rare or 145°F (63°C) for medium.
3. Should I sear my ribeye roast before roasting?
Yes, searing the ribeye roast before roasting is highly recommended. Searing it on all sides in a hot skillet helps to lock in the juices and gives the roast a delicious, caramelized crust.
4. What herbs and spices work well with a ribeye roast?
Rosemary, thyme, garlic, and black pepper are excellent choices for seasoning a ribeye roast. These herbs and spices complement the rich flavors of the meat without overpowering it.
5. How do I keep my ribeye roast moist while cooking?
To keep your ribeye roast moist, ensure not to overcook it. Keeping a tray of water in the oven during the roasting process can also help maintain moisture. Additionally, basting the roast periodically with its juices can promote a juicy, flavorful finish.
6. Can I cook vegetables with my ribeye roast?
Absolutely! Roasting vegetables in the same pan as your ribeye roast is a great way to absorb all the flavors. Potatoes, carrots, and onions make for a hearty and convenient side dish that cooks as your roast does.
7. What should I do with leftovers?
Leftover ribeye roast can be stored in an airtight container in the refrigerator for up to three days. Reheat it gently, or use it cold in sandwiches, salads, or wraps for a delicious next-day meal.
Conclusion
Roasting a turkey might seem like a daunting task, but with the right preparation and this step-by-step guide, you’re well on your way to serving a showstopping centerpiece. From choosing the perfect bird to carving it with confidence, every step matters. Give this recipe a try, and watch your guests marvel at your culinary skills. The best part? You’ll feel like a kitchen superstar while doing it.


