Ricotta Recipe: If you’ve never tasted fresh, homemade ricotta cheese, you’re seriously missing out. It’s soft, creamy, slightly tangy, and leaps ahead of anything you’ll find pre-packaged at the store. The best part? You don’t need fancy tools or ingredients. With just a few kitchen staples and about 30 minutes of your time, you’ll have a batch of luscious, fluffy ricotta that’s perfect for everything from lasagna and cannoli to toast and pasta.
Let’s dive in!
What is Ricotta Cheese?
Ricotta is a soft, white, creamy cheese with a slightly grainy texture and a mildly sweet flavor. Originating from Italy, the word “ricotta” actually means “recooked.” That’s because traditionally, ricotta was made by reheating the whey left over from making other cheeses like mozzarella or provolone. The proteins left in the whey would curdle again when heated with acid, forming the light, airy curds we now know as ricotta.
Today, most homemade versions skip the whey and go straight for milk, which gives a richer, creamier outcome. Ricotta is used across countless dishes – from savory staples like stuffed shells and lasagna to sweet classics like ricotta pancakes or cheesecakes. Its light texture and fresh flavor make it incredibly versatile.
Why Make Ricotta at Home?
You might wonder – why not just buy it? Fair question. But here’s why making it at home beats the store-bought version every time:
- Freshness: Homemade ricotta has a delicate flavor and fluffy texture that packaged ones just can’t match.
- Control: You choose the milk quality, fat level, salt, and acidity, customizing the cheese to your taste.
- Cost-Effective: Store-bought ricotta can be pricey, especially if you’re buying high-quality or organic brands. Making it at home cuts costs significantly.
- Satisfying: There’s something incredibly rewarding about transforming a humble jug of milk into a gourmet staple with your own hands.
Once you try this, you might never go back.
Ingredients You’ll Need
Basic Ingredients for Homemade Ricotta
You only need a handful of simple ingredients to create a heavenly batch of ricotta:
- Whole Milk (4 cups / 1 liter): The creamier, the better. Avoid ultra-pasteurized milk if possible.
- Acid: Choose from lemon juice (2–3 tablespoons), white vinegar (2 tablespoons), or citric acid (1 teaspoon mixed with 2 tablespoons water).
- Salt: A pinch (¼ teaspoon) to taste.
- Optional: Heavy Cream (½ cup): For an ultra-rich ricotta, add cream with the milk.
That’s it. Just 2–3 ingredients to work magic in your kitchen.
Optional Add-Ons for Flavor
Want to elevate your ricotta? Try these additions:
- Herbs: Fresh chopped basil, thyme, chives, or dill can be folded into the finished ricotta.
- Garlic: Add a roasted clove for depth.
- Pepper: Cracked black pepper or red chili flakes for a subtle kick.
These flavors are best mixed in after straining, just before serving.
Dairy Alternatives
If you’re lactose-sensitive or prefer alternatives, you can experiment with:
- Goat Milk: Produces tangier ricotta with a unique flavor profile.
- Sheep Milk: Rich and creamy, popular in Mediterranean-style cheeses.
- Lactose-Free Milk: Works well as long as it’s not ultra-pasteurized.
Note: Most nut or plant-based milks lack the protein and fat needed to form curds, so traditional ricotta is difficult to replicate with those.
Equipment You’ll Need
Good news — you don’t need a cheesemaker’s toolkit. Just a few basic kitchen tools:
- Heavy-bottomed Pot: Preferably stainless steel to avoid scorching.
- Thermometer (Optional): Helpful for precision but not strictly necessary.
- Wooden Spoon or Silicone Spatula: For gentle stirring.
- Cheesecloth or Fine Mesh Sieve: For straining the curds.
- Colander: To support the cheesecloth while straining.
- Bowl: To collect the whey underneath.
With all your ingredients and tools ready, it’s time to move to the fun part — making ricotta from scratch.
Step-by-Step Guide to Making Ricotta
Step 1 – Heating the Milk
Pour whole milk (and a bit of cream if you want it extra rich) into a large, heavy-bottomed pot. Slowly heat it over medium heat until it reaches about 185°F (85°C), just before boiling. Stir gently to prevent scorching, watching for tiny bubbles forming around the edges.
Step 2 – Adding Acid to Curdle the Milk
Once the milk is hot, remove it from heat and stir in your acid of choice — lemon juice, white vinegar, or citric acid. Gently swirl it once or twice, then stop. You’ll soon see soft white curds forming and separating from the translucent whey. That’s the magic moment when milk becomes cheese.
Step 3 – Letting the Curds Settle
Let the mixture rest undisturbed for about 10 minutes. This allows the curds to firm up slightly and fully separate from the whey. Patience here makes for smoother, creamier ricotta.
Step 4 – Straining the Curds
Line a fine-mesh strainer with cheesecloth and place it over a large bowl. Gently ladle the curds into the strainer and let them drain for 10–20 minutes, depending on your desired texture. Less time gives creamier ricotta; more time makes it firmer.
Step 5 – Seasoning and Storing the Ricotta
Once drained, transfer the ricotta to a bowl and season lightly with salt. You can use it immediately or refrigerate it in an airtight container for up to three days. Spread it on toast, stir it into pasta, or spoon it over desserts — fresh, homemade ricotta is pure, creamy bliss.
Tips and Tricks for Perfect Ricotta
Making ricotta is simple, but a few small tweaks can take your batch from good to wow.
Choosing the Right Milk
Milk is everything in this recipe. It’s the main ingredient, so quality matters. Here’s what to look for:
- Whole Milk: For the creamiest, richest ricotta, whole milk is the way to go.
- Avoid Ultra-Pasteurized: This kind of milk has been heated to very high temps, which damages the proteins and prevents curds from forming well.
- Organic or Grass-Fed: If possible, choose high-quality milk. The flavor and texture will reward you.
You can also experiment with mixing in a little heavy cream for a richer result.
Common Mistakes to Avoid
- Overheating the Milk: If you boil it, the proteins can toughen and your ricotta will turn grainy.
- Not Using Enough Acid: If curds don’t form, you might need a little more.
- Stirring Too Much: Once the acid is in, avoid stirring—let the curds settle naturally.
- Not Letting it Rest: Don’t rush the process after adding the acid; patience leads to better curds.
How to Get Creamier Texture
Want ricotta so smooth it melts in your mouth?
- Drain for less time.
- Add a splash of cream after straining and stir gently.
- Use the freshest milk possible.
- Whip it briefly in a food processor after straining for an extra smooth finish.
Creative Uses for Homemade Ricotta
Once you’ve made your own batch of creamy, dreamy ricotta, the next question is—what can you do with it? The answer: just about anything. Ricotta is incredibly versatile and works in both savory and sweet dishes. Let’s explore some of the most delicious ways to enjoy your homemade creation.
Breakfast Ideas
Start your day on a high note by incorporating ricotta into your breakfast menu. Here are a few mouthwatering ideas:
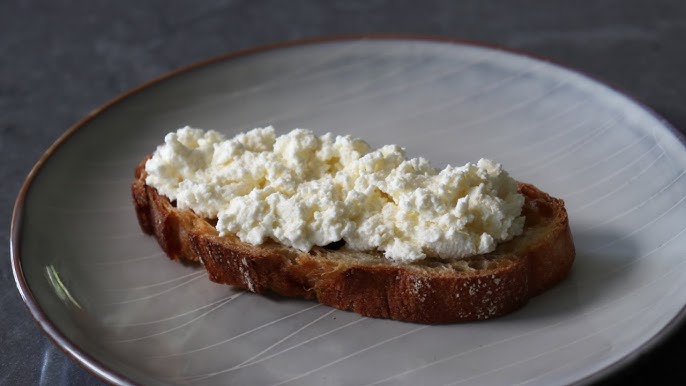
- Ricotta Toast: Spread ricotta on a slice of toasted sourdough or multigrain bread. Top with honey, figs, berries, or a sprinkle of cinnamon. For a savory twist, try cherry tomatoes, avocado, and a poached egg.
- Ricotta Pancakes: Add a scoop of ricotta to your pancake batter for a moist, fluffy texture. These pancakes are lighter than traditional ones and pair perfectly with fresh fruit and maple syrup.
- Ricotta Omelet: Mix ricotta with herbs and spoon it into an omelet just before folding. It adds creaminess without overpowering the eggs.
Lunch and Dinner Recipes
Ricotta is a game-changer in main courses and savory meals. It’s especially beloved in Italian cuisine.
- Lasagna: Use ricotta as one of the main cheese layers in your lasagna. Blend it with spinach and garlic for extra flavor.
- Stuffed Shells or Manicotti: Fill large pasta shells with a ricotta, spinach, and herb mixture, then bake with marinara sauce and mozzarella.
- Ricotta Gnocchi: Unlike traditional potato gnocchi, ricotta gnocchi are lighter and quicker to make. Just mix ricotta with flour and eggs, shape into dumplings, and boil.
- Ricotta Pizza: Dollop fresh ricotta over your pizza before baking for creamy bites that contrast beautifully with tomato sauce and mozzarella.
Desserts and Sweet Treats
Yes, ricotta also shines in desserts! Its mild, creamy nature is ideal for sweets.
- Cannoli Filling: Mix ricotta with powdered sugar, vanilla, and chocolate chips for a classic cannoli filling.
- Ricotta Cheesecake: Lighter than the New York style, ricotta cheesecakes have a unique fluffy texture. Add lemon zest and a graham cracker crust for a winning combo.
- Ricotta with Honey and Nuts: A simple yet elegant dessert. Spoon ricotta into a bowl, drizzle with honey, and sprinkle with chopped pistachios or almonds.
Once you have homemade ricotta in your fridge, you’ll find it easy to incorporate it into every meal of the day!
Storage and Shelf Life
Ricotta is best enjoyed fresh, but that doesn’t mean it won’t last a few days in your fridge. Here’s how to keep it fresh and safe to eat.
How to Store Ricotta Cheese
Once your ricotta has cooled to room temperature, scoop it into a clean, airtight container. Store it in the refrigerator, ideally in the coldest part (usually near the back).
Key storage tips:
- Use within 3 to 5 days for best taste and texture.
- Avoid leaving it uncovered or exposed to air to prevent drying out or absorbing other fridge odors.
- Use clean utensils when scooping to avoid contamination.
If your ricotta starts to smell sour, develops mold, or becomes overly watery, it’s time to toss it.
Can You Freeze Ricotta?
Technically, yes—you can freeze ricotta, but it’s not always the best idea.
What happens when you freeze it?
- The texture changes. Freezing causes ice crystals to form, which break down the creamy structure. When thawed, it becomes grainy and watery.
- It’s still usable in cooked dishes, like lasagna or baked casseroles, but not ideal for eating fresh or in desserts.
How to freeze ricotta:
- Transfer to a freezer-safe container.
- Label with the date.
- Use within 2 months.
- Thaw in the fridge overnight before using.
If you plan to use it within the week, skip the freezer and enjoy it fresh—it’s worth it.
Nutritional Information
Ricotta doesn’t just taste amazing—it also comes with a decent nutritional profile. Whether you’re counting calories or looking for high-protein foods, ricotta can fit into a balanced diet.
Calories and Macros
Here’s a breakdown of the typical nutrition in 1/2 cup (124g) of whole milk ricotta:
| Nutrient | Amount |
|---|---|
| Calories | ~170 |
| Protein | ~14g |
| Fat | ~10g |
| Carbohydrates | ~6g |
| Sugars | ~1g |
| Calcium | ~25% DV |
| Sodium | ~80mg |
Notes:
- Lower-fat versions have fewer calories and fat, but also less creaminess.
- Homemade ricotta’s exact nutrition can vary based on the milk used and how much whey is drained.
Health Benefits of Ricotta Cheese
Ricotta is more than just a treat—it can be part of a healthy diet:
- High in Protein: Supports muscle growth and keeps you feeling full.
- Calcium-Rich: Good for bones and teeth.
- Low in Sugar and Carbs: Suitable for low-carb and keto diets (when made with full-fat milk).
- Easily Digestible: Especially when made fresh; it lacks the strong cultures or rennet found in aged cheeses.
Just keep in mind that ricotta is still a dairy product, so if you’re lactose intolerant, moderation or lactose-free milk versions are better suited.
FAQs about Ricotta Recipe
1. How long does homemade ricotta last in the fridge?
Homemade ricotta typically lasts 3 to 5 days when stored properly in an airtight container in the refrigerator. For the best flavor and texture, use it within the first 3 days. If it smells sour or develops mold, discard it immediately.
2. Can I make ricotta with non-dairy milk?
Unfortunately, most non-dairy milks like almond, oat, or soy do not contain the protein structures needed to form curds when acid is added. However, some people experiment with thickening agents or alternative methods using soy milk and lemon juice. Results vary and the texture won’t match dairy-based ricotta.
3. Is ricotta cheese healthy for weight loss?
Ricotta can be part of a weight-loss-friendly diet, especially when made with low-fat milk. It’s high in protein, relatively low in carbs, and can help keep you feeling full. Choose lower-fat versions if calorie intake is a concern, and avoid over-salting or mixing in too much sugar for dessert versions.
4. What’s the best milk to use for ricotta?
Whole milk is ideal for making rich, creamy ricotta. Avoid ultra-pasteurized milk as it affects curd formation. Organic or grass-fed milk tends to offer the best taste and texture. You can also blend in heavy cream for extra richness or use goat’s milk for a tangier flavor.
5. Can I use whey leftover from ricotta?
Yes! Don’t toss the whey. It’s full of protein, vitamins, and minerals. Use it in:
- Bread and pizza dough recipes
- Soups or stews
- Smoothies (for added protein)
- As a cooking liquid for grains or pasta
It’s a great way to reduce food waste and boost your recipes nutritionally.
Conclusion
From breakfast toast and savory pasta dishes to decadent desserts, ricotta is one of those versatile staples that elevates any meal. Plus, the satisfaction of making it yourself? Priceless.
This guide has walked you through every step—from the science of curdling to expert tips and creative uses. Whether you’re a seasoned home cook or trying this for the first time, remember: great ricotta starts with great milk, patience, and a touch of love.
So go ahead—grab that pot, heat the milk, and experience the joy of making your own cheese at home. Once you try fresh ricotta, there’s no going back.