Rice Pud Recipe: Rice pudding, often lovingly called “rice pud,” is a classic comfort dessert that has won hearts across generations and continents. This cozy dish is made by slow-cooking rice with milk and sugar until it reaches a rich, creamy consistency. It’s the kind of dessert that feels like a warm hug in a bowl—simple, nostalgic, and utterly satisfying.
The beauty of rice pudding lies in its versatility. You can enjoy it hot, cold, or somewhere in between. It can be delicately flavored with vanilla and cinnamon, or jazzed up with raisins, nutmeg, or even citrus zest. It’s also a fantastic way to use up leftover rice, making it a smart and budget-friendly dessert option.
Whether you like it thick and spoonable or soft and runny, rice pudding offers something for everyone. Best of all, it’s super easy to make and only requires a few staple ingredients you likely already have in your pantry.
Origins and Popularity
Rice pudding has a long and rich history, dating back to ancient times. Its origins can be traced to Asia, the Middle East, and parts of Europe where rice was a staple crop. Over time, every culture put its own spin on the recipe. From the sweet milky “kheer” in India to the cinnamon-dusted “arroz con leche” in Latin America, this dish has traveled the globe and transformed along the way.
Its popularity soared in Victorian England and later became a school dinner classic in Britain. In the U.S., it’s a beloved traditional dessert, often served during the holidays or as a cozy treat on a rainy day.
Today, rice pudding is experiencing a revival as people seek out nostalgic comfort foods that are both satisfying and simple to prepare. Ready to make your own? Let’s dive into the ingredients you’ll need.
Ingredients Required
Core Ingredients
To make a traditional and creamy rice pudding, you don’t need anything fancy. Here’s a list of basic ingredients to get you started:
- White rice (preferably short-grain) – ½ cup
- Whole milk – 4 cups (for richness and creaminess)
- Granulated sugar – ⅓ cup (adjust to taste)
- Vanilla extract – 1 tsp
- Salt – a pinch (to balance the sweetness)
- Butter – 1 tbsp (adds a silky texture)
These core ingredients form the heart of any good rice pudding recipe. Short-grain rice works best because it releases starch that thickens the pudding naturally. If you prefer a richer texture, you can replace part of the milk with cream.
Optional Add-ons and Flavors
This is where you can have fun and tailor the rice pudding to your taste. Here are some tasty add-ons:
- Raisins or sultanas – soak them in rum or hot water for extra plumpness
- Ground cinnamon or nutmeg – for a warm, spiced flavor
- Orange or lemon zest – adds a fresh, zippy twist
- Coconut milk – for a tropical flair
- Cardamom or rose water – for a Middle Eastern touch
- Chopped nuts – almonds, pistachios, or walnuts for crunch
By playing around with these additions, you can create countless variations of rice pudding to suit any mood or occasion.
Tools and Equipment Needed
Kitchen Essentials for Making Rice Pudding
Before you begin cooking, make sure you have the right tools on hand to make the process smooth and stress-free:
- Heavy-bottomed saucepan – prevents the milk from scorching
- Wooden spoon or silicone spatula – for gentle, frequent stirring
- Measuring cups and spoons – to ensure accurate proportions
- Small bowl – for soaking raisins or prepping add-ins
- Whisk – if you need to incorporate eggs or blend ingredients smoothly
Using a heavy-bottomed pan is especially important when making rice pudding, as milk can easily burn if not monitored closely. Keep an eye on the pot and stir regularly to prevent sticking and ensure an even cook.
How to Make Rice Pud – Step-by-Step Recipe Guide
Step 1: Rinse the Rice
The first and one of the most crucial steps is rinsing your rice under cold water. This removes excess starch, which can cause the pudding to become overly thick or gluey. Simply place the rice in a fine-mesh strainer and rinse it under running water until the water runs clear.
Rinsing ensures that you get a smoother, creamier texture in the final dish. Skip this step, and you might end up with a pudding that’s a bit too starchy for comfort.
Step 2: Simmer the Milk and Rice
Once your rice is rinsed, it’s time to get cooking. Pour the milk into a heavy-bottomed saucepan and bring it to a gentle simmer over medium heat. Once you see tiny bubbles forming around the edges, add the rice.
Stir gently and reduce the heat to low. This part requires patience—rice pudding is all about slow cooking. Simmering on low heat allows the rice to absorb the milk slowly, which is what creates that luscious, creamy texture we all love.
Be sure to stir every 5 to 10 minutes to prevent the rice from sticking to the bottom or forming a skin on top. This is where a heavy-bottomed pot really pays off—it distributes heat evenly, so your pudding cooks smoothly without scorching.
Let the rice and milk simmer for about 30 to 40 minutes. The mixture should start to thicken slightly, and the rice should become soft and tender. If it looks too dry at any point, you can add an extra splash of milk.
Step 3: Add Sweeteners and Flavorings
Once the rice is cooked and the pudding is thickening up nicely, it’s time to add the good stuff—your sweeteners and flavorings.
Stir in the granulated sugar, a pinch of salt, and vanilla extract. These three ingredients balance each other perfectly: the sugar sweetens, the salt enhances flavor, and the vanilla adds that classic aroma we associate with comforting rice pudding.
If you’re using raisins or sultanas, this is the time to toss them in. Some people like to soak them in warm water or even rum beforehand to make them extra plump and juicy.
Let everything simmer for another 5 to 10 minutes so the flavors can blend together beautifully. Keep stirring to prevent sticking, and watch the texture—it should be thick but still spoonable.
Step 4: Stir and Simmer Until Thickened
Now it’s all about achieving the perfect consistency. Continue simmering the mixture over low heat, stirring frequently. As it thickens, it should coat the back of your spoon—this is your cue that it’s nearly done.
Don’t be tempted to crank up the heat to speed things along. A high temperature can curdle the milk or cause the pudding to stick and burn. Slow and steady wins the race with rice pudding.
At this point, you can also stir in a knob of butter for extra richness. It gives the pudding a silky finish and adds depth to the flavor.
If you like your pudding extra creamy, you can stir in a splash of cream or even a beaten egg yolk at the end. Just be sure to temper the egg yolk with a bit of the hot pudding before mixing it in fully—this prevents curdling and keeps the texture smooth.
Once you’re happy with the consistency and flavor, remove the pudding from the heat. Give it one final stir and let it rest for a few minutes.
Step 5: Cool and Serve
Your rice pudding is now ready to enjoy! You can serve it warm straight from the pot, or let it cool and chill it in the fridge for a few hours. Both versions are equally delicious—it just depends on your preference.
If you’re serving it cold, cover the pudding with plastic wrap directly on the surface to prevent a skin from forming. Once chilled, give it a stir to loosen it up and add a splash of milk if it’s too thick.
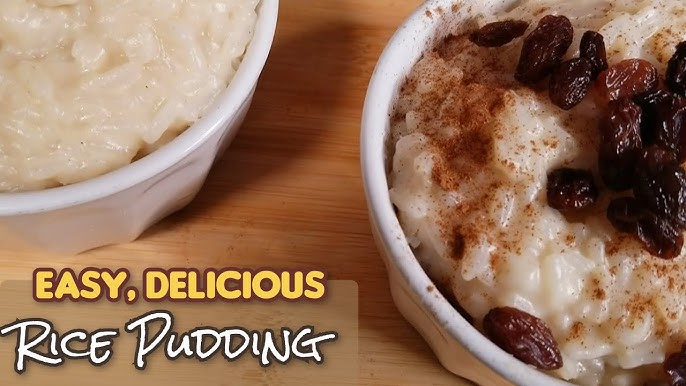
To serve, sprinkle a bit of ground cinnamon or nutmeg on top for a classic finishing touch. You can also top it with fresh berries, a dollop of whipped cream, or even a drizzle of honey or caramel sauce.
Whether you eat it warm in the winter or cold in the summer, rice pudding is one of those timeless desserts that always hits the spot.
Tips for the Perfect Rice Pud
How to Avoid Common Mistakes
Even though rice pudding is fairly simple to make, a few missteps can lead to disappointing results. But don’t worry—we’ve got some pro tips to help you avoid the most common pitfalls and guarantee a pudding that’s creamy, flavorful, and just the right texture.
- Don’t Rush the Process: One of the biggest mistakes people make is trying to cook rice pudding too quickly. High heat will cause the milk to scorch and the rice to cook unevenly. Always use low to medium heat and be patient.
- Stir Often: Rice has a tendency to settle at the bottom of the pot and stick. Stirring frequently prevents sticking and ensures an even, silky texture throughout.
- Avoid Using Uncooked Add-ins Too Early: Ingredients like raisins or other dried fruits should be added after the rice has started to soften. Otherwise, they may absorb too much moisture and make the pudding too thick.
- Don’t Forget the Salt: A tiny pinch of salt might seem insignificant, but it actually brings out the sweetness and enhances the overall flavor.
- Watch the Milk: Use whole milk for best results. If you use skim milk, your pudding may lack creaminess. Also, be careful not to let the milk boil—it should only simmer gently.
- Add Vanilla at the Right Time: Add your vanilla extract toward the end of cooking to preserve its delicate aroma and flavor.
- Let It Rest: Once it’s off the heat, give the pudding a few minutes to settle. This helps it thicken a bit more and lets the flavors develop further.
With these tips in mind, you’re already halfway to becoming a rice pudding master!
Texture Tips – Creamy or Thick?
Everyone has a personal preference when it comes to texture. Some like their rice pudding ultra-creamy and soft, while others prefer it thicker and more scoopable. The great thing is, it’s easy to tweak the recipe to your liking.
- For a Creamier Texture: Use a higher milk-to-rice ratio. You can even add a splash of heavy cream toward the end. Stir often and cook a bit longer to allow the rice to fully break down and release its starch.
- For a Thicker, Hearty Texture: Reduce the amount of milk slightly and simmer for a shorter time. Use less stirring to preserve some rice structure.
- Egg Custard Style: Want it richer? Stir in a beaten egg yolk tempered with hot pudding, then cook for a few extra minutes while stirring continuously. This adds body and a custard-like creaminess.
- Al Dente or Melt-in-the-Mouth: If you prefer a bit of bite in your rice, cook for less time and don’t let the grains break down too much. For a velvety, spoon-soft texture, keep simmering until the rice almost dissolves.
No matter your texture preference, remember it will continue to thicken as it cools, especially after refrigeration. So, if your pudding seems a little loose at first, that’s totally normal—it will firm up later.
Nutritional Value of Rice Pudding
Calories and Health Considerations
While rice pudding is certainly a treat, it can also be part of a balanced diet if consumed in moderation. Let’s break down its nutritional aspects so you can enjoy it guilt-free—or at least informed.
A standard serving of traditional homemade rice pudding (around ½ cup or 150g) contains approximately:
- Calories: 180–250 kcal
- Carbohydrates: 35–40g (mainly from rice and sugar)
- Protein: 5–6g (from milk)
- Fat: 5–8g (from milk and optional butter)
- Sugar: 15–20g (varies with recipe)
- Calcium: ~15% of your daily requirement
Health Benefits:
- Good Source of Energy: The combination of carbs and fat makes it a quick energy booster—perfect as a post-meal dessert or an occasional snack.
- Bone Health: Thanks to its milk content, rice pudding is rich in calcium and vitamin D (if fortified milk is used), which support healthy bones and teeth.
- Comfort Food for Sensitive Stomachs: Its smooth texture and mild flavor make it a go-to comfort food for people recovering from illness or with digestive sensitivities.
Ways to Make It Healthier:
- Use Low-Fat or Plant-Based Milk: Swap whole milk with almond, oat, or coconut milk to reduce fat and calories.
- Reduce Sugar: Halve the amount of sugar or use natural sweeteners like honey, stevia, or maple syrup.
- Add Fiber: Stir in some chia seeds or ground flax for a nutritional boost.
- Use Brown Rice or Quinoa: For a fiber-rich, whole-grain twist, substitute white rice with brown rice or even quinoa.
With a few simple tweaks, rice pudding can fit into just about any dietary plan—whether you’re counting calories, going dairy-free, or looking for a nutrient-dense snack.
Storage and Reheating Tips
How to Store Rice Pudding
Once you’ve made a delicious batch of rice pudding, you might have leftovers (or maybe you planned for it—that’s smart thinking!). Proper storage is key to maintaining its taste and texture.
- Refrigeration: Store rice pudding in an airtight container and keep it in the fridge. It will last for up to 4 to 5 days when properly stored. Always let the pudding cool to room temperature before refrigerating to prevent condensation from making it watery.
- Portioning Helps: If you’re meal prepping or making a big batch, divide it into single-serving containers. This not only makes it convenient but also keeps you from repeatedly opening and closing the same container, which can reduce freshness.
- Avoid Freezing (if possible): While rice pudding can technically be frozen, it often changes in texture upon thawing. The rice can become grainy or overly soft, and the milk may separate. If you do freeze it, store it in a freezer-safe container for up to one month. Thaw overnight in the fridge and stir well after reheating.
Reheating Without Losing Texture
Rice pudding tends to thicken as it cools, which is perfectly normal. But reheating it can be tricky if you want to maintain its creamy consistency. Here’s how to reheat it properly:
- Stovetop Method: Place the pudding in a saucepan over low heat. Add a splash of milk to loosen the texture and stir constantly until warmed through. This is the best method for preserving the original creaminess.
- Microwave Method: For convenience, reheat individual portions in the microwave. Add a little milk to the bowl, cover loosely with a microwave-safe lid or paper towel, and heat in 30-second intervals, stirring in between, until hot.
- Avoid Overheating: Don’t let it boil, or the milk could curdle. Always reheat slowly to maintain that perfect, creamy texture.
By storing and reheating rice pudding the right way, you can enjoy its cozy goodness multiple times without sacrificing taste or quality.
Customizing Your Rice Pud
Vegan and Dairy-Free Alternatives
Just because you’re avoiding dairy or animal products doesn’t mean you have to miss out on a delicious bowl of rice pudding. In fact, rice pud is incredibly easy to adapt for vegan and dairy-free diets.
- Milk Alternatives: Use plant-based milk like almond, soy, oat, or coconut milk. Coconut milk, in particular, adds a rich and creamy texture with a hint of tropical flavor.
- Sweetener Swaps: Instead of refined sugar, try maple syrup, agave nectar, or coconut sugar. They add depth and can even enhance the pudding’s flavor profile.
- Butter Substitute: Use vegan margarine or simply skip the butter entirely. A tablespoon of coconut cream can also do the trick for that smooth finish.
- Egg-Free: Most traditional rice puddings don’t require eggs, but if a recipe does, simply omit them or use a vegan egg replacement like cornstarch or chia gel to thicken the pudding.
With these swaps, you can enjoy all the creamy indulgence of rice pudding without compromising your dietary needs.
Kid-Friendly Versions
Rice pudding is a wonderful dessert for children—it’s soft, easy to eat, and full of nourishing ingredients. Plus, it’s a great way to sneak in some extra nutrition if needed.
Here are some kid-friendly twists:
- Add Fruit Purees: Stir in mashed bananas, applesauce, or blended strawberries to add natural sweetness and a fruity flavor.
- Fun Toppings: Sprinkle on some mini chocolate chips, crushed graham crackers, or colorful sprinkles for a treat kids will get excited about.
- Shape It Up: Pour the pudding into fun-shaped molds or silicone cupcake liners to make it more appealing.
- Mild Spices: Use a pinch of cinnamon or a drop of vanilla extract—nothing too strong, just enough to enhance the flavor.
- Sneaky Health Add-ins: Stir in a bit of ground flaxseed or a touch of Greek yogurt for a protein and fiber boost that’s barely noticeable.
Rice pudding is gentle on tiny tummies, making it a safe and soothing option for toddlers and picky eaters alike. Plus, it’s easy to pack in school lunches or serve as a wholesome after-school snack.
FAQs about Rice Pudding Recipe
1. What type of rice is best for rice pudding?
Short-grain white rice or Arborio rice works best. These types become creamy when cooked, giving your pudding the perfect texture.
2. Can I use leftover rice to make rice pudding?
Yes! Leftover cooked rice can be a quick base. Just adjust the milk and sugar since it won’t absorb liquid like uncooked rice.
3. Is rice pudding served hot or cold?
Both ways are delicious. Serve it warm for comfort or chilled for a refreshing treat.
4. How long does rice pudding last in the fridge?
Rice pudding stays fresh in the refrigerator for up to 4 days when stored in an airtight container.
5. Can I make rice pudding dairy-free?
Absolutely. Use plant-based milk like almond, coconut, or oat milk, and substitute dairy-free butter or skip it entirely.

6. Why is my rice pudding too runny or too thick?
If it’s too runny, cook it a bit longer to reduce the liquid. If too thick, stir in a little more milk to reach the right consistency.
Conclusion
Rice pudding, or “rice pud” as it’s fondly called in many homes, is more than just a dessert—it’s a timeless comfort food that brings warmth and nostalgia with every spoonful. Whether you’re making it the traditional way or experimenting with vegan twists and fruity flavors, rice pudding is incredibly forgiving, endlessly customizable, and always satisfying.
From its ancient roots to modern-day kitchen experiments, rice pudding has stood the test of time. It’s budget-friendly, family-approved, and practically foolproof if you follow a few simple steps.
So go ahead—gather your ingredients, grab a pot, and stir up a bit of magic. With this step-by-step guide in hand, you’re now ready to create a creamy, dreamy, and delicious rice pudding that’s sure to impress.

