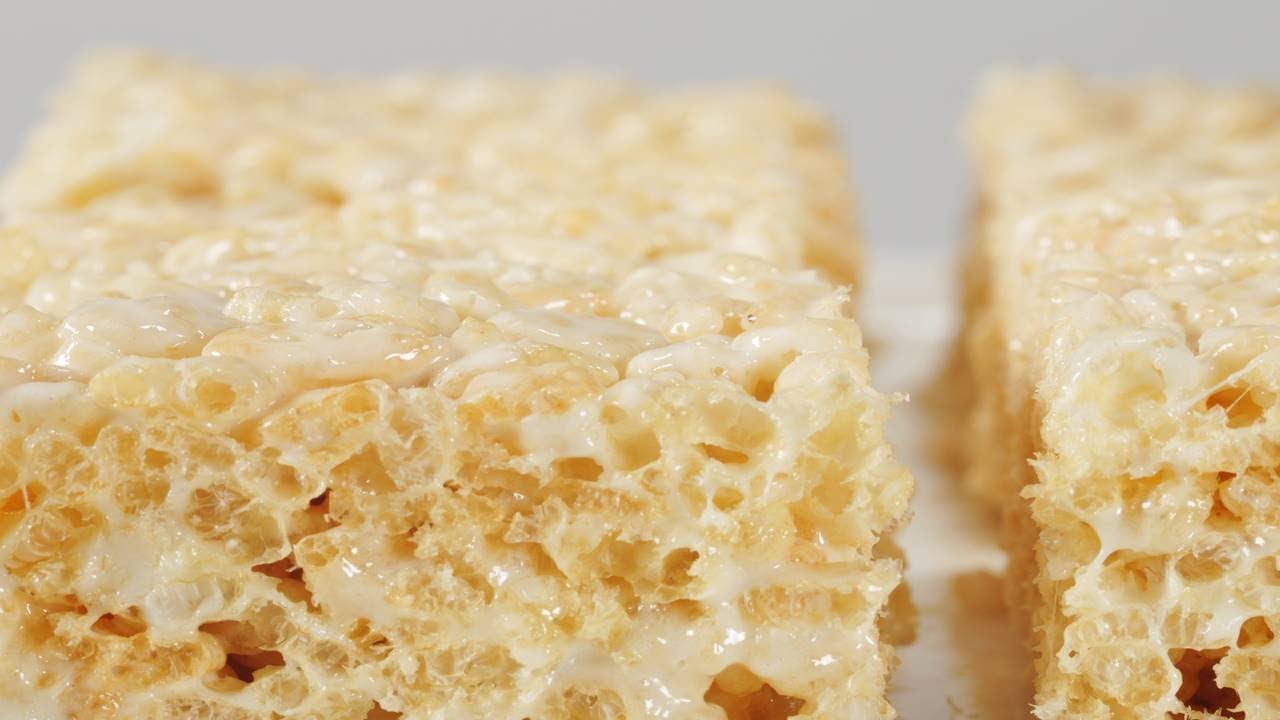
Rice Krispy Treat Recipe: Rice Krispy Treats are one of those timeless desserts that never go out of style. They’re quick to make, require only a handful of ingredients, and are loved by both kids and adults. The beauty of this dessert lies in its simplicity—crunchy rice cereal combined with gooey marshmallows and melted butter creates a perfect balance of sweetness and texture.
These treats have been around since the 1930s when Kellogg’s first introduced the recipe, and since then, they’ve become a staple in homes, bake sales, and parties. The reason they’ve stood the test of time is not just because they taste great, but also because they’re so versatile. You can enjoy them plain, jazz them up with chocolate, drizzle caramel over them, or even shape them into fun designs for special occasions.
Another big reason why Rice Krispy Treats are so popular is that they don’t require baking. Unlike cakes or cookies, you don’t have to wait for the oven to do its magic. Instead, the process is fast, fun, and foolproof—even kids can help make them. They’re the ultimate beginner-friendly dessert.
So, whether you’re making them for a quick snack, a school lunchbox treat, or a holiday celebration, Rice Krispy Treats are guaranteed to be a crowd-pleaser. In this guide, we’ll walk you through the ingredients you need, the tools that make preparation easier, and a step-by-step method to get that perfect chewy, crispy bite every single time.
Ingredients You’ll Need
The beauty of Rice Krispy Treats is that you only need three main ingredients. Let’s break them down so you know exactly what to grab before you start.
The Basic Three Ingredients
- Rice Krispies Cereal – The star of the recipe. You’ll need about 6 cups. Any crispy rice cereal will work, but Kellogg’s Rice Krispies are the most common choice.
- Marshmallows – This is what makes the treats chewy and gooey. Use 10 ounces of mini marshmallows or regular marshmallows. Mini ones melt faster and more evenly.
- Butter – About 4 tablespoons (half a stick) of unsalted butter. It adds richness and prevents the marshmallows from sticking too much.
Optional Add-ins for Extra Flavor
- Vanilla extract – Just a teaspoon can enhance the overall taste.
- Chocolate chips – Fold them in after mixing for a chocolaty twist.
- Sprinkles – Perfect for birthdays and holidays.
- Caramel drizzle – Adds a sweet, gooey topping.
- Sea salt – A light sprinkle on top balances the sweetness.
Substitutions for Healthier Options
- Use coconut oil or vegan butter instead of regular butter for a dairy-free version.
- Swap traditional marshmallows with vegan marshmallows or honey and nut butter mixture for a cleaner recipe.
- Use brown rice cereal for a whole-grain twist.
These variations allow you to adjust the recipe based on your dietary needs or taste preferences, making Rice Krispy Treats a dessert that can fit into just about any lifestyle.
Kitchen Tools You’ll Need
Making Rice Krispy Treats doesn’t require a fancy kitchen setup, but having the right tools will make the process smoother and less messy.
Essential Utensils and Equipment
- Large saucepan or pot – You’ll need a nonstick pot big enough to melt marshmallows and stir in cereal without spilling.
- Spatula or wooden spoon – For mixing. A silicone spatula works best because marshmallows won’t stick as much.
- 9×13-inch baking dish – This is the standard size to spread out the mixture evenly. You can use a smaller dish for thicker treats.
- Parchment paper or cooking spray – Prevents sticking and makes cleanup easy.
- Measuring cups and spoons – To measure ingredients accurately.
Recommended Kitchen Tips for Beginners
- Grease your spatula with butter or spray before stirring. This prevents sticky marshmallow messes.
- Use parchment paper to press the mixture into the pan evenly without it sticking to your hands.
- Always work quickly once the marshmallows are melted. If they cool too much, the mixture becomes hard to spread.
With just these simple tools and tricks, you’ll be fully prepared to make perfect Rice Krispy Treats without stress.
Step-by-Step Guide to Making Rice Krispy Treats
Now comes the fun part—the actual process of making these delicious squares. Follow these steps carefully for the best results.
Step 1 – Prepare Your Ingredients and Tools
Before you turn on the stove, measure out all your ingredients. Once marshmallows start melting, you’ll need to work fast, so having everything ready is key. Grease your baking dish and spatula with butter or nonstick spray.
Step 2 – Melt the Butter
Place your pot over low heat and add the butter. Let it melt slowly without browning. Low heat is important here because high heat can burn the butter and give your treats an unpleasant taste.
Step 3 – Add the Marshmallows
Once the butter has melted, add the marshmallows. Stir constantly until they melt completely into a smooth, gooey mixture. If you’re adding vanilla extract, this is the perfect time to stir it in.
Step 4 – Stir in the Rice Krispies
Remove the pot from heat and quickly add the Rice Krispies cereal. Stir until all the cereal is coated evenly with the melted marshmallows. Work quickly so the mixture doesn’t harden before you transfer it.
Step 5 – Transfer and Flatten the Mixture
Pour the mixture into your greased baking dish. Use your spatula or parchment paper to press it down evenly. Don’t press too hard—you want them firm but still chewy, not rock solid.
Step 6 – Cut into Squares and Serve
Let the mixture cool for about 20–30 minutes at room temperature. Once set, use a sharp knife to cut into squares or rectangles. Serve immediately or store them in an airtight container for later.
These steps will give you the classic Rice Krispy Treats that are chewy, crispy, and delicious.
Tips for Perfect Rice Krispy Treats
Even though this recipe is simple, there are a few tricks that can make your treats even better.
Avoiding Common Mistakes
- Don’t overheat the marshmallows. High heat makes them hard instead of gooey.
- Don’t pack the mixture too tightly. Pressing too hard makes the treats dense and tough.
- Use fresh marshmallows. Old ones don’t melt as smoothly.
Getting the Perfect Chewy Texture
The key to chewy Rice Krispy Treats is gentle heat and even mixing. If you want extra gooey results, you can add a few extra marshmallows to the recipe.
Storage and Freshness Tips
- Store them in an airtight container at room temperature for up to 3 days.
- For longer storage, wrap them individually in plastic wrap and freeze for up to 6 weeks.
Following these tips will help you achieve the perfect Rice Krispy Treats every time—soft, chewy, and full of flavor.
Creative Variations of Rice Krispy Treats
Rice Krispy Treats are delicious on their own, but the best part about this recipe is how flexible it is. With just a few extra ingredients, you can transform the classic into something truly unique. Here are some popular variations you’ll want to try at home.
Chocolate Rice Krispy Treats
For chocolate lovers, this version is a dream come true. Instead of just sticking with the original recipe, you can mix in ½ cup of cocoa powder while melting the marshmallows. Another method is to drizzle melted chocolate over the top once the mixture has cooled, creating a crunchy chocolate coating. You can also stir in chocolate chips for little bursts of sweetness. Want to go all out? Swap half the Rice Krispies with chocolate-flavored cereal for double the flavor.
Peanut Butter Rice Krispy Treats
If you’re a fan of peanut butter, this twist will hit the spot. Simply stir in ½ cup of creamy peanut butter with the melted butter and marshmallows before adding the cereal. The peanut butter gives a nutty richness and makes the treats even more indulgent. You can even drizzle some melted chocolate on top for that classic chocolate-peanut butter combo.
Holiday-Themed Treats
Rice Krispy Treats can easily be customized for holidays and parties. For example:
- Add red and green sprinkles for Christmas.
- Shape them into hearts for Valentine’s Day and drizzle with pink icing.
- Use orange food coloring and shape them into pumpkins for Halloween.
- Cut them into egg shapes and decorate with candy melts for Easter.
These variations not only taste great but also make your dessert table look festive and fun. They’re perfect for parties, bake sales, or holiday gatherings.
Nutritional Information
Rice Krispy Treats may be tasty, but they’re also a sweet indulgence. Knowing what’s inside can help you enjoy them in moderation.
Calorie Breakdown (per serving, approx. 1 square)
- Calories: 150–180
- Carbohydrates: 30–35 g
- Sugar: 15–18 g
- Fat: 4–6 g
- Protein: 1–2 g
While they’re not the healthiest snack, enjoying them occasionally is perfectly fine. If you want to lighten them up, consider a few simple swaps.
Healthier Alternatives
- Use brown rice cereal instead of the traditional kind.
- Swap marshmallows for a honey and nut butter mixture (½ cup honey + ½ cup peanut or almond butter).
- Cut back on butter by using coconut oil instead.
- Add chia seeds or flaxseeds for a fiber boost.
These healthier versions may not taste exactly like the classic, but they’re still delicious and provide more nutrients.
Serving Ideas and Occasions
Rice Krispy Treats are versatile enough to be served anywhere, anytime. Their light, chewy sweetness makes them a favorite across ages and events.
Perfect for Parties and Gatherings
Bring a tray of Rice Krispy Treats to a party, and watch them disappear in minutes. They’re portable, easy to cut into any shape or size, and don’t require utensils to eat. You can make them in advance and customize them to match the theme of the event. For example, drizzle team-colored icing for a sports party or shape them into stars for a Fourth of July celebration.
Fun Treat for Kids
Kids especially love Rice Krispy Treats, not just for eating but also for helping make them. Since there’s no baking involved, children can help stir, press the mixture into the pan, and even decorate with sprinkles or candy. They also make great lunchbox additions or after-school snacks. Parents love them too because they’re budget-friendly and quick to prepare.
Rice Krispy Treats are truly a universal dessert—ideal for birthdays, school events, holiday gatherings, or even just a cozy movie night at home.
FAQs about Rice Krispy Treat Recipe
1. Why are my Rice Krispy Treats hard instead of chewy?
This usually happens if the marshmallows are overheated or if you press the mixture too firmly into the pan. Use low heat and a gentle hand for the best texture.
2. Can I use large marshmallows instead of mini ones?
Yes, but they take longer to melt. Cut them into smaller pieces first for faster melting.
3. How long do Rice Krispy Treats last?
Stored in an airtight container at room temperature, they’ll stay fresh for about 3 days. For longer storage, freeze them individually wrapped for up to 6 weeks.
4. Can I make Rice Krispy Treats without marshmallows?
Absolutely! You can use a mixture of honey and nut butter as a natural binder. The flavor will be different but still delicious.
5. How can I make them extra gooey?
Simply add an extra cup of marshmallows to the recipe for a chewier, softer bite.
Conclusion
Rice Krispy Treats are proof that sometimes the simplest recipes are the best. With just three basic ingredients and a few minutes of your time, you can whip up a sweet, chewy snack that everyone will love. Whether you stick to the classic version or experiment with fun variations like chocolate, peanut butter, or holiday-themed shapes, these treats are endlessly customizable.
They’re perfect for beginners in the kitchen, a quick family project with kids, or a last-minute party dessert. Best of all, they never fail to bring smiles to the table. So the next time you’re craving something sweet and satisfying, skip the store-bought version and make your own homemade Rice Krispy Treats—you won’t regret it.