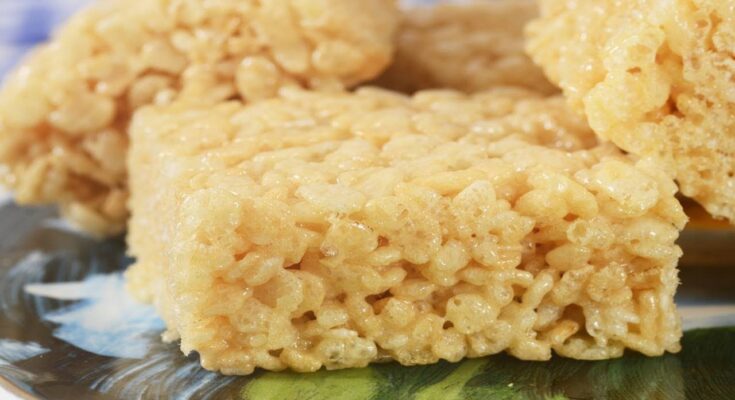
Rice Krispies Treats Recipe: Who doesn’t love a classic Rice Krispies Treat? These gooey, chewy, and irresistibly crispy squares have been a favorite for generations.
Whether you’re whipping them up for a party, a school treat, or just a snack for yourself, they’re super easy to make and customizable to your taste. With only a few ingredients and tools needed, you’ll have a delicious treat ready in no time.
Let’s dive into this step-by-step guide to making the perfect Rice Krispies Treats.
Ingredients for Rice Krispies Treats
Basic Ingredients
To make the classic Rice Krispies Treats, you’ll need just three ingredients:
- Rice Krispies Cereal: The crispy base that gives the treat its signature crunch.
- Marshmallows: These create the sweet, gooey binding that holds everything together.
- Butter: Adds richness and helps blend everything smoothly.
Optional Add-Ons
Looking to add some flair? Here are a few ideas:
- Chocolate Chips: Fold them into the mix or sprinkle on top for added sweetness.
- Sprinkles: Perfect for a festive touch.
- Peanut Butter: A spoonful added during the melting step enhances the flavor.
- Dried Fruits: For a chewy, healthy twist.
Substitutions and Dietary Options
- Vegan Option: Swap marshmallows with vegan marshmallows and use plant-based butter.
- Gluten-Free: Ensure you use a certified gluten-free crispy rice cereal.
Equipment Needed
Essential Tools
You don’t need fancy tools to make Rice Krispies Treats. Here’s the basic list:
- A saucepan for melting butter and marshmallows.
- A large mixing spoon or spatula for combining the ingredients.
- A mixing bowl for combining add-ons.
- A 9×13-inch baking pan for spreading the mixture.
Non-Stick Tips
- Grease your pan and spoon with a bit of butter or cooking spray to prevent sticking.
- Alternatively, use parchment paper to line your pan for an easier cleanup.
Step-by-Step Instructions
Step 1: Preparing Your Workspace
Before you start, gather all your ingredients and tools. This ensures a smooth and stress-free cooking process. Grease your baking pan and keep your mixing spoon ready with a light coating of butter or spray.
Step 2: Melting the Butter and Marshmallows
In a large saucepan, melt 3 tablespoons of butter over low heat. Once the butter has melted, gradually add 10 ounces of marshmallows. Stir constantly to ensure the marshmallows melt evenly and don’t stick to the pan. Keep the heat low to prevent burning.
Step 3: Adding the Rice Krispies Cereal
Remove the pan from heat and immediately pour in 6 cups of Rice Krispies cereal. Stir quickly but gently to coat all the cereal without crushing it. If you’re adding extras like chocolate chips, sprinkle them in at this stage.
Step 4: Transferring to the Pan
Spoon the mixture into your prepared baking pan. Use a greased spatula or the back of a spoon to press the mixture down evenly. Be careful not to compress it too much; you want your treats to stay light and airy.
Step 5: Cooling and Cutting
Let the treats cool at room temperature for about 30 minutes. Once they’re firm, use a sharp knife (greased with a bit of butter) to cut them into squares. Pro tip: Wipe your knife clean between cuts for perfect edges.
Variations of Rice Krispies Treats
Chocolate-Coated Treats
Melt chocolate chips and drizzle over the top or spread a layer of chocolate before cutting.
Holiday-Themed Variations
Add food coloring to the melted marshmallow mixture for a festive vibe, or use cookie cutters to shape the treats into stars, hearts, or Christmas trees.
Healthy Versions
Incorporate flaxseeds, chia seeds, or crushed nuts for a nutrient boost. You can also use brown rice cereal for a whole-grain version.
Tips and Tricks for Perfect Treats
- Avoid Hard Treats: Don’t overcook the marshmallows; they can become tough when set.
- Keep it Non-Sticky: Grease everything that touches the mixture, from spoons to pans.
- Storage Tip: Store in an airtight container to keep them fresh and soft.
Serving Suggestions
Creative Ways to Serve
- Make bite-sized cubes for party trays.
- Stick them on lollipop sticks for a fun, kid-friendly snack.
Pairing Ideas
Pair your Rice Krispies Treats with a glass of milk, a cup of coffee, or even some hot chocolate for a cozy dessert.
Storing Your Rice Krispies Treats
Short-Term Storage
Keep your treats in an airtight container at room temperature. They’ll stay fresh for about two days.
Freezing for Later
Wrap each treat in wax paper, then store in a freezer-safe bag. They can last up to six weeks. To thaw, simply let them sit at room temperature for a few hours.
Tips and Tricks for Perfect Rice Krispies Treats
Avoiding Stickiness While Shaping
Working with marshmallow mixtures can get messy. To avoid stickiness, lightly grease your hands or spatula with butter or cooking spray before pressing the mixture into the pan. This trick makes the process smoother and keeps the treats from sticking to your tools.
How to Store Your Treats for Maximum Freshness
To keep your treats fresh, store them in an airtight container at room temperature. Avoid refrigerating them, as this can make them too hard. Properly stored, they’ll stay delicious for up to three days. For longer storage, wrap each square individually in plastic wrap before placing them in the container.
Healthier Variations and Alternatives
Substituting Ingredients for Healthier Options
Looking for a healthier version of this classic treat? Here are some ideas:
- Swap out regular marshmallows for low-sugar or sugar-free marshmallows.
- Use brown rice cereal instead of the traditional Rice Krispies.
- Add in some chia seeds, flaxseeds, or a handful of chopped nuts for a boost of nutrients.
Using Vegan or Gluten-Free Ingredients
For vegan treats, use dairy-free butter and vegan marshmallows. If you need a gluten-free option, ensure your cereal is certified gluten-free, as some Rice Krispies products may contain barley malt.
Common Mistakes to Avoid
Overheating the Marshmallows
If you heat the marshmallows too quickly or at too high a temperature, they can scorch or harden. Always melt them over low heat and stir continuously for a smooth and pliable mixture.
Adding Too Many Extras
While it’s fun to experiment with add-ins, using too many can overpower the marshmallow mixture and make it difficult to bind everything together. Stick to one or two add-ins for the best results.
Serving and Presentation Ideas
Creative Ways to Serve Rice Krispies Treats
Serve them on a platter with a drizzle of chocolate or a sprinkle of powdered sugar. You can also cut them into bite-sized cubes and serve them on skewers for a fun, party-friendly snack.
Wrapping and Gifting Ideas
Rice Krispies Treats make wonderful gifts! Wrap individual squares in clear cellophane and tie them with a colorful ribbon. You can also layer them in a gift box with parchment paper between the layers to prevent sticking.
FAQs about Rice Krispies Treats Recipe
1. What ingredients do I need for Rice Krispies Treats?
To make classic Rice Krispies Treats, you will need just three ingredients: butter, marshmallows, and Rice Krispies cereal. For exact measurements, a standard recipe usually calls for 3 tablespoons of butter, 1 package (about 10 oz) of marshmallows, and 6 cups of Rice Krispies cereal.
2. How do I prevent the treats from sticking to the pan?
To prevent sticking, generously grease your pan with butter or a non-stick cooking spray before adding the mixture. You can also line the pan with parchment paper for even easier removal.
3. Can I add extras to my Rice Krispies Treats?
Absolutely! Feel free to stir in extras like chocolate chips, peanut butter, nuts, or sprinkles after mixing in the Rice Krispies. Just make sure to add them before the mixture cools too much so everything sticks together well.
4. How long do Rice Krispies Treats take to set?
Rice Krispies Treats typically set within 30 minutes to 1 hour at room temperature. For quicker setting, you can place them in the refrigerator for about 30 minutes.
5. Are Rice Krispies Treats gluten-free?
Rice Krispies cereal traditionally contains malt flavoring, which is derived from barley, a source of gluten. However, you can find gluten-free versions of puffed rice cereal to use as an alternative.
6. How do I store Rice Krispies Treats and how long do they last?
Store Rice Krispies Treats in an airtight container at room temperature. They are best eaten within two days but can last up to a week. Avoid refrigerating as it can make them hard and less chewy.
7. Can I make Rice Krispies Treats in the microwave?
Yes, you can melt the butter and marshmallows together in a microwave-safe bowl. Heat them in 30-second intervals, stirring in between, until completely melted and smooth, then mix in your Rice Krispies.
Conclusion
Rice Krispies Treats are a timeless favorite for a reason. They’re quick, easy, and endlessly customizable. Whether you stick to the classic recipe or add your unique twist, these treats are sure to bring smiles to anyone who tries them.
Ready to get started? Grab your ingredients, follow the steps, and enjoy creating a batch of delicious, gooey, and crunchy Rice Krispies Treats.


