Rice Krispie Bar Recipe: When it comes to quick and delightful desserts, Rice Krispie bars always steal the show. They are nostalgic, fun to make, and require only a handful of ingredients. Whether you’re preparing them for a kids’ party, a family gathering, or simply craving something sweet at home, this recipe will guide you through the process step by step. The best part? You don’t need to be a professional baker to whip up a batch of these delicious treats.
A childhood classic loved by all ages
If you grew up with a sweet tooth, chances are Rice Krispie bars played a part in your childhood. The combination of crunchy cereal and gooey marshmallows has a unique charm that brings back fond memories. Kids love them for their chewy texture and sweetness, while adults appreciate their simplicity and nostalgic flavor. These bars aren’t just a snack; they’re a tradition passed down through generations, often appearing at school events, bake sales, and family gatherings.
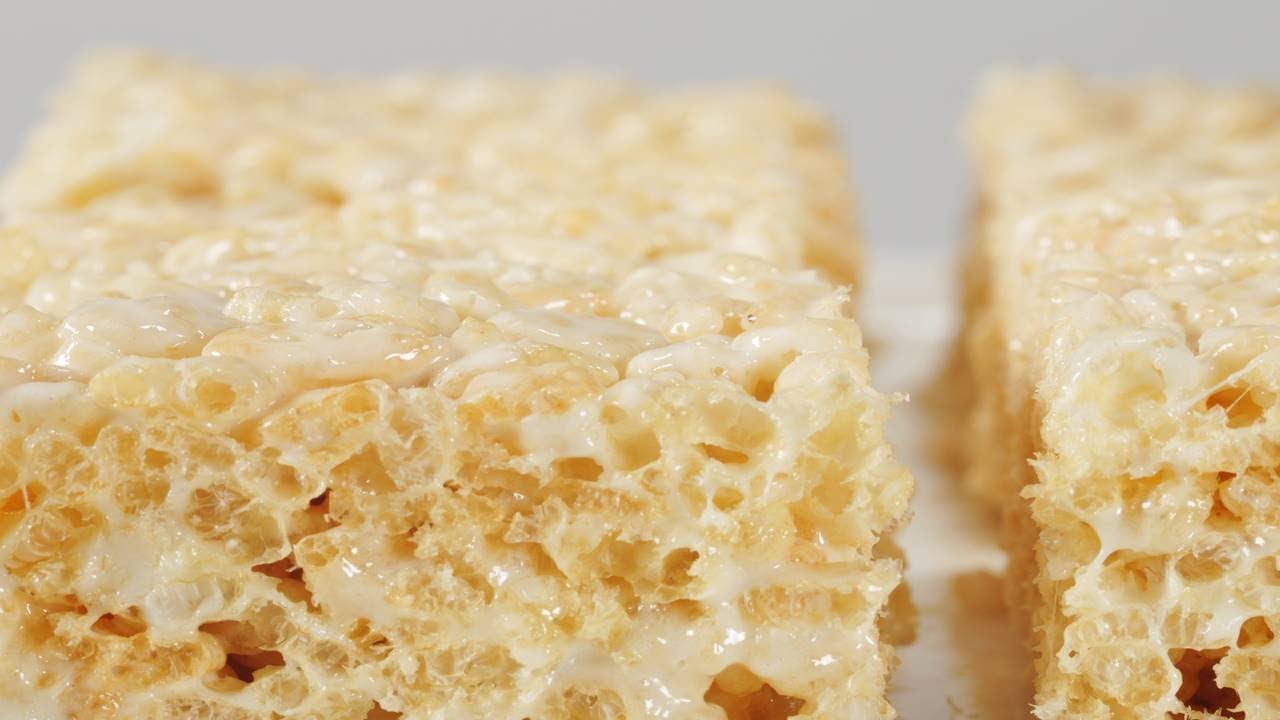
What makes them so special is the balance of textures—crispy cereal coated with melted marshmallow and butter that binds everything together. Unlike heavy desserts that leave you feeling stuffed, Rice Krispie bars are light, airy, and satisfyingly sweet without being overwhelming. Their versatility also means they can be customized with endless variations, from chocolate drizzles to colorful sprinkles.
Why this recipe stands out
You may have seen countless Rice Krispie bar recipes floating around, but not all are created equal. Some turn out too sticky, while others become rock hard after cooling. The secret lies in mastering the right marshmallow-to-cereal ratio and using the correct technique when melting and mixing. In this recipe, you’ll learn not only the classic method but also little tricks to ensure your bars come out soft, chewy, and perfectly set every single time.
Ingredients You’ll Need
Core ingredients for the perfect bars
To make classic Rice Krispie bars, you’ll only need three simple ingredients, most of which you probably already have at home:
- Rice Krispies cereal (6 cups) – The star of the show. Any crispy rice cereal works, but the original Rice Krispies brand ensures consistent results.
- Marshmallows (10 oz. bag or 40 regular size) – Marshmallows provide sweetness, softness, and that signature chewy texture. Fresh marshmallows are key, as older ones don’t melt smoothly.
- Butter (3 tablespoons) – Salted or unsalted butter works, but salted butter adds a slight flavor contrast to the sweetness.
That’s it—just three ingredients for the base recipe. Simple, right?
Optional add-ons to elevate the flavor
If you’re feeling creative, you can upgrade your Rice Krispie bars with some fun mix-ins or toppings:
- Vanilla extract for a subtle flavor boost
- Chocolate chips for extra indulgence
- Peanut butter for a nutty twist
- Sprinkles for parties or themed events
- Sea salt flakes for a sweet-and-salty combo
- Dried fruits or nuts for texture and variety
These extras aren’t necessary, but they can take your bars from ordinary to extraordinary depending on the occasion.
Essential Kitchen Tools for the Recipe
Tools that make preparation easier
One of the best things about Rice Krispie bars is that they don’t require fancy equipment. A few simple kitchen tools will make the process smooth:
- Large saucepan – For melting butter and marshmallows.
- Wooden spoon or silicone spatula – To stir and fold the mixture without sticking.
- 9×13-inch baking dish – The perfect size for evenly shaped bars.
- Parchment paper or non-stick spray – To prevent sticking when removing the bars.
- Measuring cups – To keep ingredient proportions accurate.
Substitutes if you don’t have certain tools
Don’t worry if you don’t have all the above. You can adapt with what’s available:
- No baking dish? Use any rectangular or square pan.
- No parchment paper? Grease the pan lightly with butter.
- No silicone spatula? Rub a wooden spoon with a bit of butter or oil to prevent sticking.
The goal is to make this recipe approachable for everyone—so no excuses, you can whip these up with just the basics!
Step-by-Step Guide to Making Rice Krispie Bars
Step 1 – Preparing the pan
Before you begin, lightly grease your baking dish with butter or line it with parchment paper. This simple step ensures your bars come out clean and don’t stick to the bottom. If you skip this, you’ll end up fighting with the pan, scraping sticky marshmallow residue, and breaking your bars apart. Parchment paper is the easiest option since you can lift the entire block out for clean cutting.
Step 2 – Melting the butter and marshmallows
In a large saucepan, melt the butter over low heat. Once melted, add the marshmallows and stir continuously until smooth. Patience is key here—avoid turning the heat up too high, or the marshmallows will burn and make your bars hard. A gentle, slow melt keeps everything soft and chewy.
Step 3 – Mixing in the Rice Krispies cereal
Once the marshmallows are fully melted, remove the pan from heat and quickly fold in the Rice Krispies cereal. Stir gently but thoroughly until every piece of cereal is evenly coated. Work fast, as the mixture begins to set quickly.
Step 4 – Pressing the mixture into the pan
Transfer the mixture to your prepared baking dish. Using a buttered spatula or lightly greased hands, press it down evenly. Be careful not to press too hard—this will make the bars dense and hard instead of light and airy. Gentle pressure is all you need for the perfect texture.
Step 5 – Cooling and cutting the bars
Allow the bars to cool at room temperature for about 30 minutes. Once set, lift them out of the pan using the parchment paper and cut into squares or rectangles. A sharp knife works best, and you can grease it lightly with butter to avoid sticking.
Now, you’re ready to enjoy homemade Rice Krispie bars that are soft, chewy, and oh-so-delicious!
Expert Tips for Perfect Rice Krispie Bars
How to avoid overly hard or sticky bars
Many beginners complain that their Rice Krispie bars turn out either rock-hard or unbearably sticky. The main culprit is usually overheating the marshmallows or using too little butter. Always melt your marshmallows over low heat and resist the urge to rush the process. Also, don’t over-pack the mixture into the pan—gentle pressure keeps it chewy.
Best storage tips for freshness
Rice Krispie bars taste best fresh, but if you’re making them ahead of time, store them properly. Place them in an airtight container at room temperature, where they’ll stay soft for up to 3 days. If you want them to last longer, wrap each bar individually in wax paper to prevent them from sticking together. Freezing is also an option, but the texture may change slightly once thawed.
Fun Variations of Rice Krispie Bars
Chocolate-dipped Rice Krispie treats
If you’re a chocolate lover, this twist will quickly become your favorite. After preparing the classic Rice Krispie bars, melt some chocolate chips in the microwave or on a stovetop double boiler. Once your bars have cooled, dip them halfway into the melted chocolate or drizzle it generously on top. Let them set on parchment paper until the chocolate hardens. The result? A sweet, crunchy, and slightly indulgent treat that’s perfect for satisfying chocolate cravings. You can even add toppings like crushed cookies, mini M&Ms, or sprinkles before the chocolate sets for an extra layer of fun and flavor. These are great for parties, bake sales, or just an afternoon pick-me-up.
Peanut butter Rice Krispie bars
Peanut butter fans rejoice! By adding just a few tablespoons of peanut butter to the marshmallow mixture, you completely transform the flavor profile. The nutty richness pairs beautifully with the sweetness of the marshmallows, creating a more decadent and satisfying bar. For an extra treat, melt some chocolate and spread a thin layer on top to create a peanut butter and chocolate Rice Krispie bar—it’s like a Reese’s peanut butter cup in cereal form. This variation is especially popular among adults, as the peanut butter tones down the overall sweetness and gives the bars a more balanced taste.
Holiday-themed Rice Krispie bars
Rice Krispie bars are versatile enough to be dressed up for any holiday. For Christmas, you can use red and green sprinkles or shape the mixture into festive trees and wreaths. On Halloween, orange food coloring can be mixed into the marshmallow mixture to create pumpkin-shaped bars with candy corn decorations. For Valentine’s Day, add a few drops of red food coloring and cut the bars into heart shapes, finishing them with pink sprinkles. These themed versions make Rice Krispie bars not just a dessert but also a fun activity you can do with kids, turning them into edible holiday crafts.
Nutritional Information
Calories per serving
While Rice Krispie bars are undeniably delicious, it’s important to know what you’re eating. A standard serving (about 2×2-inch square) contains roughly:
- Calories: 150–170
- Carbohydrates: 30–35g
- Sugar: 15–18g
- Fat: 3–4g
- Protein: 1–2g
This makes them a lighter dessert option compared to cakes and cookies, but they are still high in sugar due to the marshmallows. Moderation is key when enjoying these sweet treats.
Healthier alternatives
If you’d like to make Rice Krispie bars a little healthier without sacrificing taste, try these simple swaps:
- Use brown rice cereal instead of regular Rice Krispies for added fiber.
- Replace marshmallows with honey and peanut butter for natural sweetness and protein.
- Add chia seeds, flax seeds, or protein powder to boost nutrition.
- Drizzle with dark chocolate instead of milk chocolate for a lower-sugar topping.
These alternatives can make your Rice Krispie bars more suitable for everyday snacking while still keeping the fun, chewy texture everyone loves.
Serving Suggestions
Perfect occasions to enjoy Rice Krispie bars
Rice Krispie bars are the ultimate crowd-pleaser, which makes them perfect for almost any occasion. Whether it’s a birthday party, holiday gathering, or school bake sale, these treats are always a hit. They’re especially handy when you’re short on time and need something quick yet impressive. Unlike complicated desserts, Rice Krispie bars don’t require baking, cooling racks, or hours in the kitchen. In under 30 minutes, you’ll have a dessert that both kids and adults will happily devour.
They also make great lunchbox treats—individually wrapped bars are easy to pack and store without making a mess. For road trips or picnics, they’re lightweight, portable, and mess-free, making them the ideal travel-friendly dessert.
Pairing ideas with drinks and desserts
Rice Krispie bars might be simple, but you can elevate them by pairing them with complementary drinks and desserts. Try serving them with:
- Hot chocolate or coffee for a cozy, comforting pairing
- Milkshakes for a sweet overload that kids will adore
- Fruit salad to balance out the sweetness with freshness
- Ice cream by crumbling Rice Krispie bars on top for added crunch
Pairing them creatively transforms these humble bars into a centerpiece of your dessert table.
Common Mistakes to Avoid
Overheating the marshmallows
One of the most common pitfalls when making Rice Krispie bars is overheating the marshmallows. It may seem faster to crank up the heat, but high heat causes the sugar in marshmallows to caramelize, resulting in a stiff, grainy texture. Instead, always melt marshmallows slowly on low heat. Stir continuously until they are silky smooth. This small adjustment ensures your bars stay soft and chewy instead of turning into tough, rock-hard blocks.
Using too much cereal
It’s tempting to add extra cereal when mixing because the marshmallow mixture looks overly sticky. However, adding too much cereal throws off the balance, making the bars dry and crumbly. Stick to the recommended 6 cups of Rice Krispies for every 10-ounce bag of marshmallows. This ratio guarantees the perfect chewy texture. Remember: the marshmallows are the glue that holds everything together, so if you overload the cereal, the bars won’t bind properly.
FAQs about Rice Krispie Bar Recipe
1. Can I make Rice Krispie bars without marshmallows?
Yes! You can substitute marshmallows with a mixture of honey and peanut butter. Melt them together, then mix with cereal for a healthier, no-marshmallow version.
2. How long do Rice Krispie bars last?
They stay fresh for about 3 days when stored in an airtight container at room temperature. After that, they may harden.
3. Can I freeze Rice Krispie bars?
Yes, you can freeze them for up to 6 weeks. Wrap each bar individually in wax paper, place them in a freezer bag, and thaw at room temperature before serving.
4. How to make them gluten-free?
Use a gluten-free crispy rice cereal instead of regular Rice Krispies, as some brands contain malt flavoring (which has gluten).
5. Can I add protein powder to Rice Krispie bars?
Absolutely! Mix a scoop of vanilla protein powder into the marshmallow mixture before adding the cereal. It’s an easy way to make these treats more filling and nutritious.
Conclusion
Rice Krispie bars are proof that sometimes the simplest recipes bring the most joy. With just three ingredients, you can create a dessert that’s nostalgic, fun, and endlessly customizable. From chocolate drizzles to peanut butter twists and holiday-themed versions, these bars adapt to any occasion. By following the right marshmallow-to-cereal ratio, melting slowly over low heat, and pressing gently into the pan, you’ll master the art of making Rice Krispie bars that are always soft, chewy, and delicious.
Whether you’re preparing them for a party, packing them into lunchboxes, or simply treating yourself, these bars will never disappoint. Now that you have this step-by-step guide, it’s time to grab your ingredients and whip up a batch of your own.