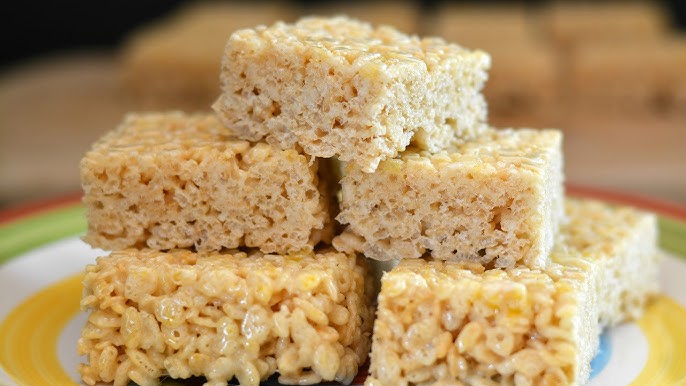
Rice Crispy Recipe: Rice crispy treats are a timeless, no-bake dessert made from puffed rice cereal, melted butter, and gooey marshmallows. If you’ve ever bitten into one, you know they’re light, chewy, and slightly crunchy with just the right hint of sweetness. Their golden color and melt-in-your-mouth texture make them a hit at bake sales, birthday parties, and pretty much any gathering where a sweet snack is welcome. These treats first gained popularity in the U.S. during the 1930s when Kellogg’s introduced them as a creative use for their Rice Krispies cereal. Since then, they’ve been a staple in kitchens and lunchboxes around the world.
Why They’re So Popular
Why do people love rice crispy treats so much? Because they’re easy to make, incredibly affordable, and ridiculously delicious! Unlike cakes or cookies that require baking and multiple steps, these treats can be whipped up in under 15 minutes. No special skills or fancy gadgets needed. Plus, they’re customizable. Want to add some chocolate chips? Go for it. Want to make them vegan or gluten-free? Easy! They also store well, making them a convenient make-ahead dessert. Whether you’re a novice in the kitchen or a seasoned baker, rice crispy treats never fail to satisfy your sweet tooth with minimal effort.
Ingredients Needed
Basic Ingredients
Here’s what you’ll need for the classic rice crispy treat recipe:
- 6 cups of Rice Krispies cereal (or any puffed rice cereal)
- 1 package (10 oz) of mini marshmallows (about 4 cups)
- 3 tablespoons of unsalted butter
These three simple ingredients are the core of the recipe. The marshmallows provide that gooey, sticky texture and sweetness, while the butter gives the treats their rich, creamy flavor. Always go for fresh marshmallows; stale ones can ruin the smooth melt and affect the final texture.
Optional Add-ins and Variations
Want to take things up a notch? Try these:
- Vanilla extract (1 teaspoon for extra flavor)
- Chocolate chips or chunks
- Peanut butter (a couple tablespoons for a nutty twist)
- Sprinkles for color and fun
- Sea salt for a sweet-and-salty vibe
Feel free to get creative. These treats are your blank canvas!
Tools and Equipment
Essential Kitchen Tools
You don’t need much to make rice crispy treats, but having the right tools can make the process smoother:
- Large saucepan or pot – to melt the butter and marshmallows
- Wooden spoon or heat-resistant spatula – for stirring
- 9×13 inch pan – to shape and cool the treats
- Parchment paper or cooking spray – for lining the pan
These basic tools are usually already in most kitchens. If you want to avoid a sticky mess, the parchment paper is especially helpful when pressing the mixture into the pan.
Preparing Your Workspace
Before you start, make sure your workspace is clean and everything is within reach. Pre-measure your ingredients so you’re not scrambling while your marshmallows are melting. Lightly grease your spatula and the pan with a bit of butter or spray—this helps keep everything from sticking. Trust us, once you pour in the sticky mix, you’ll be glad you prepared in advance.
Step-by-Step Instructions
Step 1 – Melt the Butter
Start by placing your butter in a large saucepan over medium-low heat. Let it melt completely, but be careful not to brown or burn it. You want it smooth and liquid, just enough to coat the marshmallows without adding a toasted flavor (unless that’s your thing!).
Step 2 – Add Marshmallows
Once the butter has melted, toss in all your marshmallows. Stir constantly to avoid scorching. The marshmallows should melt slowly into a smooth, glossy mixture. Keep the heat low and steady—this step requires patience. High heat will create stiff, hard treats, and nobody wants that!
Step 3 – Mix in Rice Krispies
As soon as your marshmallows are melted, turn off the heat and quickly stir in the cereal. Mix gently but thoroughly, ensuring every piece is coated in that sticky goodness. It helps to fold the cereal in batches to avoid clumps.
Step 4 – Spread in a Pan
Now that everything is mixed to perfection, it’s time to transfer the gooey mixture into your prepared pan. Spoon the sticky mass into the pan and spread it out as evenly as you can. Here’s a little trick: use a piece of wax paper, parchment paper, or a spatula sprayed with non-stick cooking spray to press down the mixture gently. Be careful not to press too hard—you want them to stay soft and chewy, not compacted like bricks.
Spreading evenly is key to making sure every bite has the perfect texture. If you notice some clumps, gently smooth them out with your spatula or the back of a spoon. Let it sit for about 30 minutes to an hour at room temperature to firm up before cutting. No need to refrigerate unless your kitchen is super warm—cold rice crispy treats can become too hard.
Step 5 – Cool and Cut
Once your rice crispy treats have cooled and set, it’s time to slice and enjoy! Use a sharp knife to cut them into squares, rectangles, or even fun shapes using cookie cutters. Want a cleaner cut? Lightly grease your knife with butter or spray—it’ll glide right through the marshmallowy goodness.
Store the cut treats in an airtight container at room temperature. They’ll stay fresh for about 3 days, but let’s be honest—these rarely last that long! You can also wrap them individually in plastic wrap if you’re packing them for lunchboxes or party favors.
Pro Tips for Perfect Rice Crispy Treats
Texture and Flavor Enhancements
If you want to step up your rice crispy game, it’s all about the small details. A splash of vanilla extract added to the melted marshmallows can bring out a more rounded flavor. Want a richer taste? Try browning the butter slightly before adding the marshmallows—it adds a nutty depth that’s seriously delicious.
To keep the texture light and chewy, avoid overmixing. Once the cereal is added, stir just enough to coat everything evenly. Also, don’t be tempted to use more cereal than recommended. Too much can lead to dry, crumbly bars instead of the soft, chewy ones we all love.
How to Keep Them Fresh
Nobody likes stale rice crispy treats. To keep yours fresh and soft:
- Store in an airtight container with a slice of bread (it helps retain moisture).
- Wrap individual bars in plastic wrap or wax paper.
- Avoid refrigeration unless necessary—it can dry them out.
- If you’re making a large batch, consider freezing them. Wrap them tightly in plastic, then foil, and store in a freezer-safe bag. They’ll last for up to six weeks!
Fun Variations to Try
Chocolate Drizzle
Want to add a decadent touch? Melt some chocolate chips and drizzle over the top of your cooled rice crispy treats. Use milk chocolate, dark, or white—whatever suits your taste. Let the drizzle set before cutting. It adds a luxurious flavor layer without much effort.
Peanut Butter Twist
Peanut butter fans, this one’s for you. Before adding the cereal, stir a few tablespoons of creamy peanut butter into the melted marshmallow mix. It creates a nutty, richer version that’s completely addictive. Want even more indulgence? Add chopped peanuts or a peanut butter drizzle on top.
Festive Sprinkle Mix
Perfect for holidays and parties! Just add colorful sprinkles, mini M&Ms, or themed candies right after mixing the cereal in. You can also use food coloring in the melted marshmallows to create fun, seasonal treats (think pink for Valentine’s, orange for Halloween, red and green for Christmas). The possibilities are endless and totally Instagram-worthy.
Common Mistakes to Avoid
Overheating Marshmallows
One of the biggest mistakes people make is overheating the marshmallows. You might think higher heat means faster melting, but it actually leads to tough, hard treats. Marshmallows are delicate—they just need a gentle, low heat to become soft and gooey. Once they’ve melted, immediately remove them from the heat and mix in the cereal.
If your treats turn out too firm or chewy in a bad way, overheated marshmallows are likely the culprit. Always melt them slowly, stirring frequently, and resist the urge to crank up the heat. Patience truly pays off in the form of perfect texture.
Pressing Too Hard into Pan
We get it—you want nice, even treats that look Instagram-perfect. But pressing too hard when spreading the mixture into the pan can ruin that light, airy texture. The harder you press, the more compact the treats become, leading to dense and overly chewy squares that feel like a chore to eat.
Instead, gently press just enough to flatten the top and spread the mixture evenly. Use a piece of wax paper or a greased spatula for this. The goal is to keep them light and bouncy, with that signature marshmallow pull when you bite in.
FAQs about Rice Crispy Recipe
Can I use vegan marshmallows?
Yes! Vegan marshmallows work great in this recipe. Just make sure they melt smoothly—some brands may take a little longer. Pair them with plant-based butter, and you’ve got a delicious, fully vegan version of this classic treat.
How long do they stay fresh?
Stored properly in an airtight container, rice crispy treats stay fresh for up to 3 days at room temperature. You can extend their shelf life by individually wrapping them or even freezing them for later enjoyment.
Can I freeze rice crispy treats?
Absolutely. Wrap them tightly in plastic wrap and then foil, and store them in a freezer-safe bag. They’ll keep for up to 6 weeks. To enjoy, just let them thaw at room temperature for about 30 minutes.
What if I don’t have Rice Krispies?
No problem! You can use any puffed rice cereal or even mix in cereals like Cheerios or Cornflakes for a unique twist. Just avoid very sugary cereals—they can mess with the balance of sweetness.
Are these safe for kids to make?
Totally! This is one of the best beginner-friendly recipes for kids. Just make sure an adult helps with the stove part, especially melting the butter and marshmallows. Once that’s done, kids can handle the mixing and shaping.
Conclusion
Rice crispy treats are the ultimate no-fuss dessert. Whether you’re whipping up a quick after-school snack or preparing a tray for a birthday bash, these golden bars of joy never disappoint. With only a few ingredients and basic steps, anyone can make them—yes, even if you’ve never turned on your stove before. And the best part? The endless customization options.
Want them extra gooey? Use more marshmallows. Prefer a hint of peanut butter? Stir it in! Feeling festive? Add sprinkles or chocolate drizzle. These treats are your canvas—get creative and make them your own. Just remember the golden rules: low heat, gentle pressing, and airtight storage. Follow these tips, and you’ll have the best rice crispy treats on the block.
So, grab a bag of marshmallows and a box of cereal, and let’s get cooking. Your sweet tooth will thank you!