Reverse Sear Steak Recipe: If you’ve ever struggled with cooking the perfect steak—where the inside is beautifully pink and juicy, and the outside has that golden-brown crust—then it’s time to change the way you cook. The reverse sear method is hands-down the secret weapon of home cooks and professionals alike. This technique flips the traditional method on its head. Instead of searing the meat first and cooking it to temp later, reverse searing starts with a slow roast in the oven and ends with a quick, intense sear in a hot pan. What’s the result? Steakhouse-quality flavor with none of the guesswork.
This article is your go-to step-by-step guide to mastering the reverse sear technique. Whether you’re cooking a thick ribeye or a juicy strip steak, you’ll walk away with everything you need to wow your friends, family—or just yourself. Let’s dig in.
Benefits of Reverse Searing Steak
So, what makes the reverse sear method so popular? Here are a few key reasons people are ditching traditional methods for this technique:
- Perfect Doneness: Cooking the steak low and slow gives you way more control. You won’t end up with a steak that’s raw in the middle and burnt outside.
- Amazing Texture: The final sear gives you that crunchy, crusty outer layer while keeping the inside tender and juicy.
- Consistency: Once you get the hang of this method, it’s nearly impossible to mess up. Plus, it’s much easier to hit that perfect medium-rare sweet spot.
You don’t have to be a chef to pull this off. With just a few tools and the right technique, you’ll elevate your steak game dramatically.
Best Cuts for Reverse Searing
Not all steaks are created equal—some cuts work better with the reverse sear technique than others. Here are the best types to choose:
- Ribeye: Rich in fat and flavor. Perfect for searing.
- New York Strip: Less marbled than ribeye but still packed with flavor.
- Filet Mignon: Super tender and lean—needs careful cooking, making the reverse sear ideal.
- Porterhouse or T-Bone: Thicker cuts benefit greatly from the even cooking of this method.
Make sure the steak is at least 1.5 inches thick. The thicker the steak, the better the reverse sear will work.
List of Ingredients You’ll Need
Here’s what you’ll need to get started:
Main Ingredients:
- 1 or more thick-cut steaks (Ribeye, Strip, Filet, etc.)
- Kosher salt
- Freshly ground black pepper
Optional Seasonings:
- Garlic powder
- Smoked paprika
- Fresh rosemary or thyme
- Crushed garlic cloves
- Butter (for basting)
Tools & Equipment:
- Cast-iron skillet (or heavy stainless steel pan)
- Oven-safe wire rack
- Baking sheet
- Instant-read meat thermometer
- Tongs
- Aluminum foil (for resting)
You don’t need anything fancy—just a few reliable kitchen tools and a quality cut of meat.
What You’ll Need: Tools and Gear
Let’s break it down further. Your steak is only as good as your tools. Here’s the must-have gear:
- Wire Rack & Baking Sheet: Allows air to circulate evenly during the oven phase.
- Meat Thermometer: Absolutely essential. It takes the guesswork out of doneness.
- Cast-Iron Skillet: Retains heat like a champ. Perfect for achieving that crust.
- Tongs: Don’t use a fork! You want to avoid piercing the meat.
A small investment in good gear pays off big when it comes to steak night.
Prepping the Steak
Before you even think about turning on the oven, you need to prep your steak properly.
- Bring to Room Temperature: Take your steak out of the fridge 30–60 minutes before cooking. This ensures even cooking.
- Season Generously: Salt and pepper are essential. Don’t be shy—season all sides evenly.
- Pat it Dry: Moisture is the enemy of a good sear. Use paper towels to dry the surface thoroughly.
This step is like stretching before a workout—it makes everything else go smoother.
Step-by-Step Guide to Reverse Searing a Steak
Here’s where the magic happens. Let’s go step by step:
Step 1: Preheat the Oven
Set your oven to 225°F (107°C). Low and slow is key. You’re essentially “slow-roasting” the steak before searing.
Step 2: Set Up the Rack
Place the steak on a wire rack set over a baking sheet. This setup helps air circulate and cooks the steak evenly.
Step 3: Cook in the Oven
Cook until your steak hits 10-15°F below your target doneness. For medium-rare, that’s about 115–120°F internal temp. This takes around 25–40 minutes depending on thickness.
Step 4: Remove and Rest
Once it reaches the target temp, take it out and let it rest for 10 minutes. This redistributes the juices.
Step 5: Sear on the Skillet
Crank up the heat! Place your skillet on high and let it get smoking hot. Add a little oil with a high smoke point (like avocado or grapeseed oil).
Step 6: Butter Baste
Throw in some butter, garlic, and fresh herbs like rosemary or thyme. Spoon the sizzling butter over the steak as it sears—flavor bomb!
Step 7: Finish and Serve
After 1–2 minutes per side, remove the steak. Rest again for 5 minutes, then slice and serve.
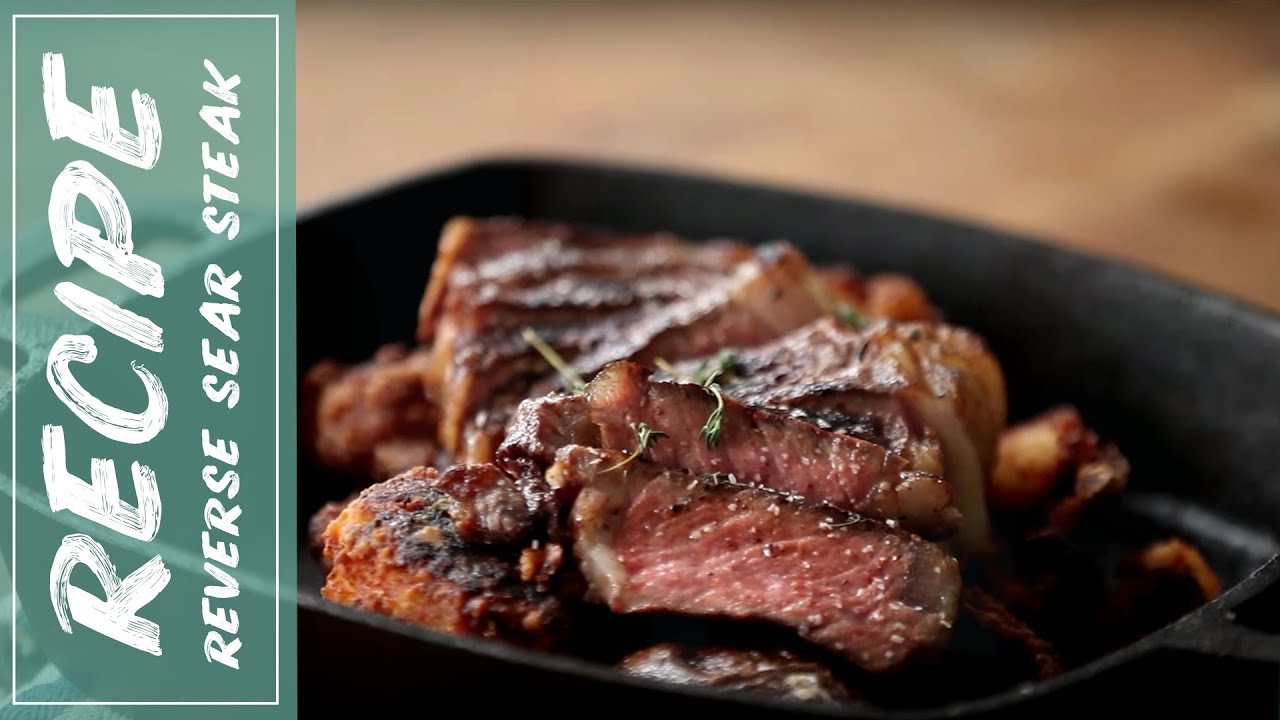
How to Get the Perfect Crust
Now that your steak is properly cooked on the inside, it’s time to get that irresistible, steakhouse-style crust on the outside. This is where most people either nail it—or completely mess it up. But don’t worry, we’re going to get it just right.
First things first: you need a hot pan. And not just hot—smoking hot. A cast-iron skillet is the gold standard here because it holds and distributes heat evenly. Preheat it on high heat for a few minutes before adding anything to it. You should see a faint shimmer on the surface of the pan. That’s your sign it’s ready.
Choose the right oil. You’ll want something with a high smoke point like:
- Avocado oil
- Canola oil
- Grapeseed oil
- Peanut oil
Avoid butter during the initial sear—it burns too quickly. You can always add it after the crust has formed, during the butter-basting stage.
Here’s the secret: don’t move the steak. Once it hits the pan, leave it alone for 1–2 minutes. This uninterrupted contact with the hot surface creates the Maillard reaction, which is responsible for that deep, complex flavor and beautiful browning. Flip it once, sear the other side, then sear the edges if your steak is extra thick.
And lastly, don’t overcrowd the pan. Searing multiple steaks at once lowers the pan’s temperature and ruins the crust. Sear in batches if necessary.
Internal Temperature Chart for Steak Doneness
Cooking steak to the perfect doneness is all about temperature accuracy. That’s why a meat thermometer is a must. Here’s a simple breakdown of internal temps for each level of doneness (remember, remove your steak from the oven 10–15°F below these temps since the sear will bring it up to final doneness):
| Doneness | Internal Temp (After Sear) | Texture & Color |
|---|---|---|
| Rare | 120–125°F | Cool red center, very soft |
| Medium-Rare | 130–135°F | Warm red center, soft & juicy |
| Medium | 140–145°F | Pink center, slightly firm |
| Medium-Well | 150–155°F | Slight pink, firmer texture |
| Well-Done | 160°F+ | No pink, very firm |
If you’re aiming for that steakhouse-quality medium-rare, pull your steak from the oven at 115–120°F and let the searing finish the job.
Reverse Sear on Grill vs. Oven
Wondering if you can reverse sear a steak on the grill instead of the oven? The answer is yes—both work well, but each has its pros and cons.
Reverse Sear in the Oven:
Pros:
- Easy to control temperature
- Great for indoor cooking
- Consistent results
Cons:
- No smoky flavor unless you sear in cast iron with extra seasoning
Reverse Sear on the Grill:
Pros:
- Adds natural smoky flavor
- No kitchen smoke (win!)
Cons:
- Requires more attention to heat zones
- More weather dependent
To reverse sear on a grill, set up two heat zones: one side with low indirect heat (for the “roasting” phase) and the other blazing hot for the sear. It works just like the oven method but adds a hint of smokiness that charcoal lovers crave.
How Long Does It Take to Reverse Sear a Steak?
One of the most common questions is: “How long will this take?” And the honest answer is—it depends on thickness, doneness level, and your oven temp. But here’s a rough guide for steaks around 1.5–2 inches thick:
Oven Time (225°F):
- Rare (120°F): 20–25 minutes
- Medium-Rare (130°F): 30–35 minutes
- Medium (140°F): 35–40 minutes
Add another 5–10 minutes if your steak is thicker than 2 inches.
Searing Time:
- 1 to 2 minutes per side
- Optional: 30 seconds per edge for thick cuts
Resting Time:
- 10 minutes after oven
- 5 minutes after searing
So from start to finish, plan for 45–60 minutes total—but trust me, the result is more than worth the wait.
Reverse Sear for Thick vs. Thin Steaks
The reverse sear technique shines with thick steaks, but what about thinner ones?
Thick Steaks (1.5″ to 2.5″)
- Ideal for reverse searing
- Perfectly even doneness from edge to center
- Won’t overcook during sear
Thin Steaks (<1.5″)
- Not ideal
- Risk of overcooking during sear
- Better suited for traditional searing methods
If you still want to reverse sear a thinner steak, cut down the oven time drastically—maybe 10–15 minutes—and use a thermometer religiously. But if you want the full benefit of this method, thick-cut steaks are the way to go.
Serving Suggestions
Alright, your steak is cooked to perfection—but what do you serve it with? A great steak deserves equally amazing sides and sauces.
Perfect Side Dishes:
- Garlic mashed potatoes
- Roasted asparagus
- Crispy Brussels sprouts
- Creamed spinach
- Mac and cheese
- Grilled corn on the cob
Sauces That Pair Well:
- Garlic herb butter
- Peppercorn sauce
- Béarnaise
- Chimichurri
- Red wine reduction
Don’t forget to slice your steak against the grain before serving. This makes each bite more tender. Oh, and pair it with your favorite drink—maybe a bold red wine or a cold craft beer.
Common Mistakes to Avoid
Even though the reverse sear method is beginner-friendly, a few mistakes can trip you up. Let’s break down what to watch for:
1. Skipping the Thermometer
Guesswork doesn’t work here. A thermometer gives you precise control, so don’t wing it.
2. Not Resting the Steak
This is non-negotiable. Skipping the rest period after cooking or searing leads to dry meat. Always give it time to soak its own juices back in.
3. Searing for Too Long
It’s a quick sear, not a second cook. Overdoing the sear can undo all the precision from the oven phase.
4. Searing in the Wrong Pan
Use a cast-iron skillet. Non-stick pans won’t give you a crust, and stainless steel might stick.
Avoid these rookie errors, and you’ll be reverse searing like a pro in no time.
FAQs about Reverse Sear Steak Recipe
1. Can you reverse sear frozen steak?
Yes, but you’ll need to fully thaw it first. Never reverse sear directly from frozen.
2. Do you need a thermometer for this method?
Absolutely. It’s the key to hitting your target doneness without guesswork.
3. Can I use this method for other meats?
Definitely! Reverse sear works great for thick pork chops, lamb chops, and even roasts.
4. What oil is best for searing?
Use oils with high smoke points like avocado, canola, or grapeseed. Avoid olive oil and butter at the start of searing.
5. Should I marinate the steak before reverse searing?
It’s not necessary. A simple dry brine (salt + rest) works best to enhance the steak’s natural flavor.
Conclusion
Reverse searing steak isn’t just a trend—it’s a technique that transforms your cooking game. With a little patience, the right cut of meat, and a meat thermometer in hand, you can deliver steakhouse results from the comfort of your kitchen. That perfect pink center, the sizzling crust, the juicy bites—it’s all within reach.
The next time someone asks how you make such a perfect steak, you can smile and say, “It’s all about the reverse sear.”


