Relish Recipe: Relish is one of those unsung heroes of the condiment world. It’s not as flashy as ketchup or mustard, but when it’s good, it really elevates your food. A spoonful of relish can add a tangy crunch to burgers, hot dogs, grilled meats, and even deviled eggs. But what exactly is relish?
Simply put, relish is a condiment made of chopped vegetables or fruits that are pickled or cooked with vinegar, sugar, and spices. The beauty of relish is its versatility. While the most well-known version in the U.S. is probably the classic pickle relish, found on hot dogs and in potato salads, relish exists in various forms around the world—like India’s spicy chutneys or the UK’s Branston Pickle.
People love relish not just because it adds flavor, but also texture. That sweet-tangy taste mixed with crunchy vegetables creates a delightful contrast to rich, savory dishes. Plus, making relish at home allows you to control the ingredients, flavors, and even how chunky or smooth it turns out.
Ingredients Needed for Homemade Relish
Before diving into the step-by-step process, let’s get our ingredients in place. The recipe below makes a sweet cucumber relish, which is ideal for hot dogs, burgers, and sandwiches. You can always tweak it later to make it spicier or more savory.
Base Ingredients:
- 4 cups finely chopped cucumbers (peeled and seeded)
- 1 ½ cups finely chopped onion
- 1 cup finely chopped red bell pepper
- 1 cup finely chopped green bell pepper
- 2 tablespoons salt
- 1 ¾ cups sugar
- 1 cup white vinegar (5% acidity)
- 1 tablespoon celery seed
- 1 tablespoon mustard seed
Optional Add-ins for Flavor Customization:
- A pinch of turmeric for color and depth
- A jalapeño for heat
- Dill for a pickle-y twist
- Crushed garlic for a savory kick
These ingredients can be easily adjusted based on what you have on hand or what flavor profile you’re going for. For instance, apple cider vinegar can be used in place of white vinegar if you prefer a fruitier tang. You can also reduce the sugar if you want a more tart and less sweet relish.
Preparing Your Kitchen and Tools
Cooking, like any creative process, goes smoother when you’re organized. Before you start making relish, make sure your kitchen is ready and your tools are clean.
Tools You’ll Need:
- Large cutting board and sharp knife (or a food processor for quicker chopping)
- Mixing bowls
- Measuring cups and spoons
- Cheesecloth or fine mesh strainer
- Large non-reactive pot (stainless steel or enamel)
- Wooden spoon for stirring
- Jars or airtight containers for storing
Make sure everything is washed and sanitized, especially if you plan to preserve the relish for long-term storage. If you’re canning, you’ll also need canning jars, lids, and a boiling water canner.
Prepping Tips:
- Wash your vegetables thoroughly to remove any dirt or residue.
- Use gloves if you’re chopping spicy peppers like jalapeños.
- Chop vegetables evenly for consistent texture and even cooking.
Having all your ingredients prepped and measured before you start cooking will make the entire process smoother and more enjoyable.
Step-by-Step Instructions for Making Relish
Now the fun begins. Making relish isn’t difficult, but it does require some patience, especially when waiting for vegetables to sit or cook down. Here’s how to do it:
Step 1 – Washing and Chopping Vegetables
Start by thoroughly washing your cucumbers, bell peppers, and onions. Peel the cucumbers if desired (especially if the skins are thick or waxy) and remove the seeds. Chop all the vegetables finely—this is where a food processor can save you loads of time.
The key here is uniformity. The smaller and more evenly you chop your vegetables, the better the texture of your final relish will be. Once everything is chopped, transfer the vegetables to a large bowl.
Step 2 – Salting the Vegetables
Sprinkle the two tablespoons of salt over your chopped veggies. Mix well to distribute the salt evenly. This salting step does two things: it draws out excess moisture and begins to soften the vegetables.
Let this mixture sit for at least 2 hours at room temperature. Then, transfer the salted veggies to a colander lined with cheesecloth or a clean kitchen towel. Squeeze out as much liquid as you can. The drier your vegetables are, the better the relish texture.
Step 3 – Cooking the Mixture
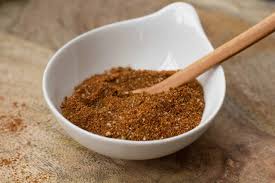
Now that your vegetables are drained and ready, it’s time to bring everything together in a pot. In a large non-reactive saucepan, combine your sugar, vinegar, mustard seed, and celery seed. If you’re using optional ingredients like turmeric or jalapeños, add them at this stage.
Heat the mixture over medium heat, stirring until the sugar is completely dissolved and the liquid starts to simmer. Once you see bubbles forming gently around the edges, add your drained vegetable mixture to the pot.
Cook the mixture at a low simmer for about 10–15 minutes, stirring occasionally to prevent sticking. The goal here is not to overcook but to allow the flavors to meld and the vegetables to soften slightly while still retaining some crunch.
You’ll notice the liquid thickens slightly and the aroma becomes tangy and sweet. That’s when you know it’s close to done. If you like a thicker relish, you can simmer it a bit longer, but don’t let it become mushy.
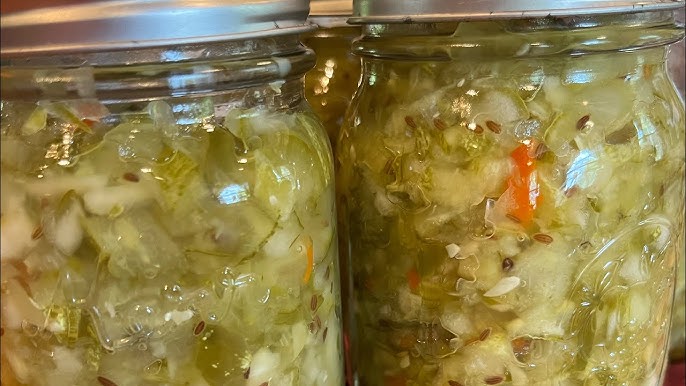
Step 4 – Cooling and Storing the Relish
Once the cooking process is complete, turn off the heat and let the relish cool slightly—about 10–15 minutes in the pot. Carefully ladle the warm relish into clean jars or airtight containers, leaving about half an inch of headspace at the top.
If you’re planning to eat it within a week or two, simple refrigeration will do. Let the jars cool fully at room temperature before storing them in the fridge.
For longer shelf life, consider water bath canning. This process involves sealing the jars and boiling them in water for 10–15 minutes to make them shelf-stable. Always follow safe canning procedures if you go this route.
Your homemade relish is now ready! It’ll taste even better after sitting for a day or two as the flavors meld further.
Tips for Perfecting Your Relish Every Time
Making the perfect relish isn’t just about following a recipe—it’s about understanding the process and adapting it to your taste.
Here are some expert tips:
- Balance the Sweet and Tangy: Adjust sugar and vinegar ratios depending on how sweet or sour you like it.
- Texture Matters: Overcooking the veggies makes them soggy. Aim for a short cook time to keep them slightly crunchy.
- Spice It Up: Add hot peppers, chili flakes, or even ginger if you want a spicy kick.
- Experiment with Herbs: Dill, parsley, and thyme can add an herbal note to your relish.
- Try Fruit Relishes: Switch cucumbers for green tomatoes, apples, or pineapple for a sweet twist.
Avoid These Common Mistakes:
- Skipping the Salt Soak: This step removes excess moisture and prevents watery relish.
- Not Sterilizing Jars Properly: If you’re canning, dirty jars can cause spoilage.
- Overloading Spices: Start with small amounts—spices intensify over time as the relish sits.
With a bit of trial and error, you’ll find your perfect balance. Homemade relish becomes addictive—once you start making it, you might never go back to store-bought.
Creative Ways to Use Relish
Relish is incredibly versatile and can transform even the most basic meal into something exciting. Once you’ve made your homemade batch, you’ll find plenty of creative ways to use it beyond the traditional burger topping.
Here are some tasty and inventive ideas:
1. Classic Toppings
- Hot Dogs & Hamburgers: The most common use—slather relish on grilled meats for a tangy crunch.
- Sandwiches & Wraps: Add a spoonful to tuna or chicken salad sandwiches for an extra zing.
- Grilled Sausages: Relish pairs beautifully with bratwursts and kielbasa.
2. Mix Into Recipes
- Potato Salad: A scoop of relish adds sweetness and acidity to creamy potato salads.
- Deviled Eggs: Stir a bit into the yolk mixture for flavor that pops.
- Egg or Tuna Salad: Give your lunch a flavorful boost with a spoonful of relish.
- Coleslaw: Add it to coleslaw for a sweet crunch and depth.
3. As a Flavor Booster
- On Cheese Boards: Relish makes a unique pairing with sharp cheeses and crackers.
- Grilled Meats: Serve it on the side of grilled chicken, pork chops, or steak.
- Tacos or Nachos: Yes, really! Especially if you make a spicy variation with jalapeños.
4. Cooking Enhancer
- Glaze Base: Mix relish with mustard or BBQ sauce for a meat glaze.
- Baked Dishes: Stir into casseroles or meatloaf for added texture and flavor.
- Marinades: Combine with oil and vinegar for a quick vegetable or meat marinade.
There’s no wrong way to enjoy relish. Once you start using it creatively, you’ll wonder how you ever lived without it!
How to Store and Preserve Relish
Preserving your homemade relish is crucial if you want to enjoy it for weeks—or even months—without it spoiling. Luckily, you’ve got two solid options depending on your storage goals: refrigeration or canning.
Refrigerator Storage
If you’re planning to eat the relish within 2–3 weeks, the fridge is all you need:
- Store in clean, airtight jars or containers.
- Make sure the relish has cooled completely before refrigerating.
- Label the container with the date it was made.
- Always use a clean spoon when scooping to avoid contamination.
Refrigerated relish often tastes even better after a day or two, once the flavors fully develop.
Canning for Long-Term Use
If you’ve made a big batch and want it to last several months, canning is the way to go:
- Sterilize canning jars and lids in boiling water.
- While the relish is hot, fill the jars leaving ½ inch of headspace.
- Remove air bubbles and wipe the rims clean.
- Place lids and process in a boiling water canner for 10–15 minutes (depending on your altitude).
- Let jars cool for 24 hours. You should hear the satisfying “pop” of sealing.
Properly canned relish can be stored in a cool, dark place for up to a year. Always check seals before opening—if a lid pops or smells off, discard it.
FAQs about Relish Recipe
1. How long does homemade relish last?
If refrigerated in an airtight container, homemade relish typically lasts 2–3 weeks. If properly canned, it can last up to 12 months in a cool, dark place.
2. Can I make relish without sugar?
Yes! You can reduce or completely omit the sugar, but the flavor will be tangier and less sweet. Consider using honey or a sugar substitute if needed.
3. Is relish gluten-free?
Most homemade relishes are naturally gluten-free, especially if you’re using pure spices and vinegar. Always check labels if using store-bought ingredients.
4. What vegetables can I use in relish?
Cucumbers, bell peppers, onions, green tomatoes, corn, and even carrots work well. You can also experiment with fruits like pineapple or apple for sweetness.
5. Can I freeze homemade relish?
Technically yes, but it may affect the texture. For best results, stick to refrigeration or proper canning methods for long-term storage.
Conclusion
Making homemade relish is a rewarding and surprisingly simple process. It’s one of those DIY kitchen projects that delivers huge flavor for minimal effort. Whether you’re topping a hot dog at a backyard barbecue or adding a tangy crunch to your lunch wrap, relish brings life to every bite.
What’s even better? You control the ingredients. You can keep it sweet, make it spicy, use different veggies, or even turn it into a fruit-based relish. And once you’ve got a jar or two in your fridge, you’ll constantly find new ways to use it.
So the next time you’ve got a few extra cucumbers and peppers lying around, skip the store-bought stuff and make your own. Trust me—your sandwiches will thank you.