Red Velvet Cheesecake Recipe: There’s something irresistible about red velvet cheesecake. It’s not just another dessert—it’s a perfect marriage of two all-time favorites: the smooth, creamy richness of cheesecake and the moist, slightly tangy sweetness of red velvet cake. Whether you’re baking it for a special celebration or just want to treat yourself and your loved ones, this recipe guarantees a dessert that looks stunning and tastes heavenly.
In this step-by-step guide, I’ll walk you through everything—from the ingredients you’ll need to the baking process, layering, frosting, and presentation tips. By the end, you’ll have a show-stopping dessert that rivals any bakery creation. Let’s get started!
Introduction to Red Velvet Cheesecake
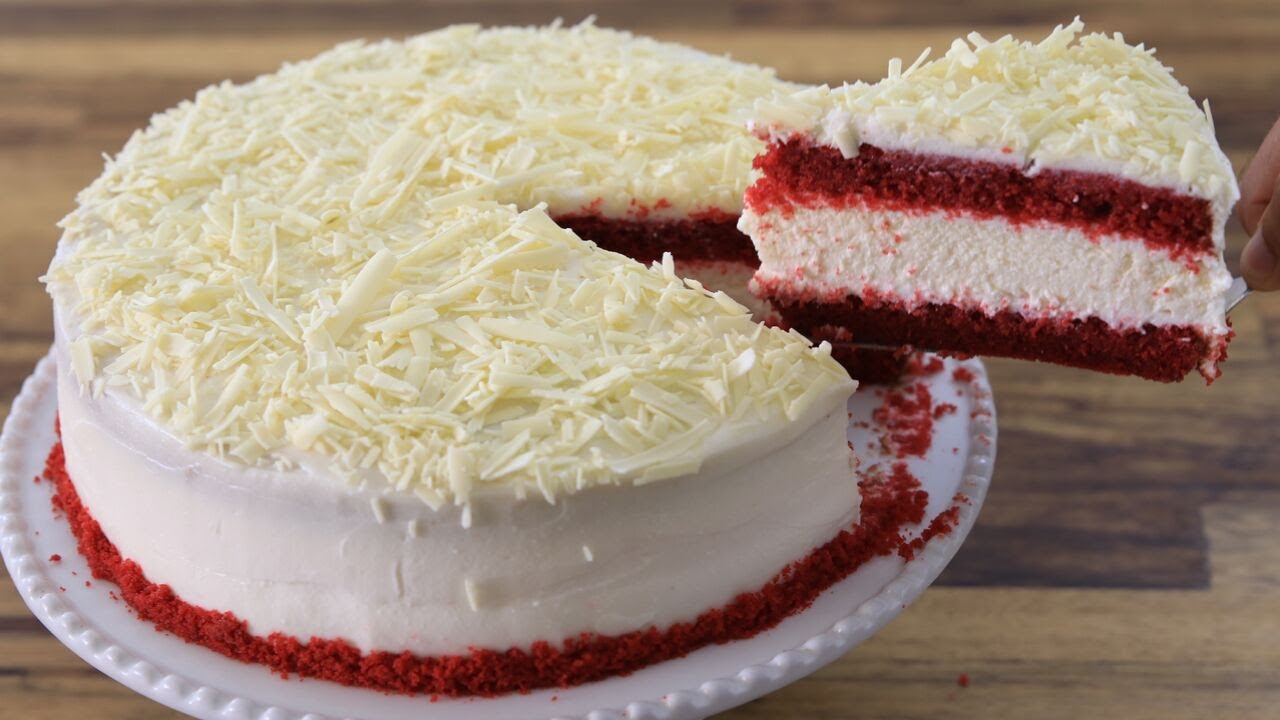
Red velvet cheesecake isn’t just a dessert—it’s an experience. The first thing people notice is its dramatic color: that rich, deep red contrasted against a snowy white cream cheese layer. But beyond appearances, it offers a unique blend of flavors. The red velvet portion has a hint of cocoa and tanginess from buttermilk, while the cheesecake is rich, creamy, and slightly tart. Together, they strike a perfect balance of flavor and texture.
The origins of red velvet cake date back to the 1800s, where the combination of cocoa powder and vinegar created a reddish hue in cakes. Over time, bakers enhanced this effect with food coloring, and the “velvet” texture became synonymous with elegance. Cheesecake, on the other hand, has a history that goes back thousands of years, celebrated for its decadent, creamy texture. Merging these two desserts gives us one of the most indulgent sweets ever created.
This recipe isn’t overly complicated, but it does require patience and attention to detail. The good news? With the step-by-step instructions below, you don’t need to be a professional baker to pull it off. Imagine serving slices of this rich dessert at a dinner party or family gathering—guests will think you ordered it from a fancy bakery.
Ingredients You’ll Need
The success of a red velvet cheesecake depends heavily on fresh, high-quality ingredients. Let’s break it down into three parts: the red velvet cake layer, the cheesecake layer, and the frosting.
For the Red Velvet Cake Layer
- 1 ¼ cups all-purpose flour
- 1 tablespoon unsweetened cocoa powder
- ½ teaspoon baking soda
- ½ teaspoon salt
- ¾ cup granulated sugar
- ½ cup vegetable oil
- 1 large egg
- ½ cup buttermilk
- 1 teaspoon vanilla extract
- 1 teaspoon white vinegar
- 2 teaspoons red food coloring (gel or liquid)
This base gives your cake its vibrant color and soft, velvety texture. The buttermilk and vinegar react with cocoa powder to create that signature tang.
For the Cheesecake Layer
- 16 oz cream cheese (softened)
- ½ cup granulated sugar
- 2 large eggs
- 1 teaspoon vanilla extract
- ½ cup sour cream
The cheesecake layer should be rich, creamy, and slightly tangy. Sour cream helps balance the sweetness and enhances the smoothness of the filling.
For the Cream Cheese Frosting
- 8 oz cream cheese (softened)
- ½ cup unsalted butter (softened)
- 3 cups powdered sugar
- 1 teaspoon vanilla extract
Cream cheese frosting adds that final luscious touch, making the cake not just taste amazing but look bakery-worthy.
Optional Garnishes and Toppings
- White chocolate shavings
- Fresh strawberries or raspberries
- Crushed red velvet crumbs for decoration
- Drizzle of chocolate ganache
Adding these finishing touches elevates your cheesecake from delicious to show-stopping.
Kitchen Tools and Equipment Required
Baking red velvet cheesecake isn’t just about the ingredients—you’ll also need the right tools to achieve bakery-quality results. Here’s what you’ll want to have ready:
- Springform pan (9-inch): This is essential for cheesecakes since the removable sides allow easy release without damaging the cake.
- Mixing bowls: At least two large ones for separating cake batter and cheesecake filling.
- Hand or stand mixer: Ensures a smooth, lump-free batter.
- Measuring cups and spoons: Accuracy is key when baking.
- Whisk and spatula: For gentle mixing and scraping down the sides.
- Cooling rack: Prevents sogginess and helps the cake cool evenly.
- Parchment paper: Keeps the cake from sticking to the bottom of the pan.
Tip: Always prep your tools before starting. Line your pan with parchment, soften your cream cheese and butter ahead of time, and measure out all ingredients. This avoids last-minute scrambling and ensures a smooth baking process.
Step-by-Step Guide to Making Red Velvet Cheesecake
Now comes the exciting part—bringing everything together. Baking this cake might take some time, but the results are well worth it. Follow these steps carefully:
Step 1 – Preparing the Cake Layer
Preheat your oven to 350°F (175°C). In one bowl, sift together flour, cocoa powder, baking soda, and salt. In another bowl, whisk sugar and oil until well combined. Add the egg, buttermilk, vanilla, vinegar, and food coloring. Gradually fold the dry ingredients into the wet mixture until smooth.
Pour the batter into your lined springform pan and bake for about 20–25 minutes, or until a toothpick comes out clean. Allow the cake to cool completely before proceeding.
This layer acts as the sturdy base for your cheesecake, so make sure it’s baked through and cooled to avoid sinking later.
Step 2 – Mixing the Cheesecake Batter
Once your red velvet cake base has cooled completely, it’s time to prepare the creamy cheesecake layer. The key to a flawless cheesecake is ensuring your ingredients are at room temperature—this helps prevent lumps and gives you that dreamy, smooth texture.
Start by beating the softened cream cheese with a hand or stand mixer until it’s silky smooth. Gradually add in the sugar and continue mixing until well combined. Next, add the eggs one at a time, mixing on low speed. Be careful not to overbeat—this can introduce too much air, which might cause cracks during baking. Stir in the vanilla extract and sour cream, mixing gently until everything is perfectly blended.
Now, pour this cheesecake mixture over the cooled red velvet cake layer in your springform pan. Smooth the top with a spatula to ensure an even layer. Tap the pan lightly on the counter a few times to remove any air bubbles.
At this stage, your dessert is already halfway to perfection—the creamy cheesecake and soft red velvet are about to come together beautifully.
Step 3 – Baking the Cheesecake Layer
Preheat your oven again to 325°F (163°C). Place the springform pan inside a larger roasting pan and fill the roasting pan with hot water, creating a water bath. This step is crucial for baking cheesecakes, as the steam helps prevent cracks and keeps the texture extra creamy.
Bake for 45–55 minutes, or until the edges look set but the center is slightly jiggly. Don’t worry—it will firm up as it cools. Once done, turn off the oven, crack the door open slightly, and let the cheesecake rest inside for about an hour. This slow cooling process helps prevent sudden temperature changes that could cause cracks.
After the resting period, remove the pan from the oven and the water bath. Let it cool completely at room temperature, then transfer it to the refrigerator for at least 4–6 hours, preferably overnight. This chilling step is non-negotiable—it allows the flavors to develop and gives the cheesecake the perfect firm yet creamy texture.
Step 4 – Layering and Assembling
Now comes the fun part—assembling your red velvet cheesecake into a show-stopping dessert. If you’ve baked just one red velvet layer, your cheesecake will naturally sit on top of it. But if you want a bakery-style look, you can bake two thinner red velvet cake layers (using the same recipe split into two pans). That way, you’ll have one cake layer at the bottom, the cheesecake in the middle, and another cake layer on top.
To assemble:
- If using two cake layers, gently release the cheesecake from the springform pan once chilled.
- Place one red velvet cake layer on your serving plate.
- Carefully transfer the cheesecake layer on top.
- Add the second red velvet cake layer above the cheesecake.
Use a serrated knife to level the cakes if needed. Once assembled, you’ll have a tall, gorgeous three-layer masterpiece that looks like it came straight out of a bakery window.
Step 5 – Chilling and Frosting
Before frosting, your cake must be completely cold. A warm cake will cause the frosting to melt and slide right off. Once everything has chilled properly, prepare the cream cheese frosting by beating softened cream cheese and butter until smooth. Gradually add powdered sugar and vanilla extract, mixing until creamy and fluffy.
Spread a thin crumb coat (a light layer of frosting) over the entire cake to lock in any loose crumbs. Refrigerate for 20–30 minutes to set this base layer. Then, apply a thicker, even coat of frosting all over, smoothing with an offset spatula for a professional finish.
For decoration, you can keep it simple with a smooth frosted finish or go the extra mile: pipe swirls on top, sprinkle red velvet crumbs along the sides, or add white chocolate curls for a touch of elegance. A few fresh raspberries or strawberries on top can also bring a pop of freshness and color.
At this point, your red velvet cheesecake is complete—rich, creamy, stunning, and ready to steal the spotlight at any gathering.
Expert Tips for the Perfect Red Velvet Cheesecake
Baking this dessert can feel intimidating at first, but with a few insider tips, you’ll be serving a flawless cheesecake every time.
- Use Room Temperature Ingredients: Cold cream cheese and eggs will create lumps in the batter. Always bring ingredients to room temperature before mixing.
- Avoid Overmixing: Too much air in the batter can cause the cheesecake to rise and then collapse. Mix on low to medium speed only.
- Always Use a Water Bath: It’s the secret to preventing cracks and achieving that creamy, bakery-quality texture.
- Cool Gradually: Cheesecake doesn’t like sudden temperature changes. Let it rest in the oven, then at room temperature, before chilling.
- Plan Ahead: This recipe requires chilling overnight for best results. If you’re baking for a party, make it a day in advance.
- Invest in a Good Springform Pan: A sturdy, leak-proof pan ensures your cake comes out perfectly every time.
Following these tips will take your baking skills to the next level and guarantee compliments from everyone who takes a bite.
Variations of Red Velvet Cheesecake
One of the best things about red velvet cheesecake is its versatility. While the classic layered version is always a winner, you can easily adapt this dessert into different forms depending on the occasion. Here are a few creative variations to try:
Mini Red Velvet Cheesecakes
Instead of making one large cake, you can bake individual cheesecakes using a muffin tin. Simply line the tin with cupcake liners, add a spoonful of red velvet batter at the bottom, then top with cheesecake batter. Bake as usual (but for less time—around 20 minutes). Once chilled and frosted, they make adorable bite-sized treats that are perfect for parties, picnics, or as edible gifts.
No-Bake Red Velvet Cheesecake
If you don’t want to turn on the oven, a no-bake version is the way to go. Use crushed red velvet cookies or Oreos as the base, mix up a no-bake cheesecake filling with cream cheese and whipped cream, and layer it inside a springform pan. Chill for several hours until firm, then decorate with frosting or whipped cream. This version is faster and lighter but just as indulgent.
Red Velvet Cheesecake Brownies
Want something rich but less time-consuming? Swirl cheesecake batter into a pan of red velvet brownies before baking. The marbled effect looks stunning, and the taste combines fudgy chocolate with creamy cheesecake. It’s a casual but crowd-pleasing dessert.
These variations let you experiment with presentation and flavors while keeping the essence of red velvet cheesecake intact. Whether you go with mini versions, a no-bake twist, or brownies, you’ll end up with something that’s sure to impress.
How to Store and Preserve Red Velvet Cheesecake
Red velvet cheesecake isn’t just delicious fresh out of the oven—it stores surprisingly well if handled properly. Here’s how you can keep it tasting as good as day one:
- Room Temperature: Cheesecake should not be left at room temperature for more than 2 hours. Beyond that, bacteria can grow and compromise food safety.
- Refrigeration: Store your cheesecake covered in the fridge for up to 5–6 days. Use an airtight cake container or wrap the cake tightly with plastic wrap to prevent it from drying out or absorbing odors.
- Freezing: Yes, you can freeze cheesecake! Slice it into individual portions, wrap each slice tightly in plastic wrap, then place them in a freezer-safe container. Cheesecake can be frozen for up to 2 months. When ready to serve, thaw slices in the fridge overnight.
- Frosting Considerations: If you’re freezing, it’s best to freeze the cheesecake without frosting. Add the cream cheese frosting fresh after thawing for the best texture.
By following these storage methods, you’ll always have a slice of indulgence waiting in your fridge or freezer, ready for those sudden dessert cravings.
Serving Suggestions and Presentation Ideas
Half the magic of red velvet cheesecake lies in its presentation. Since this dessert already has eye-catching layers, a little creativity can make it even more striking. Here are some ideas:
- Garnish with Crumbs: Save a handful of baked red velvet cake crumbs and sprinkle them on top of the frosted cheesecake. This creates a beautiful contrast and a rustic finish.
- Chocolate Drizzle: Melt white or dark chocolate and drizzle it over the top for a glossy, elegant touch.
- Fresh Berries: Strawberries, raspberries, or even blueberries not only add color but also a refreshing tartness that balances the sweetness.
- Whipped Cream Rosettes: Pipe swirls of whipped cream around the edges for a bakery-style look.
- Serve with Drinks: Pair with a cup of strong coffee, a glass of milk, or even champagne for special celebrations.
If you’re serving at a party, cut the cheesecake into neat slices using a hot knife (dip the knife in hot water, wipe it, then slice). This ensures clean, Instagram-worthy slices every time.
Common Mistakes to Avoid
Baking a layered cheesecake may seem intimidating, and mistakes can happen. Knowing what to avoid can save your cake (and your confidence in the kitchen):
- Overbaking the Cheesecake: If the center is completely firm in the oven, it’s overdone. Cheesecake should have a slight jiggle when you turn off the oven.
- Skipping the Water Bath: Without it, your cheesecake might crack or dry out. Always use one for best results.
- Not Cooling Properly: Cutting into a warm cheesecake will ruin its structure. Be patient and let it chill fully before slicing.
- Using Cold Ingredients: This can create lumps in the batter, making your cheesecake grainy instead of smooth.
- Adding Too Much Food Coloring: Red velvet should be vibrant but natural-looking. Overdoing the food coloring can leave a bitter taste.
Avoiding these pitfalls will ensure your red velvet cheesecake turns out bakery-perfect every time.
Health and Nutritional Information
While red velvet cheesecake is undeniably indulgent, it’s helpful to know what’s inside each slice:
- Calories per Slice (1/12 of cake): ~450–550 calories
- Carbohydrates: 45–55g
- Fat: 25–30g
- Protein: 6–8g
- Sugar: 35–40g
Clearly, this isn’t a low-calorie dessert, but there are a few ways to make it slightly lighter:
- Use low-fat cream cheese or Greek yogurt instead of full-fat versions.
- Reduce sugar slightly in both the cake and frosting.
- Swap vegetable oil for unsweetened applesauce in the cake batter.
- Use almond flour instead of all-purpose flour for a lower-carb option.
These swaps won’t completely transform it into a health food, but they can make it a bit more waistline-friendly while still retaining its rich flavor.
Red Velvet Cheesecake for Special Occasions
One of the best things about red velvet cheesecake is how versatile it is for different celebrations. Its vibrant color, indulgent flavor, and elegant presentation make it a show-stopper for holidays, parties, and romantic dinners. Let’s explore how you can use it to elevate special occasions:
Valentine’s Day Delight
Nothing says love like a rich, red velvet dessert. The bright red color naturally symbolizes romance, and pairing it with creamy cheesecake makes it extra indulgent. Add heart-shaped sprinkles or pipe rosettes of cream cheese frosting for a festive touch. You can even bake the cheesecake in a heart-shaped pan for a romantic twist.
Holiday Celebrations
Red and white are classic holiday colors, which makes red velvet cheesecake a natural fit for Christmas or New Year’s gatherings. Decorate with green holly sprinkles, dust with powdered sugar “snow,” or top with sugared cranberries for a seasonal flair. It’s the perfect dessert to wow family and friends at festive dinners.
Birthdays and Anniversaries
For birthdays or anniversaries, red velvet cheesecake offers a unique alternative to the usual chocolate or vanilla cake. You can layer it like a traditional tiered cake, decorate with candles, and serve as the centerpiece of the celebration. Adding a personal message in frosting on top makes it even more special.
Whether it’s Valentine’s, Christmas, or a milestone birthday, red velvet cheesecake is a dessert that always brings smiles and compliments.
FAQs about Red Velvet Cheesecake Recipe
1. Can I make red velvet cheesecake without food coloring?
Yes! While food coloring gives red velvet its iconic look, you can skip it if you prefer a natural cake. The flavor will remain the same—rich, slightly cocoa-y, and tangy. If you want a natural alternative, try beetroot powder for a subtle red hue.
2. How do I prevent the cheesecake from sinking in the middle?
Cheesecakes sink when they’re overmixed or cooled too quickly. Always mix on low speed, avoid incorporating too much air, and let the cake cool gradually in the oven before transferring it to the fridge.
3. Can I use a store-bought cake mix for the red velvet layer?
Absolutely. If you’re short on time, using a boxed red velvet cake mix works fine. Just bake the cake layer as directed, then follow the recipe for the cheesecake and frosting. The result is still delicious and saves effort.
4. How long can I store red velvet cheesecake in the fridge?
When stored properly in an airtight container, red velvet cheesecake lasts about 5–6 days in the fridge. Be sure to cover it well to keep it from drying out or absorbing other odors.
5. Is red velvet cheesecake freezer-friendly?
Yes! You can freeze it for up to 2 months. Wrap slices individually in plastic wrap, then store them in a freezer-safe container. Thaw overnight in the fridge before serving. For the best results, add frosting only after thawing.
Conclusion
Red velvet cheesecake is more than just a dessert—it’s a culinary masterpiece that combines the best of two worlds: the classic elegance of red velvet cake and the creamy indulgence of cheesecake. Whether you’re baking it for a romantic Valentine’s dinner, a festive holiday feast, or a birthday celebration, this recipe guarantees a dessert that will impress every time.
With its rich layers, smooth texture, and show-stopping appearance, red velvet cheesecake is the perfect way to turn any occasion into a memorable one. Plus, with the expert tips, storage hacks, and variations we’ve covered, you now have all the tools you need to bake it like a pro.
So go ahead—grab your whisk, preheat your oven, and create a dessert that’s as unforgettable as the moments you’ll share over it.

