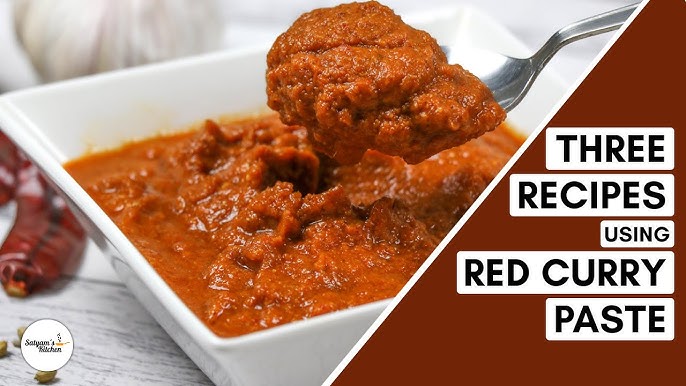
Red Curry Paste Recipe: Red curry paste, known as “Prik Gaeng Phed” in Thai, is the fiery, aromatic backbone of countless Thai dishes. With its brilliant crimson hue and complex flavor profile, it’s the soul of Thailand’s famous red curry. Unlike store-bought versions, homemade red curry paste captures the authentic blend of herbs and spices, delivering that fresh, punchy heat and deep umami flavor that lifts any Thai curry from good to unforgettable.
Why Make It at Home?
There’s a world of difference between homemade and jarred curry paste. When you make it yourself, you control the heat, freshness, and balance. Store-bought versions often contain preservatives and lack the bright, clean notes of fresh herbs. Plus, if you’re sensitive to additives or looking for vegan or gluten-free options, making your own ensures complete transparency and quality.
Making red curry paste at home also opens up a world of creativity. Want more garlic? Prefer a milder chili? You’re the chef now. It’s not just a recipe—it’s your own culinary adventure.
Essential Ingredients for Authentic Red Curry Paste
Traditional Thai Ingredients
For true Thai red curry paste, start with these essentials:
- Dried Red Chilies: The base of the paste, providing color and heat.
- Galangal: A peppery cousin of ginger, lending a citrusy warmth.
- Lemongrass: Aromatic and zesty, it brightens the mix.
- Kaffir Lime Zest: Adds a sharp, fragrant citrus note.
- Garlic and Shallots: For savory depth.
- Coriander Roots (or stems): A pungent, earthy addition.
- Shrimp Paste: Delivers intense umami (skip for vegan version).
- Spices: Ground cumin, coriander seeds, and white peppercorns.
Each ingredient plays a unique role. The balance of heat from chilies, the citrus notes from lime and lemongrass, and the earthy spices come together in a culinary symphony that’s distinctively Thai.
Substitutes for Hard-to-Find Ingredients
Can’t find galangal or kaffir lime? No worries:
- Galangal Substitute: Use fresh ginger with a pinch of black pepper.
- Kaffir Lime Zest: Swap with regular lime zest or a bit of lime juice.
- Coriander Root: The stems work in a pinch.
- Shrimp Paste: For vegan or allergy-friendly versions, miso paste or soy sauce adds umami.
Don’t stress perfection—what matters is layering flavor. You’ll still achieve a bold, flavorful paste even with a few smart swaps.
Tools and Equipment You’ll Need
Mortar and Pestle vs. Food Processor
Traditionally, red curry paste is made using a mortar and pestle. It’s a labor of love—but totally worth it. Grinding by hand releases essential oils and creates a texture that’s smoother and more integrated.
- Mortar and Pestle: Best for authenticity and flavor.
- Food Processor or Blender: Ideal if you’re short on time. Just remember to soak your dried chilies longer and scrape down the sides frequently.
Each method has its charm. If you’re a purist, go with the mortar. If you’re busy (or just practical), your blender’s got your back.
Other Handy Kitchen Tools
Besides your grinding tool, a few items make the process easier:
- Cutting Board & Sharp Knife: For prepping herbs and roots.
- Spice Grinder: To toast and grind seeds like cumin and coriander.
- Measuring Spoons: Accuracy matters when it comes to spice levels.
- Airtight Containers: For storing your finished paste.
Having your tools lined up makes the whole process smoother—and more enjoyable.
Step-by-Step Instructions to Make Red Curry Paste
Step 1 – Prepping the Ingredients
Start by soaking your dried red chilies in warm water for 15–30 minutes until softened. Remove the seeds if you want a milder paste. Chop the galangal, lemongrass, shallots, garlic, and coriander roots into smaller pieces. This makes them easier to pound or blend.
Peeling and chopping ahead ensures even blending and consistent flavor. Don’t rush this step—precision here sets the tone for everything that follows.
Step 2 – Toasting the Spices
Next, heat a dry skillet over medium heat. Toast your coriander seeds, cumin seeds, and peppercorns until fragrant—about 1–2 minutes. Stir constantly to avoid burning.
Once cooled, grind the spices into a fine powder using a spice grinder or mortar. This step releases essential oils and adds incredible depth to your paste. Freshly toasted spices make all the difference—never skip this step if you want that restaurant-level flavor.
Step 3 – Grinding and Blending
Now it’s time to bring all those flavors together. If you’re using a mortar and pestle, start with the hardest ingredients—chilies, spices, galangal, lemongrass—and work your way to the softer ones like garlic, shallots, and coriander roots. Pound each group into a fine paste before adding the next. This layering method ensures everything breaks down evenly and the flavors meld beautifully.
If you’re going for convenience with a blender or food processor, combine all the prepped ingredients: soaked chilies, chopped herbs, ground spices, and shrimp paste. Add a tablespoon of water or oil if needed to help the blades turn. Pulse until smooth but still textured—you don’t want baby food here.
The color should be vibrant red, the aroma should hit you immediately, and the texture should be thick yet spreadable. Take a spoon and taste it—need more saltiness, spiciness, or brightness? Adjust it now, because this paste is the foundation of your curry.
Step 4 – Adjusting the Texture and Flavor
Once blended, it’s time for a little fine-tuning. If your paste is too thick, add a splash of water or oil to thin it out. Want it spicier? Toss in another chili or two. If it needs more zing, a bit more lime zest or a squeeze of lime juice can balance things out.
Here are a few tricks to personalize your paste:
- Too hot? Add more shallots or a touch of palm sugar.
- Too salty? Add more neutral vegetables or a squeeze of lemon.
- Too mild? A fresh chili or a pinch of chili flakes does wonders.
Taste and tweak until it sings. When you hit that sweet spot—complex, spicy, tangy, and aromatic—you know you’ve nailed it.
Storing and Preserving Your Red Curry Paste
How to Store for Maximum Freshness
Once your paste is done, let it cool if you’ve used any heat (like toasting or sautéing ingredients). Transfer it to a clean, airtight jar or container. Top it off with a thin layer of neutral oil to seal in freshness and prevent oxidation.
Store in the refrigerator for up to 2 weeks. The flavor may even improve after a day or two as the ingredients meld. Always use a clean spoon when scooping to avoid contamination.
Label the jar with the date you made it—trust me, you’ll thank yourself later when you’re rummaging through the fridge wondering, “When did I make this?”
Can You Freeze Red Curry Paste?
Absolutely. Red curry paste freezes like a champ. Spoon it into ice cube trays, freeze, and pop the cubes into a ziplock bag. Now you’ve got ready-to-go curry bombs that last for up to 3 months.
Pro tip: Each cube is roughly a tablespoon, which is perfect for recipes. Pull one or two out, drop them into your stir-fry or curry, and boom—instant Thai flavor without the fuss.
This make-ahead strategy is a lifesaver for busy weeknights when you crave something bold but don’t want to start from scratch.
FAQs about Red Curry Paste Recipe
1. Can I use fresh red chilies instead of dried?
Yes, but the texture and flavor will differ. Dried chilies give a deeper, smokier taste and a thicker paste.
2. Is red curry paste gluten-free?
It can be. Just ensure your shrimp paste or soy-based substitutes don’t contain hidden gluten.
3. What dishes can I use red curry paste in?
It’s perfect for curries, marinades, soups, noodles, stir-fries, and even as a base for spicy dressings.
4. How spicy is red curry paste?
It depends on the type and quantity of chilies used. Thai red curry is typically moderately spicy, but you can adjust it to your liking.
5. Can I make a big batch and store it long-term?
Absolutely! Freeze it in small portions so you always have it on hand for quick meals.
Conclusion
Making red curry paste at home might sound intimidating, but it’s actually a rewarding process that transforms your Thai cooking from average to extraordinary. You get control over flavor, heat, and freshness, all while skipping the preservatives and questionable additives of store-bought options.
Once you’ve tasted your own homemade version, it’s nearly impossible to go back. It’s fresher, bolder, and infinitely customizable. Keep it in your fridge or freezer, and you’ll always be just a few steps away from a restaurant-quality curry.
Whether you’re making a creamy red curry chicken, spicy tofu stir-fry, or coconut shrimp soup—this paste is your secret weapon.