Rainbow Cake Recipe: Ever dreamed of slicing into a cake and revealing a stunning spectrum of vibrant layers? That’s the magic of a rainbow cake.
It’s the kind of dessert that turns heads at parties, birthdays, or any celebration that calls for a bit of extra joy. And guess what? You don’t have to be a pastry chef to pull this off.
In this detailed guide, you’ll learn exactly how to create a perfect rainbow cake from scratch, step by step. This article is packed with everything from ingredients and tools to foolproof baking and frosting techniques.
Let’s dive in and bring that rainbow to your kitchen!
What is a Rainbow Cake?
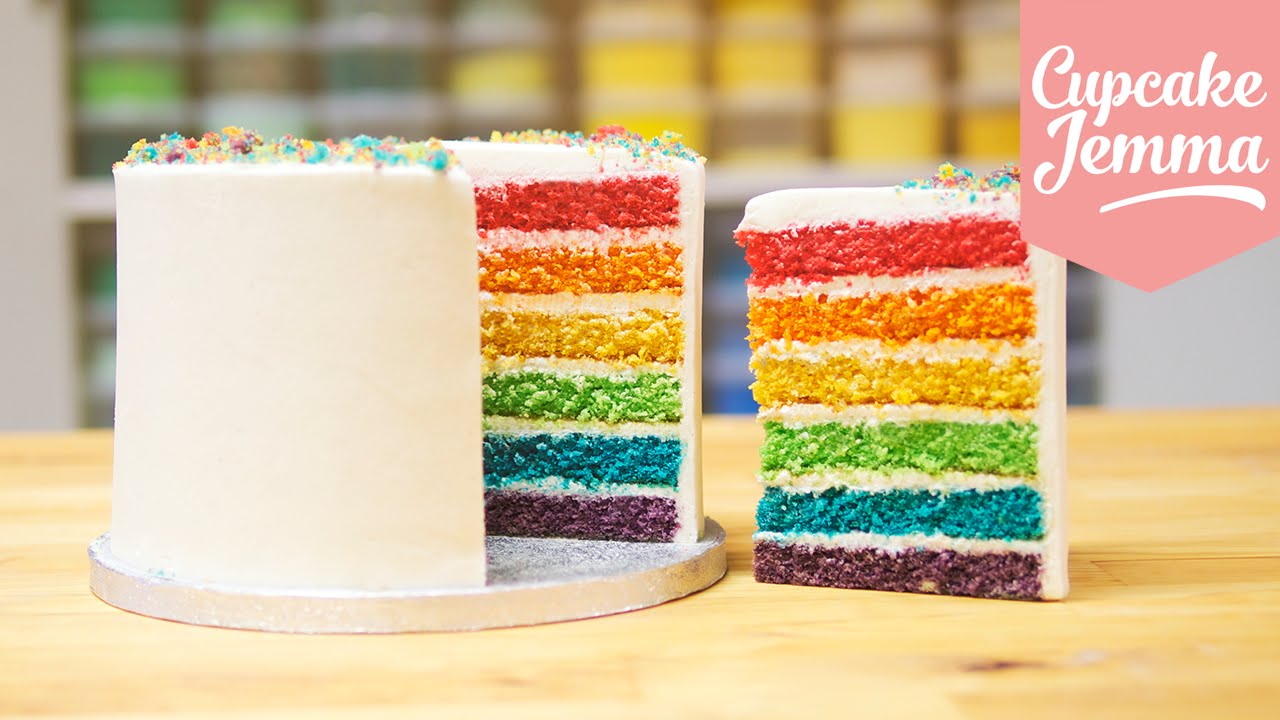
A rainbow cake is a layered cake where each layer is dyed a different color to represent the rainbow. When you slice it open, you reveal a vibrant, colorful surprise that looks as good as it tastes. Each layer typically follows the colors of the rainbow: red, orange, yellow, green, blue, indigo, and violet, although many bakers use just six for simplicity. Between those layers is usually a fluffy white frosting like buttercream or cream cheese frosting, which adds both flavor and aesthetic balance. It’s fun, festive, and a guaranteed crowd-pleaser!
Why Make a Rainbow Cake at Home?
Making a rainbow cake at home may seem like a challenge, but it’s incredibly rewarding. Here’s why:
- Customization: Choose your own colors, flavors, and decorations.
- Fun Baking Project: It’s a creative, engaging way to spend time, especially with kids.
- Healthier Control: Use organic ingredients, reduce sugar, or choose natural food coloring.
- Save Money: Buying a rainbow cake from a bakery can be pricey.
- Bragging Rights: Honestly, few things impress guests like a homemade rainbow cake.
So why not give it a go? It’s simpler than it seems, and you’ll love the reaction when you slice it open.
Ingredients You’ll Need
Let’s break down what you’ll need to get started. We’ll keep it simple and easy to find at any grocery store.
For the Cake Layers
- 3 ½ cups all-purpose flour
- 1 tbsp baking powder
- ½ tsp baking soda
- 1 tsp salt
- 1 cup unsalted butter (room temperature)
- 2 cups granulated sugar
- 5 large egg whites (room temperature)
- 2 tsp vanilla extract
- 1 ½ cups whole milk (room temperature)
- Gel food coloring (red, orange, yellow, green, blue, violet)
For the Buttercream Frosting
- 2 cups unsalted butter (room temperature)
- 6 cups powdered sugar
- 2 tsp vanilla extract
- 4–6 tbsp heavy cream or milk
- A pinch of salt
For Decoration (Optional)
- Rainbow sprinkles
- Edible glitter
- Piping bags and tips
- Fondant stars or clouds
Tools and Equipment You’ll Need
To pull this off smoothly, make sure you have the following:
- 6 (or 7) round 8-inch cake pans (or bake in batches)
- Parchment paper
- Mixing bowls
- Electric mixer or stand mixer
- Silicone spatula
- Measuring cups and spoons
- Cooling racks
- Offset spatula
- Cake leveler or serrated knife
- Cake turntable (optional but super helpful)
Step-by-Step Guide to Make Rainbow Cake
Let’s get into the nitty-gritty. Follow this step-by-step process and you’ll end up with a cake that’s both stunning and delicious.
Step 1: Prepare Your Workstation
Clear your counter and gather all ingredients, food coloring, bowls, and tools. Having everything ready makes the process smooth and stress-free.
Step 2: Preheat and Prepare Cake Pans
Preheat the oven to 350°F (175°C). Grease and line multiple cake pans with parchment paper so the layers release easily.
Step 3: Mix the Dry Ingredients
In a bowl, whisk together flour, baking powder, and salt. This ensures even distribution and a light cake texture.
Step 4: Mix the Wet Ingredients
In a separate bowl, cream butter and sugar until light and fluffy. Add eggs one at a time, then mix in milk and vanilla extract.
Step 5: Combine Wet and Dry Ingredients
Gradually add the dry ingredients to the wet mixture, mixing gently until just combined. Avoid overmixing to keep the cake soft.
Step 6: Divide the Batter Evenly
Divide the batter evenly into separate bowls, one for each color. Equal portions help create uniform cake layers.
Step 7: Color Each Batter
Add food coloring to each bowl and mix until vibrant. Start with a small amount and build the color gradually.
Step 8: Bake the Cake Layers
Pour each colored batter into prepared pans. Bake for 12–15 minutes, or until a toothpick inserted comes out clean.
Step 9: Let the Cakes Cool Completely
Remove from the oven and cool in pans for a few minutes, then transfer to a rack. Cakes must be fully cool before frosting.
Step 10: Prepare the Buttercream Frosting
Beat butter until smooth, then gradually add powdered sugar. Mix in vanilla and a splash of milk until creamy and spreadable.
Step 11: Assemble the Cake
Stack the cake layers in rainbow order, spreading a thin layer of frosting between each one to hold them together.
Step 12: Frost and Decorate
Cover the entire cake with buttercream. Smooth the sides and decorate as desired with sprinkles or piped designs.
Bright, joyful, and delicious—rainbow cake is a celebration in every slice 🌈🍰
Tips for a Perfect Rainbow Cake
Making a rainbow cake might seem like a big task, but here are some pro tips to help you nail it the first time:
- Use Gel Food Coloring: Liquid coloring can dilute the batter and change its consistency. Gel-based food coloring gives vibrant results without altering the texture.
- Weigh Your Batter: For even layers, weigh the batter and divide it evenly among bowls. This ensures your rainbow is level and visually stunning.
- Don’t Overmix the Batter After Coloring: Overmixing can affect the rise and texture. Gently fold in the coloring until just combined.
- Cool Completely Before Frosting: Any residual heat will melt the frosting and cause layers to slide or bulge.
- Use a Turntable: A cake turntable makes it easier to frost and smooth your cake for that professional finish.
- Chill Between Steps: After stacking and crumb-coating, chill the cake. It helps lock in the structure and makes final frosting easier.
- Be Patient: Take your time. Rainbow cakes require a bit of planning, but the end result is worth every second.
Common Mistakes to Avoid
Even seasoned bakers can make mistakes. Here’s what to watch out for:
- Incorrect Pan Sizes: Using the wrong size can affect baking time and layer height.
- Uneven Layers: If you don’t level your layers or measure batter evenly, the cake may lean or look lopsided.
- Skipping the Crumb Coat: This light layer of frosting locks in crumbs so your final layer looks neat and clean.
- Overbaking: Thin layers bake quickly. Check a few minutes early to prevent drying out.
- Stacking Warm Cakes: This is a recipe for disaster. Let them cool fully before assembling.
Avoid these, and you’ll be well on your way to rainbow cake success.
How to Store Rainbow Cake
Your hard work deserves to stay fresh! Here’s how:
- Room Temperature (1-2 Days): Store the frosted cake in an airtight container or cake dome.
- Refrigerator (Up to 5 Days): Place in an airtight container. Let it come to room temp before serving for best flavor and texture.
- Freezer (1-2 Months): Freeze slices individually wrapped in plastic wrap, then place in a freezer-safe bag. Thaw overnight in the fridge.
Always store away from strong-smelling foods (like onions!) to avoid flavor contamination.
Serving Suggestions
Rainbow cakes are already a showstopper, but you can make the experience even better with these serving tips:
- Pair with Ice Cream: Vanilla or berry flavors complement it well.
- Add Fruit Toppings: Fresh strawberries, raspberries, or blueberries add a burst of freshness.
- Serve with Drinks: A glass of milk, hot cocoa, or a fruity punch works great for kids. For adults, try it with tea or champagne.
- Make it a Theme: Use rainbow napkins, plates, or even rainbow balloons to match the vibe!
Whether it’s a birthday, Pride celebration, or just because—you’re guaranteed a room full of smiles.
Rainbow Cake Variations
Want to switch it up? Try these fun rainbow cake twists:
- Rainbow Swirl Cake: Instead of layers, swirl the colored batters together in one pan for a tie-dye effect.
- Chocolate Rainbow Cake: Add cocoa to the base recipe and use colored buttercream between layers.
- Mini Rainbow Cakes: Use muffin tins or small cake rings to make personal rainbow cakes.
- Gluten-Free Version: Substitute with a gluten-free all-purpose flour blend.
- Natural Coloring: Use beetroot powder, turmeric, spirulina, and blueberry powder to color naturally.
There’s no limit to your creativity. Make it yours!
Nutritional Information (Per Slice)
| Nutrient | Amount (Approx.) |
|---|---|
| Calories | 450–500 kcal |
| Total Fat | 22g |
| Saturated Fat | 12g |
| Carbohydrates | 60g |
| Sugars | 42g |
| Protein | 4g |
| Fiber | 1g |
| Sodium | 210mg |
Note: These values are approximate and vary based on ingredients and serving size.
FAQs about Rainbow Cake Recipe
1. Can I use box cake mix for rainbow cake?
Yes, you can use white box cake mix and divide it into colored layers. It’s quicker and still tasty.
2. What’s the best food coloring for vibrant layers?
Gel food coloring gives the most vivid results without affecting batter texture.
3. Can I make this cake the day before?
Absolutely. Bake and frost it the day before your event, and store it in the fridge. Let it come to room temperature before serving.
4. How many people does this rainbow cake serve?
A standard 8-inch, 6-layer cake can serve around 12–18 slices, depending on portion size.
5. How do I get my layers flat without trimming?
Use cake strips or wrap wet paper towels in foil around your cake pans. This helps them bake evenly and prevents doming.
Conclusion
And there you have it—a complete, step-by-step guide to baking a stunning, mouth-watering rainbow cake from scratch. It’s the kind of project that’s fun, colorful, and totally worth the effort. Whether you’re celebrating a birthday, throwing a pride party, or just want to bake something magical, this cake is sure to deliver. Follow each step carefully, give yourself plenty of time, and don’t forget to have fun with it. After all, baking is part science, part art, and all love.