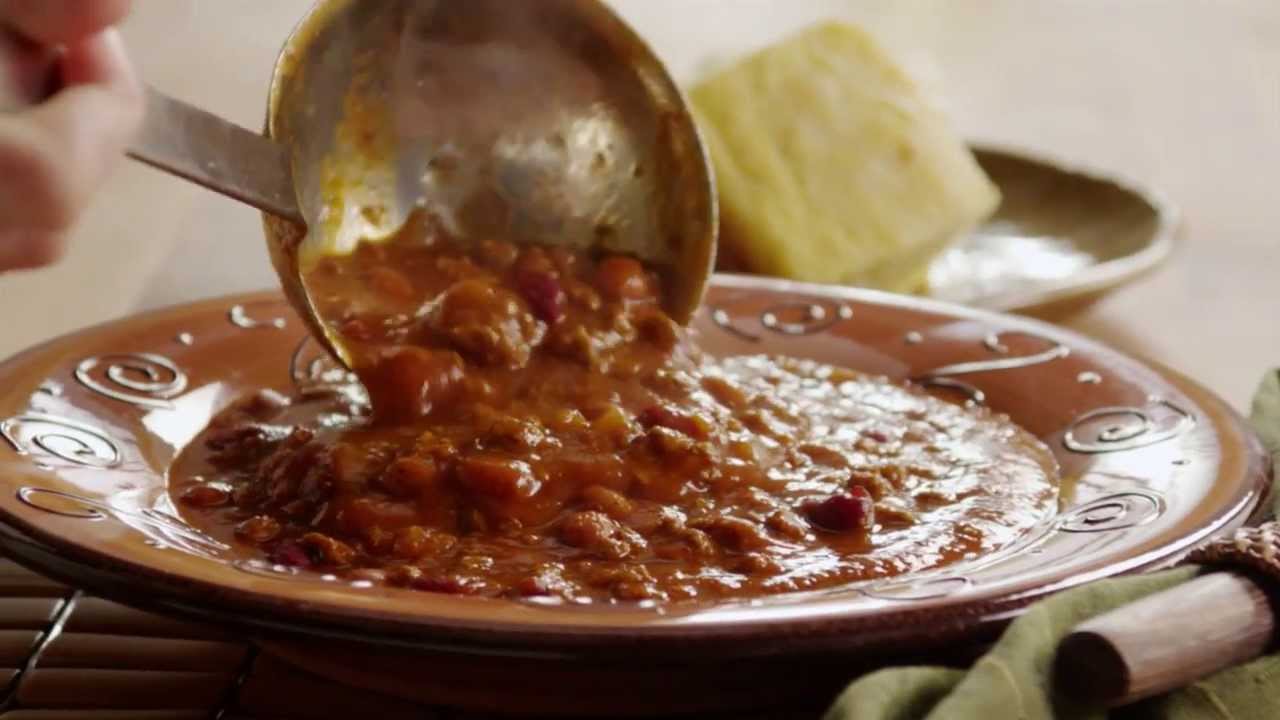
Quick Chili Recipe: Chili is that cozy, no-fuss dish we all turn to when we need warmth in a bowl. It’s filling, flavorful, and the perfect one-pot meal that hits the spot every single time. Whether it’s a chilly weeknight, game day, or you’re just craving something hearty, chili always comes to the rescue. The best part? It’s endlessly customizable. You can make it meat-heavy, bean-packed, super spicy, or mild and mellow—it all depends on your taste.
What makes chili truly special is how all its components—meat, beans, spices, and veggies—come together to create something deeply satisfying. It’s a dish born from simplicity, yet with the right ingredients and a little know-how, it can taste like it’s been simmering for hours—even when it hasn’t.
The Secret to Making a Quick Yet Flavorful Chili
A lot of people assume that great chili takes all day to make. And sure, low-and-slow versions have their place. But with the right steps and ingredients, you can make a rich, comforting chili in under 45 minutes—without sacrificing flavor.
The secret lies in smart layering of ingredients and using bold spices from the get-go. Browning your meat properly, blooming your spices in oil, and using ingredients like fire-roasted tomatoes or a splash of coffee or cocoa can create depth fast. We’re going to walk you through how to do just that—step by step.
Let’s dive in and build your go-to chili recipe that’s fast, easy, and seriously delicious.
Ingredients You’ll Need
Essential Protein Options
Let’s kick things off with the foundation: protein. This is where chili gets its heartiness and that meaty satisfaction. Ground beef is the classic go-to—especially 80/20 lean-to-fat ratio for the best balance of flavor and texture. The fat adds richness, and when browned properly, it gives you those irresistible crispy bits.
Not a fan of red meat? No problem. Ground turkey is a leaner alternative that still soaks up all the delicious spices. If you’re vegetarian or vegan, lentils or plant-based meat crumbles (like Beyond Meat or soy-based crumbles) are excellent substitutes.
Quick Tip: If you’re using lean meats like turkey or chicken, consider adding a tablespoon of olive oil to help carry the spices and add a little moisture.
Key Vegetables and Beans
Here’s where chili starts to feel wholesome. Onions and garlic are non-negotiable—they’re the aromatic base that gives chili its bold start. You’ll want to finely dice one large onion and mince about 3-4 garlic cloves for depth.
Tomatoes are next. Canned diced tomatoes, especially the fire-roasted kind, bring smokiness and that classic chili body. Tomato paste adds an umami kick and thickens the whole thing up nicely.
When it comes to beans, the sky’s the limit. Kidney beans and black beans are classic choices. Pinto beans, white beans, or even chickpeas work too if you want to switch things up. Just make sure to rinse and drain them to avoid extra sodium and weird textures.
Veggie Add-ins: Bell peppers, corn, and celery add both color and sweetness, making your chili more vibrant and balanced.
Spices and Flavor Boosters
This is where the magic happens. If you don’t have good spices, your chili won’t have that punch we all crave. You’ll need:
- Chili powder – the main spice, full of rich earthy flavor
- Cumin – brings a smoky, warm depth
- Paprika – for color and a gentle kick
- Salt and pepper – to balance everything
- Optional: Cayenne or red pepper flakes if you like heat
Flavor Boosters: Want to go the extra mile? Add a teaspoon of unsweetened cocoa powder, a shot of espresso, or even a splash of beer. These umami bombs deepen the flavor quickly and make it taste like it’s been cooking all day.
Optional Add-ins
Depending on your preferences, you can load your chili up with some tasty extras:
- Jalapeños for heat and crunch
- Sweet corn for a pop of color and natural sweetness
- Bell peppers for added freshness
- A splash of lime juice for brightness
- Fresh cilantro or green onions for garnish
With these ingredients ready, you’re set to make an amazing chili in no time.
Step-by-Step Guide
Step 1 – Gather All Ingredients
Preparation is everything—especially when you want dinner ready in under an hour. That’s where mise en place comes in. It’s a French culinary term that means “everything in its place.” It might sound fancy, but it simply means getting everything chopped, measured, and ready before you start cooking.
Trust me—this makes a massive difference. No running back to the fridge mid-cook. No wondering if you added the cumin. No chaos.
Here’s your checklist:
- Meat of choice, thawed and portioned
- Chopped onion and garlic
- Diced tomatoes, tomato paste
- Rinsed and drained beans
- All your spices pre-measured
- Any veggies or extras chopped and set aside
You’ll want a large, heavy-bottomed pot or Dutch oven, a good wooden spoon, and a lid for simmering later on. Once everything is laid out, it’s go-time.
Step 2 – Brown the Meat
This is the flavor-launchpad. Add a drizzle of oil to your pot over medium-high heat. When it’s hot, throw in your ground meat. Don’t stir it too much—let it sear and form a crust. That’s where the flavor lives.
Pro Tip: Use a metal spatula or wooden spoon to break the meat into chunks, not crumbs. You want texture!
Cook for about 6-8 minutes, or until the meat is fully browned and no longer pink. Drain excess fat if needed, especially if it’s pooling.
This step is key to building a strong base. Don’t rush it. Let those brown bits at the bottom form—they’ll come up when we add the next layers, bringing tons of flavor with them.
Step 3 – Add Aromatics
Once your meat is nicely browned and you’ve got those flavorful bits at the bottom of the pot, it’s time to bring in the aromatics. These are the veggies and seasonings that set the flavor tone for your chili right from the start.
Toss in your chopped onions and let them cook for about 4–5 minutes until they start to soften and become translucent. Stir them occasionally to make sure they don’t stick. Then, add the garlic. Garlic burns fast, so only cook it for about 30 seconds to 1 minute. As soon as you smell that familiar garlicky aroma, it’s time to move on.
Want an extra layer of flavor? Add your bell peppers or jalapeños now if you’re using them. These give your chili that garden-fresh dimension and a pop of color. Plus, if you’re using jalapeños, this is where the heat starts to kick in.
Quick tip: If the bottom of your pan is looking too dark or dry, add a splash of broth, water, or even beer to deglaze it. Scrape up those tasty brown bits—they’re pure flavor gold.
This stage is about building complexity. By cooking your veggies with the leftover fats and fond from the meat, you’re infusing your chili with a whole new level of taste.
Step 4 – Mix in Beans, Tomatoes, and Spices
Now we’re getting to the soul of the chili. This is where it starts to look and smell like the real deal.
First, add your spices—yes, before the liquid. This trick is called “blooming.” Letting the spices toast for about 30 seconds in the fat helps unlock their oils and boost their flavor. Toss in chili powder, cumin, paprika, salt, and pepper. If you’re feeling bold, add a pinch of cayenne or red pepper flakes.
Optional flavor boosters: This is also the perfect moment to stir in your tomato paste, cocoa powder, or espresso. Give it a good mix to coat everything in the pot.
Next, pour in your canned diced tomatoes—juices and all. Fire-roasted ones are a personal favorite because they add a smoky kick without needing more spice. Then add your drained beans. One can of kidney beans and one can of black beans usually do the trick, but feel free to customize.
Want it saucier? Add half a cup of broth or water here. This will help it simmer without drying out.
Mix everything well so the spices are evenly distributed. Bring the whole pot to a gentle boil.
Step 5 – Simmer and Let Flavors Marry
This is where patience pays off—even in a “quick” chili recipe. Turn the heat down to low and cover your pot, letting everything simmer gently for at least 20–30 minutes. Stir occasionally so nothing sticks to the bottom.
While it simmers, all the ingredients start to mingle. The beans absorb flavor, the tomatoes break down, and the spices mellow into a balanced, deep richness.
Need a thicker chili? Take the lid off for the last 10 minutes to let some of the liquid cook off. Or mash a few beans with the back of your spoon to naturally thicken the sauce.
Taste as you go. Add more salt, a splash of lime juice, or even a spoonful of sugar if the tomatoes taste too acidic.
Once your chili looks thick, rich, and smells amazing—you’re done. Ladle it into bowls and get ready to top it off with all your favorites (we’ll cover those in a moment).
Cooking Tips and Tricks
Let’s be real. Anyone can throw together meat, beans, and tomatoes. But making a chili that’s memorable? That takes a few insider tricks.
Don’t Rush the Browning
We said it earlier, but it bears repeating—browning your meat isn’t just about cooking it. It’s about creating flavor. Don’t crowd the pan or stir too soon. Let it sear!
Toast Your Spices
Add your dry spices before the liquids. Let them cook for just 30 seconds in the fat and you’ll get deeper, toastier, more robust flavor.
Deglaze That Pot
After browning and sautéing, pour in a splash of beer, broth, or even coffee to lift the flavorful brown bits off the bottom of the pan. That’s where the magic is hiding.
Add a “Secret Weapon”
Great chili often has one or two surprise ingredients that set it apart. Here are a few game-changers:
- Cocoa powder – adds bitterness and depth
- Espresso or coffee – enhances meaty richness
- Beer – gives a malty, complex flavor
- A touch of vinegar or lime juice – brightens and balances
Make It Ahead (If You Can)
Chili is one of those dishes that tastes even better the next day. The flavors deepen and blend beautifully overnight. So if you’ve got time, make it in advance and reheat before serving.
Adjusting Spice Levels
Chili is one of those beautiful dishes that adapts to your personal preferences—especially when it comes to heat. Whether you love your food fiery or prefer a more mild experience, tweaking the spice level is super simple.
How to Make It Mild
If you’re cooking for kids, spice-sensitive guests, or just want something on the mellow side, here’s how to keep things tame without losing flavor:
- Skip the hot peppers like jalapeños or serranos.
- Use sweet paprika instead of hot or smoked versions.
- Start with a low amount of chili powder—1 tablespoon or less—and build up slowly.
- Add natural sweetness with a bit of corn, bell pepper, or even a tiny pinch of sugar to round out the flavors.
Chili doesn’t need to be spicy to be tasty. With rich spices like cumin, paprika, and garlic, you’ll still have plenty of flavor.
How to Crank Up the Heat
If you like it hot, chili is the perfect dish to bring the fire. You can control the burn with these ingredients:
- Fresh hot peppers: Jalapeños, habaneros, or serranos
- Dry heat: Cayenne pepper, red chili flakes, hot smoked paprika
- Spicy chili powders: Some brands are hotter than others—experiment to find your favorite
Pro tip: Add your heat in stages. You can always add more spice, but it’s hard to take it out once it’s in. Start small, taste, and adjust.
If you accidentally go overboard, a dollop of sour cream, shredded cheese, or even a splash of cream can help tone it down.
Serving Suggestions
Chili is awesome on its own—but it’s even better when dressed up with toppings or served with the right sides. Here’s how to take your bowl from basic to bold.
The Best Toppings
Think of toppings as your final flavor layer. They add texture, freshness, creaminess, or crunch—all the things that balance out a hearty, rich chili.
- Shredded cheese – cheddar, pepper jack, or mozzarella
- Sour cream or Greek yogurt – cools the spice and adds creaminess
- Chopped green onions – for a bit of bite
- Fresh cilantro – adds brightness
- Avocado slices – creamy and rich
- Crushed tortilla chips or cornbread croutons – adds crunch
- Lime wedges – a squeeze of citrus can wake up the whole bowl
Let everyone build their own bowl so they can customize it to their liking.
What to Serve with Chili
While chili is definitely a full meal, pairing it with a side dish can round things out and make it even more satisfying.
- Cornbread – slightly sweet and perfect for soaking up chili
- Tortilla chips – great for scooping or crumbling
- Rice – makes the chili stretch further and tones down the heat
- Baked potatoes – use chili as a topping for a hearty twist
- Salad – a crisp, light counterbalance to the heaviness of chili
Want to feed a crowd? Set up a chili bar with toppings, sides, and even variations like white chili or veggie chili. It’s easy, fun, and perfect for parties.
Storage and Reheating Tips
Chili isn’t just great for dinner tonight—it’s even better tomorrow. And with the right storage and reheating tricks, you can enjoy it for days without losing flavor or texture.
Storing Leftovers
After the chili has cooled to room temperature, transfer it into airtight containers. You can store it in:
- The fridge for up to 4–5 days
- The freezer for up to 3 months
If freezing, consider dividing it into single-serving containers. That way, you only thaw what you need. Be sure to leave a little space at the top of each container—liquid expands when frozen.
Label your containers with the date so you don’t lose track of how long it’s been in there.
Reheating Like a Pro
When it’s time to reheat your chili, you want to preserve its flavor and consistency. Here’s how:
- On the stove: Reheat over medium-low heat, stirring occasionally. Add a splash of water or broth if it’s too thick.
- In the microwave: Use a microwave-safe bowl, cover with a lid or plate (to prevent splatters), and heat in 1-minute intervals, stirring in between.
- From frozen: Let it thaw overnight in the fridge, or use a pot on low heat to defrost and warm it up slowly.
Avoid boiling your chili during reheating—it can break down the beans too much and turn everything mushy.
The best part? Chili often tastes even better the next day because the flavors have had more time to meld together. So go ahead—make a big batch!
Variations of Chili
One of the best things about chili is how endlessly adaptable it is. Whether you’re vegetarian, trying to cut calories, or just want to try something new, there’s a version out there for you. Let’s explore some popular chili variations that are just as hearty, comforting, and delicious as the classic.
Vegetarian and Vegan Chili
No meat? No problem. You can still enjoy a rich, satisfying bowl of chili with plant-based ingredients that pack in just as much flavor.
Protein options for vegetarian chili:
- Lentils – cook quickly and give great texture
- Quinoa – adds protein and soaks up the spices beautifully
- Tofu or tempeh – crumbled for a meat-like feel
- Mushrooms – offer umami richness and chew
Key tips:
- Use vegetable broth instead of meat stock
- Load up on beans (black, kidney, chickpeas)
- Don’t skip the spices—they make all the difference
Vegan chili often tastes even better with extras like sweet potatoes, zucchini, or corn for added body and sweetness. A splash of lime juice and a sprinkle of fresh cilantro at the end brightens everything up.
White Chicken Chili
White chili is a totally different vibe—creamy, tangy, and just as cozy.
What you’ll need:
- Cooked, shredded chicken breast or rotisserie chicken
- White beans (like cannellini or Great Northern beans)
- Green chilies and jalapeños for a gentle kick
- Onion, garlic, and sometimes corn
- A creamy base made with cream cheese, sour cream, or a flour-based roux
This version is lighter than red chili but still rich and hearty. It’s a great choice for those who want something a little milder or who just love creamy textures.
Regional Variations
There are endless spins on chili based on where you are. Here are a few famous ones:
- Texas Chili (Chili con Carne): No beans, just meat and spices—deep, bold, and smoky.
- Cincinnati Chili: Spiced with cinnamon and allspice, and served over spaghetti.
- New Mexico Green Chili: Made with green chiles and pork—fresh and fiery.
- Chili Verde: A tomatillo-based version often featuring chunks of pork or chicken.
Each version has its own story and fan base. Try them all and see which one you love most.
Common Mistakes to Avoid
Even though chili is a relatively simple dish, a few small mistakes can keep it from reaching its full flavor potential. Here’s what to watch out for—and how to fix it.
1. Skipping the Browning Step
If you don’t brown your meat properly, you’re missing out on major flavor. Always sear your meat well—it creates caramelization and a deeper, richer base.
2. Undercooking the Aromatics
Throwing in raw onions and garlic without sautéing them first will leave your chili tasting harsh. Always give them time to soften and release their sweetness.
3. Using Too Much Liquid
Chili isn’t soup. You want it thick, not watery. If it looks too thin, simmer it uncovered to reduce the liquid or mash a few beans to help thicken it naturally.
4. Overcomplicating It
Adding too many spices, ingredients, or secret “hacks” can muddy the flavors. Stick to a solid core recipe and build from there—balance is key.
5. Not Tasting As You Go
Spices can vary in strength, and ingredients like tomatoes and broth can affect overall saltiness. Always taste and adjust throughout the cooking process.
Pro Tip: A small splash of vinegar or citrus juice at the end can rescue a flat-tasting chili. It brightens everything and brings balance.
Nutritional Breakdown
Chili can be surprisingly nutritious—especially if you make smart ingredient choices. Here’s an approximate nutritional breakdown for one serving (1.5 cups) of a classic ground beef and bean chili:
| Nutrient | Amount |
|---|---|
| Calories | 350–450 kcal |
| Protein | 25–30 grams |
| Carbohydrates | 25–35 grams |
| Fiber | 8–12 grams |
| Fat | 15–20 grams |
| Saturated Fat | 4–7 grams |
| Sodium | 600–900 mg |
Healthier modifications:
- Use ground turkey or chicken for less fat
- Add more beans and veggies to increase fiber
- Choose low-sodium canned goods
- Skip the cheese or sour cream toppings if you’re watching fats
Chili is a perfect high-protein, high-fiber meal that keeps you full and satisfied—especially when you load it with beans and veggies.
FAQs about Quick Chili Recipe
1. Can I freeze chili?
Absolutely! Chili freezes beautifully. Let it cool completely, then store it in airtight containers or freezer bags for up to 3 months. Thaw in the fridge overnight before reheating.
2. How long does chili last in the fridge?
Stored properly in an airtight container, chili lasts about 4 to 5 days in the refrigerator. Reheat gently on the stove or in the microwave.
3. What beans work best for chili?
Kidney beans and black beans are the most common, but pinto beans, cannellini beans, and even chickpeas can be great alternatives.
4. Can I make chili in a slow cooker?
Yes! Brown your meat and sauté your aromatics first, then add everything to the slow cooker. Cook on low for 6–8 hours or on high for 3–4 hours.
5. Is chili better the next day?
It often is! The flavors have more time to blend, creating a deeper, more cohesive taste. Just reheat it slowly to preserve texture.
Conclusion
There you have it—a complete, step-by-step guide to making a mouthwatering chili that’s quick, customizable, and full of bold flavor. Whether you like it meaty or meatless, spicy or mild, there’s a chili for everyone.
With the right ingredients, a few smart techniques, and a little bit of love, you can whip up a pot of chili that tastes like it simmered all day—even when it didn’t. So next time you’re craving comfort in a bowl, you know exactly what to do.
Now go fire up that stove, grab your favorite toppings, and get ready to dive into a big, satisfying bowl of homemade chili.

