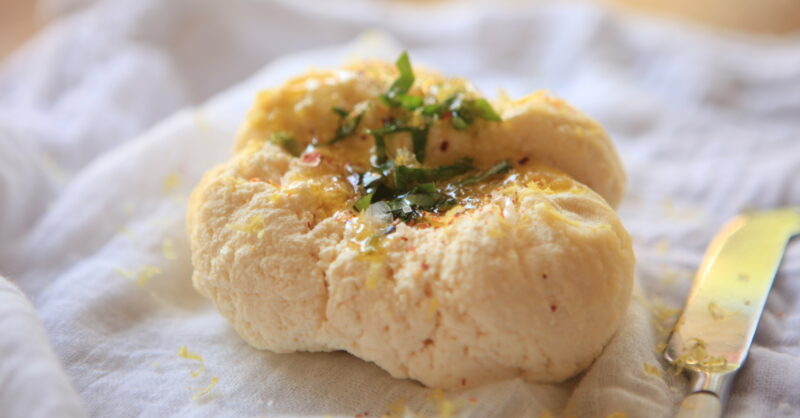
Queso Fresco Recipe: Queso Fresco, which means “fresh cheese” in Spanish, is a beloved staple in many Latin American households. This soft, crumbly, and slightly tangy cheese is traditionally made from cow’s milk or a mix of cow and goat milk. Unlike aged cheeses, Queso Fresco is meant to be enjoyed fresh—within a few days of making it. It doesn’t require any special aging or fermenting process, which makes it perfect for beginners or anyone interested in DIY dairy projects.
Its mild, creamy flavor makes it incredibly versatile—it crumbles beautifully over tacos, enchiladas, grilled corn, soups, salads, and even fruit. And because it’s usually made without rennet, it’s vegetarian-friendly too. Think of it as the Latin American cousin of feta or paneer, but with its own unique twist.
This cheese is cherished for its simple ingredients and quick prep time. Best of all, it’s a wonderful entry point into the world of cheesemaking. If you’ve never made cheese before, Queso Fresco is the place to start.
Why Make Queso Fresco at Home?
Making Queso Fresco at home gives you total control over the ingredients and flavor. Unlike store-bought versions that might include preservatives or stabilizers, your homemade batch will be fresh, clean, and preservative-free. You also get the freedom to experiment—add herbs, spice it up, or make it low-sodium depending on your preferences.
It’s also surprisingly cost-effective. A gallon of milk can yield nearly a pound of cheese, making it a great way to save money while also enjoying something homemade. Plus, there’s something incredibly satisfying about turning milk into cheese with just a few simple steps. It’s part science, part magic—and 100% delicious.
Ingredients You’ll Need
Essential Ingredients for Authentic Queso Fresco
To make traditional Queso Fresco, you’ll only need a few simple ingredients that are probably already in your kitchen:
- Whole Milk (1 gallon): Fresh, non-ultra-pasteurized milk works best. The higher the fat content, the creamier your cheese.
- Acid (1/4 cup): White vinegar or lemon juice. These acids cause the milk to curdle and separate into curds and whey.
- Salt (1 to 2 teaspoons): To season the cheese. Adjust according to taste.
You don’t need any fancy additives or artificial cultures. That’s part of what makes this recipe so approachable. Whole, fresh milk and an acidifier—that’s the magic duo.
If you’re using raw milk, all the better. But store-bought milk works just fine as long as it’s not ultra-high temperature (UHT) pasteurized, which won’t curdle well.
Optional Ingredients to Customize Your Cheese
Once you’ve mastered the basic Queso Fresco recipe, try experimenting with flavors. Here are some popular additions:
- Chopped herbs: Cilantro, oregano, basil, or parsley add a fresh twist.
- Crushed red pepper flakes: For a spicy kick.
- Black peppercorns: Add a bold, peppery punch.
- Garlic or onion powder: For an aromatic flair.
- Cumin or smoked paprika: Gives it a Mexican flavor profile.
These ingredients can be added after draining the curds, just before pressing and salting the cheese. The possibilities are endless and allow you to personalize every batch.
Tools and Equipment Required
You don’t need professional equipment to make Queso Fresco, but a few kitchen essentials will help:
- Large pot: Stainless steel, preferably non-reactive.
- Thermometer: To monitor the milk temperature accurately.
- Cheesecloth or muslin: To drain the curds.
- Colander or strainer: For holding the cheesecloth while the whey drains.
- Slotted spoon or ladle: For scooping curds.
- Weight or cheese mold: For pressing the cheese (you can use a clean, heavy object like a canned good if you don’t have a press).
These tools are easy to find, and most home cooks will already have them in the kitchen.
Preparing for the Process
Setting Up Your Kitchen
Before you dive into cheesemaking, it’s crucial to prep your workspace. Cheesemaking is a precise process, and cleanliness matters. Here’s how to get started:
- Sanitize everything: Wash your hands and sanitize all equipment, especially anything that will touch the milk.
- Clear your workspace: Keep your counters clutter-free so you can move quickly and efficiently.
- Pre-measure your ingredients: Have your acid and salt ready to go so you’re not fumbling during crucial moments.
Setting up your station like a professional kitchen will make the process smooth and stress-free. Think of it like preparing for a science experiment—you want all variables controlled.
Tips Before You Begin
Here are some pro tips to help ensure your Queso Fresco turns out perfect on the first try:
- Use fresh milk: Avoid UHT or shelf-stable milk; it doesn’t curdle properly.
- Don’t boil the milk: Overheating can make the curds tough. Keep it just under boiling—around 180°F (82°C).
- Stir gently: Once the acid is added, stir gently. Aggressive mixing can break the curds.
- Be patient: Let the curds rest after acidification. Rushing this step can affect texture.
These little tips make a big difference, especially when you’re making Queso Fresco for the first time.
Step-by-Step Guide to Making Queso Fresco
Step 1: Heating the Milk
Start by pouring 1 gallon of whole milk into a large pot. Set it over medium heat and begin warming it slowly. You want to bring the milk up to about 180°F (82°C)—not boiling, just hot enough for the milk to begin steaming and forming tiny bubbles around the edges.
Use a thermometer to monitor the temperature closely. Stir occasionally to prevent scorching, but be gentle—you don’t want to agitate the milk too much.
This step takes about 15–20 minutes, depending on your stove. Be patient. Even heating is essential to ensure the milk curdles properly when the acid is added. Too hot, and the curds will turn rubbery. Too cold, and you may not get curds at all.
Once the milk reaches the target temperature, remove it from heat immediately. You’re now ready for the next step: curdling.
Step 2: Adding Acid and Curdling the Milk
Now that your milk is properly heated, it’s time to curdle it—this is where the magic begins! Slowly add your acid (either 1/4 cup of lemon juice or white vinegar) into the hot milk while gently stirring in a slow, circular motion.
As you stir, you’ll notice the milk begin to separate almost immediately. The curds (solid white clumps) will separate from the whey (a yellowish liquid). This transformation usually takes 1 to 2 minutes, but sometimes a little longer. Keep stirring gently until the curds fully form and the whey becomes clear.
If your milk doesn’t curdle, don’t panic. You may need to add a bit more acid—try adding another tablespoon at a time, stirring gently in between. Make sure your milk was hot enough before adding the acid, or it won’t separate properly.
Once you see clear separation between curds and whey, stop stirring. Let the pot sit undisturbed for about 10–15 minutes. This allows the curds to fully develop and firm up before draining.
Remember: patience and gentle movements are key here. Aggressive stirring can break the curds, leaving you with a grainy final product instead of the smooth, crumbly texture Queso Fresco is known for.
Step 3: Letting the Curds Settle
After the acid has done its job, and the curds have clearly separated from the whey, the next step is to let the curds rest. This is a crucial, often-overlooked part of the process that allows the curds to firm up naturally and settle to the bottom of the pot.
Letting the curds sit for 10 to 15 minutes without stirring helps them bond slightly and retain a better structure. It also gives the whey more time to separate, which makes draining easier later.
During this time, cover the pot with a clean towel or lid to keep the heat in. You want to maintain a warm environment without reheating, so avoid lifting the lid too often.
If you like a softer, more moist cheese, you can move on to the draining stage a bit sooner. But for a firmer, more crumbly Queso Fresco, let it sit the full 15 minutes.
This pause may feel like downtime, but it’s a game-changer for your cheese’s texture. Think of it as the moment where the curds “decide” who they want to be—soft and pliable or firm and crumbly. Give them the time they need to settle naturally.
Step 4: Draining the Curds
Once the curds have settled, it’s time to drain them and remove as much whey as possible. Place a colander in the sink and line it with a large piece of cheesecloth or fine muslin. Make sure the cloth is big enough to fold over the top of the curds once they’re inside.
Now, gently ladle or pour the curds into the colander. Be careful not to break them up too much during this transfer. Let the whey drain naturally—do not squeeze yet.
Let the curds sit for about 5–10 minutes, letting gravity do most of the work. After this, bring the edges of the cheesecloth together and twist the top to form a tight bundle. You can now either:
- Hang the bundle from a spoon placed across a large bowl to let it drip for 30 minutes to an hour.
- Press it down in the colander using a small plate and a light weight (like a can or jar) for a firmer texture.
The more whey you remove, the drier and crumblier the cheese will be. For a softer, spreadable version, reduce the draining time.
At this point, your cheese is taking its final shape—and it’s starting to smell and look deliciously fresh.
Step 5: Pressing and Salting the Cheese
Now that your curds are drained, it’s time to press and season your cheese. This step brings it all together.
If you’re going for the traditional pressed wheel of Queso Fresco, place your curds into a cheese mold or small bowl lined with fresh cheesecloth. Fold the cloth over the top and add a light weight. Press for 30 minutes to 2 hours, depending on how firm you want your cheese.
For a crumbly texture, reduce the pressing time. If you prefer a dense, sliceable block, press longer and with a slightly heavier weight.
After pressing, unmold the cheese and sprinkle with 1 to 2 teaspoons of salt, gently mixing it in with your hands or a spoon. You can also add herbs, spices, or other flavorings at this stage.
If you’d rather salt the curds before pressing, that’s totally fine too—just be sure to mix thoroughly so the salt is evenly distributed.
Once salted, your Queso Fresco is ready to eat! Serve it immediately for the freshest flavor, or refrigerate it for a few hours to allow the flavor to deepen and the texture to firm up.
At this point, you’ve done it—you’ve made fresh cheese from scratch with nothing more than milk, acid, salt, and patience. That’s something to celebrate.
Storing and Serving Queso Fresco
Proper Storage Techniques
Once your Queso Fresco is made, it’s important to store it correctly to maintain its freshness, flavor, and texture. Because it’s a fresh cheese with no preservatives, it has a relatively short shelf life compared to aged cheeses.
Here’s how to store it properly:
- Refrigeration is key: Wrap your cheese in parchment paper or cheese paper (never plastic wrap, which can trap moisture and lead to spoilage) and place it in an airtight container.
- Use within a week: Homemade Queso Fresco is best enjoyed within 5–7 days. After that, it can start to sour or dry out.
- No freezing: While technically you can freeze Queso Fresco, it’s not recommended. Freezing changes the texture, often making it crumbly and dry after thawing.
For even better preservation, you can store the cheese in lightly salted water (brine)—just like feta. This will help keep it moist and flavorful, especially if you’re storing it for more than a few days.
Avoid leaving your Queso Fresco out at room temperature for extended periods. It’s best kept chilled until right before serving.
Shelf Life and Safety Tips
Given its fresh nature, safety and hygiene play a major role in ensuring your Queso Fresco stays delicious and safe to eat. Here’s what to keep in mind:
- Watch for mold: If you see any mold growth on your cheese, discard it. Queso Fresco is not aged or hard enough to simply cut away mold like some other cheeses.
- Smell test: A sour or off smell is a sign it’s time to toss it.
- Texture change: If the cheese becomes excessively dry or slimy, it’s no longer good for consumption.
Always use clean utensils when cutting or serving your cheese to avoid introducing bacteria. And remember, homemade cheese lacks commercial preservatives, so err on the side of caution.
How to Serve Queso Fresco
One of the most beautiful things about Queso Fresco is its versatility. It can go from savory to sweet, hot to cold, and breakfast to dinner without missing a beat. Here are some delicious ways to enjoy it:
- Crumble it over tacos: Adds a fresh, creamy contrast to spicy fillings.
- Sprinkle on soups and stews: Like pozole, black bean soup, or tortilla soup.
- Stuff into enchiladas or tamales: Queso Fresco’s mild flavor complements bold sauces.
- Top roasted vegetables: Especially corn (elote), squash, or sweet potatoes.
- Pair with fruit: Serve slices alongside mango, papaya, or watermelon for a refreshing snack.
- Breakfast delight: Add to scrambled eggs or breakfast burritos.
It’s also fantastic in salads, on flatbreads, or served with crackers as part of a cheese board. Because it doesn’t melt like mozzarella or cheddar, Queso Fresco holds its shape when heated—making it ideal for crumbling over hot dishes without turning into a puddle.
Flavor Variations and Creative Additions
Herb-Infused Queso Fresco
Once you’ve nailed the basic recipe, you can take your cheese game to the next level with herb infusions. Herbs add freshness, complexity, and a custom twist to your cheese. Some popular choices include:
- Chopped cilantro: Great for a fresh, citrusy pop.
- Fresh basil or oregano: Perfect for a Mediterranean vibe.
- Chives or green onions: Adds mild oniony goodness.
- Rosemary or thyme: For a woodsy, savory depth.
Add your chosen herbs after draining the curds and before pressing. This way, the flavor gets embedded into the cheese during shaping. Just be sure to use fresh, washed, and dried herbs—excess moisture can affect the texture and shelf life of your cheese.
You can even create stunning marbled effects by layering different herbs throughout the curds. It’s not only tasty—it looks beautiful on a cheese board.
Spicy Queso Fresco
Love heat? Kick things up a notch with spicy additions. Here’s how:
- Red chili flakes: Simple and effective for that slow-building burn.
- Minced jalapeños or serranos: For fresh, peppery heat.
- Smoked chipotle: Adds heat with a deep smoky note.
- Paprika or cayenne: Great for coloring and warming flavors.
Like herbs, these should be mixed in after the draining stage. If using fresh peppers, remove seeds and finely chop them for even distribution.
You can even mix chili powder into the brine if storing the cheese that way—it adds flavor without altering the texture.
Sweet Variations
Surprised? Queso Fresco can go sweet too—and it’s amazing. Think outside the savory box:
- Cinnamon and honey: Sprinkle in a bit of cinnamon and drizzle with honey for a dessert-style cheese.
- Dried fruits: Chopped figs, raisins, or apricots add a chewy, sweet contrast.
- Vanilla and sugar: Mix in a touch of vanilla extract and sugar for a soft, dessert-like cheese.
These versions pair beautifully with fruit, crackers, or as a topping for pancakes and waffles. Queso Fresco’s neutral flavor makes it a blank canvas for both sweet and savory explorations.
Nutritional Information
Health Benefits
Queso Fresco isn’t just delicious—it also brings some solid nutritional value to the table. When made with whole milk, it contains essential vitamins and minerals that are crucial for your body. Here are a few benefits of this homemade cheese:
- High in Protein: With around 5–7 grams of protein per ounce, Queso Fresco is a great addition to vegetarian diets, helping to support muscle repair and immune health.
- Calcium Rich: As a dairy product, it’s naturally loaded with calcium, which is vital for bone strength and overall skeletal health.
- Lower in Fat Than Aged Cheeses: Fresh cheeses like Queso Fresco are usually lower in saturated fat compared to hard, aged cheeses like cheddar or gouda.
- Naturally Gluten-Free and Low-Carb: Ideal for those following gluten-free or keto lifestyles.
Homemade versions are even better because you control what goes into them. No preservatives, unnecessary additives, or excessive sodium.
For lactose-intolerant individuals, Queso Fresco can sometimes be easier to digest, especially if you use raw milk or ferment the curds slightly longer. But always test carefully and consult a doctor if unsure.
Caloric and Macronutrient Breakdown
Let’s take a look at a general macronutrient profile of homemade Queso Fresco (per 1 oz/28g serving):
| Nutrient | Amount (Approx.) |
|---|---|
| Calories | 80–90 |
| Protein | 5–7g |
| Total Fat | 6g |
| Saturated Fat | 4g |
| Carbohydrates | 1g or less |
| Sugar | 0–1g |
| Sodium | 60–120mg |
| Calcium | 150mg |
These numbers can vary depending on the milk you use and whether or not you add salt or flavorings. Low-fat milk will yield a leaner cheese, while full-fat milk offers a creamier, more satisfying version.
Overall, Queso Fresco is a balanced cheese—full of flavor without being overly indulgent.
Common Mistakes to Avoid
Overheating the Milk
One of the most common pitfalls for beginners is overheating the milk. You might think more heat equals faster curds—but in reality, overheating can ruin the texture. If milk goes beyond 190°F (88°C), it can scorch or denature too quickly, resulting in rubbery or grainy cheese.
Always monitor your temperature with a reliable kitchen thermometer. Aim for 180°F (82°C) and no more. Slow and steady wins this race—gentle heat allows for a better, creamier texture.
If you don’t have a thermometer, watch for visual clues: the milk should be steamy with small bubbles around the edges, but never boiling.
Using the Wrong Type of Acid
The acid you use is just as important as the temperature. Some recipes suggest any type of vinegar, but not all vinegars are created equal. Avoid flavored or balsamic vinegars, as they can affect the taste and curdling process.
Stick with:
- Distilled white vinegar
- Fresh lemon juice
- Apple cider vinegar (mild option)
Adding too much or too little acid can also cause problems. Over-acidification can make the curds rubbery; not enough, and the milk won’t separate. Start with 1/4 cup and add more only if needed.
Also, remember to stir gently—vigorous stirring after acid is added can shatter the curds and ruin the texture.
FAQs about Queso Fresco Recipe
1. Can I make Queso Fresco without cheesecloth?
Yes! In a pinch, you can use a clean cotton dish towel, muslin fabric, or even a clean pillowcase. Just make sure the fabric is tightly woven enough to hold in the curds while letting the whey drain out.
2. Why is my cheese too dry or crumbly?
It may have been pressed too long or drained too thoroughly. Next time, reduce your pressing time or use a lighter weight. Adding a bit less acid can also help retain moisture.
3. Can I use goat’s milk instead of cow’s milk?
Absolutely! Goat’s milk makes a tangier, creamier Queso Fresco. You can also use a 50/50 blend of cow and goat milk for a more complex flavor profile.
4. How can I make my Queso Fresco creamier?
Use whole milk and reduce your draining time. You can also stir in a spoonful of cream or yogurt after draining for a richer texture.
5. Is Queso Fresco good for melting?
Not really. Queso Fresco softens with heat but doesn’t melt like mozzarella or cheddar. It’s best used crumbled or sliced on top of hot dishes rather than inside grilled sandwiches or casseroles.
Conclusion
Making Queso Fresco at home is one of those kitchen adventures that’s surprisingly easy and endlessly rewarding. With just a few basic ingredients—milk, acid, and salt—you can create a cheese that’s creamy, fresh, and perfect for any meal.
It’s a beginner-friendly entry point into cheesemaking, offering delicious results even on your first try. Whether you’re crumbling it over tacos, slicing it for a salad, or infusing it with herbs and spices, Queso Fresco is versatile, nutritious, and downright fun to make.
Plus, it brings you a little closer to the roots of traditional Latin American cuisine, where fresh, handmade cheese is a cherished part of daily life.
So grab that pot, pour the milk, and start stirring—you’re just a few simple steps away from one of the freshest cheeses you’ll ever taste.

