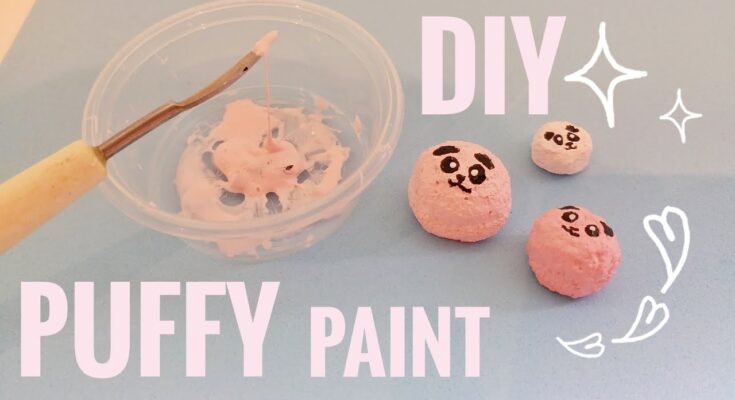
Puffy Paint Recipe: Ever seen those fun, fluffy, 3D-looking artworks and wondered how to make them yourself? That’s the magic of puffy paint! It’s a fun, tactile way to bring your art projects to life — whether you’re creating with kids or just indulging your inner artist. Puffy paint is soft, squishy, and super easy to make right in your own kitchen using simple, everyday ingredients.
Unlike traditional paint, puffy paint adds texture and dimension to your artwork. When it dries, it forms a raised, spongy surface that gives your craft a unique 3D effect. It’s perfect for art projects, decorating cards, or making homemade gifts. And the best part? You don’t need expensive art supplies or chemical-heavy paints — you can make it using things you probably already have at home.
In this step-by-step guide, we’ll cover everything — from the ingredients you’ll need to mixing tips, color variations, and creative ideas to make your puffy paint projects stand out. Ready to dive into some DIY fun? Let’s get started!
Ingredients You’ll Need
Making puffy paint is incredibly easy because it uses household staples. Here’s everything you need to prepare before you begin:
Basic Ingredients for Puffy Paint
- 1 cup of shaving cream (the fluffy, foamy kind—not gel)
- ½ cup of white glue (such as Elmer’s or any PVA glue)
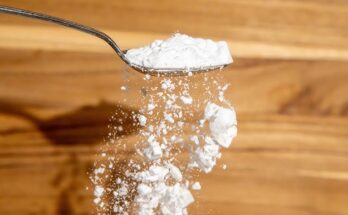
- ½ cup of flour (for thickness and structure)
- Food coloring or washable paint (your choice of colors)
These core ingredients create the perfect puffy paint texture — soft, airy, and vibrant. The shaving cream gives the paint its fluffiness, while glue helps it stick to surfaces and maintain its puffed shape even after drying. The flour adds a bit of body, making it more paint-like rather than runny.
Optional Add-Ons for Customization
If you want to get creative, you can take your puffy paint to the next level with these optional ingredients:
- Glitter – for sparkly puffy designs
- Essential oils – to add a pleasant scent (try lavender or lemon)
- Glow powder or neon pigments – for glow-in-the-dark effects
- Cornstarch – to make the paint thicker if you prefer more structure
Safe and Non-Toxic Materials
Always ensure the ingredients are non-toxic, especially when kids are involved. Use non-toxic glue and washable food colors so that the paint is completely safe for skin contact. Avoid using shaving gels or chemical-based foams that may irritate sensitive skin.
Tools and Supplies Required
To keep your workspace organized and mess-free, gather these simple tools:
- Mixing bowls (one for each color you plan to make)
- Spoons or spatulas for mixing
- Plastic squeeze bottles, piping bags, or ziplock bags (for application)
- Measuring cups
- Paintbrushes (optional, for finer details)
- Paper, cardboard, canvas, or fabric to paint on
If you want your puffy paint to last longer, you can store it in airtight containers. Make sure your containers are labeled with colors so you can grab them easily when it’s time to paint again.
Pro Tip: Use a ziplock bag as a makeshift piping bag! Just fill it with puffy paint, snip off a corner, and start drawing — it’s neat, fun, and perfect for kids.
Step-by-Step Guide to Making Puffy Paint
Now that you have your ingredients and tools ready, it’s time for the fun part — making the puffy paint! Follow these steps carefully for the best results.
Step 1: Gather Your Materials
Lay out all your ingredients and tools on a clean, flat surface. It’s easier (and less messy) if you prepare everything before mixing. Have paper towels or a damp cloth handy in case of spills.
Step 2: Mix the Base Ingredients
In a mixing bowl, combine ½ cup of flour, ½ cup of white glue, and 1 cup of shaving cream. Stir gently using a spoon or spatula. The key is to fold the mixture slowly — just like making whipped cream — so it stays fluffy and doesn’t lose air.
Keep mixing until you get a smooth, whipped texture. The consistency should be similar to thick frosting — not too runny, but soft enough to spread easily.
Step 3: Add Color and Texture
Once your base is smooth, divide the mixture into smaller bowls (depending on how many colors you want). Add a few drops of food coloring or washable paint into each bowl and stir gently.
You can also mix in glitter or glow powder at this stage for a magical twist. Be creative — try blending two colors to make new shades, or swirl them together for a marbled effect.
Step 4: Adjust Consistency
After adding color, check the texture of your puffy paint. If it feels too thick, add a teaspoon of water and mix slowly until it reaches a smooth, creamy consistency. If it’s too runny, sprinkle in a little more flour and stir until it thickens up again.
The perfect puffy paint should be light and fluffy — similar to whipped cream or meringue. It should hold its shape when applied but still spread easily with a brush or squeeze bottle. Remember, too much mixing can deflate the air bubbles that make it “puffy,” so stir gently!
Before using, test a small amount on paper. If it spreads nicely and holds its puff after drying, you’ve nailed it!
Step 5: Store and Use Your Puffy Paint
Once you’ve perfected your paint, you can start creating your masterpieces right away! Use squeeze bottles, brushes, or even your fingers to draw on paper, cardboard, or fabric. Puffy paint works beautifully for DIY cards, posters, t-shirts, and kids’ crafts.
If you’re not using all your paint at once, store it in airtight containers or resealable bags. Make sure there’s minimal air inside to keep it fresh and fluffy for longer. Typically, homemade puffy paint lasts about 2 to 3 days when refrigerated. Before reusing, give it a gentle stir to refresh the texture.
Pro Tip: For an extra raised effect, place your artwork in the microwave for 10–15 seconds (only if your surface is microwave-safe, like cardstock). The heat helps the paint puff up even more and set faster.
Tips for Best Results
Want that perfect fluffy finish? Here are a few expert tips to make your puffy paint creations stand out:
- Use fresh shaving cream. Old or watery foam can make the paint too thin.
- Mix gently. Overmixing will cause the paint to lose its air and flatten.
- Don’t overload the surface. A thin, even layer puffs better than a thick blob.
- Let it dry completely. Air-dry your designs for at least 12–24 hours for maximum puff and durability.
- Experiment with colors. Mix primary shades (red, yellow, blue) to create custom tones.
If your paint starts losing its fluff, a quick stir or a few pumps of shaving cream can revive it instantly.
Pro Tip: For a professional look, use squeeze bottles with narrow tips to control the paint flow and draw precise lines.
Fun Craft Ideas with Puffy Paint
Puffy paint is a game-changer when it comes to creative projects. Whether you’re crafting with your kids or designing unique gifts, there’s no limit to what you can make. Here are some fun ideas:
Puffy Paint Art for Kids
Kids absolutely love the tactile feel of puffy paint. It’s squishy, colorful, and encourages sensory play. Let them paint rainbows, clouds, animals, or abstract patterns. When the paint dries, they’ll be amazed to feel the raised, soft texture on their artwork.
DIY Greeting Cards
Make birthdays, holidays, and thank-you cards extra special by decorating them with puffy paint. You can create 3D hearts, stars, or even textured lettering for a handmade, personal touch.
Puffy Paint T-Shirt Designs
Yes, puffy paint can work on fabric too! Use it to decorate plain t-shirts, tote bags, or hats. Just be sure to let the paint dry fully (or use a blow dryer on low heat to speed up the process). Once dry, the paint becomes flexible yet durable enough for wear.
Creative Tip: Outline your designs with black puffy paint for a bold, cartoon-style effect. Kids love this because it makes their artwork pop!
Cleaning and Storage Tips
Cleaning up after a puffy paint session doesn’t have to be a hassle. Here’s how to keep your supplies and workspace neat:
- Wash mixing bowls and spoons immediately with warm, soapy water before the paint dries.
- Wipe surfaces quickly — puffy paint can harden if left to dry.
- For brushes and squeeze bottles, rinse them thoroughly to remove any leftover paint.
- Store leftover paint in airtight containers in the refrigerator. Stir gently before the next use.
If your paint starts to separate after a few days, just give it a quick mix — it’s usually good as new.
Pro Tip: Always label your stored paints with the color and date you made them. This helps you track freshness and avoid waste.
Safety and Allergy Considerations
Homemade puffy paint is generally safe, but it’s always good to take a few precautions — especially when crafting with kids.
- Use non-toxic and child-safe ingredients like washable glue and food coloring.
- Avoid shaving creams with strong fragrances or chemicals if your child has sensitive skin.
- Keep the paint away from the mouth and eyes.
- If anyone in your household has allergies to wheat or gluten, replace flour with cornstarch or rice flour for a hypoallergenic version.
Always supervise young children during the craft process to prevent accidental ingestion or messes.
Common Mistakes to Avoid
Even simple DIY recipes can go wrong without a little know-how. Here are some common mistakes and how to fix them:
- Using too much glue: Makes the paint sticky and heavy. Stick to the measured ratio.
- Overmixing: Deflates the air bubbles, making the paint flat.
- Adding too much water: Thins the paint and reduces puffiness.
- Not letting it dry fully: Can cause cracking or smearing.
- Microwaving on the wrong surface: Only microwave-safe materials like cardstock should be used.
Quick Fix: If your puffy paint flattens while drying, remix with a bit more shaving cream and apply a thinner layer next time.
Variations of Puffy Paint Recipes
Want to experiment? Try these fun variations for different effects:
Microwave Puffy Paint
Make your art extra fluffy! Mix the same recipe, apply it on thick paper, and microwave for 10–20 seconds. The paint will puff up beautifully as it dries.
Glow-in-the-Dark Puffy Paint
Add glow pigment powder or glow-in-the-dark paint to your mix for nighttime fun. Perfect for stars, planets, or Halloween crafts!
Scented Puffy Paint
Mix a few drops of essential oils (like lavender, vanilla, or peppermint) into the paint. It smells amazing and adds a sensory twist to your projects.
Puffy Paint for Educational Activities
Puffy paint isn’t just a fun craft material—it’s also a fantastic educational tool for kids. Teachers, parents, and homeschoolers can use it to make learning more interactive and sensory-based. It encourages creativity, fine motor skills, and hands-on engagement, which are crucial for early development.
Learning Through Art
Children can use puffy paint to learn letters, numbers, and shapes. For example, write the alphabet on a piece of cardboard with puffy paint and let your child trace over it with their fingers once it’s dry. This tactile learning method helps them memorize letters faster and improves hand-eye coordination.
You can also create math-related activities. Draw numbers and simple equations using puffy paint, allowing kids to visualize and touch them as they count. The texture makes learning more engaging and less intimidating for young learners.
Art teachers often use puffy paint to teach color mixing. Since the paint holds its form, it’s easy to show how two colors blend together without the mess of liquid paints. It’s perfect for hands-on color theory lessons in early art education.
Sensory Play Ideas
Sensory play with puffy paint is an incredible experience for toddlers and preschoolers. The soft, squishy texture stimulates their sense of touch and encourages curiosity. You can spread it on a tray and let kids draw shapes or patterns with their fingers.
Try using it in themed sensory activities—like making puffy snow for winter crafts, fluffy clouds for weather lessons, or colorful textured rainbows for fun visual exploration. Sensory play not only supports creativity but also helps children calm down and focus, making it a great activity for relaxation and mindfulness.
FAQs about Puffy Paint Recipe
1. How long does homemade puffy paint last?
Typically, puffy paint stays fresh for 2 to 3 days when stored in an airtight container in the refrigerator. Stir gently before reuse to restore its texture.
2. Can I use puffy paint on fabric?
Yes! You can use it to decorate t-shirts, tote bags, or hats. Just let it dry completely (or use a hairdryer on low heat) before wearing. It’s best suited for decorative projects rather than machine-washable designs.
3. Why did my puffy paint flatten after drying?
This usually happens when the paint mixture is too thin or overmixed. Add a little more shaving cream and flour to improve the consistency next time.
4. Can I make puffy paint without shaving cream?
Yes, you can substitute shaving cream with whipped foam soap or use a microwave puffy paint recipe (flour, salt, water, and food coloring). The texture will be slightly different but still 3D when dry.
5. Is puffy paint safe for kids and toddlers?
Absolutely—if you use non-toxic and washable ingredients. Always supervise young children and ensure they don’t ingest the paint.
Conclusion
Making homemade puffy paint is one of the simplest yet most satisfying DIY projects you can try. It’s inexpensive, fun, and endlessly customizable. Whether you’re crafting with your kids, decorating gifts, or exploring your own creativity, puffy paint adds that extra touch of texture and life to your artwork.
From fluffy clouds and rainbows to 3D greeting cards and custom t-shirts, the possibilities are endless. Plus, since it’s made with safe, everyday ingredients, it’s perfect for family-friendly craft sessions or classroom activities.
So, next time you want to create something fun and colorful, skip the store-bought paints and whip up your own batch of homemade puffy paint. It’s quick, budget-friendly, and guaranteed to bring smiles to everyone’s faces!


