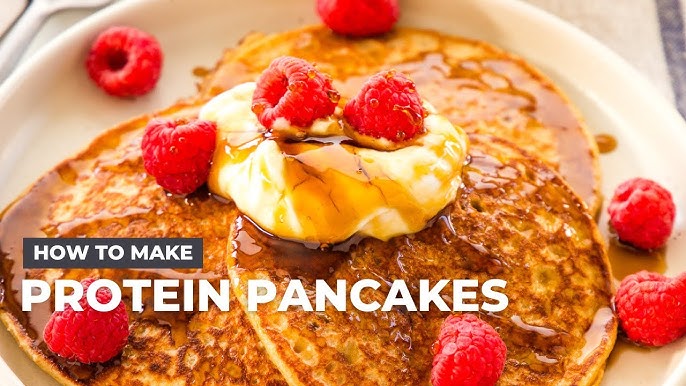
Protein Pancake Recipe: Ever bite into a stack of pancakes only to feel sluggish an hour later? Traditional pancakes are typically loaded with refined carbs and sugars, giving you that instant energy rush—followed by the dreaded crash. Protein pancakes flip the script. They are rich in protein, lower in carbs, and designed to fuel your day with sustainable energy. Whether you’re bulking up, trimming down, or just trying to eat clean, protein pancakes give you the satisfaction of a hearty breakfast without the guilt.
What makes them stand out isn’t just the macros. Protein pancakes can be crafted using a wide variety of ingredients—from whey protein powder to Greek yogurt, from oats to almond flour. You can personalize them according to your fitness goals and dietary needs. Want more fiber? Add flaxseed. Need more flavor? Mix in vanilla or cinnamon. The versatility is endless, and the outcome is deliciously wholesome.
Health Benefits of Protein Pancakes
Not only are protein pancakes tasty, but they also come packed with serious health perks. First, the high protein content helps with muscle repair and growth. This is especially crucial post-workout, making these pancakes a popular choice for fitness enthusiasts.
Second, they’re typically lower in sugar and higher in fiber, which supports blood sugar stability and improves digestion. Plus, if you’re aiming for weight loss, the protein helps keep you full longer—curbing those mid-morning snack cravings.
Another win? They’re easy to make gluten-free or dairy-free depending on your needs. Unlike processed breakfast options, you control every ingredient. No additives, no preservatives—just clean, muscle-friendly food that starts your day on the right foot.
Essential Ingredients for Protein Pancakes
High-Quality Protein Sources
The backbone of any good protein pancake recipe is—you guessed it—protein. But not all protein sources are created equal. Here are a few excellent options:
- Whey Protein Powder: Fast-digesting and packed with amino acids.
- Casein Protein: Slow-releasing, ideal for a more sustained energy release.
- Plant-Based Proteins: Like pea, brown rice, or hemp—great for vegans.
- Eggs: Natural source of complete protein and helps bind the batter.
- Greek Yogurt or Cottage Cheese: Adds creaminess and protein simultaneously.
Pick a protein that aligns with your dietary needs. If you’re lactose intolerant or vegan, go for a plant-based powder. If you’re prepping for a workout, whey is your best friend.
Recommended Flours and Binders
Flour plays a critical role in giving your pancakes the right texture. While all-purpose flour might be the norm, here are healthier alternatives:
- Oat Flour: Rich in fiber and naturally gluten-free.
- Almond Flour: Adds a nutty flavor and is low in carbs.
- Coconut Flour: Super absorbent, so a little goes a long way.
- Whole Wheat Flour: Offers more nutrients than white flour.
For binding, eggs usually do the job. But if you’re vegan, flaxseed mixed with water or mashed banana can work wonders.
Sweeteners and Flavor Options
Let’s be real—no one wants a bland pancake. The good news? You don’t need processed sugar to make them delicious.
- Natural Sweeteners: Like honey, maple syrup, agave, or mashed fruits.
- Spices and Extracts: Think cinnamon, nutmeg, vanilla extract, or even cocoa powder.
- Add-Ins: Blueberries, dark chocolate chips, nuts, or shredded coconut can level up the flavor game.
The key here is balance. Don’t overload the batter. Let the flavors complement the protein, not overpower it.
Tools and Equipment Needed
Basic Kitchen Tools
Making protein pancakes doesn’t require a high-tech kitchen setup. You can whip up a batch using common tools:
- Mixing Bowls: One for dry, one for wet ingredients.
- Measuring Cups & Spoons: Precision matters for consistent results.
- Whisk or Electric Mixer: Helps blend the ingredients smoothly.
- Spatula: Essential for flipping without destroying your pancakes.
- Non-Stick Pan or Griddle: Ensures even cooking and less mess.
Optional Gadgets to Enhance the Process
Want to go pro? These optional tools can take your pancake game up a notch:
- Blender or Food Processor: Great for combining ingredients into a super-smooth batter, especially if you’re using oats or cottage cheese.
- Pancake Dispenser: For evenly shaped, mess-free pancakes.
- Griddle with Temperature Control: Allows you to cook multiple pancakes evenly and quickly.
Bottom line—don’t let equipment stop you. If you’ve got a stove and a pan, you’re ready to roll.
Step-by-Step Guide to Making Protein Pancakes
Step 1: Gather Your Ingredients
Prep is everything. Start by laying out all your ingredients on the kitchen counter. Here’s a basic ingredient list:
- 1 scoop of protein powder (whey or plant-based)
- 1/2 cup oat flour
- 1 egg (or flax egg for vegan)
- 1/4 cup milk (dairy or plant-based)
- 1/2 banana (for sweetness and moisture)
- 1/2 tsp baking powder
- 1/2 tsp vanilla extract
- Pinch of salt
- Optional: blueberries, chocolate chips, nuts
Having everything in front of you not only speeds up the process but also ensures you don’t forget any crucial ingredient.
Step 2: Mix the Wet and Dry Ingredients Separately
This is where the magic begins. In one bowl, combine your dry ingredients—protein powder, flour, baking powder, and a pinch of salt. Mixing these first helps ensure that the leavening agent (baking powder) distributes evenly. A clump of baking powder is the last thing you want to bite into.
In another bowl, mash your banana until smooth, then whisk it together with the egg, milk, and vanilla extract. If you’re going the vegan route, remember to use a flax egg (1 tablespoon flaxseed meal + 2.5 tablespoons water, let it sit for 5 minutes). The wet mixture should be silky smooth—no lumps.
Separating the wet from the dry might seem tedious, but it’s crucial. It helps avoid overmixing later on, which can lead to dense or rubbery pancakes. Think of this as setting the foundation for fluffy, restaurant-worthy pancakes.
Step 3: Combine and Blend the Batter
Now it’s time to bring everything together. Slowly pour the wet ingredients into the dry while stirring gently. You’re looking for a thick yet pourable consistency—think slightly runny cake batter. If it’s too thick, add a splash more milk. Too runny? Toss in a tablespoon more flour or protein powder.
Pro tip: For extra fluffiness, let the batter sit for 5-10 minutes before cooking. This allows the flour to hydrate and the baking powder to activate, giving you that classic pancake puff.
Want ultra-smooth batter? Blend it! Using a blender can break down oats and banana to create a creamy texture. Just don’t over-blend—30 seconds is more than enough.
Once mixed, resist the temptation to keep stirring. Overworking the batter develops gluten, and nobody wants chewy protein pancakes. Less is more here.
Step 4: Heat the Pan and Cook the Pancakes
Set your non-stick pan or griddle over medium heat. To test if it’s hot enough, sprinkle a few drops of water—if they sizzle and evaporate quickly, you’re good to go.
Lightly grease the surface with coconut oil, butter, or non-stick spray. This not only prevents sticking but also adds flavor. Using a 1/4 cup measuring scoop, pour the batter into the pan to form evenly sized pancakes.
Cook each side for 2-3 minutes or until bubbles start forming on the surface and the edges look set. Flip gently with a spatula and cook the other side for another 1-2 minutes. The pancakes should be golden brown and slightly firm to the touch.
Don’t overcrowd the pan. Give each pancake some breathing room to cook evenly and make flipping easier. Cooking in batches? Keep the finished pancakes warm in a low oven (around 200°F) while you finish the rest.
Step 5: Flip, Finish, and Serve
Now comes the best part—serving! Stack those golden, fluffy protein pancakes high and get ready to dress them up.
Here’s where you can get creative with toppings (more on that in the next section). Whether you’re going for a drizzle of honey or a dollop of almond butter, make sure to balance flavor and nutrition. Your pancakes are protein-packed powerhouses—don’t ruin the healthiness with sugar overload.
Got leftovers? These pancakes store well in the fridge for up to 3 days and freeze beautifully. Just reheat in the toaster or microwave, and you’ve got a quick breakfast or snack ready to go.
This is your breakfast masterpiece—crafted with purpose, flavor, and nutrition in mind.
Topping Ideas for Protein Pancakes
Now that you’ve nailed the pancake base, it’s time to level up with toppings that are as nutritious as they are tasty. The goal here is to add layers of texture, color, and flavor without sabotaging your healthy start.
Sweet Toppings
Love your pancakes on the sweet side? Here are some wholesome options:
- Fresh Berries: Strawberries, blueberries, raspberries—they add antioxidants, fiber, and natural sweetness.
- Banana Slices: Naturally sweet and perfect for that tropical vibe.
- Nut Butters: Almond, peanut, or cashew butter add healthy fats and extra protein.
- Greek Yogurt: Creamy, tangy, and protein-rich—like frosting but better.
- Dark Chocolate Chips or Cacao Nibs: Adds indulgence without the sugar crash.
- Coconut Flakes or Chia Seeds: For added crunch and nutrients.
Savory Options
Not a sweet tooth? No problem. Go savory:
- Avocado Slices and Eggs: For a breakfast twist with healthy fats and extra protein.
- Smoked Salmon and Cream Cheese: Yes, it sounds wild—but it’s incredibly satisfying.
- Grated Cheese and Herbs: A great option if you’re pairing with a veggie scramble or having breakfast-for-dinner.
Balance is key. Combine flavors and textures that complement each other without overwhelming the base. Whether you’re going sweet, savory, or a bit of both, protein pancakes are the perfect canvas.
Tips for Perfect Protein Pancakes Every Time
Even with the best ingredients and intentions, pancakes can go from fluffy dream to rubbery flop fast. Let’s troubleshoot and refine the process to guarantee perfect pancakes every time.
Avoiding Common Mistakes
1. Don’t Overmix the Batter: This is pancake sin #1. Overmixing activates the gluten in flour, making your pancakes chewy instead of tender. Mix until ingredients are just combined—lumps are okay!
2. Use the Right Heat: Too hot, and your pancakes burn on the outside while staying raw inside. Too low, and they cook unevenly. Medium heat is your friend. Always preheat the pan and test with water droplets to make sure it’s ready.
3. Let the Batter Rest: Allowing your batter to sit for 5-10 minutes gives the leavening agents time to activate and the flour to absorb the liquid. This makes your pancakes fluffier and more cohesive.
4. Use a Non-Stick Surface: Even if you lightly grease a regular pan, a truly non-stick skillet or griddle works wonders for even browning and easy flipping.
5. Measure Batter Consistently: Using a 1/4 cup measure for each pancake ensures even cooking times and prevents a big mess from oversized, undercooked centers.
Adjusting Texture and Flavor
If your pancakes are too dense:
- Add a bit more milk or a splash of water to thin the batter.
- Use baking soda in combination with an acidic ingredient like yogurt or banana to help them rise more.
If they’re too dry:
- Add moisture with Greek yogurt, mashed banana, or a touch of oil or nut butter.
If they taste bland:
- Boost flavor with a dash of cinnamon, nutmeg, or vanilla extract. Don’t forget a pinch of salt—it enhances sweetness and flavor overall.
Tweak until you find your sweet spot. Making protein pancakes is part science, part art—and all about enjoying the journey.
Variations of Protein Pancakes
One of the greatest things about protein pancakes is how customizable they are. Whether you have dietary restrictions or simply want to shake up your breakfast routine, here are a few variations that still keep nutrition front and center.
Vegan Protein Pancakes
Ditching animal products? No problem! You can make killer vegan protein pancakes with these swaps:
- Egg Substitute: Use flaxseed or chia eggs.
- Milk Alternative: Almond, oat, soy, or coconut milk.
- Protein Powder: Opt for plant-based options like pea, hemp, or brown rice protein.
- Binder: Mashed bananas or applesauce add structure and moisture.
Tip: Add a tablespoon of apple cider vinegar to react with baking soda—it gives vegan pancakes a fluffier rise.
Gluten-Free Options
Celiac or gluten-sensitive? Swap regular flour for:
- Oat flour (certified gluten-free)
- Almond flour
- Coconut flour (be mindful—it absorbs a lot of moisture)
- Gluten-free all-purpose blends
Always check that your protein powder is gluten-free as well—many aren’t!
Low-Carb and Keto-Friendly Versions
If you’re watching carbs, here’s how to keep pancakes keto:
- Use almond flour or coconut flour
- Add eggs, cream cheese, or Greek yogurt
- Use a low-carb protein powder
- Skip sugary fruits and use stevia, erythritol, or monk fruit to sweeten
Serve with sugar-free syrup and a pat of butter for a comforting, guilt-free stack.
Nutritional Breakdown of a Basic Protein Pancake Recipe
Let’s break down the macros of a basic protein pancake recipe (per serving, makes about 3 small pancakes):
| Nutrient | Amount |
|---|---|
| Calories | 300-350 |
| Protein | 25-30g |
| Carbohydrates | 20-25g |
| Dietary Fiber | 4-6g |
| Sugars | 5-8g (natural) |
| Fats | 10-12g |
Keep in mind, this varies depending on ingredients. Add-ins like nut butter, chocolate chips, or different protein powders can alter the nutritional content. If you’re tracking macros, plug your exact ingredients into a calorie calculator app for precision.
These pancakes pack a powerful punch for breakfast, pre- or post-workout meals, or even an evening snack. Balanced macros make them ideal for almost any diet plan—from muscle building to fat loss.
FAQs about Protein Pancake Recipe
What ingredients do I need for a protein pancake recipe?
To make protein pancakes, you typically need protein powder, eggs, oats or flour, baking powder, milk (dairy or non-dairy), and optional ingredients like banana or Greek yogurt for added moisture and flavor. Sweeteners like honey or maple syrup are also popular additions.
Can I make protein pancakes without protein powder?
Yes, you can make protein pancakes without protein powder by using high-protein alternatives such as Greek yogurt, cottage cheese, or additional eggs. You can also use ingredients like almond flour or oats to help bind the pancakes while increasing their protein content.
Are protein pancakes healthy?
Protein pancakes can be a healthy option, especially when made with whole food ingredients and without added sugars. They provide a good balance of protein, carbs, and fats, making them a satisfying meal that can support muscle repair and growth, particularly after a workout.
How can I make my protein pancakes fluffy?
To make fluffy protein pancakes, ensure your baking powder is fresh as it’s a key ingredient for rise. Also, avoid overmixing the batter to keep the air bubbles intact. Letting the batter sit for a few minutes before cooking can also help the pancakes become fluffier as the baking powder activates.
Can protein pancakes be made vegan?
Yes, protein pancakes can easily be adapted for a vegan diet by using plant-based protein powder, substituting eggs with flax eggs or mashed bananas, and using dairy-free milk. Ensure all other ingredients like sweeteners and flavorings are vegan-friendly.
How do I store leftover protein pancakes?
Leftover protein pancakes can be stored in the refrigerator for up to 5 days. Ensure they are cooled to room temperature before storing them in an airtight container. You can also freeze them for up to 2 months, separating each pancake with parchment paper to prevent sticking.
Conclusion
Protein pancakes are more than just a trendy health food—they’re a powerhouse meal disguised as comfort food. Whether you’re into intense workouts, focused on healthy eating, or just looking to change up your breakfast game, these pancakes hit the mark. They’re easy to make, fun to customize, and packed with nutrients that your body will thank you for.
Now that you have the full step-by-step guide, what’s stopping you? Grab your ingredients, heat that skillet, and flip your way to a better breakfast!


