Protein Ball Recipe: Protein balls are small, energy-packed snacks that combine wholesome ingredients like oats, nut butter, honey, and protein powder into bite-sized balls of deliciousness. Think of them as your go-to snack when hunger strikes between meals. They’re like energy bars but better – easier to make, cheaper, and customizable to your taste. The best part? You don’t even have to bake them!
These no-bake treats are made with natural, nutrient-dense ingredients, giving your body a quick boost of protein and energy. Whether you’re a gym-goer, a busy professional, or a parent looking for healthy snacks for the kids, protein balls can be your secret weapon. They’re super versatile and you can make them with as few as three ingredients or go all out with flavors like chocolate, peanut butter, coconut, or even matcha.
Why Protein Balls Are a Healthy Snack Option
Snacking can often feel like a guilty pleasure – especially when it involves chips, cookies, or candy. Protein balls offer a guilt-free alternative that keeps you satisfied and fueled throughout the day. Here’s why they deserve a spot in your snack rotation:
- High in Protein: As the name suggests, protein balls are packed with protein – essential for muscle repair, keeping you full, and stabilizing blood sugar.
- Energy-Boosting: With a combo of complex carbs and healthy fats, they give you sustained energy, not a sugar crash.
- Naturally Sweetened: Most recipes use honey, dates, or maple syrup, making them a cleaner option than store-bought sweets.
- Customizable: Whether you’re vegan, gluten-free, or nut-free, there’s a recipe for you.
- On-the-Go Friendly: Make a batch, store in the fridge, and grab one when you’re rushing out the door.
Essential Ingredients for Protein Balls
Core Ingredients
Let’s break down the foundation of a solid protein ball. While the exact recipe can vary, most include these staples:
- Rolled Oats: A great base that adds texture and fiber.
- Nut Butter: Acts as the binder and adds healthy fats. Popular choices are peanut butter, almond butter, and cashew butter.
- Sweetener: Adds moisture and taste. Think honey, maple syrup, or mashed dates.
- Protein Powder: This is where the “protein” part kicks in. Use whey, plant-based, or even collagen protein depending on your dietary needs.
These four ingredients create the basic structure of protein balls. From here, you can build your own masterpiece by mixing in additional flavors and nutrients.
Optional Add-ins for Flavor and Nutrition
If you’re feeling fancy, there are countless ways to jazz up your protein balls. Here are some ideas:
- Chia seeds or flaxseeds for omega-3s and fiber.
- Mini chocolate chips for a dessert vibe.
- Dried fruits like cranberries, raisins, or chopped apricots for natural sweetness.
- Coconut flakes for texture and tropical flair.
- Spices like cinnamon, vanilla extract, or even cocoa powder.
- Crushed nuts for a crunchy texture.
Customizing your protein balls means you’ll never get bored. It’s like creating a new flavor every week – your own healthy snack bar collection!
Tools and Equipment You’ll Need
Must-Have Kitchen Tools
Making protein balls doesn’t require a ton of fancy equipment. In fact, you probably already have what you need:
- Mixing bowl – Preferably large, for easy stirring.
- Wooden spoon or spatula – To combine the ingredients.
- Measuring cups and spoons – Accuracy helps for consistent results.
- Baking sheet or plate – To lay out the rolled balls before chilling.
- Refrigerator – For setting them.
Optional Tools to Make Things Easier
These tools aren’t mandatory, but they can speed up the process and reduce the mess:
- Food processor – Especially useful if you’re using dates or want a smoother texture.
- Cookie scoop – Ensures uniform size and saves time.
- Parchment paper – Keeps things tidy and prevents sticking.
- Storage container with lid – For keeping your protein balls fresh and organized in the fridge.
Step-by-Step Guide to Making Protein Balls
Step 1 – Gather Your Ingredients
Before diving into the recipe, lay out everything you need. It saves time and makes the whole process smoother. Decide on your core base (oats, nut butter, sweetener, and protein powder), then choose your optional mix-ins based on your cravings or dietary needs.
Here’s a sample base recipe:
- 1 cup rolled oats
- 1/2 cup peanut butter
- 1/4 cup honey
- 1/2 cup vanilla protein powder
- 2 tbsp chia seeds (optional)
- 1/4 cup mini chocolate chips (optional)
Make sure your nut butter is room temperature – it’s easier to mix!
Step 2 – Mix the Dry Ingredients
In a large mixing bowl, combine all the dry ingredients. That includes:
- Rolled oats
- Protein powder
- Chia seeds
- Chocolate chips or nuts (if using)
Stir everything together until evenly distributed. This step ensures you don’t end up with clumps of powder or all the mix-ins in one corner.
Step 3 – Add the Wet Ingredients
Next, pour in the wet ingredients:
- Nut butter
- Honey or maple syrup
Use a spatula or wooden spoon to mix until everything starts to stick together. The mixture should be thick but pliable, like cookie dough. If it’s too dry, add a little more honey or a splash of almond milk. Too wet? Add a bit more oats or protein powder.
Step 4 – Combine and Roll into Balls
Now that you’ve got a well-mixed dough-like consistency, it’s time to shape those bites! Scoop out small portions of the mixture – about one tablespoon each – and roll them between your palms to form evenly-sized balls. If you have a cookie scoop, use it to get uniform portions.
Rolling can be a bit sticky, especially if your nut butter is super creamy or you added sticky sweeteners. Here are a few quick hacks:
- Lightly grease your hands with coconut oil or water to prevent sticking.
- Chill the mixture in the fridge for 10–15 minutes before rolling for easier handling.
- Press in extra ingredients like chocolate chips or shredded coconut as you roll, if desired.
Lay the balls out on a baking tray or plate lined with parchment paper. Try not to stack them yet—they’ll be softer at this point and need to firm up a little before storing.
Depending on your batch size and scoop, you should get around 12–16 balls from a standard recipe. That’s nearly two weeks’ worth of daily snacks!
Step 5 – Chill and Store Properly
Once rolled, pop your protein balls into the fridge for about 30–60 minutes. This allows them to firm up and hold their shape. After chilling, transfer them into an airtight container.
Storage tips:
- Refrigerator: They’ll last 7–10 days in the fridge.
- Freezer: Want to make a big batch? Store them in the freezer for up to 3 months. Just thaw for 5–10 minutes before eating.
One of the best things about protein balls is how portable they are. Pack a few in a small snack box or ziplock bag, and you’ve got a quick energy boost anytime, anywhere—pre-workout, mid-afternoon, or on your next road trip.
Tips for Perfect Protein Balls Every Time
How to Get the Right Consistency
Getting the texture just right can make or break your protein ball experience. Too crumbly and they’ll fall apart. Too wet and they’ll stick to everything. Here’s how to master the mix:
- If your mixture is too dry, add a bit more nut butter, honey, or even a splash of almond milk.
- If it’s too sticky, toss in more oats, protein powder, or ground flaxseed to absorb moisture.
- Letting the mix sit for 5–10 minutes before rolling helps the oats and chia seeds absorb moisture, improving binding.
Temperature also matters. If your kitchen is warm, the nut butter may be too runny. Chill the mixture briefly before shaping. Conversely, if it’s too cold, let it sit out a bit before rolling.
How to Customize for Dietary Needs
One of the coolest things about protein balls? You can tweak them to fit almost any dietary lifestyle.
- Vegan? Use plant-based protein powder and swap honey for maple syrup or agave.
- Nut-free? Use sunflower seed butter and avoid nut-based mix-ins.
- Gluten-free? Choose certified gluten-free oats and protein powder.
- Low-carb or keto? Reduce or skip the oats and use almond flour or coconut flour as a base.
You can even switch up flavors with simple substitutions:
- Add matcha powder or espresso for an energy kick.
- Use cocoa powder for a chocolate fix.
- Incorporate zest from lemons or oranges for a fresh, citrusy twist.
The sky’s the limit when it comes to variety. With just a few base ingredients and a little creativity, you can make dozens of different types of protein balls—and never get bored!
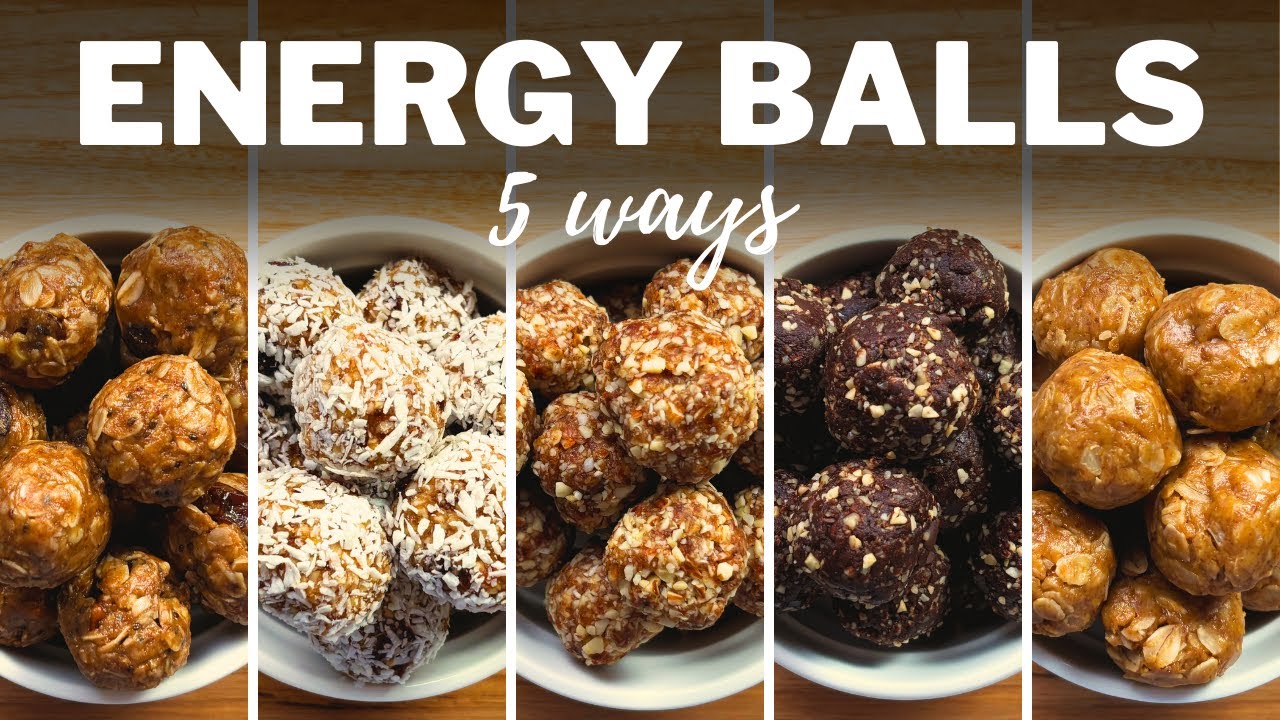
Delicious Flavor Variations to Try
1. Chocolate Peanut Butter Protein Balls
This one’s a classic. Chocolate and peanut butter? A match made in snack heaven.
Ingredients:
- 1 cup rolled oats
- 1/2 cup peanut butter
- 1/4 cup honey
- 1/2 cup chocolate protein powder
- 1 tbsp cocoa powder
- 1/4 cup mini dark chocolate chips
Mix as usual and roll. These taste like dessert but with none of the guilt.
2. Coconut Almond Joy Bites
Craving something tropical with a candy-bar vibe?
Ingredients:
- 1 cup oats
- 1/2 cup almond butter
- 1/4 cup maple syrup
- 1/2 cup vanilla protein powder
- 1/3 cup shredded coconut
- Optional: a few chopped almonds and dark chocolate drizzle
These taste like an Almond Joy but fuel your day instead of spiking your sugar.
3. Mocha Hazelnut Power Balls
Need a caffeine fix? Here’s your snack.
Ingredients:
- 1 cup oats
- 1/2 cup hazelnut butter
- 1/4 cup honey
- 1/2 cup chocolate or mocha protein powder
- 1 tsp espresso powder
- 2 tbsp mini chocolate chips
These are amazing with coffee and make you feel like you’re indulging at a fancy café.
When and How to Enjoy Protein Balls
Protein balls aren’t just great snacks—they’re also versatile enough for different situations:
- Pre-Workout: Eat one 30 minutes before your session for a quick fuel-up.
- Post-Workout: Ideal for muscle recovery when paired with a protein shake.
- Mid-Morning or Afternoon Snack: Keep energy levels steady and cravings at bay.
- Meal Replacement: Grab 2–3 if you’re in a rush and need a quick on-the-go breakfast.
Want to level up your snack game? Pair your protein ball with:
- A cup of green tea for a metabolism boost.
- A banana post-workout for potassium and energy.
- A dollop of Greek yogurt for extra protein and probiotics.
They’re also kid-approved and lunchbox-friendly, making them perfect for the whole family.
Common Mistakes to Avoid
Let’s avoid those rookie errors, shall we?
Mistake 1: Using Too Much Protein Powder
Too much can dry out your mixture and leave a chalky aftertaste. Balance is key.
Mistake 2: Skipping the Chill Time
The chill step isn’t just for firmness—it helps everything bind together. Don’t rush it.
Mistake 3: Not Tasting Before Rolling
Always taste the mix before rolling. Want it sweeter? Add honey. More flavor? A dash of vanilla or cinnamon helps.
Mistake 4: Using Low-Quality Ingredients
Fresh nut butter, good oats, and high-quality protein make all the difference.
Mistake 5: Not Sealing Properly During Storage
Exposure to air = dry, stale bites. Use airtight containers.
FAQs about Protein Ball Recipe
Q1: How long do protein balls last?
Protein balls typically last up to 7 days in the fridge when stored in an airtight container. You can also freeze them for up to 3 months.
Q2: Can I make protein balls without protein powder?
Yes! You can replace protein powder with nut butter, oats, chia seeds, or powdered milk for a natural protein boost.
Q3: Are protein balls good for weight loss?
Absolutely—if eaten in moderation. Protein balls are great for curbing hunger, supporting metabolism, and helping with portion control.
Q4: Can I use honey instead of dates?
Yes, honey is a great natural sweetener substitute. It adds moisture and sweetness, just like dates.
Q5: Are these recipes kid-friendly?
Yes! Most protein ball recipes are made with simple, wholesome ingredients that are perfect for kids’ lunchboxes or after-school snacks.
Q6: How many protein balls should I eat in a day?
For adults, 1–2 protein balls per serving is ideal as a healthy snack or pre/post-workout energy bite.
Conclusion
Protein balls are the ultimate DIY snack: simple to make, endlessly customizable, and packed with energy and nutrients. Whether you’re craving chocolate, coconut, coffee, or something fruity, there’s a protein ball for you. They’re quick, convenient, and way better for you than grabbing a candy bar or processed snack. Once you try making them, they’ll become a staple in your kitchen.
So go ahead, mix up your favorite flavors and enjoy delicious, nutritious bites whenever you need a quick boost. Trust me—your taste buds and your body will thank you.


