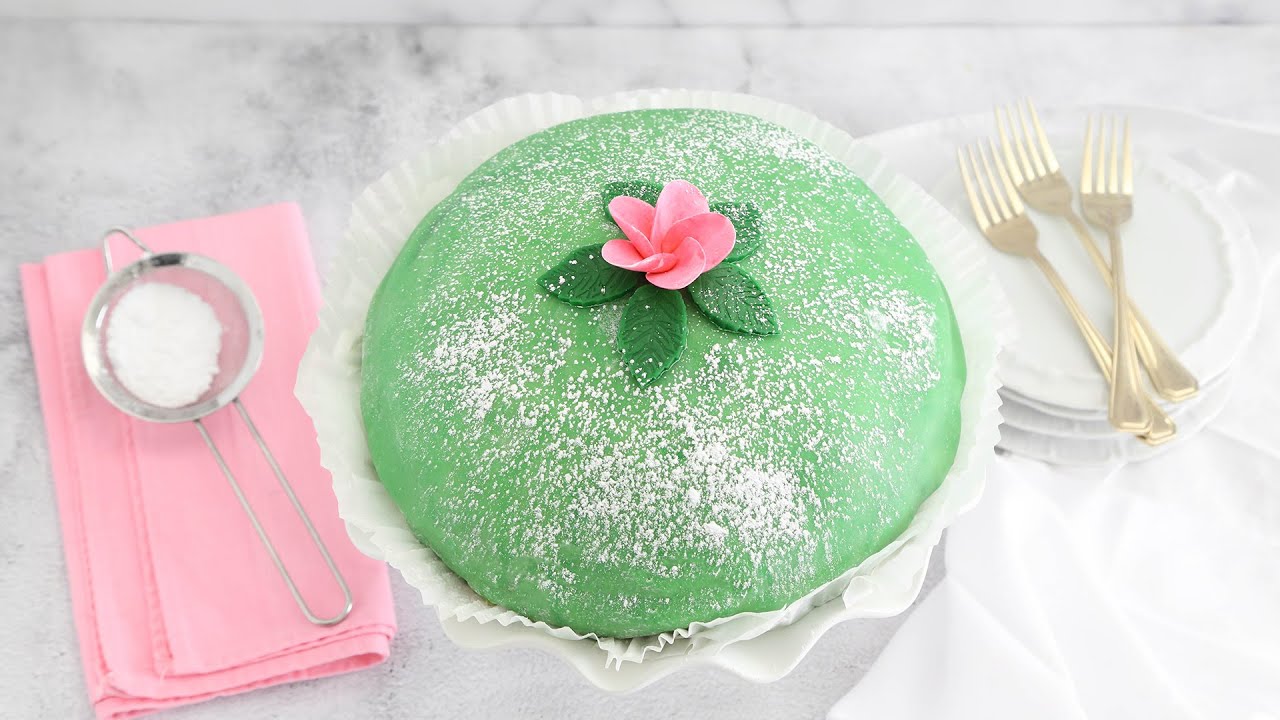
Princess Cake Recipe: If you’ve ever laid eyes on a Princess Cake, you know it’s something special. With its signature pale green marzipan dome, elegant presentation, and luscious layers of sponge, jam, custard, and whipped cream, the Swedish Prinsesstårta is the queen of celebration cakes. Originally created in the early 20th century for Swedish princesses, this cake has become a beloved dessert around the world, especially in Scandinavia.
But don’t be fooled by its royal appearance—this cake is absolutely achievable at home! Whether you’re planning a birthday, a tea party, or simply want to challenge your baking skills, this guide will walk you through every step of the process. We’ll go over all the ingredients, techniques, and tips you need to make a stunning Princess Cake that tastes as amazing as it looks.
Let’s get started with what you’ll need.
Ingredients You’ll Need
Here’s a breakdown of everything you need to make this royal masterpiece:
For the Sponge Cake:
- 4 large eggs (room temperature)
- ¾ cup granulated sugar
- ¾ cup all-purpose flour
- 1 teaspoon baking powder
- Pinch of salt
For the Vanilla Custard Filling:
- 2 cups whole milk
- 4 egg yolks
- ⅓ cup granulated sugar
- 3 tablespoons cornstarch
- 1 teaspoon pure vanilla extract
- 1 tablespoon butter
For the Whipped Cream:
- 2 cups heavy cream
- 2 tablespoons powdered sugar
- ½ teaspoon vanilla extract
For the Marzipan Covering:
- 14 oz marzipan (store-bought or homemade)
- Green food coloring (gel works best)
- Powdered sugar (for dusting)
Optional:
- Raspberry jam (about ½ cup)
- Marzipan rose (for decoration)
- Extra powdered sugar for dusting the top
Tools & Equipment Needed
To make the Princess Cake successfully, these tools will be very helpful:
- 9-inch round cake pan
- Electric mixer or stand mixer
- Whisk
- Mixing bowls
- Saucepan (for custard)
- Offset spatula
- Rolling pin
- Piping bag (optional)
- Cake turntable (optional, but helpful for assembling)
- Cling film or parchment paper
Step-by-Step Guide for Princess Cake
Step 1: Prepare the Sponge Cake
Whisk eggs and sugar until very pale and tripled in volume. Gently fold in sifted flour to keep air intact. Bake immediately. Avoid overmixing to prevent a dense cake.
Step 2: Make the Vanilla Custard
Heat milk with vanilla. Whisk egg yolks, sugar, and cornstarch, then slowly temper with hot milk. Cook gently, whisking constantly, until thick and smooth. Strain if needed to remove lumps. Cool completely.
Step 3: Whip the Cream
Whip cold heavy cream to soft peaks. Add a little sugar and vanilla. Do not overwhip—cream should be smooth and spreadable.
Step 4: Assemble the Cake Layers
Slice the sponge into layers. Place the first layer on a plate, spread raspberry jam, add custard, then a layer of cream. Repeat evenly.
Step 5: Shape the Dome
Pile whipped cream on top and gently shape into a smooth dome using a spatula. Chill the cake to set the shape.
Step 6: Prepare and Color the Marzipan
Knead marzipan with a small amount of green food coloring until evenly colored. Dust lightly with powdered sugar and roll thin.
Step 7: Cover the Cake with Marzipan
Carefully drape marzipan over the cake. Smooth gently from the top down to avoid cracks. Trim excess at the base.
Step 8: Decorate the Princess Cake
Form a rose from pink marzipan and add green leaves. Dust lightly with powdered sugar for the classic finish. Chill before serving.
Tips for the Best Princess Cake
Want your cake to truly impress? Keep these expert tips in mind:
- Use room-temperature ingredients for the sponge. It helps the batter trap more air.
- Chill between steps—especially before covering with marzipan.
- Don’t overfill with custard or jam or it’ll ooze out during assembly.
- Use gel food coloring to avoid making the marzipan too sticky.
- Store the cake in the fridge, but let it sit at room temperature for 15–20 minutes before serving for the best texture.
Variations of the Princess Cake
Feeling adventurous? There are so many fun ways to twist the traditional Princess Cake:
- Chocolate Princess Cake: Add cocoa powder to the sponge and drizzle ganache on top.
- Mini Princess Cakes: Use a cupcake pan to create individual domes.
- Holiday Twist: Use strawberry jam and color the marzipan red or gold for Christmas.
Vegan or Gluten-Free? You can absolutely adapt the recipe. Use gluten-free flour for the sponge and coconut cream for whipping.
Nutritional Information
Here’s a rough estimate per slice (based on 12 servings):
| Nutrient | Amount |
|---|---|
| Calories | 390–450 kcal |
| Total Fat | 22g |
| Carbohydrates | 45g |
| Sugars | 30g |
| Protein | 6g |
| Fiber | 1g |
Note: This is an estimate. Exact numbers depend on ingredient brands and portion sizes.
FAQs about Princess Cake Recipe
1. Can I use store-bought sponge cake?
Yes, if you’re short on time, store-bought sponge cake can be a helpful shortcut. Just make sure it’s light and not too sweet.
2. What can I use instead of marzipan?
You can use fondant, but the flavor will be different. Another alternative is modeling white chocolate, though it’s a bit trickier to work with.
3. How far in advance can I make this cake?
You can assemble the cake up to 2 days ahead. Just keep it refrigerated and wait to dust with powdered sugar right before serving.
4. Can I freeze Princess Cake?
It’s not ideal due to the whipped cream, but you can freeze the sponge layers and custard separately and assemble fresh.
5. Is Princess Cake gluten-free?
Traditionally, no—but it can be made gluten-free by using GF flour for the sponge and checking that your marzipan is GF-certified.
Conclusion
And there you have it—a full, detailed guide to making a truly royal dessert, the Princess Cake. It might take a bit of time and effort, but the end result is more than worth it. The delicate balance of flavors, the stunning presentation, and the satisfaction of making it from scratch are simply unbeatable.
Whether you’re baking for a loved one, a celebration, or just because, your homemade Princess Cake will definitely steal the spotlight.
So, tie on your apron, channel your inner pastry chef, and create a dessert fit for royalty!

