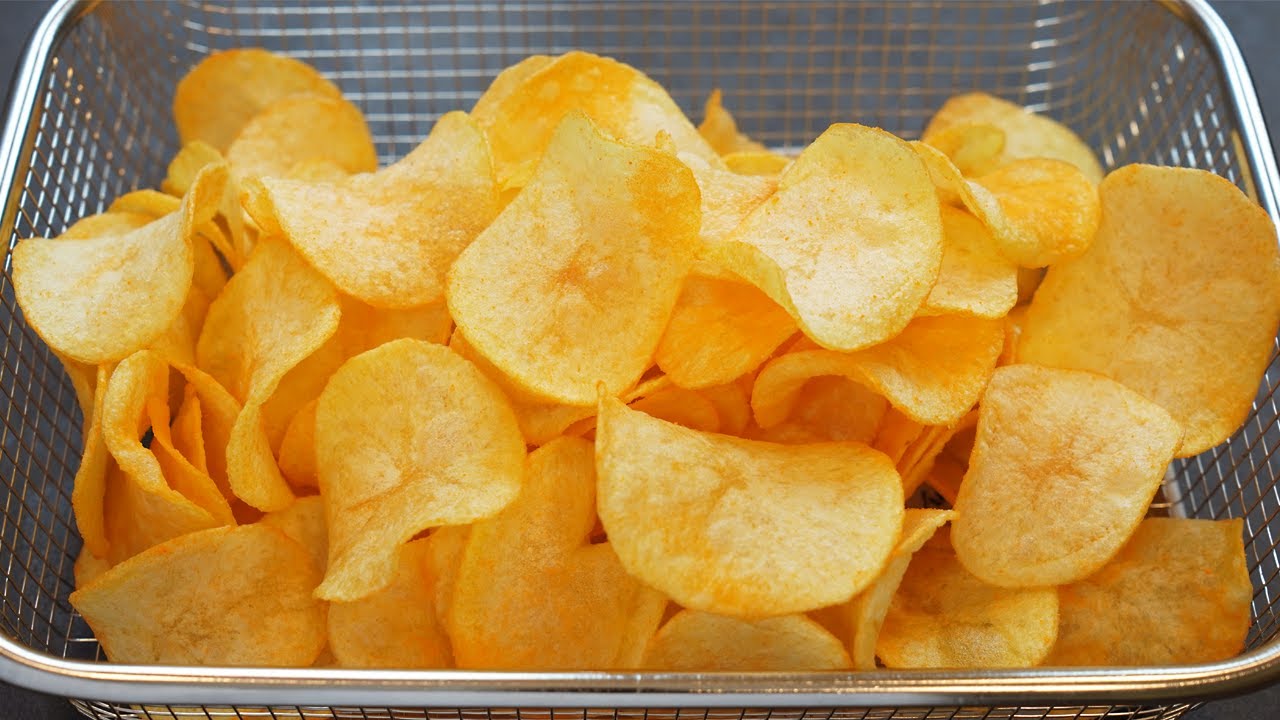
Potato Chip Recipe: Who doesn’t love potato chips? That golden crunch, the salty bite, and the satisfying snap with every munch. Potato chips are one of the most loved snacks around the world—and guess what? You don’t have to buy a bag from the store to enjoy them. Making your own potato chips at home is easier than you think, and the results? Oh, they’re worth every minute.
Whether you’re craving something salty during a movie night or need a quick appetizer for guests, homemade potato chips are a crowd-pleaser. Plus, you get full control over the ingredients and flavors—so say goodbye to preservatives and hello to pure potato bliss.
Benefits of Homemade Potato Chips
Let’s talk about why homemade is better. First, there’s the health factor. Most store-bought chips are packed with additives, preservatives, and excessive sodium. When you make them yourself, you choose the oil, the seasoning, and even how much salt to use.
Second, the customization is unbeatable. Want a barbecue flavor? Done. How about cheesy jalapeño or vinegar & sea salt? Go for it. The possibilities are endless.
Lastly, making chips at home is cost-effective. A single potato can turn into a bowl full of crispy delights, and that’s not something you can say for that overpriced snack bag at the supermarket.
Types of Potatoes to Use
Not all potatoes are created equal—especially when it comes to chip-making. For the crispiest, most delicious chips, choose high-starch potatoes like:
- Russet Potatoes – These are the gold standard. They fry beautifully and give you that iconic crunch.
- Yukon Gold – Slightly creamier texture, but still crisp up nicely.
- Maris Piper (UK) – Another great option for that golden finish.
Avoid waxy potatoes like red potatoes or new potatoes, which hold moisture and won’t get as crispy.
List of Ingredients You’ll Need
Here’s what you’ll need to make your own crispy, golden chips:
Basic Ingredients:
- 2–3 large russet potatoes (or any high-starch variety)
- Vegetable oil (canola, sunflower, or peanut oil)
- Salt to taste
Optional Flavors and Add-ins:
- Garlic powder
- Onion powder
- Paprika or smoked paprika
- Black pepper
- Chili powder
- Vinegar (for salt & vinegar flavor)
- Parmesan cheese
- Fresh or dried herbs (rosemary, thyme, dill)
You can mix and match according to your taste—get creative with it!
Essential Tools and Equipment
You don’t need a commercial fryer to make potato chips at home. Here’s what you need:
- Sharp knife or mandoline slicer (for super thin, even slices)
- Large mixing bowls
- Paper towels or a clean kitchen towel
- Heavy-bottomed frying pan or deep pot
- Slotted spoon or tongs
- Cooling rack or plate lined with paper towels
- Thermometer (optional but helpful)
Make sure to use a deep pot if frying on the stove to avoid oil splatter. Safety first!
Preparation Tips Before You Begin
Before jumping into the frying action, it’s all about the prep. Here’s what to keep in mind:
- Wash and peel your potatoes (unless you prefer the skin on).
- Use a mandoline slicer if you want ultra-thin, uniform slices. Thinness equals crispiness!
- Soak the slices in a bowl of cold water for at least 30 minutes (or up to a few hours). This helps remove excess starch and prevents sticking.
- After soaking, dry the slices thoroughly. Any water on the surface can cause oil to splatter dangerously and prevent proper crisping.
The key to perfectly crunchy chips starts before the oil even heats up.
Step-by-Step Guide to Making Potato Chips
Alright, let’s dive into the main event. Here’s your step-by-step walkthrough:
Step 1: Wash and Peel Potatoes
Scrub the potatoes under cold running water. Peel them (if preferred), then rinse once more to remove any residual dirt.
Step 2: Slice Potatoes Thin
Use a mandoline for best results. Aim for slices that are about 1/16 inch (1.5 mm) thick. Uneven slices will cook unevenly—some will burn while others stay soggy.
Step 3: Soak in Cold Water
Place your slices into a large bowl of cold water. Let them soak for 30 minutes to 1 hour. You’ll notice the water turning cloudy—that’s the starch leaving the potato.
Step 4: Dry Thoroughly
Drain the water and pat the potato slices completely dry using paper towels or a clean kitchen towel. Wet potatoes in hot oil? That’s a disaster waiting to happen.
Step 5: Heat the Oil
Pour about 2–3 inches of oil into a deep pan or pot. Heat to 350°F (175°C). Use a thermometer if you have one, or test with a small slice—it should sizzle immediately.
Step 6: Fry in Batches
Drop the potato slices into the hot oil in small batches. Don’t overcrowd! Fry for 3–5 minutes or until golden brown and crisp, flipping occasionally.
Step 7: Drain and Season
Use a slotted spoon or tongs to transfer chips to a paper towel-lined plate. Immediately season with salt or your choice of flavoring while they’re still hot.
Alternative Cooking Methods
Not into deep frying? No problem. You can still enjoy crispy homemade potato chips without all the oil. Here are two healthier methods:
Baking Method
- Preheat your oven to 400°F (200°C).
- Arrange your thinly sliced and dried potato slices on a baking tray lined with parchment paper.
- Brush or spray each slice with a light coat of oil, then sprinkle with salt or your chosen seasoning.
- Bake for 15–20 minutes, flipping halfway through. Keep an eye on them—they can burn fast toward the end!
- Once golden and crisp, let cool slightly before serving.
Air Fryer Method
- Preheat your air fryer to 360°F (180°C).
- Lightly oil the slices and place them in a single layer in the basket.
- Air fry for 10–15 minutes, shaking the basket every 5 minutes to ensure even cooking.
- Remove and season immediately.
These methods use way less oil but still give you that delightful crunch, especially with the air fryer. It’s the modern hack for guilt-free snacking.
Seasoning Variations and Flavor Ideas
This is where the fun really begins. Once your chips are hot and fresh, you can season them any way you like. Here are some classic and creative flavor combos:
Classic Seasonings
- Sea Salt – Simple and timeless.
- Salt & Vinegar – Spray chips lightly with vinegar before salting.
- Garlic & Herb – Toss with garlic powder and crushed dried herbs.
Bold & Spicy
- Barbecue – Mix smoked paprika, chili powder, brown sugar, and onion powder.
- Chili Lime – Sprinkle chili powder and fresh lime zest.
- Buffalo – Toss in buffalo wing seasoning or a dash of cayenne.
Cheesy & Savory
- Cheddar Cheese Powder – Great for kids and cheese lovers.
- Parmesan & Black Pepper – Sprinkle finely grated parmesan while hot.
- Truffle Salt – Fancy? Yes. Delicious? Absolutely.
Make your own seasoning blends in small jars and store them for next time. It’s like your own custom chip flavor lab!
Tips for Crispy Perfection
Want that satisfying, loud crunch every time? Follow these key tips:
- Slice Evenly: The thinner and more uniform the slice, the better the chip. Mandoline slicers are your best friend here.
- Dry Completely: Moisture is the enemy of crispiness. Be thorough when drying your slices before frying.
- Right Oil Temperature: Keep it at 350°F (175°C). Too cold and your chips will soak up oil and get soggy. Too hot and they’ll burn before cooking through.
- Fry in Small Batches: Overcrowding the pan drops the temperature and results in uneven cooking.
- Season Immediately: Season the chips right after frying while they’re still hot and oily—that’s when the flavors stick best.
It’s all about the details. Small things lead to big crunches.
Common Mistakes to Avoid
Even experienced cooks can mess up chips if they rush or skip steps. Here’s what not to do:
- Skipping the Soak: Removing starch by soaking helps chips get crispier and prevents sticking.
- Overcrowding the Pan: Frying too many at once drops the oil temp, causing soggy chips.
- Uneven Slices: Thicker slices won’t crisp, and super thin ones might burn. Keep them uniform.
- Not Drying Slices Enough: Even a little water causes oil to splatter and messes with the texture.
- Using the Wrong Oil: Avoid olive oil—it has a low smoke point. Use neutral oils like canola or sunflower instead.
Stay mindful of these mistakes and your chip game will stay strong.
How to Store Homemade Chips
Homemade chips don’t contain preservatives, so they need to be stored properly to stay crispy:
- Let them cool completely before storing—warm chips create steam and get soggy.
- Use an airtight container or a zip-lock bag.
- Add a paper towel inside to absorb moisture.
- Keep them at room temperature and away from heat or sunlight.
Properly stored, they’ll stay crunchy for up to 5 days—though chances are they’ll be gone long before that!
Serving Suggestions
Potato chips are incredibly versatile when it comes to how you serve them. Here are some tasty pairings:
With Dips:
- Sour cream & onion
- Guacamole
- Spicy mayo
- Cheese dip
As a Side:
- Alongside burgers or sandwiches
- With hot dogs at a BBQ
As a Topping:
- Crushed over casseroles
- On top of mac and cheese for crunch
Serve them fresh and warm at parties, during movie nights, or just as a weekend treat.
Making Chips in Bulk
Thinking of making a big batch for a gathering or to snack on throughout the week? Here’s how to scale up:
- Use multiple potatoes and prepare in stages.
- Pre-slice and soak all your potatoes first.
- If you’re frying, refresh the oil between batches if it becomes too dark or filled with crumbs.
- For baked chips, use multiple trays and rotate them halfway through cooking.
- You can even freeze pre-sliced, blanched potatoes and fry them later for convenience.
Batch-cooking helps you save time and energy, especially if you’re planning for game day or a picnic.
FAQs about Potato Chip Recipe
1. Can I make potato chips without oil?
Yes! Use an air fryer or bake them with a light spray of oil for a low-fat version that still gets crispy.
2. Why are my homemade chips soggy?
Chances are you didn’t dry them properly or your oil wasn’t hot enough. Also, overcrowding the pan lowers oil temperature—so fry in batches.
3. How long can I store homemade potato chips?
Up to 5 days in an airtight container. Make sure they’re fully cooled before storing to maintain crunch.
4. Can I use sweet potatoes instead?
Absolutely! Sweet potato chips are delicious, though they may take slightly longer to crisp and have a sweeter flavor.
5. What’s the best oil for frying potato chips?
Canola, sunflower, or peanut oil are best due to their high smoke points and neutral flavors.
Conclusion
Making potato chips at home isn’t just doable—it’s a delicious little adventure that ends in crispy, golden perfection. From picking the right potato to choosing your favorite flavor combo, the entire process is satisfying and super customizable. Plus, it’s a healthier, tastier, and more rewarding alternative to store-bought bags.
So, what are you waiting for? Grab those potatoes, heat up the oil (or air fryer), and get ready to munch on some next-level homemade chips.