Pot Pie Crust Recipe: A pot pie crust is the heart of a comforting, hearty meal. Whether it’s filled with creamy chicken and vegetables, beef and gravy, or a veggie medley, a flaky, buttery crust ties everything together. Store-bought pie crusts may save a few minutes, but nothing beats the rich flavor and texture of homemade crust. When you make it from scratch, you control the ingredients, texture, and thickness—ensuring every bite is tender and delicious.
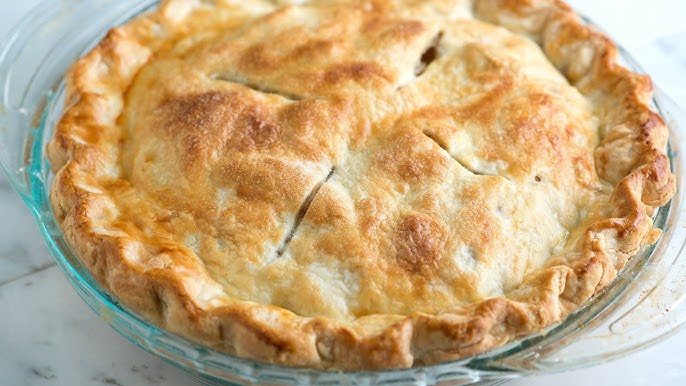
Imagine cutting into a golden-brown crust that shatters slightly under your fork, revealing a bubbling, savory filling beneath. That’s the beauty of a well-made pot pie. It’s rustic yet refined, cozy yet satisfying. And the best part? Making it isn’t as complicated as it sounds. With a few simple ingredients and a clear process, you can create a perfect crust every single time.
This step-by-step guide will walk you through everything you need to know—starting with the ingredients, then moving into the technique, tips, and storage. By the end, you’ll be ready to impress your family or guests with a pot pie that looks (and tastes) like it came straight from a professional kitchen.
Ingredients You’ll Need
A great crust starts with great ingredients. The good news? You likely have most of these in your kitchen already. The key lies in using them correctly and keeping everything as cold as possible to achieve that perfect, flaky texture.
Essential Ingredients
- All-Purpose Flour (2 ½ cups) – The base of your crust. All-purpose flour gives you the right balance of structure and tenderness.
- Unsalted Butter (1 cup / 2 sticks, cold and cubed) – Butter is the magic ingredient behind the flaky layers. Cold butter creates little steam pockets when baked, giving your crust that signature light texture.
- Salt (1 teaspoon) – Enhances the flavor and balances the richness of the butter.
- Ice Water (6–8 tablespoons) – Keeps the dough hydrated without making it sticky. The colder, the better—it prevents the butter from melting.
Optional Ingredients for Extra Flavor
- Egg (for egg wash) – Brushing a beaten egg on the crust before baking gives it that glossy, golden-brown finish.
- Sugar (1 teaspoon) – Optional for a slightly sweet note, perfect if you’re making a chicken or vegetable pot pie.
- Herbs (like thyme, rosemary, or parsley) – Mix in finely chopped herbs for a fragrant, savory twist that complements your filling.
Ingredient Substitutions and Tips
- Butter Substitute – You can use half butter and half shortening for a more tender crust. Shortening helps hold the crust’s shape better.
- Gluten-Free Option – Swap all-purpose flour for a gluten-free flour blend. Just be sure it contains xanthan gum for structure.
- Vegan Alternative – Replace butter with plant-based butter or solid coconut oil (keep it chilled!).
Pro Tip: Always cube and chill your butter before mixing. If your butter softens too soon, pop the mixture into the fridge for 10–15 minutes before continuing. This small step can make a big difference in achieving a flaky crust.
Tools and Equipment
Just like with any baking project, having the right tools makes the process smoother and more enjoyable. You don’t need anything fancy—just reliable, basic kitchen essentials.
Kitchen Tools for Perfect Crust
- Mixing Bowl – Large enough to combine ingredients without spilling.
- Pastry Cutter or Fork – Ideal for cutting butter into flour. If you don’t have one, use two knives in a crisscross motion.
- Rolling Pin – A sturdy rolling pin ensures even dough thickness.
- Plastic Wrap or Parchment Paper – For wrapping the dough while it chills.
- Bench Scraper – Helps lift and fold dough without sticking to the counter.
- Measuring Cups and Spoons – Precision is crucial when baking.
Choosing the Right Pie Dish
Your pie dish affects how evenly the crust bakes. Ceramic dishes distribute heat gently, while metal pans create a crispier bottom crust. For pot pies, a deep-dish pan is ideal—it leaves plenty of room for filling without overflow.
Pro Tip: If you often struggle with soggy crusts, preheat your pie dish in the oven for a few minutes before adding the dough. It gives the bottom crust a head start, helping it stay flaky and firm.
Step-by-Step Guide to Making Pot Pie Crust
Now, let’s get into the heart of the process. Making a pot pie crust from scratch is straightforward when you follow each step carefully. Take your time, and don’t rush—it’s worth the effort.
Step 1 – Measuring and Preparing Ingredients
Gather your ingredients: 2½ cups of all-purpose flour, 1 teaspoon of salt, 1 cup (2 sticks) of cold unsalted butter cut into cubes, and 6–8 tablespoons of ice-cold water. Keep the butter and water chilled — that’s the secret to a flaky, tender crust.
Step 2 – Mixing the Dough
In a large bowl, whisk together the flour and salt. Add the cold butter cubes and cut them into the flour using a pastry cutter or your fingertips until the mixture looks like coarse crumbs with small pea-sized bits of butter. Gradually add the ice water, one tablespoon at a time, mixing gently until the dough just starts to come together. Don’t overwork it — a light touch keeps the crust flaky.
Step 3 – Rolling Out the Dough
Divide the dough into two discs (one for the bottom crust, one for the top). Wrap them in plastic wrap and refrigerate for at least 30 minutes. When ready to use, lightly flour your surface and rolling pin, then roll one disc into a circle about ⅛ inch thick and slightly larger than your pie dish.
Step 4 – Fitting the Crust into the Dish
Carefully transfer the rolled dough into your pie dish by wrapping it loosely around the rolling pin and unrolling it over the dish. Gently press it into the bottom and sides without stretching. Trim any excess dough hanging over the edges.
Step 5 – Sealing and Venting the Crust
Once your pot pie filling is added, place the second rolled-out dough over the top. Press and crimp the edges with a fork or your fingers to seal. Cut 3–4 small slits in the top crust to let steam escape during baking — this prevents sogginess and helps the crust turn golden and crisp.
Bake as directed in your pot pie recipe, and enjoy a buttery, flaky crust that holds all that creamy, savory goodness perfectly!
Tips for the Best Pot Pie Crust
Creating a perfect pot pie crust isn’t just about following the recipe—it’s about the small, thoughtful details that elevate your crust from good to exceptional. Let’s look at a few insider tricks that bakers swear by.
Keeping the Dough Cold
The number one rule in pastry-making: keep everything cold. From the butter and water to your hands and tools, temperature control is key to flakiness. Cold butter forms little layers that melt during baking, creating pockets of steam that puff up the crust.
Work quickly, and if the dough starts to feel soft or sticky, pop it in the fridge for a few minutes. Even your rolling pin can be chilled beforehand for extra control.
Avoiding Common Mistakes
Here are some common pitfalls to avoid:
- Overmixing the dough: It develops too much gluten, making the crust tough.
- Adding too much water: Makes the dough sticky and hard to roll.
- Not chilling the dough: Causes shrinkage and uneven texture.
- Skipping the vents: Traps steam, leading to soggy spots.
- Using warm butter: Eliminates flakiness.
Keep these in mind, and your crust will come out perfectly every time—flaky, buttery, and beautifully golden.
Baking and Finishing Touches
Now that your pie crust is perfectly sealed and ready, it’s time to bake it to golden perfection. This is the moment when all your careful prep work—cold butter, proper rolling, and gentle handling—pays off in the form of a crisp, flavorful crust that beautifully complements the filling.
How to Bake to Golden Perfection
Preheat your oven to 400°F (200°C). Baking at a higher temperature initially helps the butter steam and puff up the crust, creating those signature flaky layers. If you start too low, the butter melts before it steams, resulting in a dense or greasy crust.
Place your pot pie on the middle oven rack to ensure even heat distribution. If you’re worried about spills, set it on a baking sheet lined with foil—especially if your pie is generously filled.
Bake for 35–45 minutes, depending on your oven and the type of filling. The crust should turn a deep golden brown, with bubbling filling visible through the vents. If the edges brown too quickly, cover them loosely with strips of foil or a pie shield.
Resist the urge to cut into your pot pie right away! Let it rest for at least 15–20 minutes after baking. This short cooling period allows the filling to set and thickens slightly, preventing it from running out when sliced.
Pro Tip: For an extra-crisp bottom crust, preheat a baking stone or heavy metal tray in the oven and place your pie dish directly on it while baking. This ensures that the bottom crust cooks evenly and doesn’t turn soggy.
Creative Toppings and Designs
The top crust of a pot pie doesn’t just protect the filling—it’s also your chance to show off a bit of artistry. Here are a few creative ideas to make your pot pie visually stunning:
- Lattice Crust: Cut the rolled dough into strips and weave them over the top. It’s not just pretty—it also allows more steam to escape, keeping the crust crisp.
- Cut-Out Shapes: Use small cookie cutters (like leaves or hearts) to create decorative shapes and place them on top of the pie before baking.
- Braided Edge: Roll thin strips of dough and braid them together, then lay them along the rim of your pie for a rustic, elegant touch.
- Herb-Infused Finish: Sprinkle finely chopped herbs like rosemary or thyme on the crust before baking for extra aroma and visual appeal.
Don’t forget that presentation matters as much as taste. A golden, beautifully decorated crust instantly makes your dish feel gourmet, even if it’s just a cozy weeknight dinner.
Storing and Reheating
Homemade pot pie crusts can easily be made in advance or stored for later use. Whether you’re prepping for a busy week or saving leftovers, proper storage ensures that your crust maintains its texture and flavor.
How to Store Unbaked Dough
If you’re not baking right away, wrap your dough tightly in plastic wrap and refrigerate it for up to 3 days. For longer storage, place the wrapped dough discs in a freezer bag and freeze for up to 3 months. When you’re ready to use it, thaw in the refrigerator overnight—never at room temperature—to prevent the butter from softening too quickly.
You can also freeze a fully prepared, unbaked pot pie. Assemble it in a freezer-safe dish, wrap it securely in plastic wrap and foil, and store for up to 2 months. When baking from frozen, add about 15–20 minutes to your bake time.
Pro Tip: Always label your frozen dough or pies with the date. It’s easy to forget how long they’ve been stored!
Reheating Tips for Leftovers
Leftover pot pie reheats beautifully, as long as you avoid the microwave, which tends to make the crust soggy. The best method is to use your oven:
- Preheat oven to 350°F (175°C).
- Place the leftover pie on a baking sheet.
- Cover loosely with foil to prevent over-browning.
- Bake for 20–25 minutes (or until heated through).
If reheating from frozen, extend the baking time to around 45–50 minutes. For extra crispiness, remove the foil in the last 10 minutes of baking.
For smaller portions, an air fryer can be a fantastic option—it keeps the crust flaky and golden while heating the filling evenly.
FAQs about Pot Pie Crust Recipe
1. Can I make pot pie crust ahead of time?
Absolutely! You can prepare the dough up to 3 days in advance and refrigerate it. For longer storage, freeze it for up to 3 months. Just thaw overnight in the refrigerator before using.
2. How do I make the crust flakier?
The secret is cold butter and minimal mixing. Don’t overwork your dough—small chunks of butter should still be visible before baking. They’ll melt and create steam pockets that form the flaky layers.
3. Can I use whole wheat flour?
Yes, but it will result in a denser crust with a nuttier flavor. For best results, use a 50/50 mix of all-purpose and whole wheat flour to keep it balanced.
4. Should I blind bake the crust for pot pie?
Not always. If your filling is thick and creamy, you can skip blind baking. But for wetter fillings, prebaking the crust for 10–15 minutes helps prevent sogginess.
5. What’s the secret to a golden-brown crust?
An egg wash brushed over the top before baking gives the crust that glossy, golden finish. You can also double-brush for a deeper color.
Conclusion
Homemade pot pies aren’t just about the recipe—they’re about comfort. That first bite of warm, creamy filling beneath a crisp, golden crust brings a sense of home and tradition that no store-bought alternative can match. Whether you’re cooking for a family dinner or impressing guests at a special gathering, your freshly baked pot pie will always be the star of the show.
So, roll up your sleeves, keep your butter cold, and follow these steps—you’ll have a pot pie crust that rivals any professional baker’s. Once you master this recipe, you can adapt it endlessly: chicken pot pie, beef and mushroom, or even a vegetarian version with roasted vegetables and herbs.
There’s nothing quite like the satisfaction of pulling a bubbling, golden pot pie from the oven. And when you know you made that perfect crust from scratch, it tastes even better.