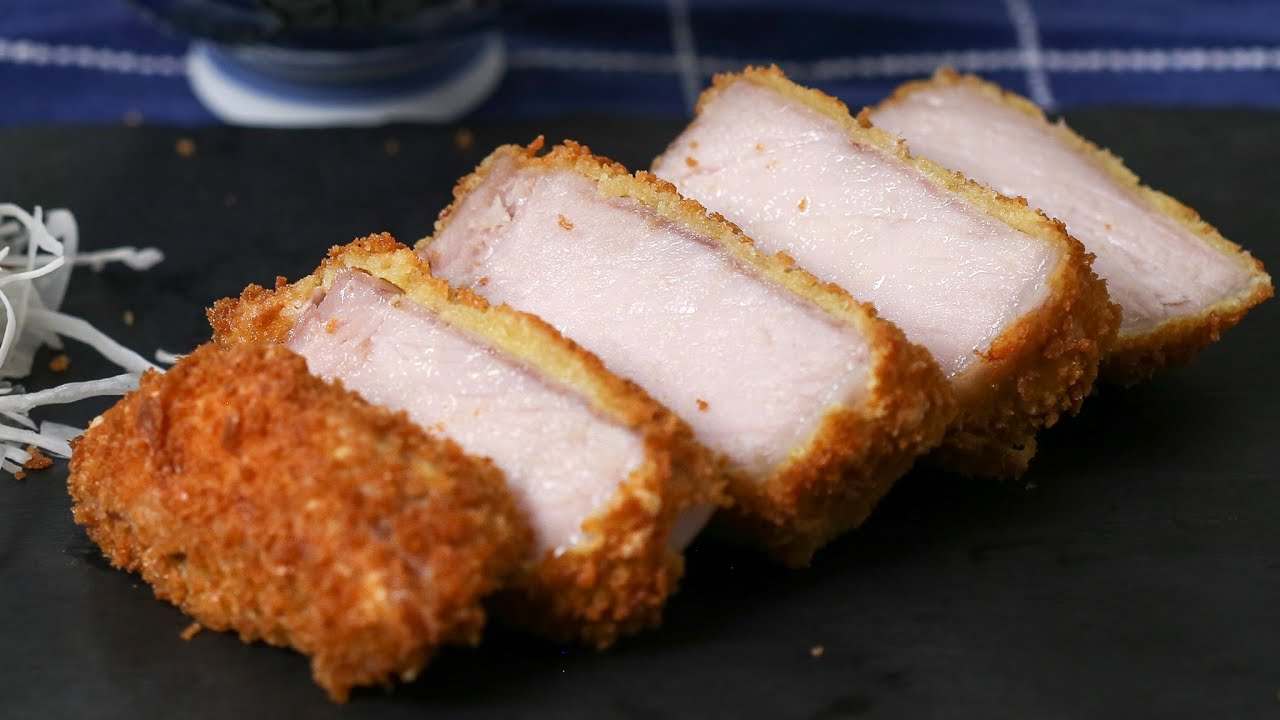
Pork Katsu Recipe: Pork Katsu, also known as Tonkatsu in Japan, is a crispy breaded and deep-fried pork cutlet that has become one of the most beloved comfort foods in Japanese cuisine. The dish is made by coating a juicy pork cutlet in flour, egg, and panko breadcrumbs, then frying it until golden brown. Served with shredded cabbage, steamed rice, and tangy katsu sauce, it strikes the perfect balance between crunch and tenderness. While it originated in Japan, Pork Katsu has made its way across the world and is now enjoyed in Japanese restaurants, fusion eateries, and even homemade kitchens. It’s simple, satisfying, and incredibly versatile.
Why Pork Katsu is Loved Worldwide
The beauty of Pork Katsu lies in its universal appeal. It’s crispy on the outside, tender on the inside, and flavorful in every bite. Unlike many fried foods, the use of Japanese panko breadcrumbs creates a lighter, airier crust that doesn’t feel greasy. This makes it both indulgent and surprisingly balanced. Beyond Japan, Pork Katsu has influenced dishes in Korea (donkkaseu), Hawaii (katsu curry), and even Western-style bento shops. Its popularity also comes from how adaptable it is—you can serve it with rice, in a sandwich (Katsu Sando), or even with Japanese curry. In short, it’s a dish that satisfies cravings while still being elegant enough to impress guests.
Ingredients You’ll Need
Main Ingredients for Pork Katsu
- 4 boneless pork chops (about ½ inch thick)
- Salt and black pepper (to taste)
- Oil for deep frying (vegetable or canola oil recommended)
For the Coating (Breading Ingredients)
- ½ cup all-purpose flour
- 2 large eggs (beaten)
- 1 ½ cups Japanese panko breadcrumbs (for extra crispiness)
For the Sauce (Optional but Recommended)
- 4 tbsp Worcestershire sauce
- 2 tbsp ketchup
- 1 tbsp soy sauce
- 1 tsp sugar
- ½ tsp Dijon mustard (optional)
Recommended Side Dishes to Serve with Pork Katsu
- Steamed white rice or Japanese sticky rice
- Shredded cabbage with sesame dressing
- Pickled radish or cucumber slices
- Miso soup
- Lemon wedges (for garnish)
Tools and Equipment Required
Essential Kitchen Tools for Perfect Katsu
- Sharp chef’s knife (for slicing pork)
- Meat mallet (for tenderizing)
- Mixing bowls (for flour, egg wash, and breadcrumbs)
- Deep frying pan or Dutch oven
- Wire rack or paper towels (to drain excess oil)
- Tongs (for safe handling during frying)
Frying Tips and Safety Precautions
When deep frying, maintaining the right oil temperature (around 340–350°F or 170–175°C) is crucial. If the oil is too hot, the coating will burn before the pork cooks through. If too cool, the pork will soak up oil and become greasy. Always fry in small batches and avoid overcrowding the pan. After frying, place the cutlets on a wire rack instead of paper towels to keep the coating crispy.
Preparing the Pork Cutlets
Choosing the Right Cut of Pork
The best cut for Pork Katsu is boneless pork loin or pork tenderloin. Pork loin provides a good balance of fat and lean meat, making it juicy and flavorful after frying. Pork tenderloin, on the other hand, is leaner but still tender, offering a slightly healthier option.
How to Tenderize Pork for Katsu
Tenderizing is key for achieving that melt-in-your-mouth texture. Use a meat mallet to pound the pork cutlets to about ½ inch thickness. This not only makes the pork tender but also ensures even cooking. If you don’t have a mallet, the back of a heavy knife or even a rolling pin works well.
Seasoning for the Perfect Flavor
Simple seasoning goes a long way. Sprinkle both sides of the pork cutlets with salt and pepper before breading. Some chefs also rub a bit of garlic powder or soy sauce for added flavor, but the traditional recipe keeps it minimal to let the pork shine.
Step-by-Step Cooking Guide
Step 1: Preparing the Pork
Trim any excess fat from the pork chops and pat them dry with paper towels. Moisture prevents the breading from sticking, so ensuring the pork is dry is an important step.
Step 2: Dredging in Flour
Lightly coat each cutlet in flour. This helps the egg wash adhere properly to the pork. Shake off any excess flour before moving to the next step.
Step 3: Coating with Egg Wash
Dip the floured pork cutlet into beaten eggs. Make sure it’s fully coated, as this acts as the “glue” that holds the breadcrumbs in place.
Step 4: Covering with Panko Breadcrumbs
Press each pork cutlet into a plate of panko breadcrumbs. Use your hands to gently press the breadcrumbs onto the surface so they stick firmly. For extra crunch, you can double-coat by repeating the egg wash and panko step.
Step 5: Frying the Pork to Golden Perfection
Heat oil in a deep pan to 340–350°F (170–175°C). Gently lower the pork cutlet into the oil and fry for 3–4 minutes per side, depending on thickness. The pork should be golden brown and cooked through.
Step 6: Resting and Slicing the Katsu
Remove the cutlets and place them on a wire rack. Let them rest for 2–3 minutes to allow juices to settle. Slice into strips and serve hot with rice, cabbage, and sauce.
Making the Perfect Katsu Sauce
Simple Homemade Katsu Sauce Recipe
No Pork Katsu experience is complete without the rich, tangy, and slightly sweet katsu sauce. While you can buy bottled versions at most Asian grocery stores, making it at home is surprisingly quick and rewarding. The classic recipe requires just a few pantry staples: Worcestershire sauce, ketchup, soy sauce, sugar, and sometimes mustard for a bit of heat. Simply whisk these ingredients together until smooth, and you’ll have a sauce that balances sweet, savory, and umami flavors perfectly. Homemade sauce is also customizable—you can adjust sweetness with more sugar, add garlic for depth, or even a splash of rice vinegar for extra tang. This sauce not only pairs beautifully with Pork Katsu but can also double as a dipping sauce for fries, chicken nuggets, or even roasted vegetables.
Alternative Sauce Options
If you want to try something different, there are plenty of variations that can complement Pork Katsu. For a spicy kick, mix in a bit of sriracha or chili paste. For a creamier option, blend mayonnaise with a dash of soy sauce (a popular twist in Japanese diners). You can also serve Pork Katsu with Japanese curry sauce for the famous Katsu Curry, a heartier, comfort-food version of the dish. Another option is tonkatsu miso sauce, a regional specialty in Nagoya, which has a deeper, savory flavor due to miso paste. With these choices, you can keep the dish exciting and tailor it to your taste preferences.
Serving Suggestions
Traditional Japanese Style Serving
In Japan, Pork Katsu is often served in a neat, balanced way that highlights both taste and presentation. Typically, it’s sliced into strips and arranged over a bed of finely shredded cabbage, with steamed white rice on the side. A wedge of lemon may be added for freshness, and miso soup is served as a warming complement. The shredded cabbage isn’t just for decoration—it adds a refreshing crunch and helps balance the richness of the fried pork. When eaten together, the flavors create a harmonious meal that feels comforting yet light.
Modern Twists for Presentation
Outside of Japan, chefs have found creative ways to serve Pork Katsu. One popular option is the Katsu Sando, a sandwich that layers Pork Katsu between soft, crustless Japanese milk bread with a generous spread of katsu sauce. It’s simple yet incredibly satisfying, making it perfect for a quick lunch. Another trendy version is Katsu Curry, where crispy cutlets are topped with a rich, spiced Japanese curry sauce and served over rice. You can also pair Pork Katsu with fusion sides like garlic butter noodles or even a fresh salad with sesame dressing. No matter how you serve it, Pork Katsu adapts beautifully, making it a dish that suits both traditional and modern dining tables.
Tips and Tricks for Crispy Pork Katsu
How to Keep the Coating Crunchy
The secret to perfect Pork Katsu lies in the crispiness of its coating. First, always use Japanese panko breadcrumbs instead of regular breadcrumbs, as they create a lighter, crunchier texture. Second, don’t overcrowd the frying pan—this lowers the oil temperature, which can make the pork soggy. Fry in small batches and check that the oil stays between 340–350°F (170–175°C). After frying, let the cutlets rest on a wire rack instead of paper towels. Paper towels can trap steam, softening the crust, while a wire rack allows air to circulate and keep the coating crispy. Lastly, serve the cutlets as soon as possible—Pork Katsu is best enjoyed hot and freshly fried.
Mistakes to Avoid While Frying
There are a few common mistakes that can ruin Pork Katsu if you’re not careful. One is frying with oil that’s too hot, which burns the breadcrumbs before the pork cooks through. Another is using wet or damp pork cutlets, which prevents the breading from sticking properly. Also, avoid using fine breadcrumbs instead of panko, as they won’t give you that signature crunch. If you’re new to frying, use a cooking thermometer to maintain oil temperature consistently. Finally, don’t flip the pork too often—just one flip halfway through frying is enough. Following these tips ensures that your Pork Katsu turns out golden, crispy, and delicious every single time.
Nutritional Information
Calories and Macronutrients
Pork Katsu is undeniably indulgent, but understanding its nutritional value helps you enjoy it mindfully. A standard serving (one breaded and fried pork cutlet with sauce) contains roughly 400–600 calories, depending on the cut of pork and amount of oil absorbed. Protein content is high, usually around 25–30 grams per serving, making it a satisfying main dish. Carbohydrates come mainly from the breading and sauce, while fat comes from both the pork itself and the frying oil. While it may not be the lightest meal, Pork Katsu is filling and nutrient-dense when served with balanced sides like rice, miso soup, and cabbage.
Healthier Alternatives for Pork Katsu
If you want a lighter version of Pork Katsu, there are a few adjustments you can make without sacrificing flavor. Instead of deep frying, try air frying or baking the cutlets with a light spray of oil. This method reduces fat content while still producing a crispy coating. You can also use leaner cuts like pork tenderloin instead of pork loin. For those avoiding gluten, replace all-purpose flour with rice flour and panko breadcrumbs with gluten-free alternatives. Another idea is to swap pork for chicken or even tofu for a vegetarian twist. With these options, you can enjoy the comfort of Pork Katsu in a healthier, guilt-free way.
Storing and Reheating Pork Katsu
Best Ways to Store Leftovers
Sometimes, you might cook a few extra Pork Katsu cutlets, and the good news is—they store quite well if handled properly. To keep them fresh, allow the fried cutlets to cool completely before storing. Never wrap them while they’re hot, as trapped steam will make the coating soggy. Place the cooled cutlets in an airtight container lined with parchment paper to prevent sticking. For best results, store them in the refrigerator for up to 2–3 days. If you want to keep them longer, freezing is an excellent option. Wrap each cutlet tightly in plastic wrap and then in aluminum foil before placing them in a freezer-safe bag. Frozen Pork Katsu can last up to one month and still maintain good flavor and texture when reheated correctly.
How to Reheat Without Losing Crispiness
The biggest challenge with reheating Pork Katsu is keeping that golden, crispy crust intact. Microwaving is not recommended because it makes the breading soggy. Instead, use an oven or air fryer for the best results. Preheat your oven to 350°F (175°C), place the cutlets on a wire rack over a baking sheet, and heat for 10–12 minutes until warmed through and crispy. If you’re using an air fryer, reheat at 350°F for about 5–7 minutes. Both methods revive the crunch without drying out the pork. If reheating from frozen, allow the cutlets to thaw in the refrigerator overnight before reheating. By following these steps, your leftover Pork Katsu will taste almost as good as freshly made.
FAQs about Pork Katsu Recipe
1. Can I use chicken instead of pork?
Yes! Chicken Katsu is just as popular and follows the same method. Simply replace pork chops with chicken breasts or thighs, pound them thin, and follow the breading and frying steps.
2. What oil is best for frying katsu?
Neutral oils with a high smoke point like vegetable, canola, or sunflower oil work best. Avoid olive oil, as it can burn at high frying temperatures.
3. Can I bake pork katsu instead of frying?
Yes, you can bake it for a healthier version. Preheat your oven to 400°F (200°C), place breaded cutlets on a baking sheet, lightly spray with oil, and bake for 20–25 minutes until golden and cooked through.
4. How do I make gluten-free pork katsu?
Replace all-purpose flour with rice flour, and use gluten-free panko or crushed cornflakes for breading. The texture stays crunchy, and it’s safe for gluten-sensitive eaters.
5. What side dishes go best with pork katsu?
The most common sides are shredded cabbage, miso soup, pickled vegetables, and steamed rice. For a fusion twist, you can also pair it with salads, noodles, or even sandwiches.
Conclusion
Pork Katsu is more than just a dish—it’s a delicious balance of textures and flavors that has captured hearts worldwide. With its crispy golden crust, juicy tender pork, and tangy-sweet sauce, it’s a comfort food that’s both simple and elegant. Whether you’re making it the traditional Japanese way with rice and cabbage or experimenting with modern twists like Katsu Curry or Katsu Sando, this recipe never fails to impress. With the step-by-step guide above, you now have everything you need to make Pork Katsu at home—right from choosing the cut of pork to mastering the perfect fry. Pair it with your favorite sides, whip up a quick sauce, and enjoy a taste of Japan from your own kitchen. Once you’ve tried it, you’ll understand why Pork Katsu has become a global favorite.