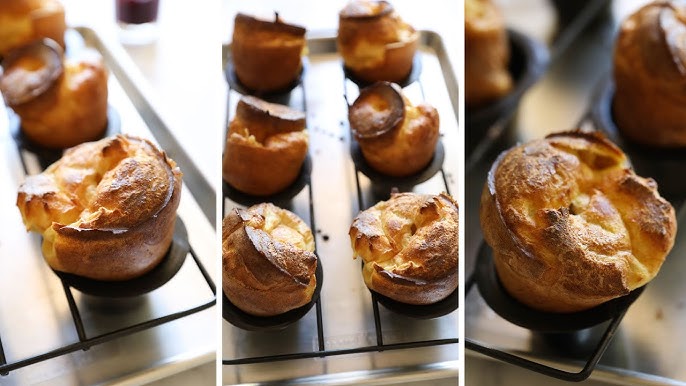
Popovers Recipe: Popovers are magical little puffs of delight made from the simplest ingredients. Imagine a crisp, golden shell with a hollow, custardy center that’s just begging for butter, jam, or gravy. They’re called “popovers” because they literally pop over the edge of the baking pan while cooking, creating that beautiful, airy puff. These beauties are a classic in American kitchens, often served as a breakfast treat, a dinner side, or even a dessert with a little sugar and spice.
Unlike muffins or cupcakes, popovers aren’t dense. Instead, they rely heavily on steam to rise, which is why the batter is thin and the oven heat must be high. You don’t need yeast or baking powder—just eggs, flour, milk, and a bit of butter. The result? A towering, crisp-on-the-outside, tender-on-the-inside roll that’s both elegant and rustic.
They’re impressively simple to make but do require attention to detail. One wrong move (like opening the oven too soon) can lead to deflated disasters instead of puffy perfection. But don’t worry—you’ll get there with the right technique, which we’ll walk through step-by-step.
A Brief History of Popovers
The popover’s roots trace back to English Yorkshire pudding, traditionally served with roast beef and gravy. When settlers brought the concept to the U.S., they swapped beef drippings for butter and began baking them as standalone breads. The first known American popover recipe appeared in the mid-19th century, and since then, these airy rolls have become a cherished staple across homes and restaurants.
In New England, particularly, popovers have found a cozy spot on breakfast menus. Fancy spots serve them with strawberry butter, while rustic diners might plate them with scrambled eggs and bacon. Regardless of how they’re served, they’ve won hearts with their dramatic puff and delightful bite.
Ingredients You’ll Need
Essential Ingredients for Perfect Popovers
Popovers don’t require fancy ingredients. In fact, you likely have everything you need sitting in your pantry or fridge right now. Here’s what you’ll need for a basic batch (makes about 6 popovers):
- 1 cup all-purpose flour – The backbone of your popovers.
- 1 cup whole milk – For richness and moisture. Room temperature is key.
- 2 large eggs – Also at room temperature. Eggs help with structure and rise.
- 1/2 teaspoon salt – Enhances flavor.
- 1 tablespoon melted butter – Adds a hint of richness.
- Extra butter or oil for greasing the pan
That’s it! No baking powder, no yeast, no sugar. The magic happens with technique and heat.
Why room temperature ingredients? Cold eggs or milk can lead to a denser batter and uneven baking. If you’re in a rush, let the eggs sit in warm water for a few minutes and microwave the milk briefly (not hot—just lukewarm).
Optional Add-ins for Extra Flavor
Once you’ve mastered the classic version, it’s time to get creative. Here are a few delicious ways to jazz up your popovers:
- Cheese – Add 1/2 cup shredded cheddar, Gruyère, or Parmesan for cheesy popovers.
- Herbs – Chopped chives, rosemary, or thyme add a savory twist.
- Garlic powder or onion powder – For extra flavor depth.
- Sugar and cinnamon – For a sweeter version, perfect with honey or jam.
Always fold these in gently at the end so you don’t overwork the batter.
Kitchen Tools Required
Must-Have Tools for Making Popovers
You don’t need a ton of fancy equipment, but a few tools will make life easier:
- Popover pan or muffin tin – Popover pans have deeper, narrower wells that help with vertical rise. A muffin tin works, but results may be a bit shorter.
- Mixing bowl – For blending your batter.
- Whisk or blender – Either tool works to get the batter smooth and lump-free.
- Measuring cups and spoons – Precision matters.
- Oven mitts – You’ll be working with a very hot oven and pan.
If you’re aiming for that perfect rise, invest in a dedicated popover pan. The tall, steep sides promote that iconic balloon shape and crispy edge.
Alternatives if You Don’t Have a Popover Pan
No popover pan? No problem. A regular muffin tin can step in. Here’s what to keep in mind:
- Grease well – Popovers can stick like crazy. Use butter or a high-smoke-point oil.
- Don’t overfill – Fill about 2/3 to 3/4 full so there’s room to puff.
- Space them out – If possible, skip every other cup so heat circulates better.
The results may not be as towering, but they’ll still taste amazing.
Step-by-Step Popovers Recipe
Step 1 – Preparing Your Oven and Pan
The secret to epic popovers? A super hot oven and preheated pan. Here’s what to do:
- Place your pan in the oven before turning it on.
- Preheat to 450°F (232°C) – This high heat is crucial for the initial puff.
- Let the pan heat for at least 10 minutes.
- Meanwhile, prepare your batter (we’ll get to that next).
- Right before pouring in the batter, remove the hot pan carefully and grease each cup generously.
A hot pan + hot oven = maximum steam = gorgeous rise.
Step 2 – Mixing the Batter
Making the batter is where simplicity truly shines. The batter should be thin and smooth—more like a crepe batter than a muffin mix. Here’s how to get it just right:
Ingredients Recap:
- 1 cup all-purpose flour
- 1 cup whole milk (room temperature)
- 2 large eggs (room temperature)
- 1/2 tsp salt
- 1 tbsp melted butter
Instructions:
- Whisk the eggs in a large bowl until they’re frothy and light. This aerates the batter and helps with the rise.
- Add the milk and whisk to combine.
- Slowly whisk in the flour and salt until smooth. Don’t rush—slow additions prevent lumps.
- Stir in the melted butter. Make sure it’s cooled slightly to avoid cooking the eggs.
Want an even smoother batter? Use a blender! Just toss all ingredients in and blend for about 20 seconds.
Let the batter rest for 10–15 minutes if you have time. This allows the flour to absorb the liquid fully, resulting in more consistent texture and rise.
The batter should be pourable and thin—don’t be tempted to thicken it.
Step 3 – Pouring and Baking
Now for the fun part—watching them rise!
- Remove the preheated pan from the oven (carefully—it’ll be extremely hot).
- Quickly grease the wells using melted butter or oil. A silicone brush or nonstick spray works great.
- Pour the batter into each cup, filling them about 2/3 to 3/4 full. Don’t overfill.
- Place the pan back in the oven immediately to avoid losing heat.
- Bake at 450°F (232°C) for 20 minutes—this high heat helps them pop.
- Without opening the oven, reduce the heat to 350°F (177°C) and bake for an additional 15–20 minutes.
Important: Don’t open the oven during baking. The sudden temperature change can deflate your popovers in seconds.
You’ll know they’re done when they’re deeply golden brown and crisp. If you tap them, they should sound hollow.
Step 4 – Cooling and Serving
Once they’re beautifully puffed and golden, remove the pan from the oven. Immediately prick each popover with a sharp knife or skewer to release steam. This prevents them from becoming soggy inside.
Let them cool for about 5 minutes in the pan, then gently remove and serve immediately.
Popovers are best enjoyed fresh out of the oven. That crunchy exterior and airy interior are unbeatable.
Serving Ideas:
- Spread with butter and jam for a sweet bite.
- Dip into gravy or soup for a savory twist.
- Serve with eggs and bacon for breakfast.
- Fill with whipped cream and fruit for dessert.
Tips for Perfect Popovers Every Time
Temperature Tricks and Timing
If there’s one tip to drill into memory, it’s this: Temperature is everything.
- Preheat your oven and pan thoroughly. The burst of heat creates steam, which causes the popovers to puff up.
- Room temp ingredients make a huge difference. Cold eggs or milk will throw off the rise.
- Bake long enough. If they’re underbaked, they’ll collapse. Aim for golden brown and crisp.
Also, resist the urge to peek! Keep the oven door closed until the end of baking. Trust the process.
Avoiding Common Mistakes
Here are a few common pitfalls to watch for:
- Lumpy batter – Use a blender or whisk thoroughly. Strain if needed.
- Too much batter – Overfilling the cups can cause overflow and uneven baking.
- Undergreased pans – They’ll stick like glue. Use plenty of butter or spray.
- Opening the oven door early – This one’s a deal-breaker. Be patient.
Master these tricks and your popovers will be perfect every time.
Creative Serving Suggestions
Sweet Toppings
Popovers may be simple, but they’re like a blank canvas for toppings—especially if you’ve got a sweet tooth.
Try these sweet ideas:
- Cinnamon Sugar: Roll freshly baked popovers in melted butter and coat with cinnamon sugar for a churro-like treat.
- Honey Butter: Whip together softened butter with honey and a pinch of sea salt. Slather it on warm popovers.
- Jam and Cream Cheese: A classic! Split a popover in half and spread with a thick layer of cream cheese and a dollop of raspberry or strawberry jam.
- Nutella & Bananas: Slice open a popover, spread with Nutella, and stuff it with banana slices. It’s basically dessert.
- Powdered Sugar & Fresh Berries: Dust with sugar and serve alongside blueberries, raspberries, or strawberries with a drizzle of maple syrup.
Want to turn popovers into a dessert? Add 1 tbsp sugar and a splash of vanilla extract to the batter before baking. Sweet and subtle.
Savory Combinations
Popovers aren’t just for breakfast. They also shine at dinner.
- Garlic Herb Butter: Mix softened butter with minced garlic, chopped parsley, and a pinch of salt.
- Cheddar & Chive: Stir shredded cheddar and chopped chives into the batter before baking for a savory twist.
- Serve with Soup: Pair with creamy tomato soup or chicken noodle for a satisfying meal.
- Stuffed Popovers: Slice open and fill with scrambled eggs, bacon, and cheese for a hand-held brunch delight.
- Gravy Dippers: Use them to mop up gravy, especially alongside roast beef or turkey.
These combos make popovers a perfect side dish or even a main when you want something special and quick.
Storing and Reheating Popovers
Best Ways to Store Leftovers
While popovers are best enjoyed fresh, you might have a few left. Here’s how to store them properly:
- Cool completely before storing. Trapped steam can make them soggy.
- Store in an airtight container at room temperature for up to 2 days.
- Refrigeration isn’t recommended as it can dry them out and make them chewy.
- For longer storage, freeze them. Wrap individually in plastic wrap and place in a freezer bag. They’ll last up to 2 months.
Label your bag with the date so you remember when to use them by.
Reheating Tips for That Fresh-Baked Taste
Want to bring back that freshly baked magic?
- Oven Method: Preheat your oven to 350°F (177°C). Place popovers on a baking sheet and heat for 5–10 minutes until warm and crisp. This is the best method.
- Air Fryer: Great alternative for quick reheating. Use the reheat setting or 350°F for 4–5 minutes.
- Avoid the microwave unless absolutely necessary—it makes them rubbery and kills the crispy texture.
If you’re reheating from frozen, let them thaw at room temp for 15 minutes first, then heat using the oven method.
Nutritional Information
Calorie Count and Nutrients
Let’s talk nutrition. A classic popover isn’t the worst indulgence, especially since they’re made with simple ingredients.
Here’s a rough breakdown per popover (based on 6 popovers per batch):
- Calories: 150–170
- Carbohydrates: 15–18g
- Protein: 5–6g
- Fat: 8–10g
- Sugar: <1g
- Fiber: 0–1g
They’re fairly low in sugar and can be filling thanks to the eggs and protein content. Keep in mind that toppings will add extra calories.
Making Healthier Popovers
Looking for a lighter or dietary-friendly version? Try these swaps:
- Use low-fat milk or plant-based milk like almond or oat.
- Swap in whole wheat flour for extra fiber. Use half whole wheat and half white to maintain lightness.
- Add flaxseed or chia to the batter for a nutrition boost.
- Try gluten-free flour blends—a 1:1 gluten-free baking mix usually works well.
- Skip the butter topping or replace it with olive oil spread.
Popovers can be part of a balanced meal—just don’t go overboard with the jam and butter (unless it’s cheat day).
FAQs about Popovers Recipe
Q1: Why didn’t my popovers rise properly?
Popovers rely heavily on steam to puff up. If your oven wasn’t hot enough or you opened the door too early, the steam may have escaped. Also, make sure your batter is smooth and at room temperature before baking.
Q2: Can I make popovers without a popover pan?
Yes! While a popover pan gives better height, you can use a muffin tin as a substitute. Just fill every other cup to allow better air circulation.
Q3: Why are my popovers dense and not airy inside?
This usually happens when the batter is overmixed or too cold. Use room-temperature ingredients and avoid over-stirring to keep the batter light.
Q4: Can I make the batter ahead of time?
It’s best to use the batter right after mixing. However, if needed, you can refrigerate it for a few hours—just let it come back to room temperature before baking.
Q5: How do I store leftover popovers?
Store them in an airtight container at room temperature for up to 1 day. To refresh, reheat in a 350°F (175°C) oven for 5–10 minutes to crisp them up again.
Q6: Are popovers the same as Yorkshire pudding?
They’re very similar in ingredients and technique, but Yorkshire pudding is traditionally cooked with beef drippings and served with savory meals, while popovers are often enjoyed sweet or with butter.
Conclusion
Popovers might look fancy and feel like a treat from a high-end bakery, but they’re shockingly simple to make at home. With just a few pantry staples and a little technique, you can whip up towering, golden puffs that are perfect for breakfast, dinner, or even dessert.
Whether you keep it classic or jazz them up with herbs, cheese, or sugar, popovers always deliver. Just remember: don’t open that oven door, use room temperature ingredients, and preheat your pan to perfection.
So, next time you want to impress your guests—or just treat yourself on a Sunday morning—skip the store-bought rolls and whip up a batch of homemade popovers. Once you taste them warm from the oven, crisp and airy, there’s no going back.


