Poke Cake Recipe: A poke cake is a deliciously moist and flavorful dessert that gets its name from the process of literally poking holes into a freshly baked cake. After the holes are made, they’re filled with a rich and flavorful liquid like pudding, Jell-O, sweetened condensed milk, or fruit puree. These fillings seep deep into the cake, creating ribbons of flavor in every bite. The result? A super moist, intensely flavorful cake that tastes like a labor of love but is surprisingly easy to make.
Poke cakes have been around since the 1970s, originating from boxed cake mix advertisements aimed at homemakers looking for quick, impressive desserts. Today, they’ve become an internet baking sensation thanks to their adaptability, simplicity, and show-stopping appeal. Plus, you can mix and match flavors endlessly—chocolate, strawberry, coconut, caramel, lemon—the combinations are only limited by your imagination!
Why Poke Cakes Are So Popular
You know what makes poke cakes a total crowd favorite? They’re easy, fun, and practically foolproof. Whether you’re a beginner baker or a kitchen pro, this dessert is a no-brainer. All you need is a cake (boxed or homemade), something to poke it with (like a wooden spoon handle), a filling, and a topping. That’s it.
What’s more, poke cakes are the ultimate “make-ahead” dessert. In fact, they taste even better the next day once the flavors have had time to mingle and soak in. They’re ideal for parties, potlucks, and family gatherings. People always ask for seconds—and the recipe.
Ingredients You’ll Need
Base Cake Ingredients
To get started, here are the basic ingredients for a classic poke cake:
- 1 box of cake mix (any flavor – vanilla, chocolate, strawberry, etc.)
- Eggs, oil, and water as required on the box
- Non-stick spray or butter (for greasing the pan)
You can also opt for a homemade cake if you prefer scratch baking. Just make sure it’s sturdy enough to hold the filling but moist enough to absorb it.
Filling and Topping Options
This is where the magic happens. Here are some irresistible ideas for fillings and toppings:
Fillings:
- 1 box (3.4 oz) instant pudding mix + 2 cups milk (for a creamy filling)
- 1 cup fruit puree or jam (for a fruity twist)
- 1 can sweetened condensed milk (for rich sweetness)
- 1 box flavored Jell-O dissolved in 1 cup boiling water + ½ cup cold water (for a bright, gelatinous center)
Toppings:
- Whipped cream or Cool Whip
- Chocolate ganache
- Cream cheese frosting
- Crushed cookies, candies, or sprinkles
You can even mix and match—for example, chocolate cake + caramel filling + whipped cream topping + chopped toffee bits.
Optional Garnishes
These aren’t necessary, but they’ll take your poke cake to the next level:
- Fresh fruits
- Shaved chocolate
- Chopped nuts
- Crumbled cookies
- Toasted coconut
Presentation matters, especially when you’re serving it at a party or special occasion!
Step-by-Step Guide to Making Poke Cake
Step 1: Bake the Cake
Start by preheating your oven to the temperature indicated on your cake mix box (usually around 350°F or 175°C). Grease a 9×13-inch baking pan with non-stick spray or butter.
Prepare the cake mix as instructed on the box or use your homemade recipe. Pour the batter into the pan and bake for the recommended time—usually 25 to 30 minutes. You’ll know it’s done when a toothpick inserted in the center comes out clean.
Let the cake cool for about 10–15 minutes, but not completely. The cake should still be warm when you poke it so that it absorbs the filling better.
Step 2: Poke the Holes
Once the cake is slightly cooled, it’s time to poke! Use the handle of a wooden spoon or a thick straw to make holes across the top of the cake. Space them about 1 inch apart.
Make sure to poke deep enough so the filling can reach the bottom layers. Don’t be shy—poke with confidence! The more even and thorough you are, the better the cake will absorb the filling.
Step 3: Pour the Filling
Now comes the exciting part—filling the holes! Depending on your choice of filling, the method might slightly vary.
If you’re using instant pudding, whisk it with cold milk until it starts to thicken but is still pourable. Slowly pour or spoon the pudding over the cake, focusing on getting it into each hole. Spread the rest evenly on top to create a base layer.
For Jell-O fillings, mix the powder with boiling water until dissolved, then add cold water. Carefully pour the liquid into each hole, letting it seep down into the cake. Be slow and deliberate to ensure even distribution.
Using sweetened condensed milk? Just pour it directly into the holes. It’ll work its way down beautifully, creating a rich, moist texture.
Fruit purees or jams should be warmed slightly so they’re more fluid, then spooned into the holes. This gives the cake a burst of fruity flavor and a vibrant look.
After adding the filling, gently tap the pan on the counter to settle the mixture and ensure it reaches all the nooks and crannies. Then let the cake rest for a few minutes before moving on.
Step 4: Chill the Cake
This step is crucial. Pop the cake in the refrigerator for at least 2 hours, though overnight is ideal. Chilling allows the filling to set and infuse the cake with flavor.
During this time, the texture becomes irresistibly moist, and the flavors start to marry. If you try to frost or serve the cake before it chills properly, the topping might slide off or the filling might not stay in place.
For best results, cover the cake with plastic wrap or aluminum foil to keep it from drying out in the fridge. Trust me, the wait is totally worth it.
Step 5: Add the Topping
Once your cake is fully chilled and set, it’s time to crown it with a delicious topping.
If you’re going with whipped cream or Cool Whip, spread it generously across the entire surface. For an extra treat, mix in a splash of vanilla or a spoonful of powdered sugar to sweeten homemade whipped cream.
Feeling fancy? Whip up a smooth cream cheese frosting or chocolate ganache. For ganache, just melt chocolate with cream until glossy and pourable, then drizzle it over the top.
Now, don’t forget your garnishes! Sprinkle on crushed cookies, drizzle with caramel, add fresh berries, or toss on some chocolate shavings. These not only add flavor but make your cake Instagram-worthy.
Slice and serve straight from the pan or transfer it to a platter if you’re feeling extra fancy. Either way, prepare for compliments and second servings.
Tips for the Best Poke Cake
Want to make your poke cake absolutely legendary? Here are some pro tips:
- Don’t overbake your cake. A moist cake absorbs filling better and doesn’t dry out after chilling.
- Poke evenly. Uniform holes ensure even flavor distribution.
- Use warm cake, not hot or cold. Warm cake is soft enough to absorb fillings but firm enough not to fall apart.
- Chill longer for richer flavor. Overnight chilling gives you the best results.
- Add texture. Toppings like nuts or crushed cookies provide a crunchy contrast to the soft cake.
With these tips in your back pocket, you’ll be whipping up bakery-quality poke cakes in no time.
Poke Cake Variations to Try
One of the best things about poke cakes is how customizable they are. You can mix and match flavors and textures to create a dessert that’s perfect for any occasion. Here are some of the most irresistible and creative poke cake variations to try:
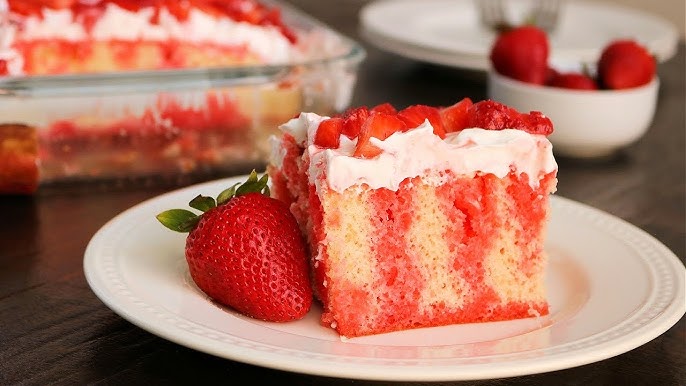
1. Strawberry Jell-O Poke Cake
- Base: White or yellow cake mix
- Filling: Strawberry Jell-O
- Topping: Cool Whip and fresh strawberries
This is a classic summertime dessert. The vibrant red filling contrasts beautifully with the light cake and fluffy topping. Chill it well and serve cold for the ultimate refreshing treat.
2. Chocolate Pudding Poke Cake
- Base: Chocolate cake mix
- Filling: Chocolate instant pudding
- Topping: Whipped cream and chocolate chips or shavings
A chocolate lover’s dream! The pudding makes the cake extra moist, and you can even add a drizzle of chocolate syrup or hot fudge for good measure.
3. Coconut Cream Poke Cake
- Base: White cake mix
- Filling: Sweetened condensed milk + coconut milk
- Topping: Whipped topping and toasted coconut flakes
This tropical twist is rich, creamy, and perfect for summer parties. The sweet coconut flavor seeps into every bite and the toasted topping adds a delightful crunch.
4. Lemon Blueberry Poke Cake
- Base: Lemon cake mix
- Filling: Blueberry pie filling or blueberry sauce
- Topping: Whipped cream and lemon zest
Bright and citrusy, this poke cake feels light yet indulgent. The blueberries provide a sweet and slightly tart flavor that pairs perfectly with lemon.
5. Pumpkin Spice Poke Cake
- Base: Spice cake or pumpkin cake
- Filling: Sweetened condensed milk
- Topping: Cream cheese frosting and crushed graham crackers
A fall favorite that tastes like Thanksgiving in a slice. It’s warm, spiced, and comforting, especially when paired with a creamy frosting.
These are just the beginning! You can experiment with red velvet, funfetti, banana, cookies and cream, and even boozy versions with flavored liqueurs. Just follow the basic process—bake, poke, fill, chill, top—and you’ll be on your way to flavor town.
FAQs about Poke Cake Recipe
1. Can I make poke cake ahead of time?
Absolutely! In fact, poke cakes taste better when made ahead. Preparing them a day in advance allows the filling to soak in fully and the flavors to develop more deeply. Just keep it covered and refrigerated until you’re ready to serve.
2. What’s the best filling for poke cakes?
It depends on your flavor preferences! Popular choices include pudding, Jell-O, fruit sauces, and sweetened condensed milk. For something creamy, go with pudding. For a fruity, colorful cake, Jell-O or jam works great.
3. Can I use homemade cake instead of boxed mix?
Yes, homemade cake works perfectly. Just ensure it’s a firm yet moist cake that can hold up to poking and soaking. Vanilla, chocolate, and sponge cakes are all great choices.
4. How do I store poke cake?
Store your poke cake in the refrigerator, covered with plastic wrap or foil. It’ll stay fresh for up to 4 days. The longer it sits, the more the flavors meld—some say it tastes even better on day two!
5. Can I freeze poke cake?
Technically, yes—but it depends on the filling. Cakes filled with pudding or whipped toppings may not thaw well. If you plan to freeze it, do so before adding the topping. Wrap it tightly in plastic wrap and foil, then freeze for up to 2 months.
Conclusion
Poke cakes are the ultimate easy-yet-impressive dessert. They’re incredibly versatile, incredibly moist, and absolutely bursting with flavor in every bite. Whether you’re making one for a family gathering, birthday party, or just a Tuesday treat, this dessert never fails to steal the spotlight.
With simple ingredients and a foolproof process, even beginner bakers can achieve mouthwatering results. And the best part? The combinations are endless, so you’ll never run out of ways to wow your taste buds.
So go ahead—pick your cake, choose your filling, and let the poking begin. Once you try it, you’ll wonder how you ever lived without poke cake in your life.


